PHP WEB-----Apache的安装和配置&&PHP的安装与配置
1 简介
Apache是一个Web服务器: 基于Http/Https/Websocket等协议对外部提供数据、文件的获取功能。
PHP是可编程的脚本语言: 提供基本的运算和逻辑处理的功能,可以很好的应用于Web网站功能需求的开发。
Apache是web服务器软件,它可以接受来自客户端的Http/Https等协议的请求,当请求的文件是PHP脚本文件时,它会调用PHP解释器去解释和执行该脚本中的内容,并将解释器返回的结果,根据对应的协议规则封装成相应格式的数据,再将数据返回给请求的客户端,Apache和PHP解释器之间是调用和被调用之间的关系。
2 Apache的安装和配置
参考网址:https://www.cnblogs.com/EricZLin/p/9139059.html
(1)官网下载Apache,并解压到相应文件夹。【解压路径最好不要用中文】【下载地址:https://www.apachelounge.com/download/】


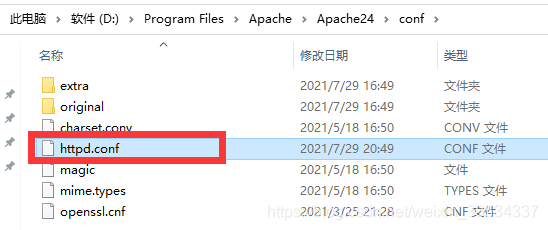
(2)修改httpd.conf文件

a. 如图添加,SRVROOT安装位置(通过在顶端定义了一个常量,在下面引用该常量来访问,好处不用多说了,之后改动只要改这一个即可,其他的都是相对路径了)

b. Listen 监听端口号,默认80

**c.**ServerAdmin 用于用户设置管理员邮箱(用于客户端的用户联系管理员,现在很少使用)

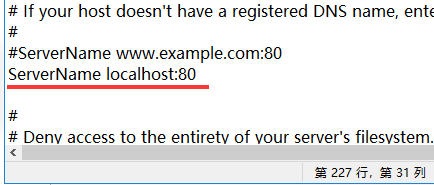
d. ServerName 域名

e. DocumentRoot用于设置基站点根目录(网站根目录就是存放网站文件的最顶层目录,通过URL中域名后面的第一个斜线对应映射的就是网站根目录)

f. Directory配置段

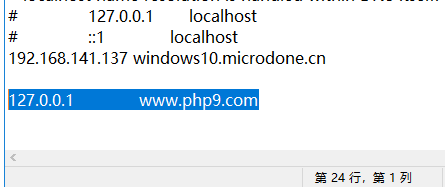
(3)修改hosts文件【C:\Windows\System32\drivers\etc】
在hosts文件中配置域名与IP地址对应关系

(4)配置window环境变量
.“计算机”右键 → “高级系统设置” → “高级” → “环境变量”
点击系统变量的“新建”→ 变量名"HTTPD_HOME" → 变量值“D:\Program Files\Apache\Apache24”(Apache安装路径)→ “确定”

.点击系统变量的“编辑”(没有时新建)→ 变量名"Path" → 变量值“%HTTPD_HOME%\bin;”(Apache的bin目录的路径)→ “确定”

(5)测试启动httpd.exe 【D:\Program Files\Apache\Apache24\bin】

关闭占用端口的教程链接:https://blog.csdn.net/weixin_38534337/article/details/86621030

解决了端口被占用的问题再重新测试
