前言
在b站小伙伴的帮助下,了解到了诚殷网络,了解到了无常老师,正好赶上了无常老师的公开课,让小白的我获益匪浅,建立了人生第一个论坛,抛开现象看本质,宝塔、小皮面板、wamp这些集成开发环境的出现是给我们带来了很多便利,但一个好的码农最起码得知道地里的菜是怎么长成这样的,弄清原理,会更好帮助我们的学习成长(可以说这是一份学习笔记吧)
# 一、启动Apache、Mysql服务:
- MYSQL、PHP、Apache安装下载
MYSQL下载安装
php下载安装
Apache下载安装 - 在系统盘创建www目录(D盘也行根据个人习惯)
- 将文件解压到www目录内
 注意,php不要下载含“nts”的
 - Apache bin 目录—>Shift +单击右键—>power shell—>
Cmd—>Httpd -k install(创建服务)

倘若创建服务失败,win+r —>cmd —>切换到管理员

我这个是已经安装过来,安装成功会显示success打开服务 apache2.4 会发现启动不了的,我们需要进一步配置C:\WWW\Apache24\conf\httpd.conf 打开此目录的配置文件
如下图操作:


重新启动apache服务
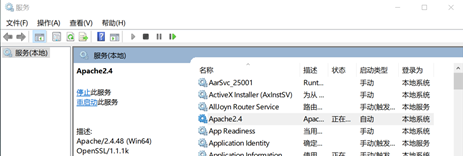
倘若依旧无法正常启动Apache服务打开事件查看器 选择windows日志里的应用程序清空日志,再次启动Apache日历就会显示错误原因,依照具体情况进行对应修改
- MYSQL bin 目录,异曲同工,指令改为
mysqld --install(启动mysql 服务)
二、Apache+PHP环境搭建:
-
将根目录下php.ini-production 复制一份,并重命名为php.ini;

-
设置环境变量将C:\www\PHP5.5和C:\www\PHP5.5\ext加入环境变量PATH中

-
打开C:\www\Apache24\conf目录(conf所在目录)中的httpd.conf文件
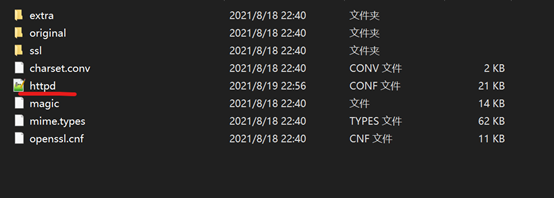
-
查找
ServerName localhost:80,修改为ServerName 127.0.0.1:80(去掉前面的#)
-
查找
DocumentRoot "C:/Apache/htdocs",修改为DocumentRoot "C:/WWWEB"(创建网站目录),单独创建一个文件夹。
-
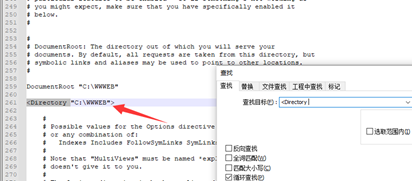
查找
<Directory,修改为网站目录
-
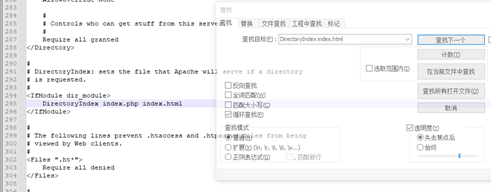
查找
DirectoryIndex index.html修改为DirectoryIndex index.php index.htm
-
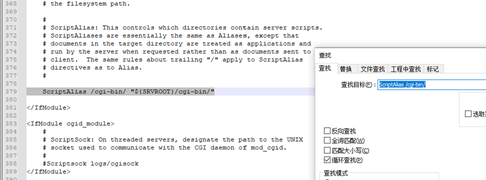
查找
ScriptAlias/cgi-bin/ "C:/Apache/cgi-bin/",修改为ScriptAlias /cgi- bin/ " C:/Apache/cgi-bin"(如果一样,也不用改)
-
查找<
Directory "C:/Apache/cgi-bin">修改为<Directory "C:/Apache/cgi-bin/">(如果一样,也不用改) -
在 C:\Apache\conf\httpd.conf最后一行添加添 加
LoadModule php5_module "C:/php/php5apache2_4.dll"让 apache 支持php (请确认C:/ php/有php5apache2_4.dll,“nts”版是没有这个文件的)添加AddType application/x-httpd-php .php .html .htm添加PHPIniDir "C:/www/php5.5"(告诉apache php.ini的位置)
-
测试:
创建phpinfo.php,写入<?php phpinfo( ); ?>,并布置到C:\WEB下,打开apache服务,在浏览器输入http:/127.0.0.1 /phpinfo.php

参考链接:
Apache Windows下Apache安装步骤
Apache+PHP环境搭建
后话
下一章:
暂离集成开发环境,回本溯源,搭建属于自己的第一个论坛(终)
下一篇继续讲解论坛的搭建,搭建人生中的第一个论坛,无常老师的公开课还会持续几天的时间,有兴趣的小伙伴可以微信公众号搜索“诚殷网络Team”回复“订阅公开课”每天晚上九点半准时开课,让你了解到wamp,小皮,宝塔这些集成环境背后的操作原理是怎样的