目录
PHP源码编译
php源码编译压缩包
 解压
解压
tar jxf php-7.4.12.tar.bz2
配置
./configure --prefix=/usr/local/php --with-config-file-path=/usr/local/php/etc --enable-fpm --with-fpm-user=nginx --with-fpm-group=nginx --with-curl --with-iconv --with-mhash --with-zlib --with-openssl --enable-mysqlnd --with-mysqli --with-pdo-mysql --disable-debug --enable-sockets --enable-soap --enable-inline-optimization --enable-xml --enable-ftp --enable-gd --enable-exif --enable-mbstring --enable-bcmath --with-fpm-systemd
配置时会出错,需要自己解决依赖性问题、
	yum install -y systemd-devel.x86_64
	yum install libxml2-devel.x86_64 -y
	yum install sqlite-devel
	yum install libcurl-devel.x86_64
	yum install libpng-devel
	yum install oniguruma-devel-6.8.2-1.el7.x86_64.rpm oniguruma-6.8.2-1.el7.x86_64.rpm -y
最后两个onigurma需要自己去网络下载,镜像软件包不自带
提示这一步,显示配置成功

编译
make
到这一步,显示编译成功

安装
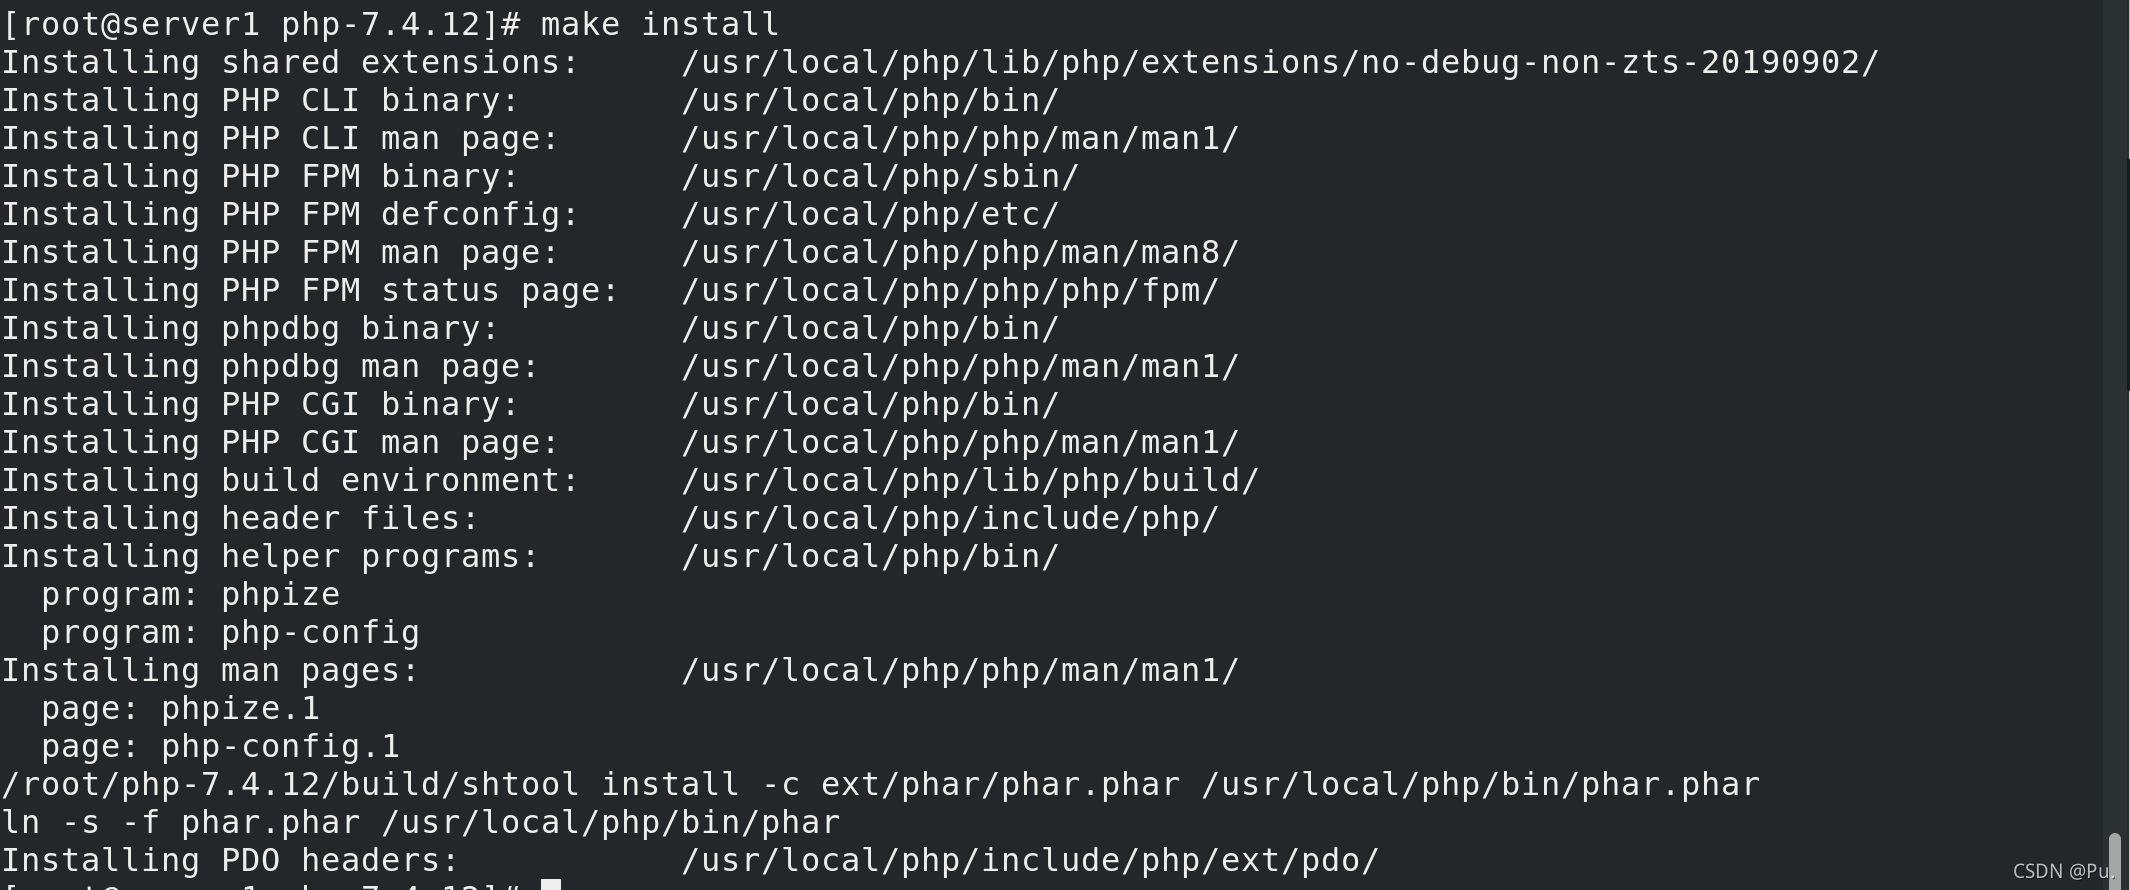
make install
安装成功

nginx结合php-fpm
进入安装后的php目录
cd /usr/local/php/etc
复制一个默认的配置文件,并命名为php-fpm.conf
cp php-fpm.conf.default php-fpm.conf
进入一开始解压源码编译包的php的目录
cd php-7.4.12/
拷贝系统推荐的php.ini设置参数到安装目录下
cp php.ini-production /usr/local/php/etc/php.ini
修改设置参数的时区
vim /usr/local/php/etc/php.ini
 拷贝解压源码编译包目录中
php-fpm.service的到系统systemd下
cp /root/php-7.4.12/sapi/fpm/php-fpm.service /usr/lib/systemd/system/
此时可以通过systemctl来控制php
systemctl daemon-reload
systemctl enable --now php-fpm.service  ##这会报错
在启动时会报错
vim /usr/lib/systemd/system/php-fpm.service
将红线划的这一行注释

再次重新启动
systemctl enable --now php-fpm.service
查看端口
netstat -antlp
可以看到9000端口已经开启,监控本机
 修改nginx的配置文件,打开php
vim /usr/local/nginx/conf/nginx.conf

写一个php文件,保存在/usr/local/nginx/html
[root@server1 html]# cat index.php
<?php
phpinfo()
?>
重启nginx
nginx -t #检测语法
nginx -s reload #刷新服务
测试访问:
http://172.25.21.1/index.php
如果看到主配置文件,那么就是启动成功

传统缓存策略 php添加memcache功能模块
传统缓存策略
 memcache安装压缩包
 memcache-4.0.5.2.tgz
解压后进入目录
tar zxf memcache-4.0.5.2.tgz
cd memcache-4.0.5.2
phpize
作用是检测php的环境还有就是在特定的目录生成相应的configure文件,这样makeinstall之后,生成的.so文件才会自动加载到php扩展目录下面
 提示没有phpize
在php的安装目录下有phpize
 加入全局变量
vim ~/.bash_profile
 使文件生效
使文件生效
source ~/.bash_profile
再次进入memcache解压后的目录
执行phpize
提示缺少autoconf

安装autoconf
yum install autoconf
再次执行 phpize 这次成功

此时可以看到生成了 configure

配置
./configure --enable-memcache
编译和安装
make
make install
此时查看php模块中有没有memcache
php -m |grep memcache
显示没有
 修改php.ini主配置文件
vim /usr/local/php/etc/php.ini
在中间加入extension=memcache
 重新加载php,再次查看插件
systemctl reload php-fpm.service
php -m  |grep memcache
可以看到memcache已经加入php
 将memcache解压后目录中的两个案例移动到nginx发布目录
cp /root/memcache-4.0.5.2/memcache.php /root/memcache-4.0.5.2/example.php /usr/local/nginx/html/
下载memcached
yum install memcached # memcached是一套分布式的高速缓存系统
启动,并查看端口 11211是否开启
systemctl enable --now memcached
netstat -antlp |grep :11211

查看memcached相关信息
cat /etc/sysconfig/memcached

修改一下nginx默认发布目录里面的memcache,并修改密码、修改server1相关信息和注释server2
vim /usr/local/nginx/html/memcache.php

测试访问:
http://172.25.21.1/example.php

http://172.25.21.1/memcache.php
需要输入账号密码,也就是刚刚修改的账号的密码


做压力测试
ab -c 10 -n 1000 http://172.25.21.1/index.php
不使用缓存时,在并发量大的时候,会产成93个错误请求

ab -c 10 -n 1000 http://172.25.21.1/memcache.php
使用缓存时,在并发量大的时候,无错误

构建nginx高速缓存 openresty基于nginx和lua
高效缓存策略

首先准备安装压缩包openresty-1.19.3.1.tar.gz
解压并进入解压后的目录
tar zxf openresty-1.19.3.1.tar.gz
cd openresty-1.19.3.1
直接进行配置
./configure
编译
make
安装
make install
默认安装在/usr/local/openresty/nginx
 关闭之前打开的nginx
nginx -s stop
修改配置文件
keepalive 512 保持512个不立即关闭的连接用于提升性能

当所请求的uri以“.php”结尾时,首先到memcache中查询有没有以$uri$args为key的数据,
如果有则直接返回;否则,执行location的逻辑,
如果返回的http状态码为200,则在输出前以$uri$args为key,将输入结果存入memcache。

internal;			//表示只接受内部访问
set $memc_key $query_string;	//使用内置的$query_string来作为key
set $memc_exptime 300;		//表示缓存失效时间

打开这个新的nginx
/usr/local/openresty/nginx/sbin/nginx
压力测试:
ab -c10 -n1000 http://172.25.21.1/example.php
这是上面传统缓存策略的速度

这是高速缓存策略

goaccess日志可视化
如果上面打开了告诉缓存的Openresty,先将这个关闭,然后打开nginx
/usr/local/openresty/nginx/sbin/nginx -s nginx #关闭新的nginx
nginx	#打开旧的nginx

解压安装包,并进入安装后的目录
cd goaccess-1.4
配置
./configure --enable-utf8 --enable-geoip=legacy
提示缺少依赖性,去网上自行寻找GeoIP-devel-1.5.0-13.el7.x86_64.rpm

安装GeoIP-devel
yum install GeoIP-devel-1.5.0-13.el7.x86_64.rpm -y
再次配置,显示缺少ncursesw我们需要安装的是ncurses-devel.x86_64
这个安装包在rhel7.6的镜像软件中可以直接下载

安装ncurses-devel.x86_64
yum install ncurses-devel.x86_64 -y
再次配置,显示这个则代表配置成功

编译和安装
make && make install
进入到nginx的日志目录
cd /usr/local/nginx/logs
执行启动goaccess,并打入后台
goaccess access.log -o /usr/local/nginx/html/report.html --log-format=COMBINED --real-time-html &
测试访问
http://172.25.21.1/report.html

在其他主机做压力测试
ab -c 10 -n 1000 http://172.25.21.1/download/vim.jpg

安装tomcat
准备一台新的虚拟机server2 ip为172.25.21.2
首先安装jdk
rpm -ivh jdk-8u121-linux-x64.rpm
可以看到java和javac

解压tomcat源码编译压缩包到/usr/loacl ,并进入/usr/local
tar zxf apache-tomcat-7.0.37.tar.gz -C /usr/loacl
cd /usr/local/
创建一个软链接,方便使用
ln -s apache-tomcat-7.0.37 tomcat
进入到tomcat目录 使用命令 ll
可以看到有bin目录

打开tomcat
bin/startup.sh
此时可以看到8080端口已经开启
netstat -antlp
 浏览器访问测试:
172.25.21.2:8080

tomact配合memcached、nginx
使用 nginx sticky实现基于cookie的负载均衡
原理图:

首先配置nginx
新加入一个负载均衡器

在监听localhost的server里面加入,如果访问172.25.21.1/*.jsp那么就负载均衡到tomcat

此时在server3安装tomcat和jdk 根据上面 安装tomcat同步操作
此时我们server1就是nginx server2就是tomcat1和memcached1 server3就是tomcat2和memcache2
配置server2和3的tomcat
vim /usr/local/tomcat/conf/context.xml

<Manager className="de.javakaffee.web.msm.MemcachedBackupSessionManager"
memcachedNodes="n1:172.25.21.2:11211,n2:172.25.21.3:11211"
failoverNodes="n1"
requestUriIgnorePattern=".*\.(ico|png|gif|jpg|css|js)$"
transcoderFactoryClass="de.javakaffee.web.msm.serializer.kryo.KryoTranscoderFactory"
/>
加入在两个<context>之间
memcachedNodes是写入所有的memcached n数字:ip:端口
failoverNodes比如是server2,那就是n1,server3就是n2 每一台tomcat都不相同
 将这些包放入到
tomcat的/libs目录中

在server2、3都安装memcached,并设置开机自动启动
yum install memcached -y
systemctl enable --now memcached
进入tomcat目录
然后重新启动tomcat
bin/shutdown.sh
bin/startup.sh
查看tomcat日志
cat logs/catalina.out
如果在server2的tomcat日志中看到红圈的n1 代表server2已经部署完成

如果在server3的tomcat日志中看到红圈的n2 代表server3已经部署完成

我们将测试test.jsp
<%@ page contentType="text/html; charset=GBK" %>
<%@ page import="java.util.*" %>
<html><head><title>Cluster App Test</title></head>
<body>
Server Info:
<%
out.println(request.getLocalAddr() + " : " + request.getLocalPort()+"<br>");%>
<%
out.println("<br> ID " + session.getId()+"<br>");
String dataName = request.getParameter("dataName");
if (dataName != null && dataName.length() > 0) {
String dataValue = request.getParameter("dataValue");
session.setAttribute(dataName, dataValue);
}
out.print("<b>Session list</b>");
Enumeration e = session.getAttributeNames();
while (e.hasMoreElements()) {
String name = (String)e.nextElement();
String value = session.getAttribute(name).toString();
out.println( name + " = " + value+"<br>");
System.out.println( name + " = " + value);
}
%>
<form action="test.jsp" method="POST">
name:<input type=text size=20 name="dataName">
<br>
key:<input type=text size=20 name="dataValue">
<br>
<input type=submit>
</form>
</body>
</html>
放入到tomcat的发布目录tomcat/webapps/ROOT
测试访问:
172.25.21.1/test.jsp

server3查看日志
[root@server3 tomcat]# cat logs/catalina.out

此时关闭server3的memcached
[root@server3 tomcat]# systemctl stop memcached
再次输入数据 可以看到n2变成了n1

server3查看日志
[root@server3 tomcat]# cat logs/catalina.out

然后关闭server3的tomcat
[root@server3 tomcat]# bin/shutdown.sh
再次输入数据,可以看到server info 已经改变 n1还是n1

查看server2的日志
[root@server2 tomcat]# cat logs/catalina.out
可以看到交叉存储成功,即便server3的tomcat掉了还是memcached掉了,都会保存下来
