监控软件的功能
1.通过一个友好的界面进行浏览整个网站所有的服务器状态
2.可以在 Web 前端方便的查看监控数据
3.可以回溯寻找事故发生时系统的问题和报警情况
4.使用监控系统查看服务器状态以及网站流量指标,利用监控系统的数据去了解上线发布的结果,和网站的健康状态
zabbix定义
1.zabbix 是一个基于 Web 界面的提供分布式系统监视以及网络监视功能的企业级的开源解决方案
2.zabbix 能监视各种网络参数,保证服务器系统的安全运营;并提供灵活的通知机制以让系统管理员快速定位/解决存在的各种问题
3.zabbix 由 2 部分构成,zabbix server 与可选组件 zabbix agent。通过 C/S 模式采集数据,通过 B/S 模式在 Web 端展示和配置
4.zabbix server 可以通过 SNMP,zabbix agent,ping,端口监视等方法提供对远程服务器/网络状态的监视,数据收集等功能, 它可以运行在 Linux 等平台上
5.zabbix agent 需要安装在被监视的目标服务器上,它主要完成对硬件信息或与操作系统有关的内存,CPU 等信息的收集
zabbix监控原理
zabbix agent安装在被监控的主机上,zabbix agent负责定期收集客户端本地各项数据,并发送至 zabbix server 端,zabbix server 收到数据后,将数据存储到数据库中,用户基于 Zabbix WEB 可以看到数据在前端展现图像。当 zabbix 监控某个具体的项目, 该项目会设置一个触发器阈值,当被监控的指标超过该触发器设定的阈值,会进行一些必要的动作,动作包括:发送信息(邮件、微信、短信)、发送命令(shell 命令、reboot、restart、install 等
zabbix的五个程序
1.zabbix server:zabbix 服务端守护进程,其中 zabbix_agent、zabbix_get、zabbix_sender、zabbix_proxy 的数据最终都提交给 zabbix server
2.zabbix agent:客户端守护进程,负责收集客户端数据,例如:收集 CPU 负载、内存、硬盘使用情况等
3.zabbix proxy:zabbix 分布式代理守护进程,通常大于 500 台主机,需要进行分布式监控架构部署
4.zabbix get:zabbix 数据接收工具,单独使用的命令,通常在server或者 proxy 端执行获取远程客户端信息的命令
5.zabbix sender:zabbix 数据发送工具,用户发送数据给 server 或 proxy 端,通常用户耗时比较长的检查
安装zabbix5.0
部署zabbix服务端
环境准备
systemctl disable --now firewalld
setenforce 0
hostnamectl set-hostname zbx-server
su

获取zabbix的下载源和更换阿里源
rpm -ivh https://mirrors.aliyun.com/zabbix/zabbix/5.0/rhel/7/x86_64/zabbix-release-5.0-1.el7.noarch.rpm

cd /etc/yum.repos.d
sed -i 's#http://repo.zabbix.com#https://mirrors.aliyun.com/zabbix#' zabbix.repo

yum clean all && yum makecache

安装zabbix组件
yum install -y zabbix-server-mysql zabbix-agent
yum install -y centos-release-scl


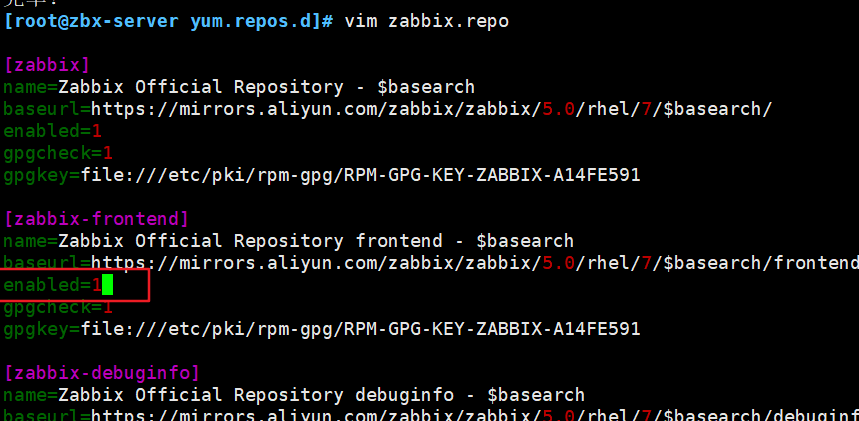
修改zabbix-front前端源,安装zabbix前端环境到scl环境下
vim zabbix.repo
......
[zabbix-frontend]
......
enabled=1          #开启安装源
......

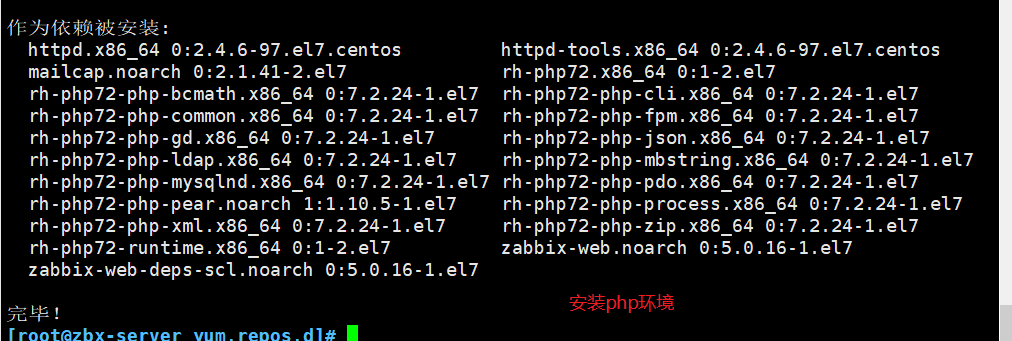
yum install -y zabbix-web-mysql-scl zabbix-apache-conf-scl
安装zabbix所需的数据库
yum install -y mariadb-server mariadb

systemctl enable --now mariadb

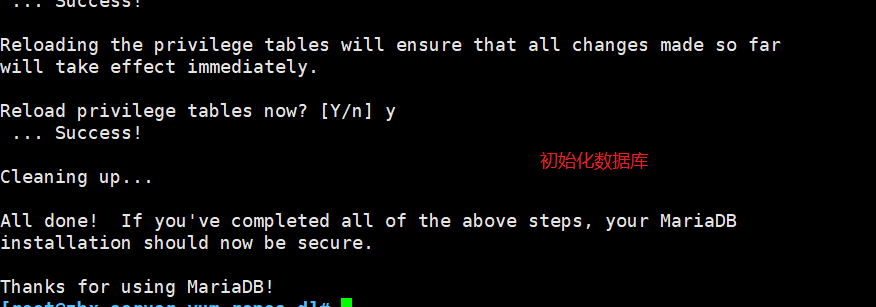
mysql_secure_installation         #初始化数据库,并设置密码,如264196

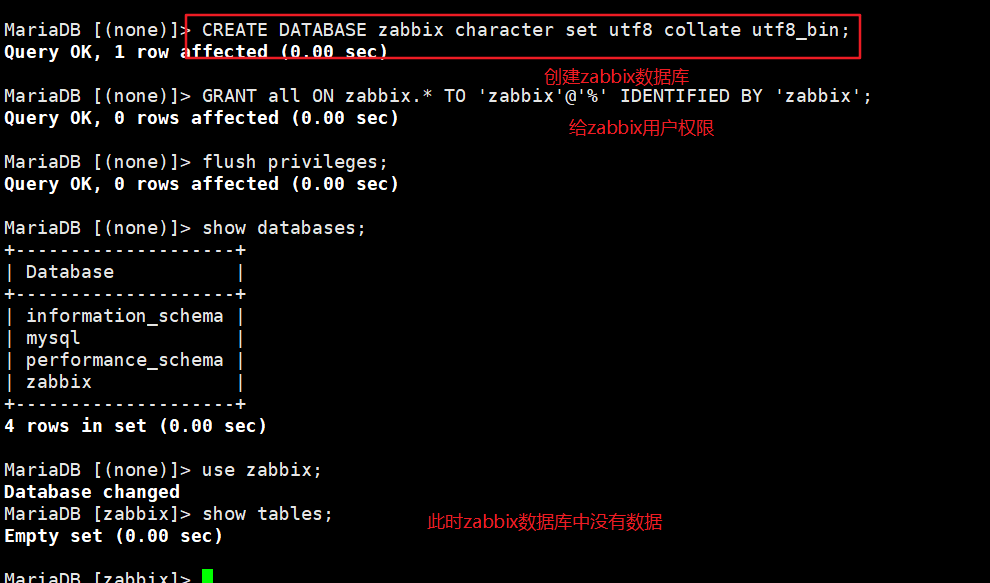
添加数据库用户,以及zabbix所需的数据库信息
mysql -u root -p264196

CREATE DATABASE zabbix character set utf8 collate utf8_bin;
GRANT all ON zabbix.* TO 'zabbix'@'%' IDENTIFIED BY 'zabbix';
flush privileges;
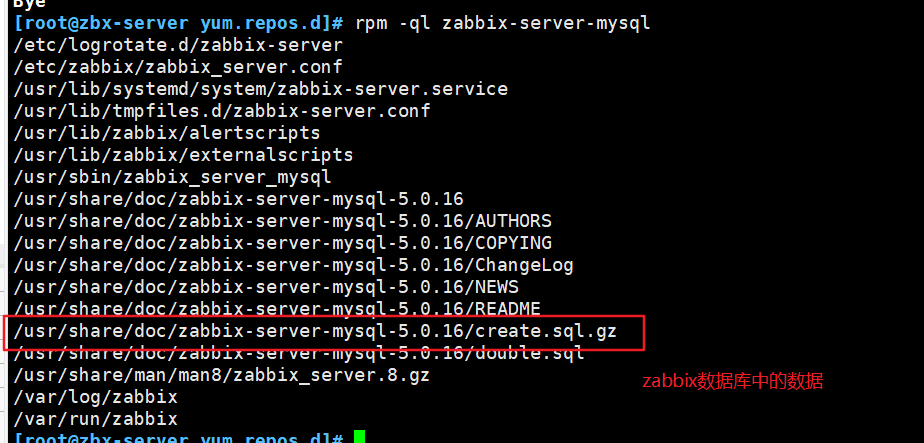
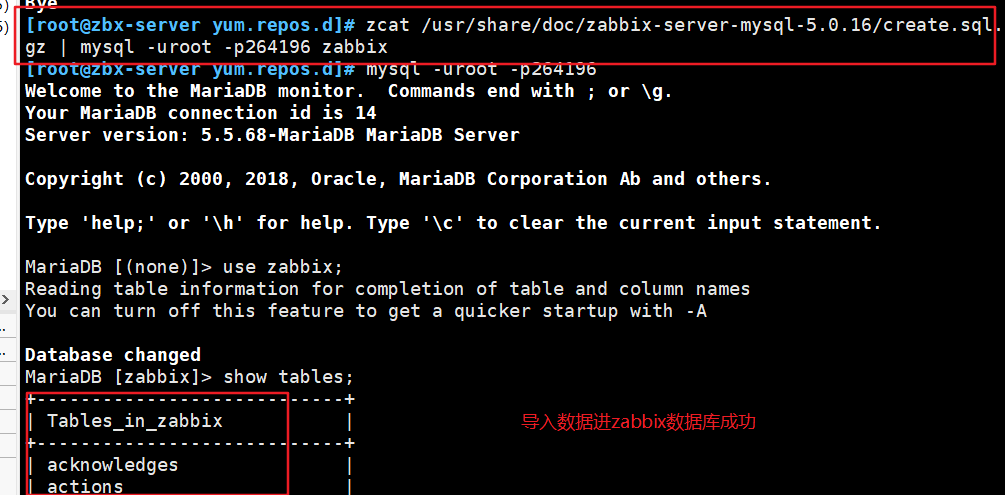
导入数据库信息
rpm -ql zabbix-server-mysql 		#查询 sql 文件的位置

zcat /usr/share/doc/zabbix-server-mysql-5.0.15/create.sql.gz | mysql -uroot -p264196 zabbix
修改zabbix server配置文件,修改数据库的密码
vim /etc/zabbix/zabbix_server.conf
......
DBPassword=zabbix					#124行,指定 zabbix 数据库的密码

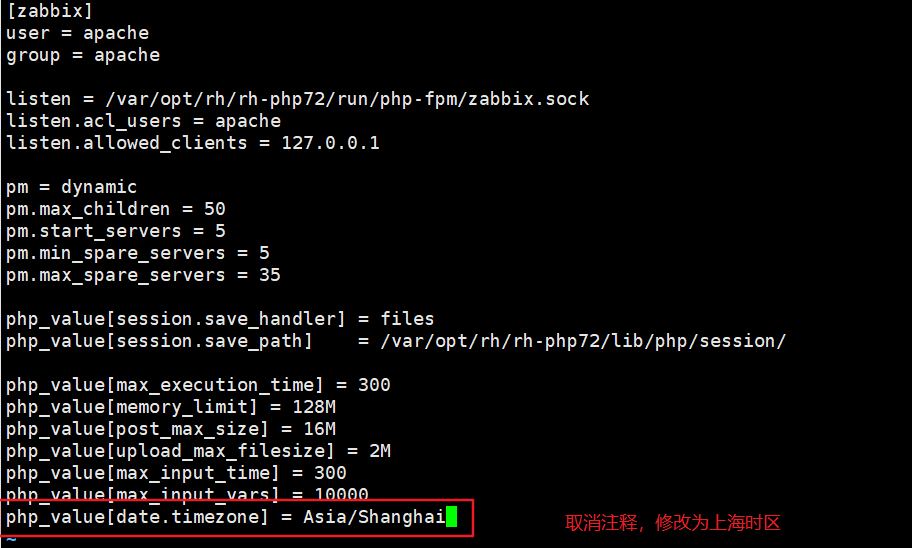
修改zabbix的php配置文件
vim /etc/opt/rh/rh-php72/php-fpm.d/zabbix.conf
......
php_value[date.timezone] = Asia/Shanghai		#24行,取消注释,修改时区
启动zabbix相关服务
systemctl restart zabbix-server zabbix-agent httpd rh-php72-php-fpm
systemctl enable zabbix-server zabbix-agent httpd rh-php72-php-fpm

浏览器访问
http://192.168.80.11/zabbix
点击下一步,设置数据库的密码 zabbix
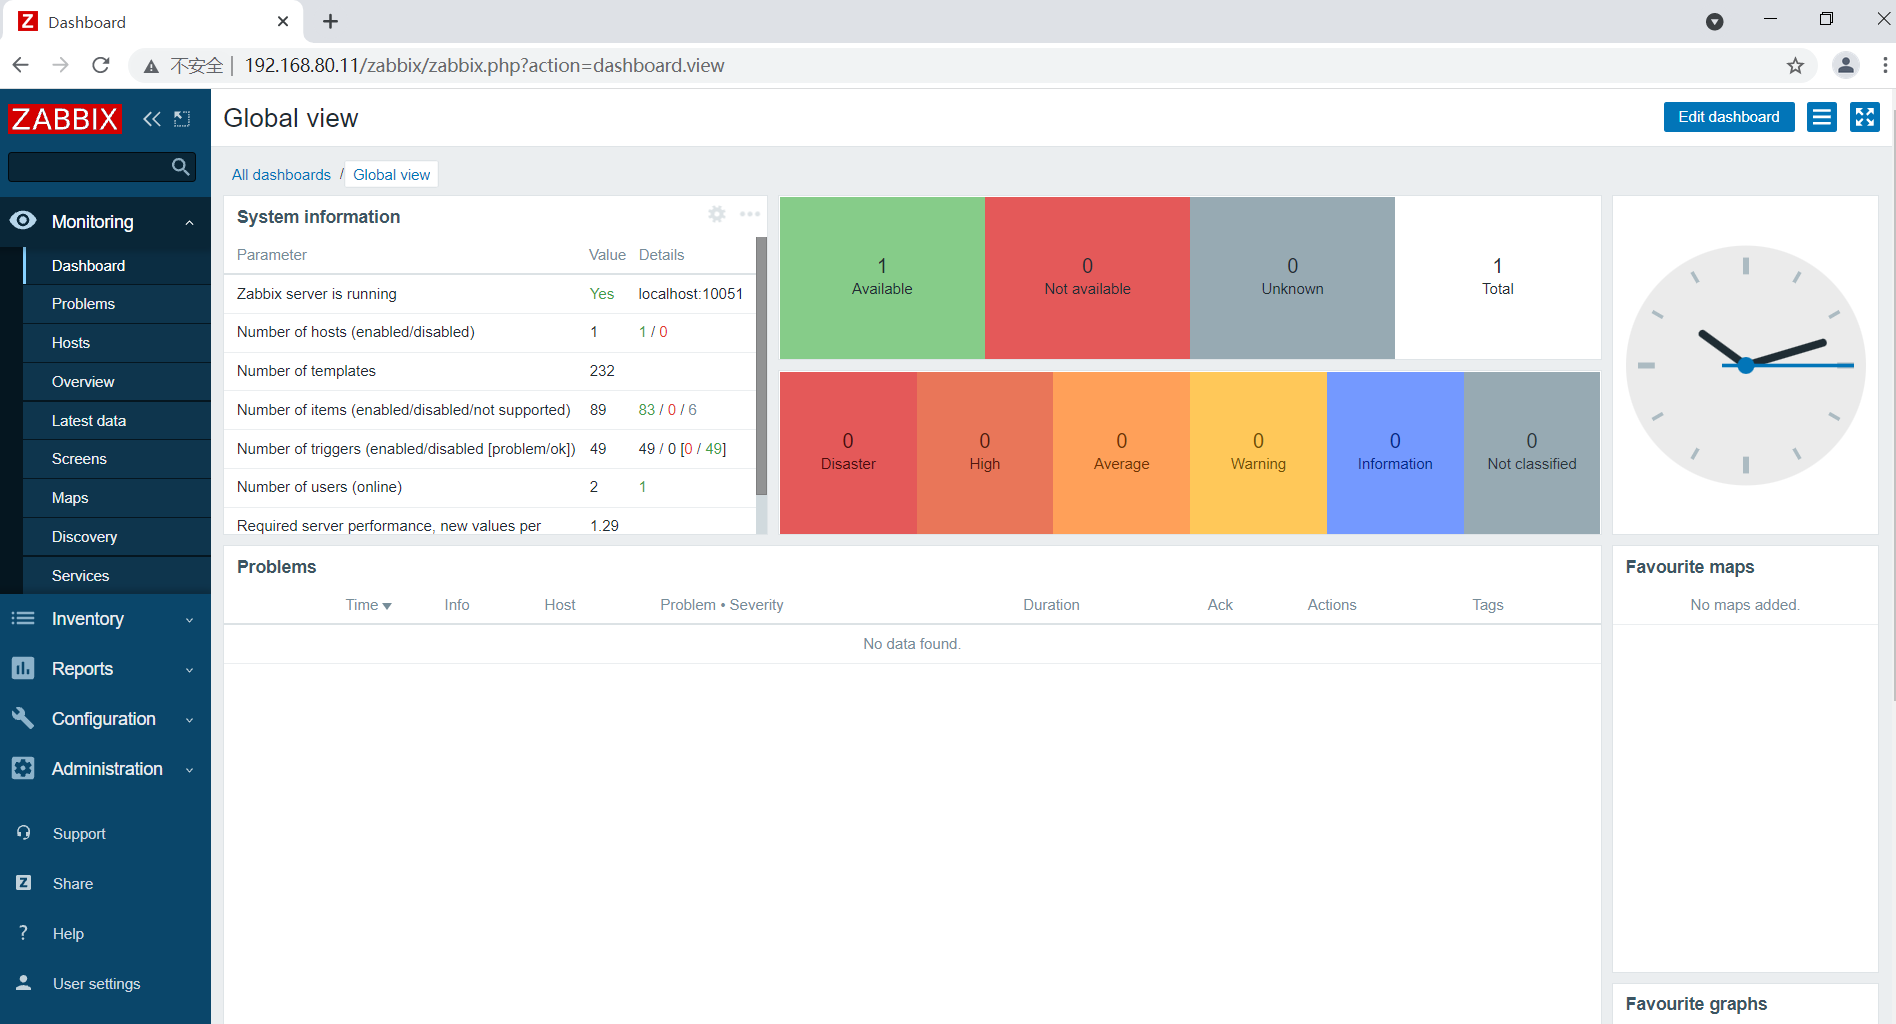
安装完成后,默认的登录账号和密码为:Admin/zabbix
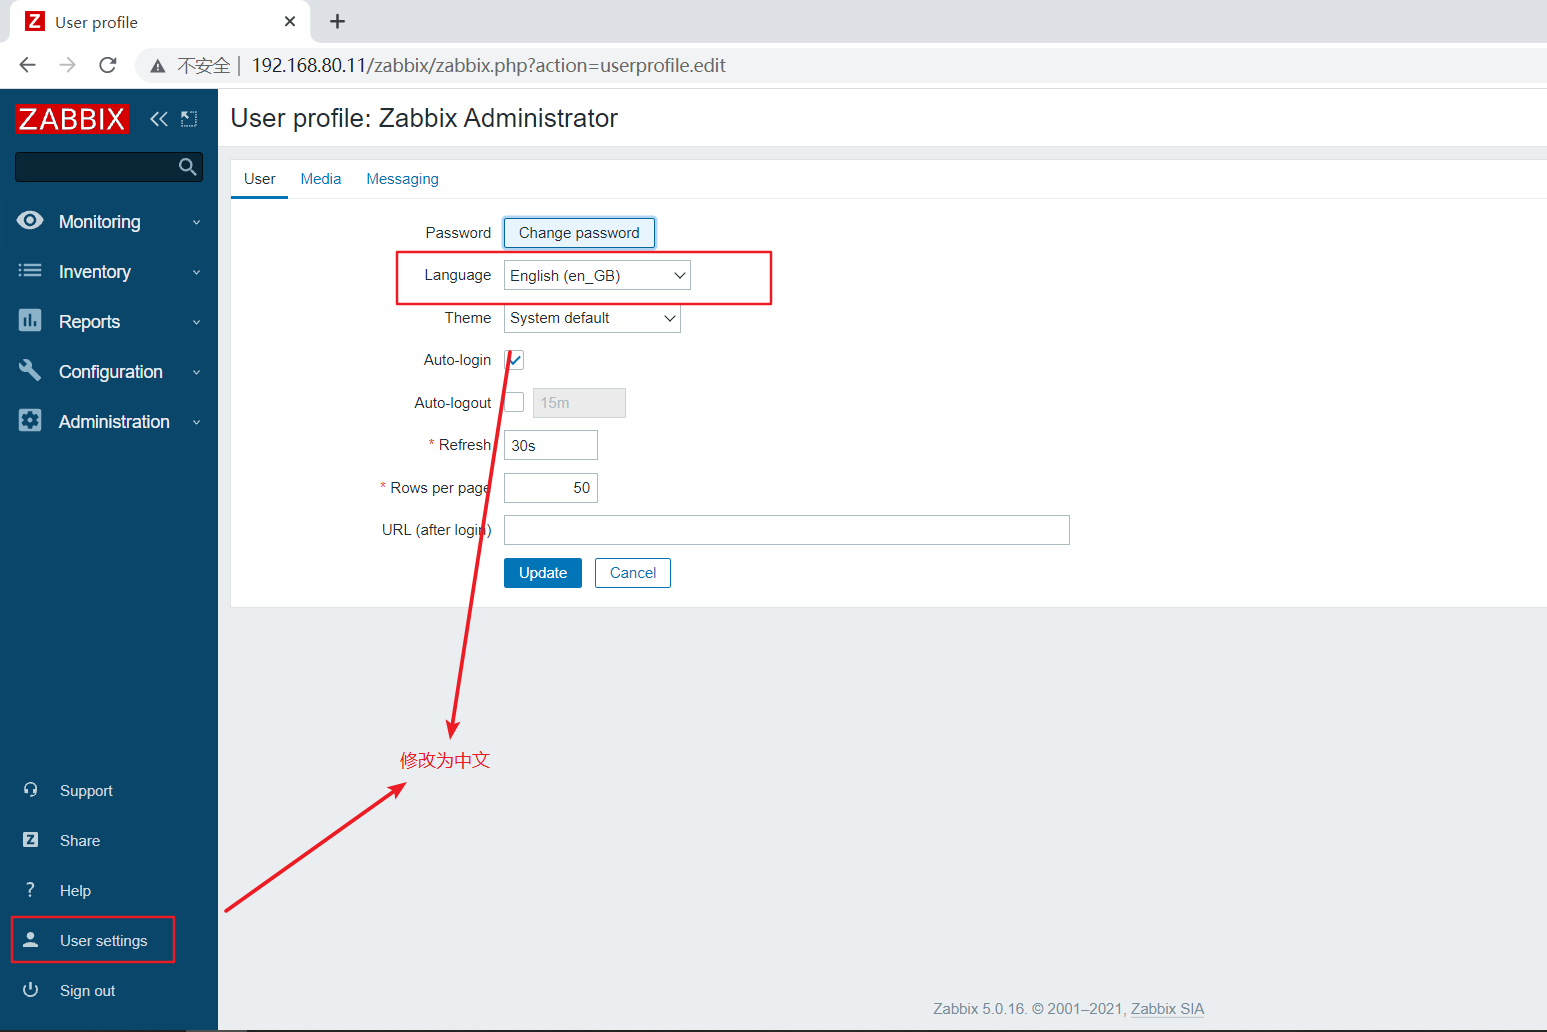
设置文件界面:点击左边菜单栏的【User settings】,【Language】选择 Chinese(zh_CN),再点击 Update 更新。

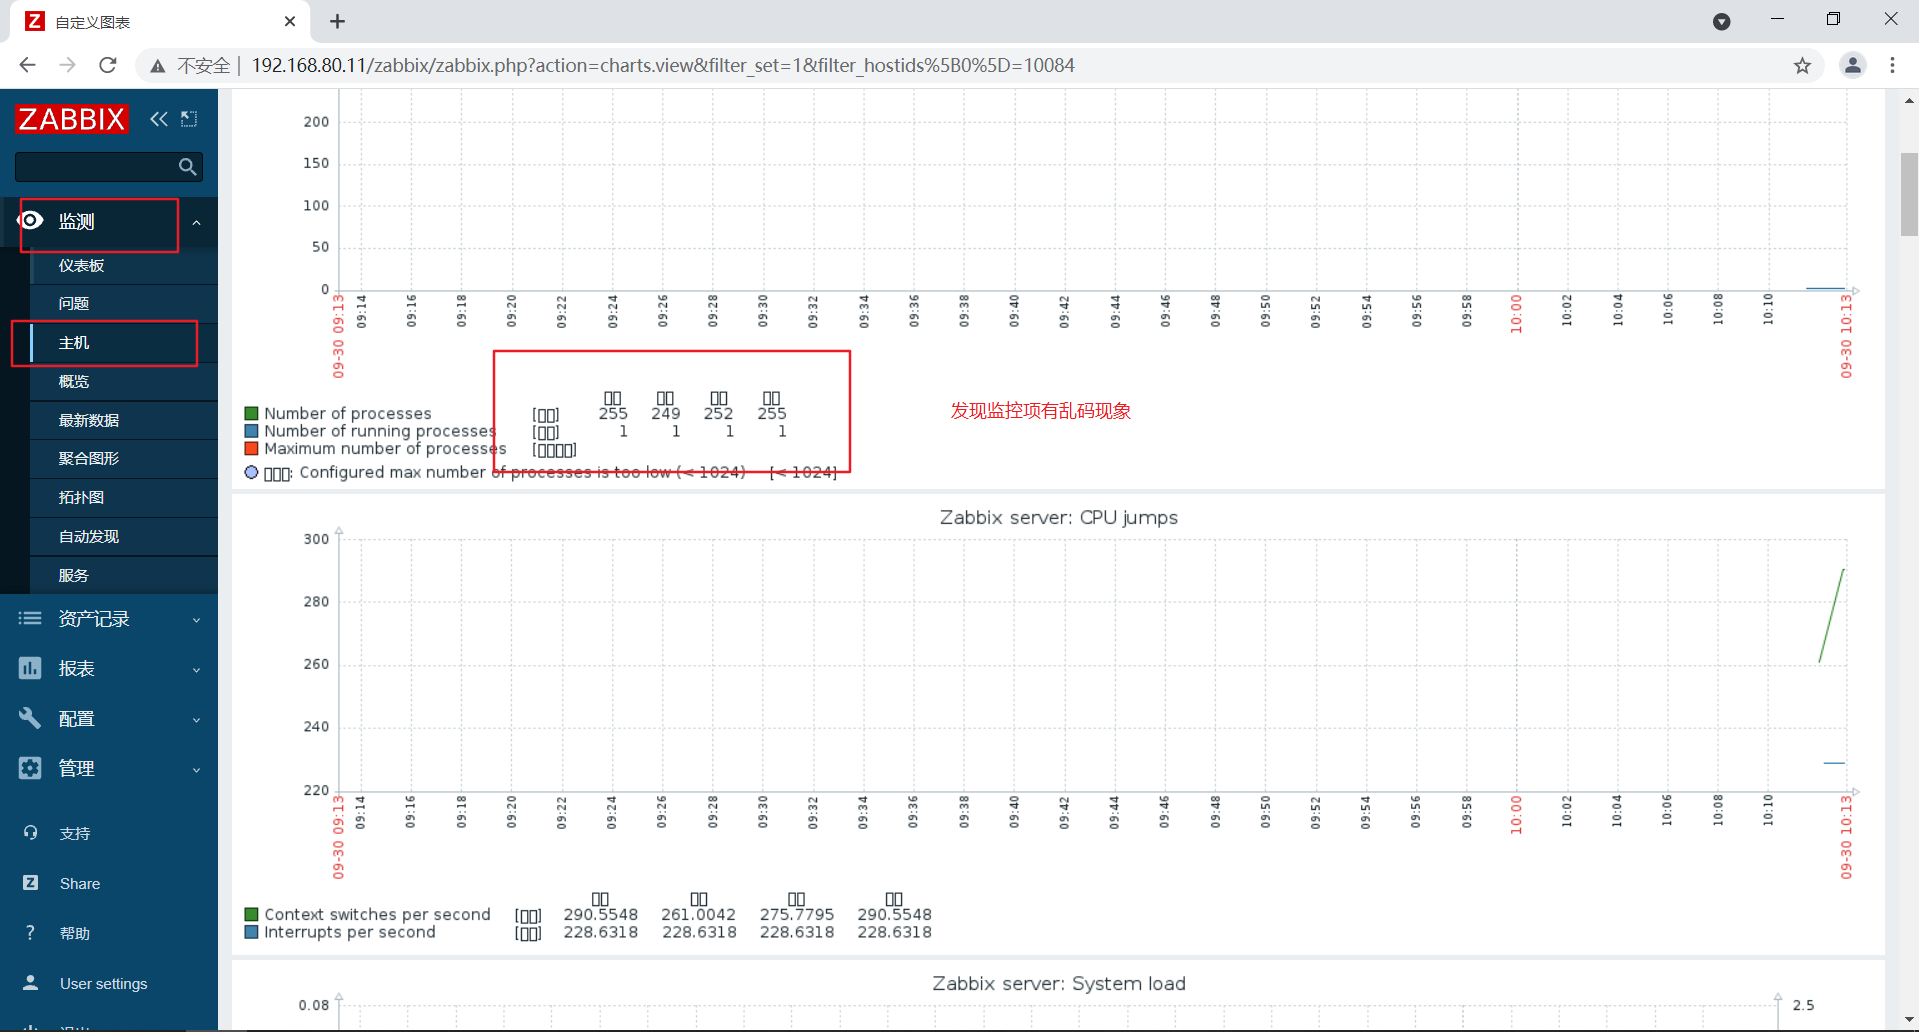
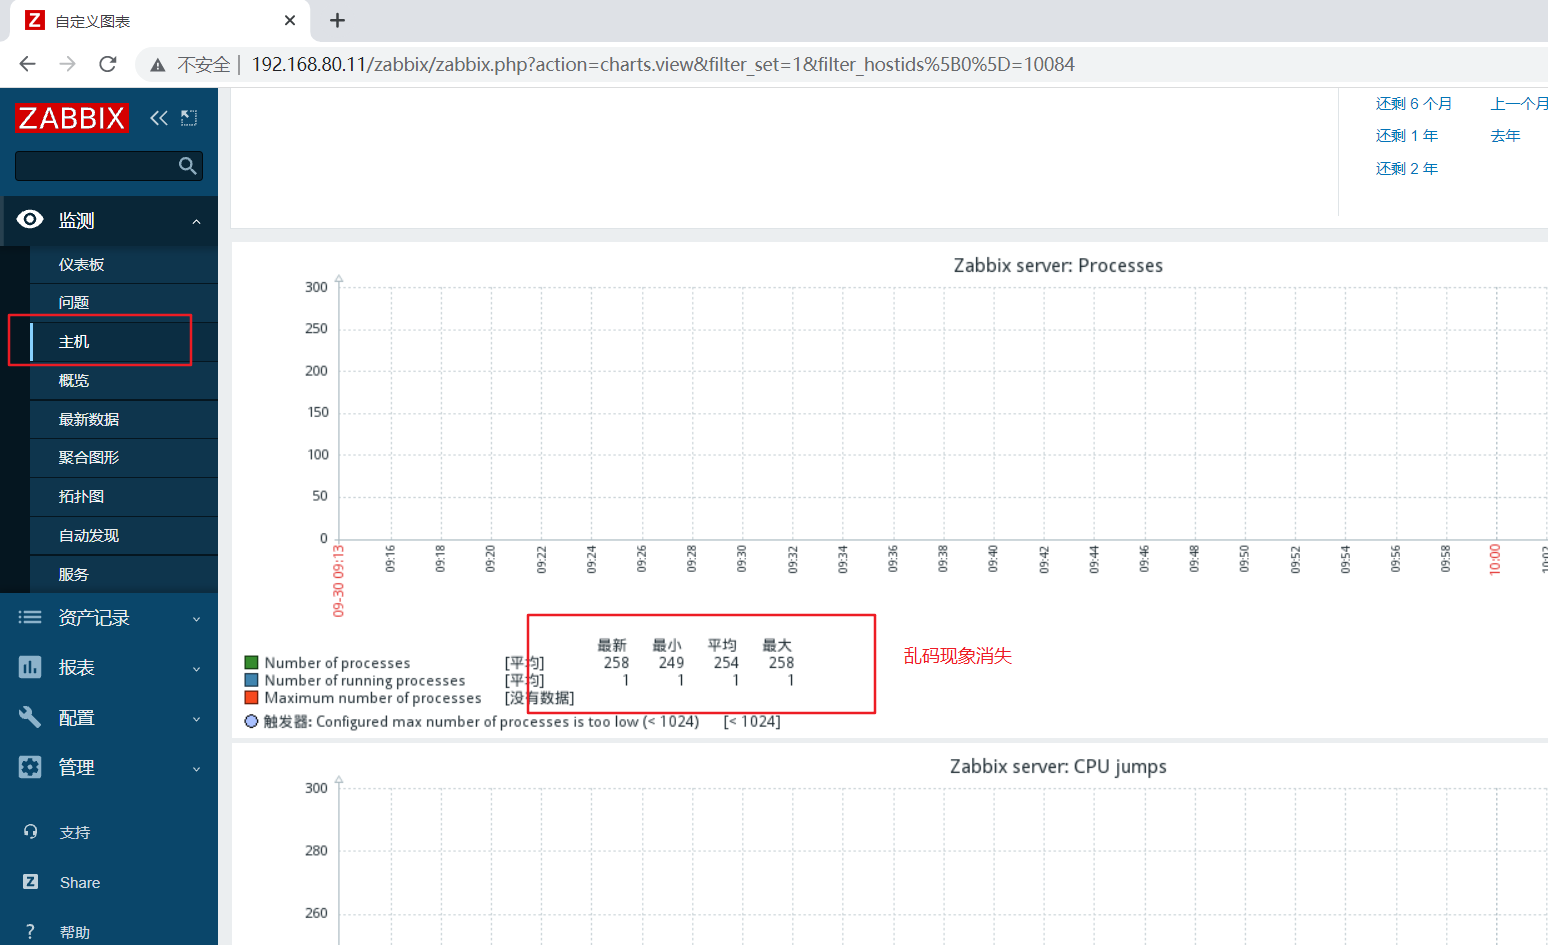
//解决 zabbix-server Web页面中文乱码问题
yum install -y wqy-microhei-fonts

\cp -f /usr/share/fonts/wqy-microhei/wqy-microhei.ttc /usr/share/fonts/dejavu/DejaVuSans.ttf
部署zabbix客户端
环境准备
systemctl disable --now firewalld
setenforce 0
hostnamectl set-hostname zbx-agent01
su

服务端和客户端都配置时间同步
yum install -y ntpdate
ntpdate -u ntp.aliyun.com

客户端配置时区,与服务器保持一致
mv /etc/localtime{,.bak}
ln -s /usr/share/zoneinfo/Asia/Shanghai /etc/localtime

date

设置zabbix的下载源,安装zabbix-agent2
rpm -ivh https://mirrors.aliyun.com/zabbix/zabbix/5.0/rhel/7/x86_64/zabbix-release-5.0-1.el7.noarch.rpm

cd /etc/yum.repos.d
sed -i 's#http://repo.zabbix.com#https://mirrors.aliyun.com/zabbix#' /etc/yum.repos.d/zabbix.repo

yum install -y zabbix-agent2

修改agent2配置文件并启动zabbix-agent2
vim /etc/zabbix/zabbix_agent2.conf
......
Server=192.168.80.11			#80行,指定 zabbix 服务端的 IP 地址
ServerActive=192.168.80.11		#120行,指定 zabbix 服务端的 IP 地址
Hostname=zbx-agent01			#131行,指定当前 zabbix 客户端的主机名

systemctl start zabbix-agent2
systemctl enable zabbix-agent2

netstat -natp | grep zabbix


在服务端验证zabbix-agent2的连通性
yum install -y zabbix-get				#安装 zabbix 主动获取数据的命令

zabbix_get -s '192.168.80.12' -p 10050 -k 'agent.ping'
1

zabbix_get -s '192.168.80.12' -p 10050 -k 'system.hostname'
zbx-agent01

在Web页面中添加agent主机
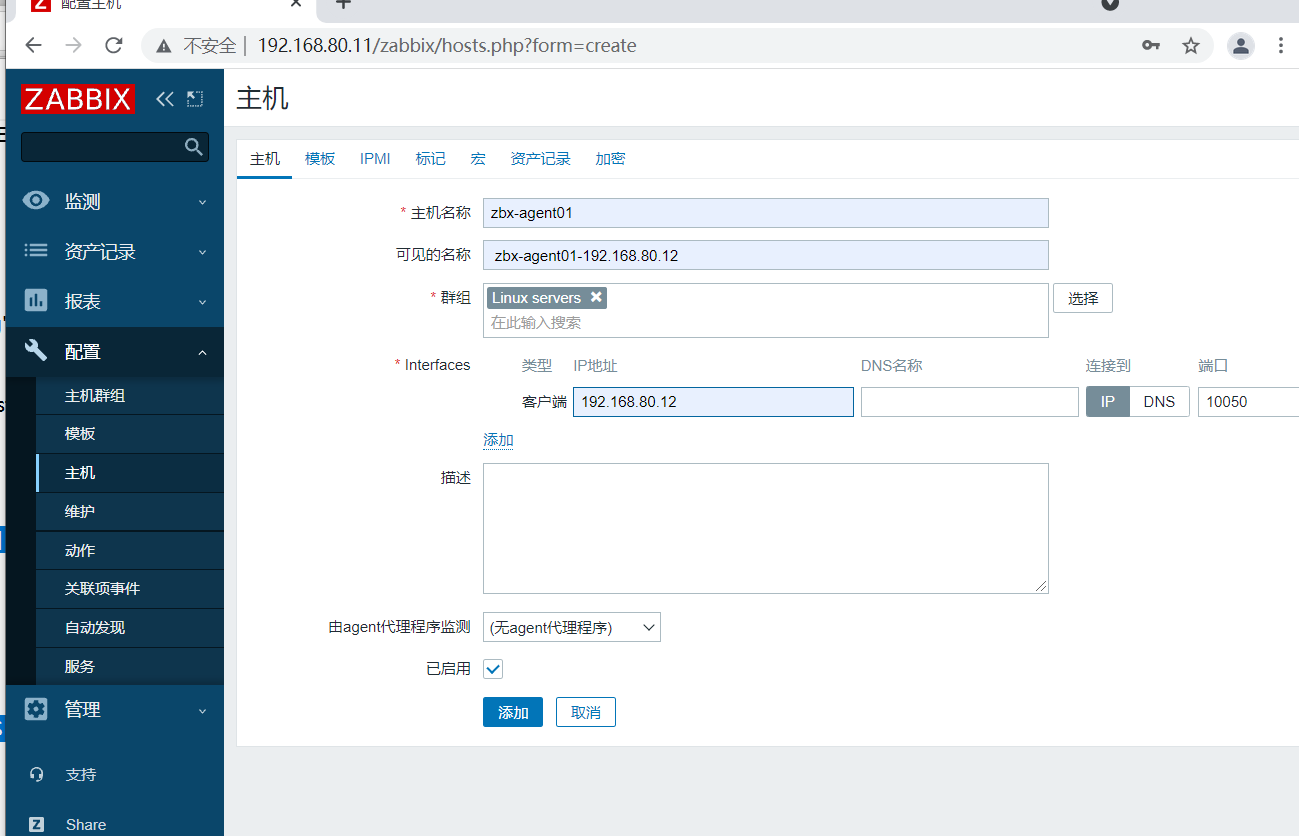
点击左边菜单栏【配置】中的【主机】,点击【创建主机】
【主机名称】设置成 zbx-agent01
【可见的名称】设置成 zbx-agent01-192.168.80.12
【群组】选择 Linux server
【Interfaces】的【IP地址】设置成 192.168.80.12

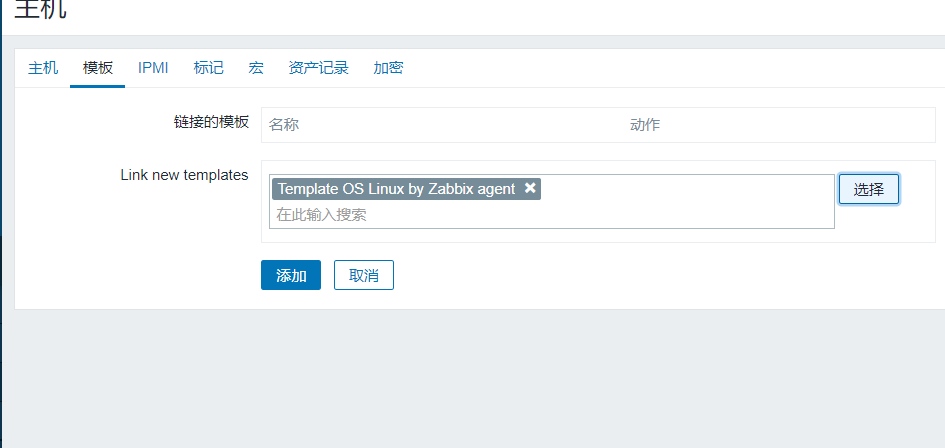
再点击上方菜单栏【模板】
【Link new tamplates】搜索 Linux ,选择 Template OS Linux by Zabbix agent
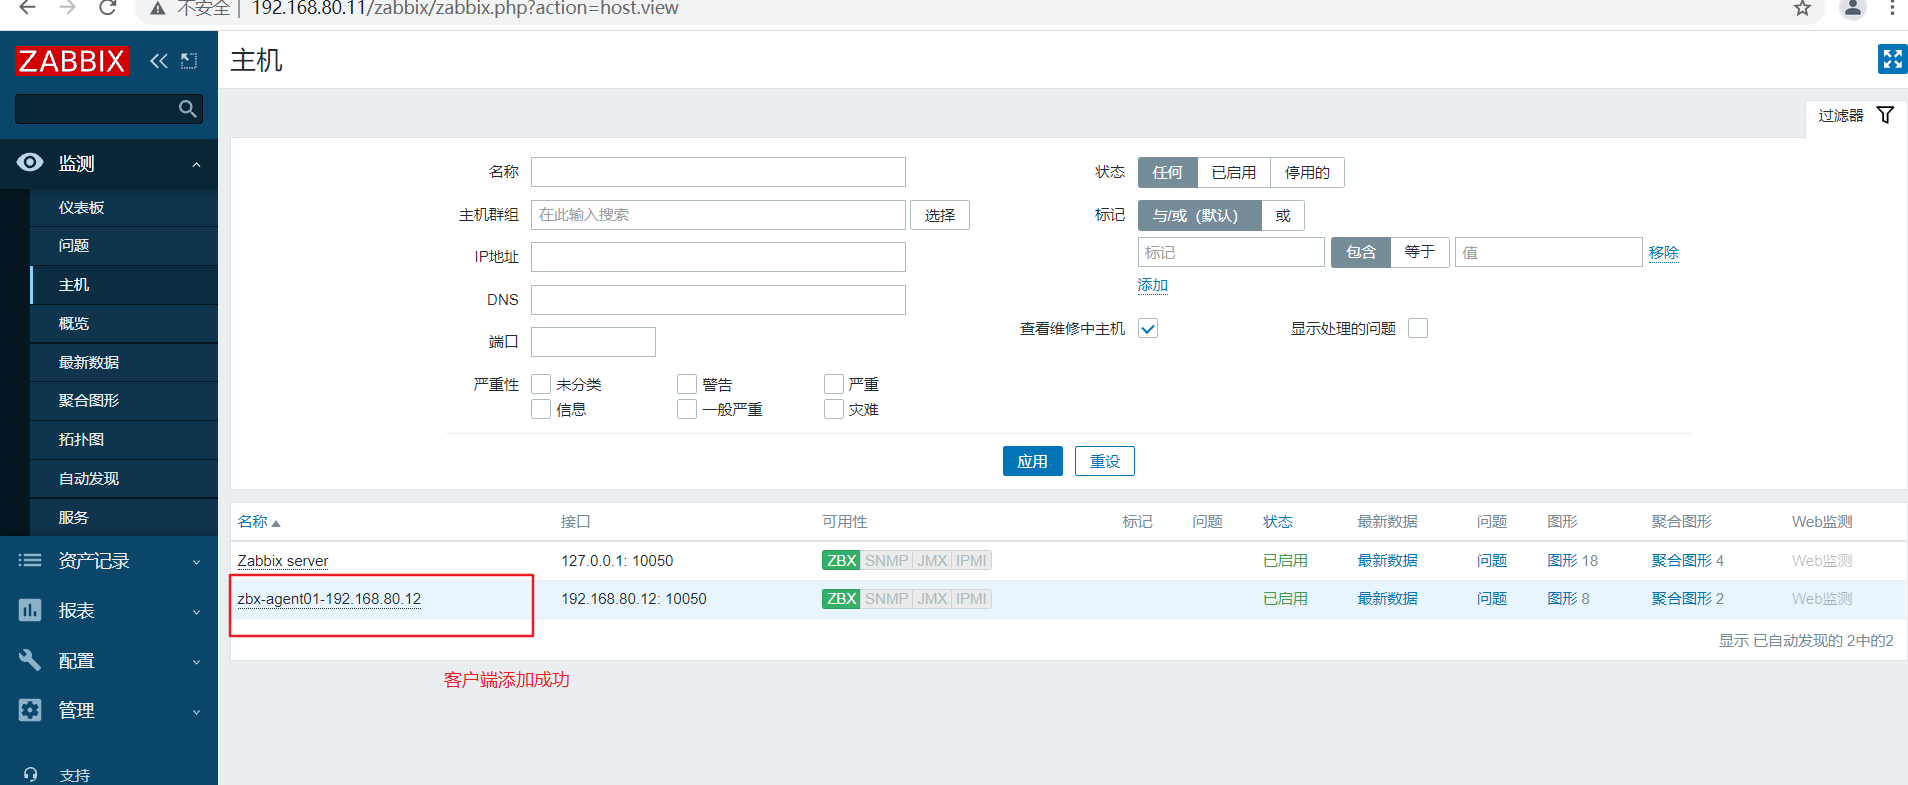
点击 【添加】
自定义监控内容
案列和需求
1.案列:自定义监控客户端服务器登录的人数
2.需求:限制登录人数不超过3个,超过3个就发出报警信息
在客户端创建自定义key
明确需要执行的linux命令
who | wc -l

创建zabbix的监控项配置文件,用于自定义key
vim /etc/zabbix/zabbix_agent2.conf
#可以将自定义的监控项配置文件创建在 zabbix_agent2.d 目录中
268 Include=/etc/zabbix/zabbix_agent2.d/*.conf
#自定义监控项的格式如下
291 #	Format: UserParameter=<key>,<shell command>

cd /etc/zabbix/zabbix_agent2.d/

vim UserParameter_login.conf
UserParameter=login.user,who|wc -l

systemctl restart zabbix-agent2


在服务端验证新建的监控项
zabbix_get -s '192.168.80.12' -p 10050 -k 'login.user'


在Web页面创建自定义监控项模板
创建模板
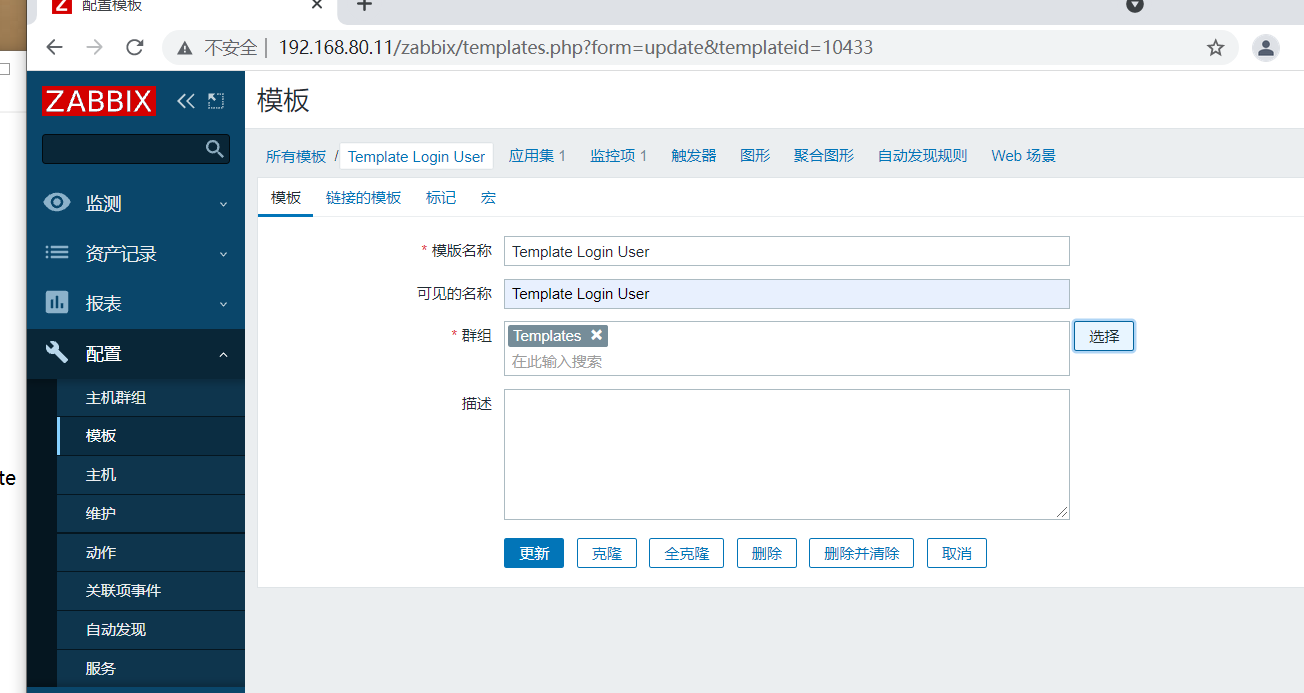
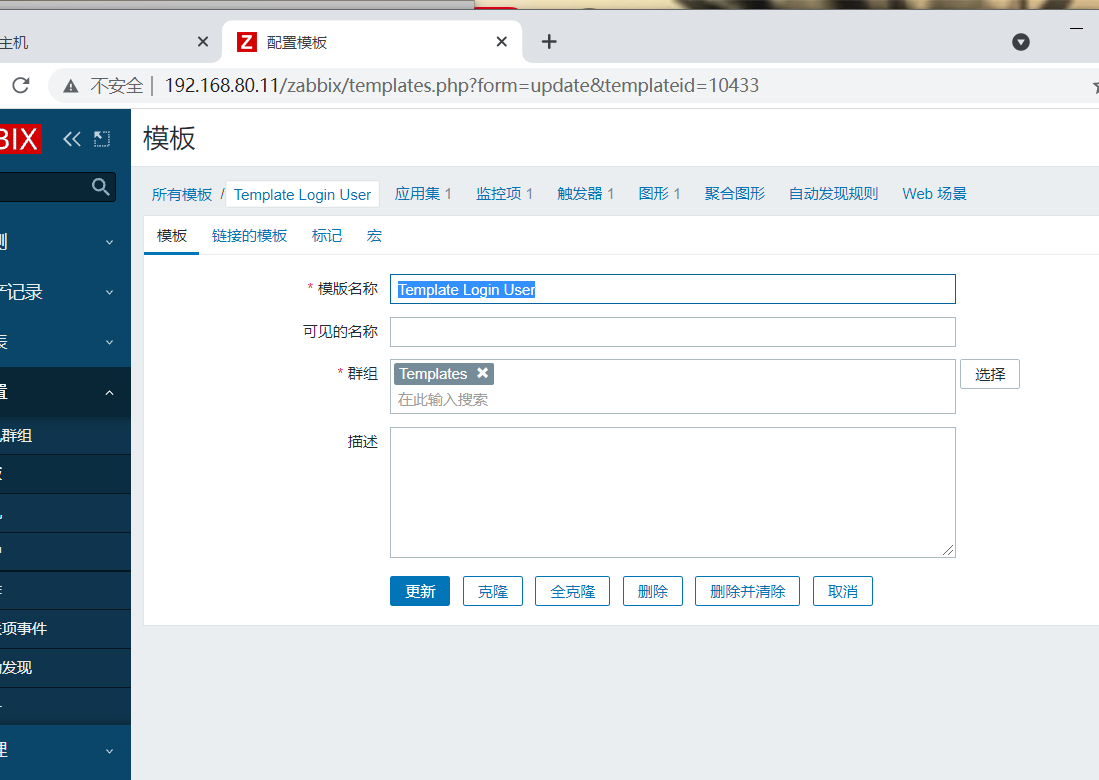
点击左边菜单栏【配置】中的【模板】,点击【创建模板】
【模板名称】设置成 Template Login User
【可见的名称】设置成 Template Login User
【群组】选择 Template
【描述】可自定义
点击 【添加】,此时就可在【链接的模板】中搜索到 Template Login User 了
创建应用集(用于管理监控项的)
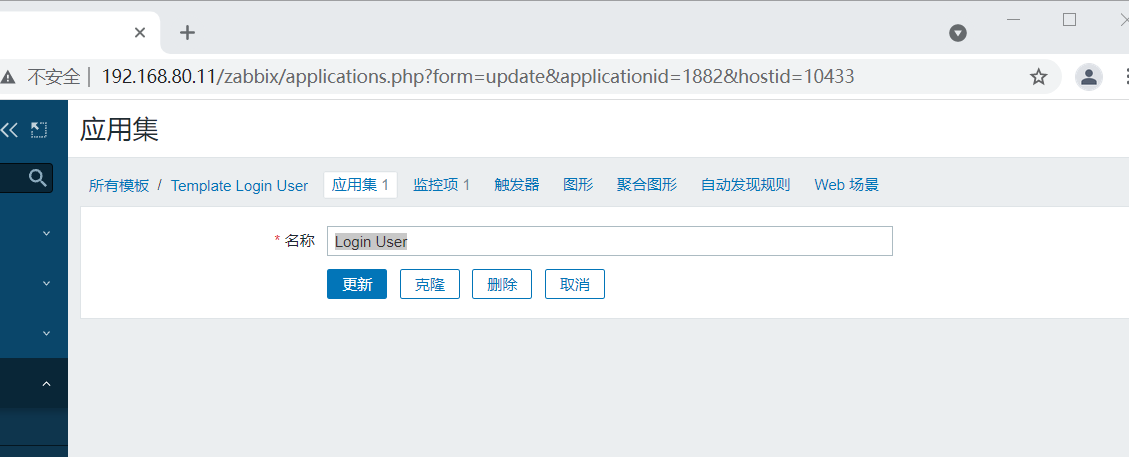
点击上方菜单栏【应用集】,点击【创建应用集】
【名称】设置成 Login User
点击 【添加】
创建监控项
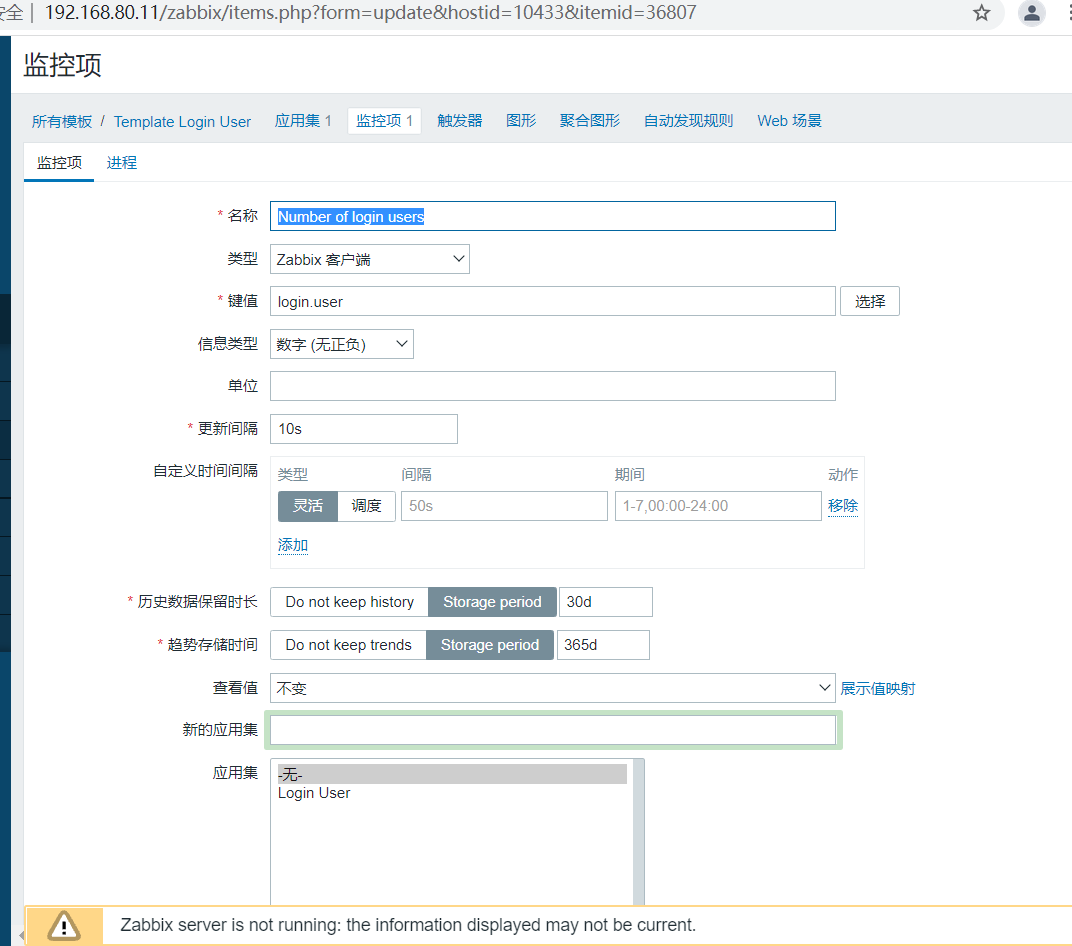
点击上方菜单栏【监控项】,点击【创建监控项】
【名称】设置成 Number of login users
【键值】设置成 login.user			#键值必须要与自定义的监控项配置文件中设置的保持一致
【更新间隔】设置成 10s
【历史数据保留时长】Storage period	30d		#保留时间可自定义设置
点击 【添加】
创建触发器(判断是否报警)
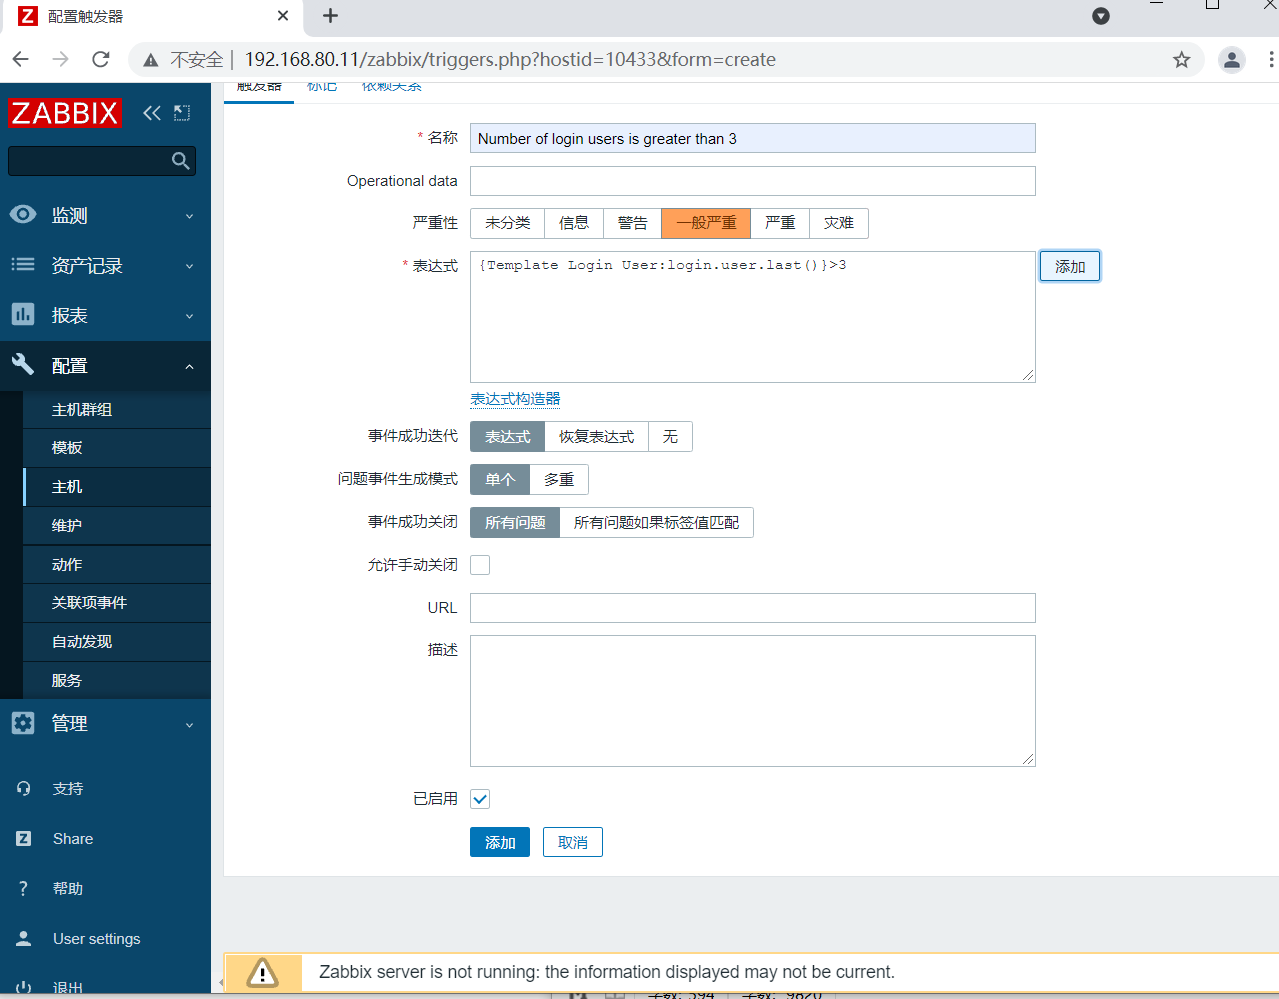
点击上方菜单栏【触发器】,点击【创建触发器】
【名称】设置成 Number of login users is greater than 3
【严重性】设置成 一般严重
【表达式】点击添加,【监控项】点击选择 Number of login users,【功能】选择 last(),【结果】选择 > 3,点击 【插入】
点击 【添加】
创建图形
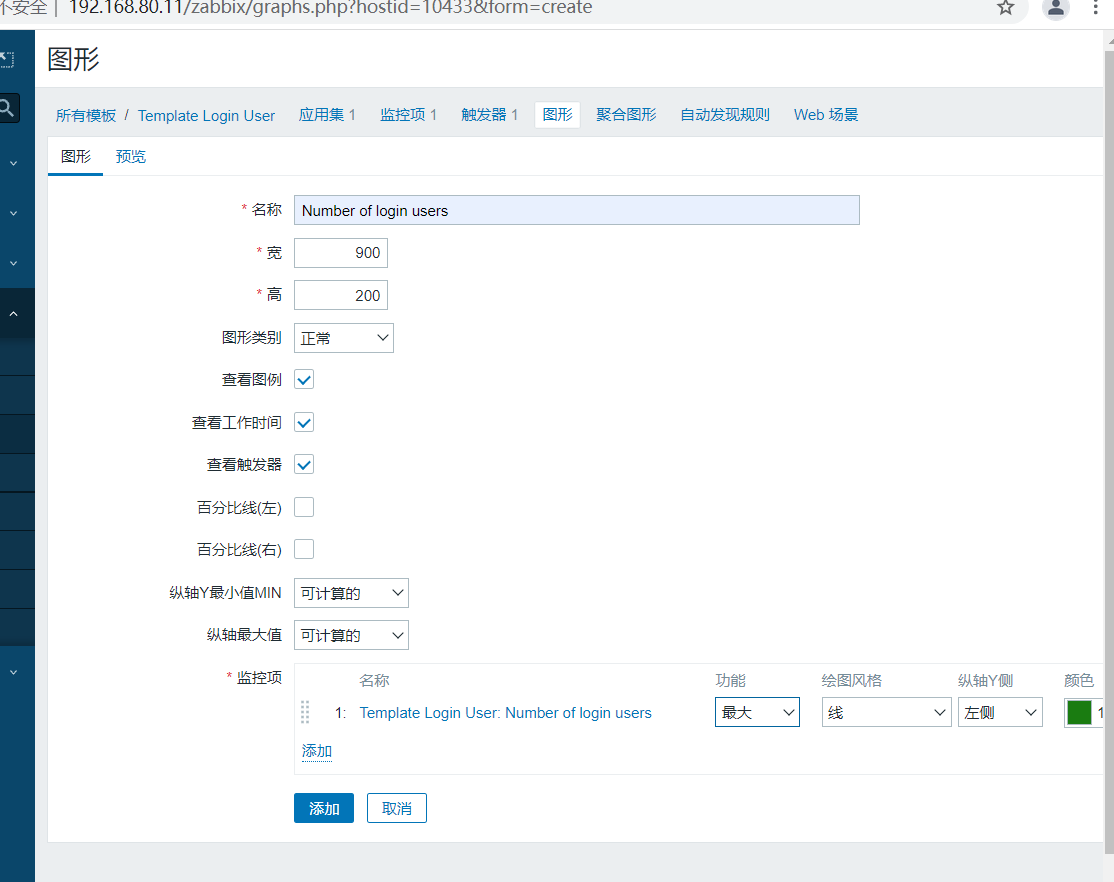
点击上方菜单栏【图形】,点击【创建图形】
【名称】设置成 Number of login users
【宽】、【高】可直接采用默认值
【监控项】点击添加勾选相关监控项 Number of login users,【功能】选择 最大,其它可保持默认值
点击 【添加】
将主机与模板关联起来(一个主机可以关联多个模板)
点击左边菜单栏【配置】中的【主机】,点击你要关联的主机
点击上方菜单栏【模板】,【Link new tamplates】搜索 login,选择 Template Login User,点击【更新】

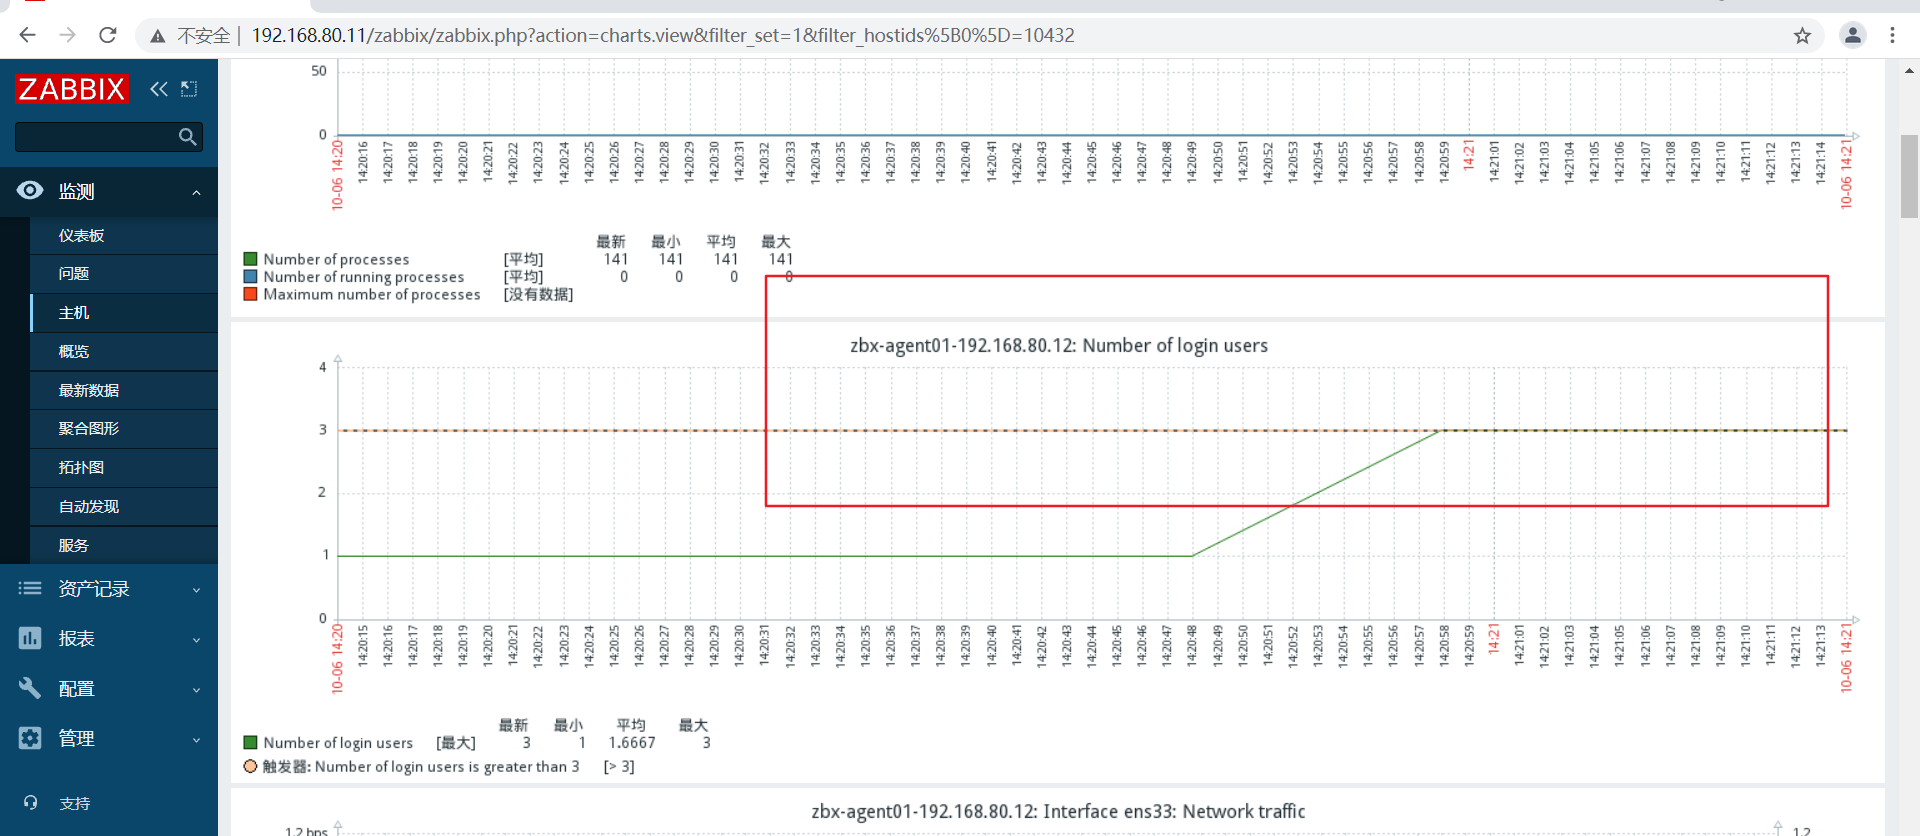
此时就点击【监测】中的【主机】,点击你关联主机的【图形】,即可查看到相关的监控项指标
设置邮件报警
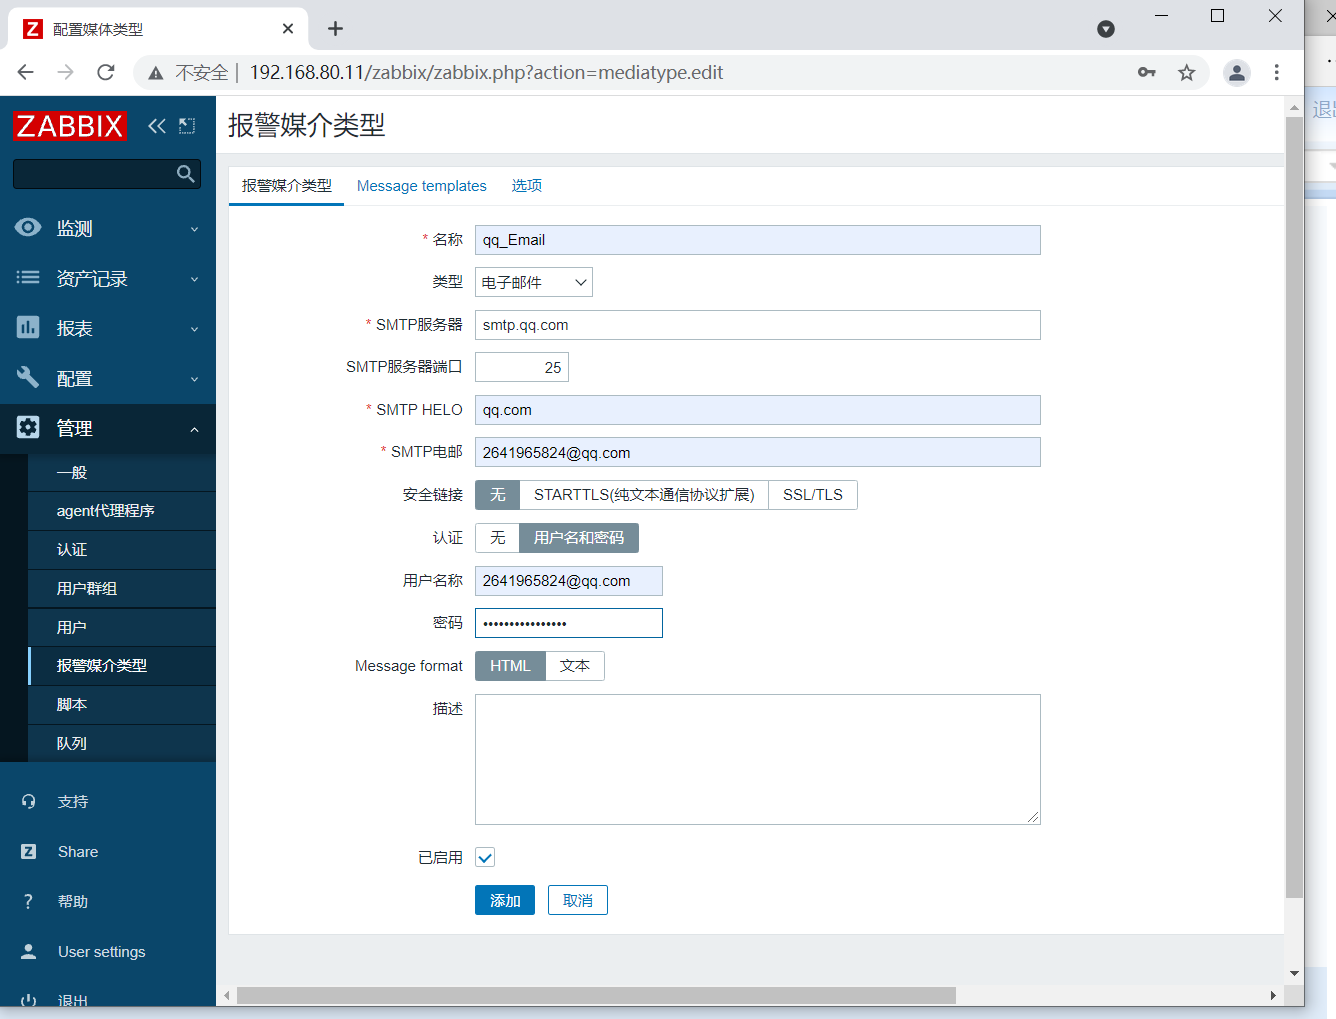
点击左边菜单栏【管理】中的【报警媒介类型】,点击【创建媒体类型】
【名称】设置成 qq_Email
【SMTP服务器】设置成 smtp.qq.com
【SMTP服务器端口】设置成 25
【SMTP HELO】设置成 qq.com
【SMTP电邮】设置成 自己的邮箱地址,例如 2641965824@qq.com
【认证】选择 用户名和密码
【用户名称】设置成 自己的邮箱地址,例如 2641965824@qq.com
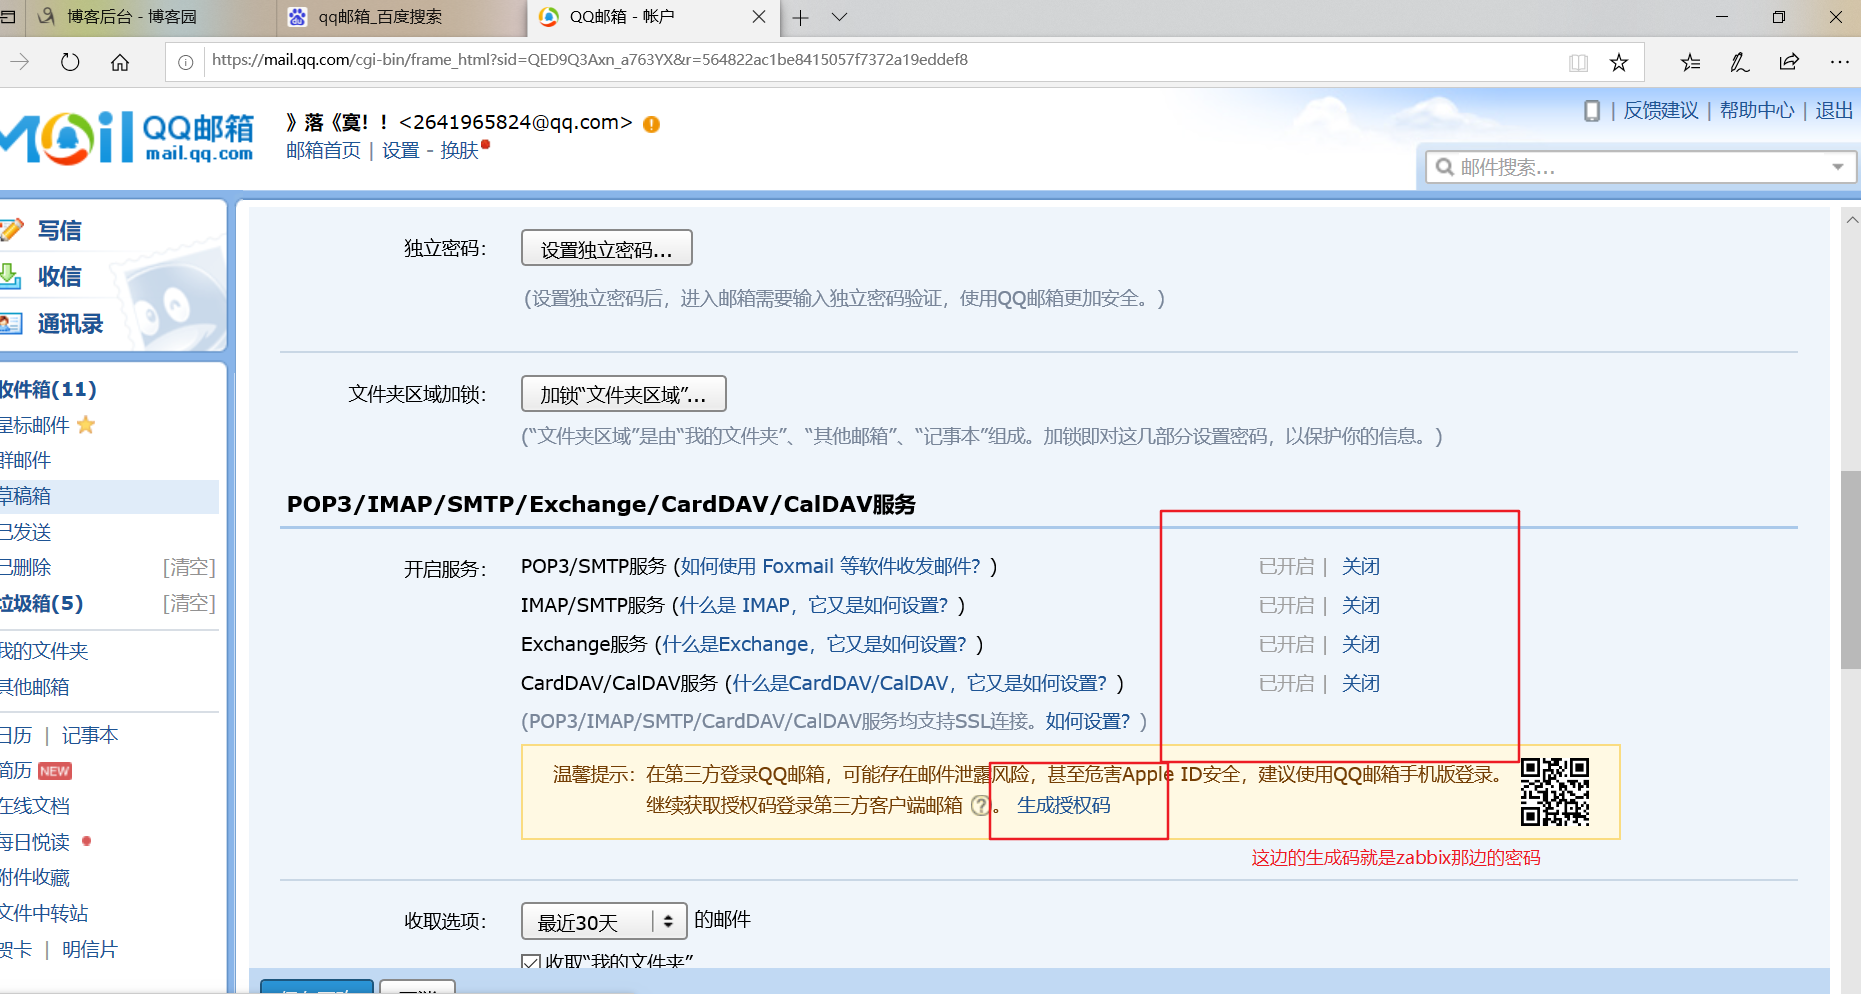
【密码】可登录QQ邮箱页面,点击【设置】-->【账户】中的【生成授权码】,通过短信获取授权码
【描述】可自定义
点击上方菜单栏【Message templates】,点击【添加】,【Message type】选择 问题,点击【更新】
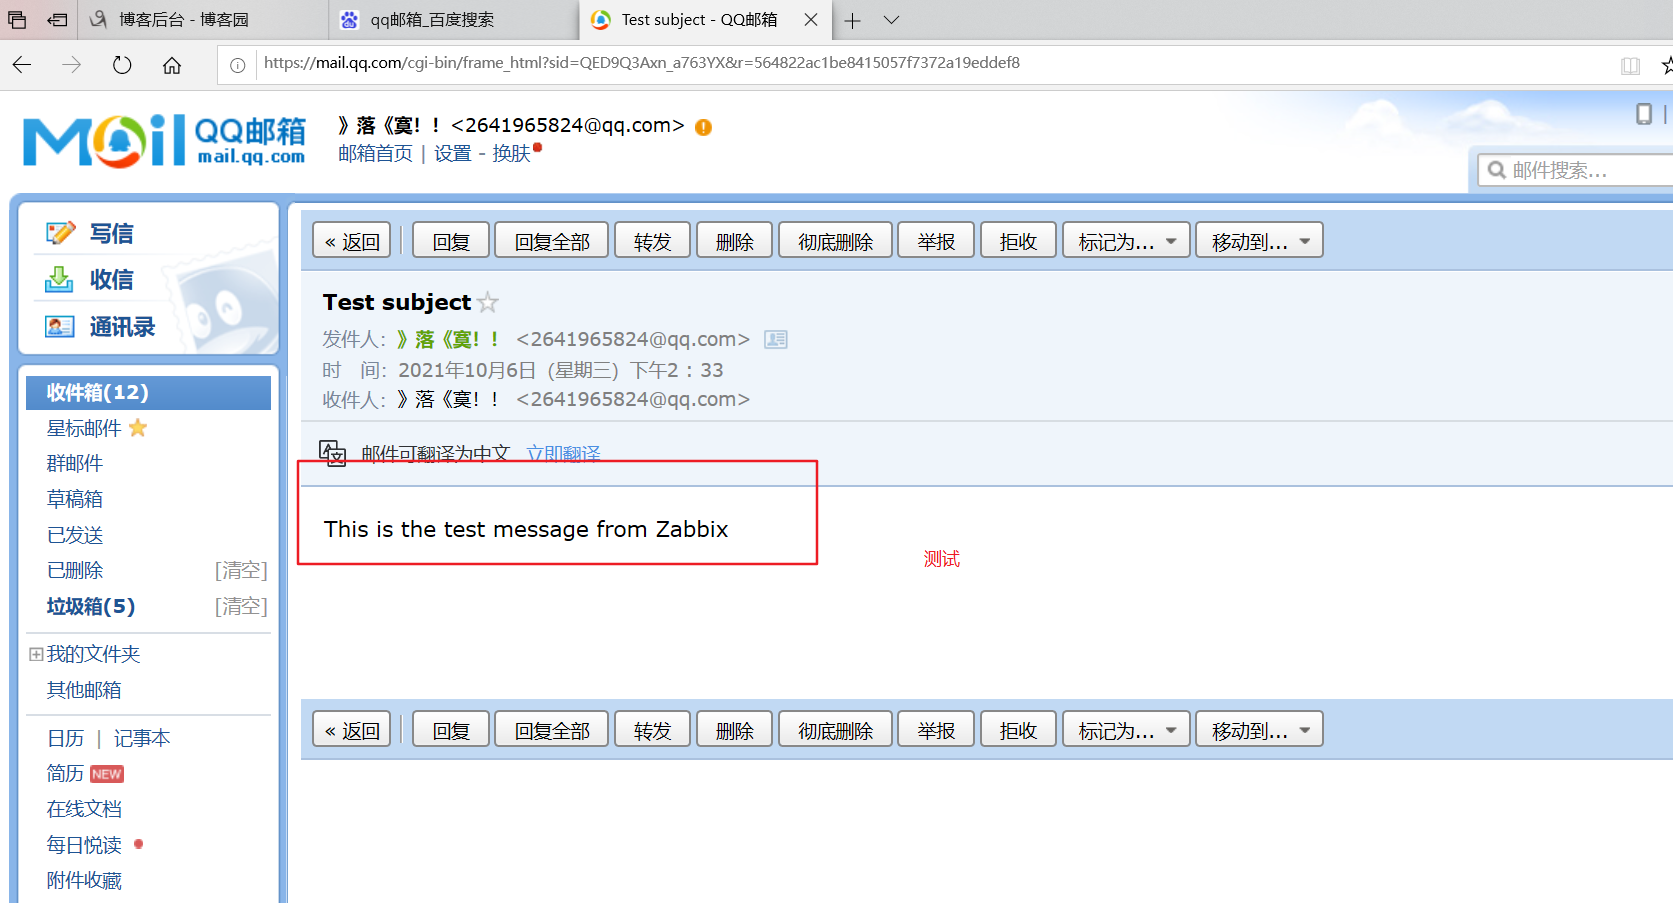
点击 【添加】,并测试功能

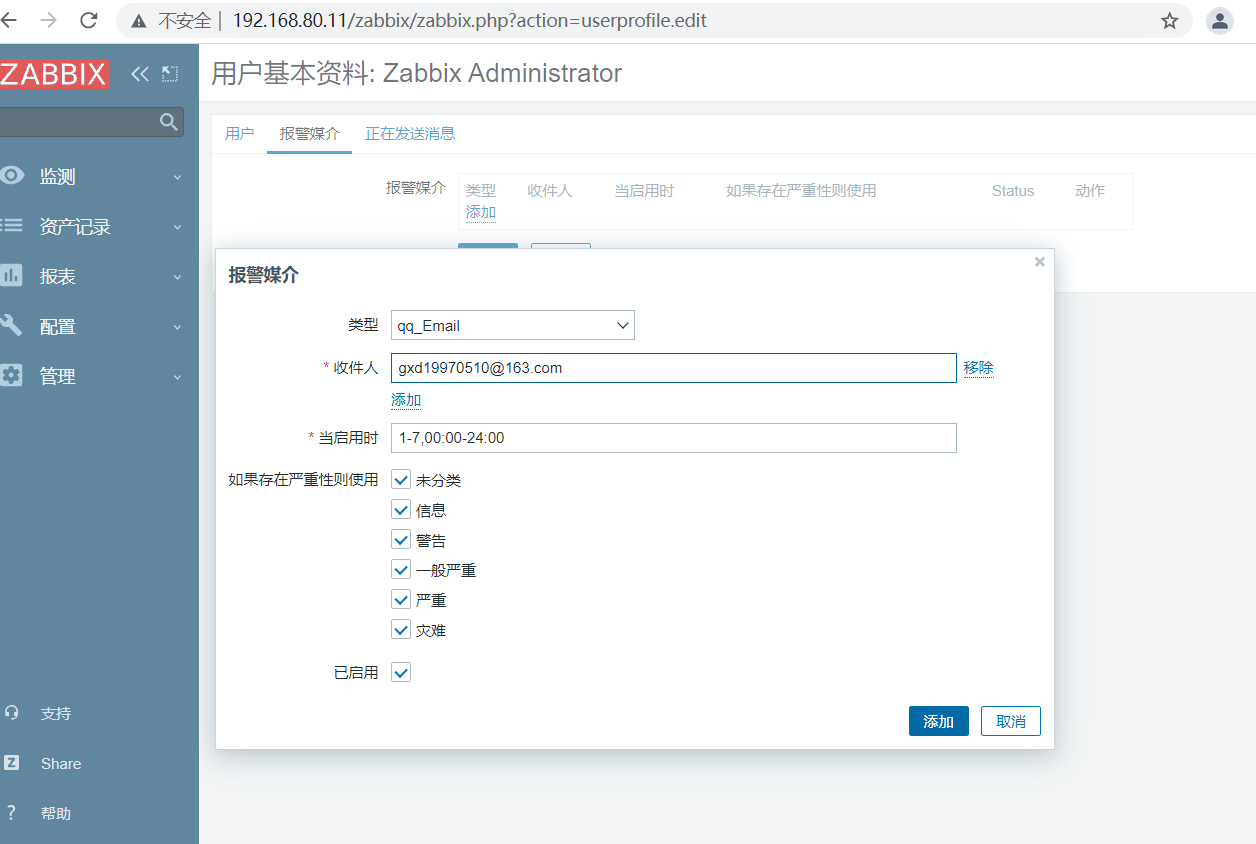
点击左边菜单栏【User settings】-->【报警媒介】,点击【添加】
【类型】选择 qq_Email
【收件人】设置成 gxd19970510@163.com
【当启用时】设置成 1-7,00:00-24:00
点击 【添加】
再点击 【更新】

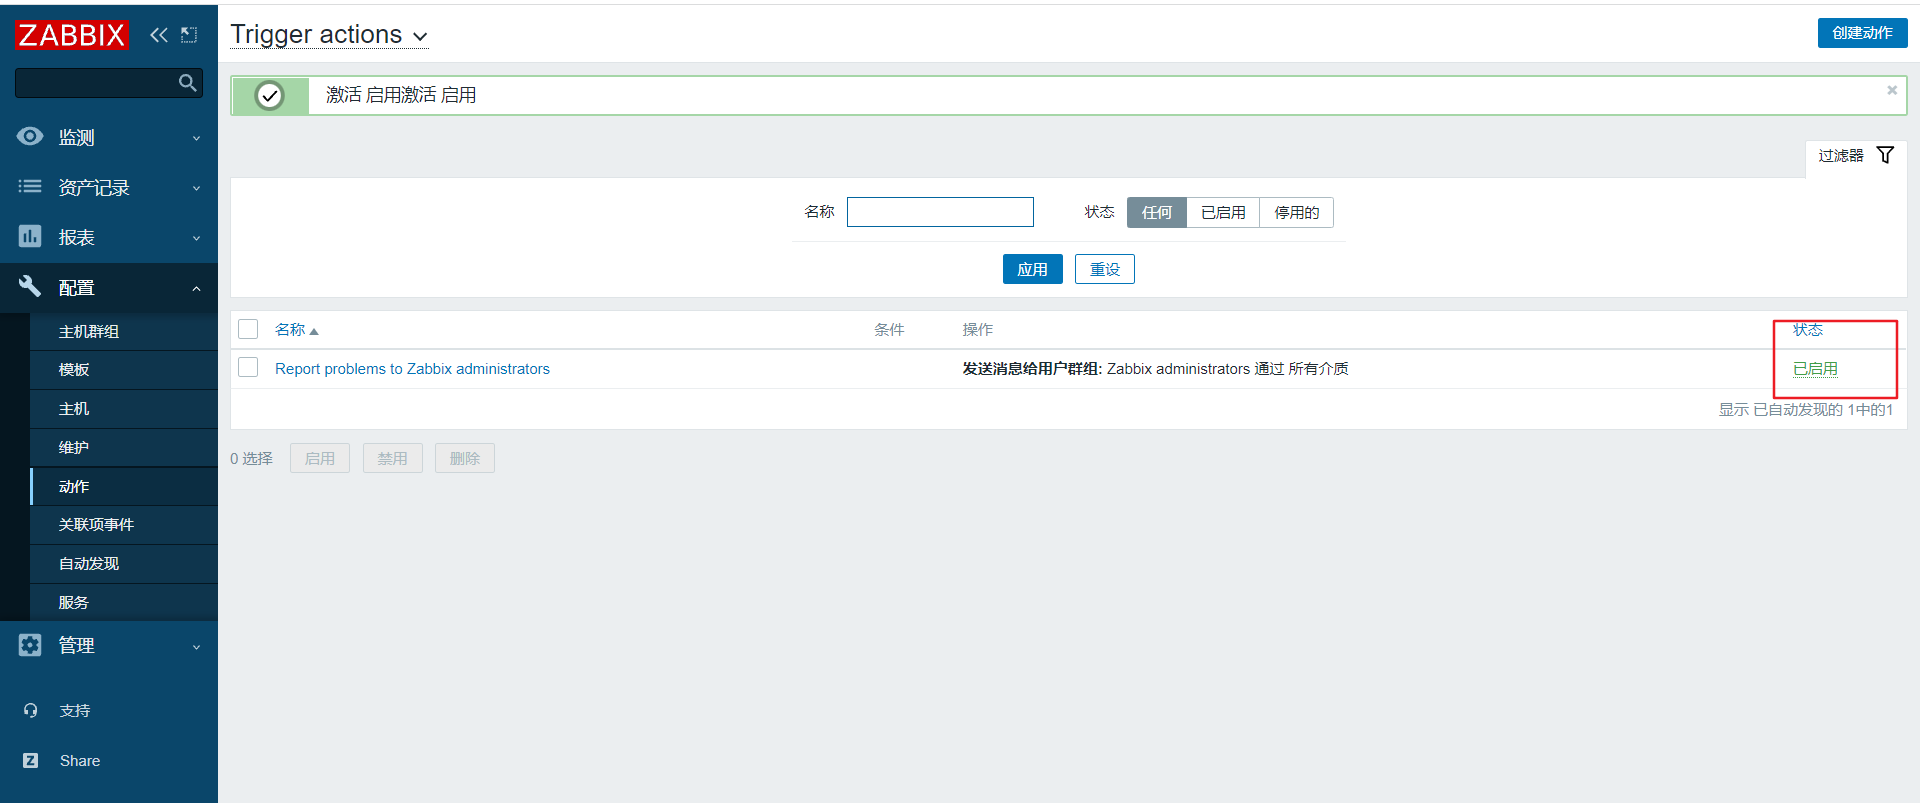
点击左边菜单栏【配置】中的【动作】,选择相对应的动作名称,点击【启用】

//测试邮件报警
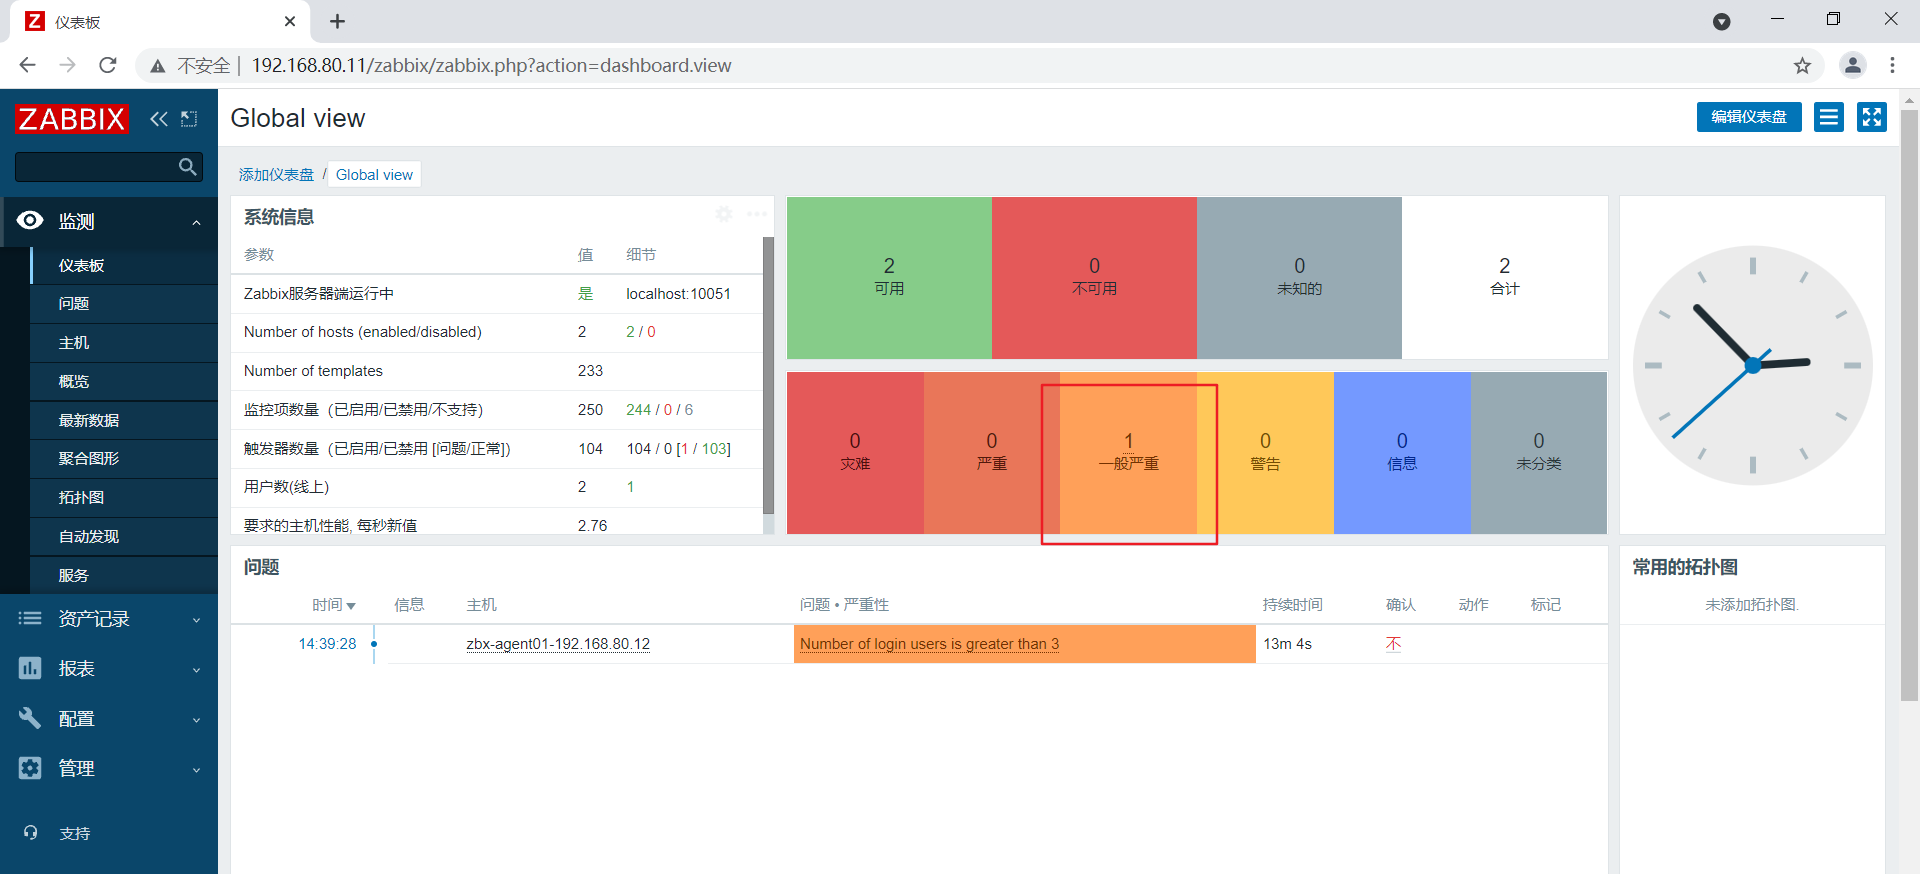
增加测试客户端的用户登录数超过触发器预设的值,查看【监测】-->【仪表盘】,确认报警
