前言
一、项目需求;
做个基础的页面,文章博客web应用实现后台交互;
二、项目模块与技术;
PHP实现web文章博客前后端交互全过程:GET、POST、AJAX请求
页面渲染交互包括前端三剑客(html,css,JavaScript)
CSS包括接入模式及嵌入模式
此web程序,引用jQuery库,html及php、与混合模式
session,cookie校验等,防前端绕过通过url请求参数获取网页
form表单提交,Ajax提交
共有六种页面,注册页面,登录页面,编辑页面,发表页面,列表页面,详情页面
文本框,用户名框,密码框,标题框,文件提交,注册按钮,登录及注销按钮
服务器数据库后台交互、保存用户信息等
界面不好看勿喷、仅基础后台交互技术方向
(本人网安人,前端与后端开发大佬多多指点)栓Q。
环境部署
//部署xampp开发集成
1、上传xampp.run包
将xampp 5.6.40.run上载至 "~" 目录

2、提升执行权限、并安装
chmod 777 xampp-linux-x64-5.6.40-1-installer.run
sh xampp-linux-x64-5.6.40-1-installer.run

3、打开 ~/.bashrc 文件、在末尾加入两行	//配置环境变量
# PATH
export PATH=/opt/lampp/bin:$PATH

4、保存退出、让环境变量生效
source ~/.bashrc

5、启动xampp
/opt/lampp/lampp start

6、创建user、blog数据库
mysql -uroot     //5.6版本xampp里的数据库默认没密码
create
create table user (
id int primary key auto_increment,
username varchar(20) not null,
password varchar(20) not null,
tel varchar(20) unique,
role varchar(20) default 'guest',
path varchar(100));

-----------------------------------------

create table blog(
id int primary key auto_increment,
headline varchar(50) not null,
content text not null,
createtime datetime,
username varchar(20) not null);

sql语句备注:"create创建 指定user表。int(数字类型)id(主键约束、自增长)varchar(可变长字符串)not null(不准为空)unique(唯一)default(默认值为guest)"

##写入一个用户留作调试环境##
insert user(username,password,del,role,path) value('wanan','wanan123','13333333333','admin','');

======查看环境常用三条sql语句======
show databases;		//查看所有数据库
create database blog;	//创建表
use blog;	//进入表

##在/opt/lampp/htdocs/里面创建一个空文件夹##
---------http://xampp服务器ip/路径------------
一、登录
“!+Enter” html框架自动列出、title标签写个网页名
style标签里写css样式、博主就记住两个"#“开头 引用时用id=,”."开头用class=
这里介绍下css样式嵌入式用法、后面页面不过多介绍了;
border: 0px solid blue;		//边框蓝色:调试完成后写0隐藏
width: 500px;	//宽度
height: 450px;		//高度
margin: auto;	//左右边界相等,居中
text-align: center;	//文本框半隐字体居中
font-size: 18px;	//字体大小
color:rgb(161, 18, 177);	//直接用color是设置字体颜色,三个数字是调色板
border: 1px solid red; //边框1px粗、红色边框
margin-top: 30px;	//上边距30px距离
margin-left: 30px;	//左边距30px距离
resize: none;	//禁止大文本框拉调
color: blueviolet;	//字体:颜色
background-image: url('black-star.jpg');    //网页背景引入图片
<!DOCTYPE html>
<html lang="en">
<head>
<meta charset="UTF-8">
<meta http-equiv="X-UA-Compatible" content="IE=edge">
<meta name="viewport" content="width=device-width, initial-scale=1.0">
<title>登录</title>
<style>
.div{
margin: auto;
text-align: center;
margin-top: 15%;
}
input[type="text"] {
height: 20px;
text-align:center;
display: block;
margin : 0 auto;
}
input[type="password"] {
height: 20px;
text-align:center;
display: block;
margin : 0 auto;
}
input[type="button"] {
height: 20px;
text-align:center;
display: block;
margin : 0 auto;
}
.body{
background: url(../black-star.jpg) no-repeat;
background-size: 100% 100% ;
background-attachment: fixed;
}
</style>
</head>
<body class="body"> //引入"."开头body样式;
<form action="login.php" method="POST"> //表单POST提交,跳转login.php页面
<div class="div">
用户名:<input type="text" name="username" id="user" placeholder="6-12个字母或数字" required="required">
密 码:<input type="password" name="password" id="pwd" placeholder="8-12个字母或数字" required="required">
验证码:<input type="text" name="verifycode" id="code" placeholder="验证码" required="required">
<input type="submit" value="登录">
//思路:一个大div盒子包裹一堆小标签
//input标签"text"类型文本框
//input标签"password"类型文本框 输入字符串小黑点用作隐藏密码
//input标签"submit"类型提交按钮
//name及id给个定位、placeholder半隐无作用提示字符、required提示必输入
// 空格占位符
</div>
</form>
</body>
</html>
效果图:(前面sql语句中插入过一条用户可登录)

二、注册
关键思路流程点
前端regist.html、后端regist.php
实现前端后端分离
注册按钮doRegist()触发自定义函数
前端处理获取数据,数据组包
文件特殊;用内置函数prop()获取元素的属性值
var dt=new FormData();实例化对象,文件上传表单提交
组装数据,组好接口参数
发送Ajax请求组好头部必写项
success:前面执行成功则执行后面代码,否则不执行(细节)
与后端数据进行if判断比较data与后端反馈结果regist-pass相同返回则注册成功。
前端代码如下;
<!DOCTYPE html>
<html lang="en">
<head>
    <meta charset="UTF-8">
    <meta http-equiv="X-UA-Compatible" content="IE=edge">
    <meta name="viewport" content="width=device-width, initial-scale=1.0">
    <title>注册</title>
    <style>
        body{
            background-image: url('bg.jpg');
        }
        fieldset{
            width: 500px;
            height: 260px;
            margin-left: 30%;
            margin-top: 10%;
            text-align: center;
            color: aquamarine;
        }
        input{
            font-size: 20px;
            margin-top: 5px;
            text-align: center;

        }
        #regist{
            font-size: 25px;
            background-color: rgb(201, 54, 14);
        }
    </style>
    <script src="jquery-3.4.1.min.js"></script>
    <script>
        function doRegist(){
            //获取数据,数据组包[默认urlencode=>username=lency&password=123456]
            var user=$("#username").val();
            var password=$("#password").val();
            var repassword=$("#repassword").val();
            var tel=$("#tel").val();
            var file=$('#photo').prop('files')[0];//prop():获取元素的属性值;设置元素属性值
            var dt=new FormData();//实例化对象,x文件上传的协议数据提交类型content-type:formdata
            dt.append("username",user);//组装数据,接口参数
            dt.append("password",password);
            dt.append("repassword",repassword);
            dt.append("phone",tel);
            dt.append("photo",file);
            //发请求
            $.ajax({
                url:'regist2.php',
                type:'post',
                contentType:false,
                processData:false,
                data:dt,
                success:function(data){
                    // alert(data);
                    if(data=='regist-pass'){
                        alert('注册成功!');
                        location.href='login.html';
                    }else{
                        alert('注册失败!');
                        location.href='regist2.html';
                    }
                }
            });
        }
    </script>

</head>
<body>

        <fieldset style="font-size: 22px;">注册系统<br><br>
            <input type="text" id="username" name="user" placeholder="User"><br>
            <input type="password" id="password" name="pwd" placeholder="Pass"><br>
            <input type="password" id="repassword" name="repwd" placeholder="Repass"><br>
            <input type="text" id="tel" name="tel" placeholder="Tel"><br>
            <input type="file" id="photo" name="photo" style="margin-left: 80px;">
            <input type="submit" value="Regist" id="regist" onclick="doRegist()">
        </fieldset>


</body>
</html>
$_POST $_FILES 收集表单
收集表单时注意定义文件路径、需要在服务器创建保存头像的文件夹
注意提升文件夹写入权限~
我的路径是’ [root@centos7 upload]# pwd
/opt/lampp/htdocs/safe14/blog/upload ’
数据非空校验if判断
后面判断服务器是否收到文件,如果没收到文件,直接终止执行注册。确保服务器不背锅
操作数据库;
include //引用db.php文件
定义后台sql语句,定义结果(dml调用当前sql语句变量)如果后台变量sql语句执行成功)
成功插入用户注册数据返回结果为1,当返回结果等于1时,echo个’regist-pass’否则失败
dml 是db.php文件中定义好的自定义函数
dml函数中写法是连接数据库代码,设好utf8编码集。
注册后端代码如下;
<?php
//收集表单
$user=$_POST['username'];//非空
$pwd=$_POST['password'];//非空
$repwd=$_POST['repassword'];//非空,必须与密码保持一致
$tel=$_POST['phone'];//非空
$photo=$_FILES['photo'];//头像
// echo $user,$pwd,$repwd,$tel;
// print_r($photo);
$tmp_name=$photo['tmp_name'];
$name=$photo['name'];
$path="upload/$name";//相对路径,绝对路径
// chmod o+w upload/ 默认用户daemon
//校验数据
//非空
if(($user=="")||($pwd=="")||($repwd=="")||($tel=="")||($photo=="")){


    die("regist-fail");
}
//确认密码与密码必须一致
if($pwd!=$repwd){


    die("password not same");

}

//头像文件保存在服务器的指定目录下,专门的目录用于存储上传后的文件
$resp=move_uploaded_file($tmp_name,$path);
if($resp!=1){

    die('upload-fail');
}
//操作数据库
include 'db.php';
$sql="insert user (username,password,tel,path) value('$user','$pwd',$tel,'$path')";
$res=dml($sql);
if($res==1){
    echo 'regist-pass';
    // echo "<script>location.href='login.html'</script>";

}else{
    echo 'regist-fail';
    // echo "<script>location.href='regist1.html'</script>";

}
?>
效果图:(后面有db.php “dml”函数代码)
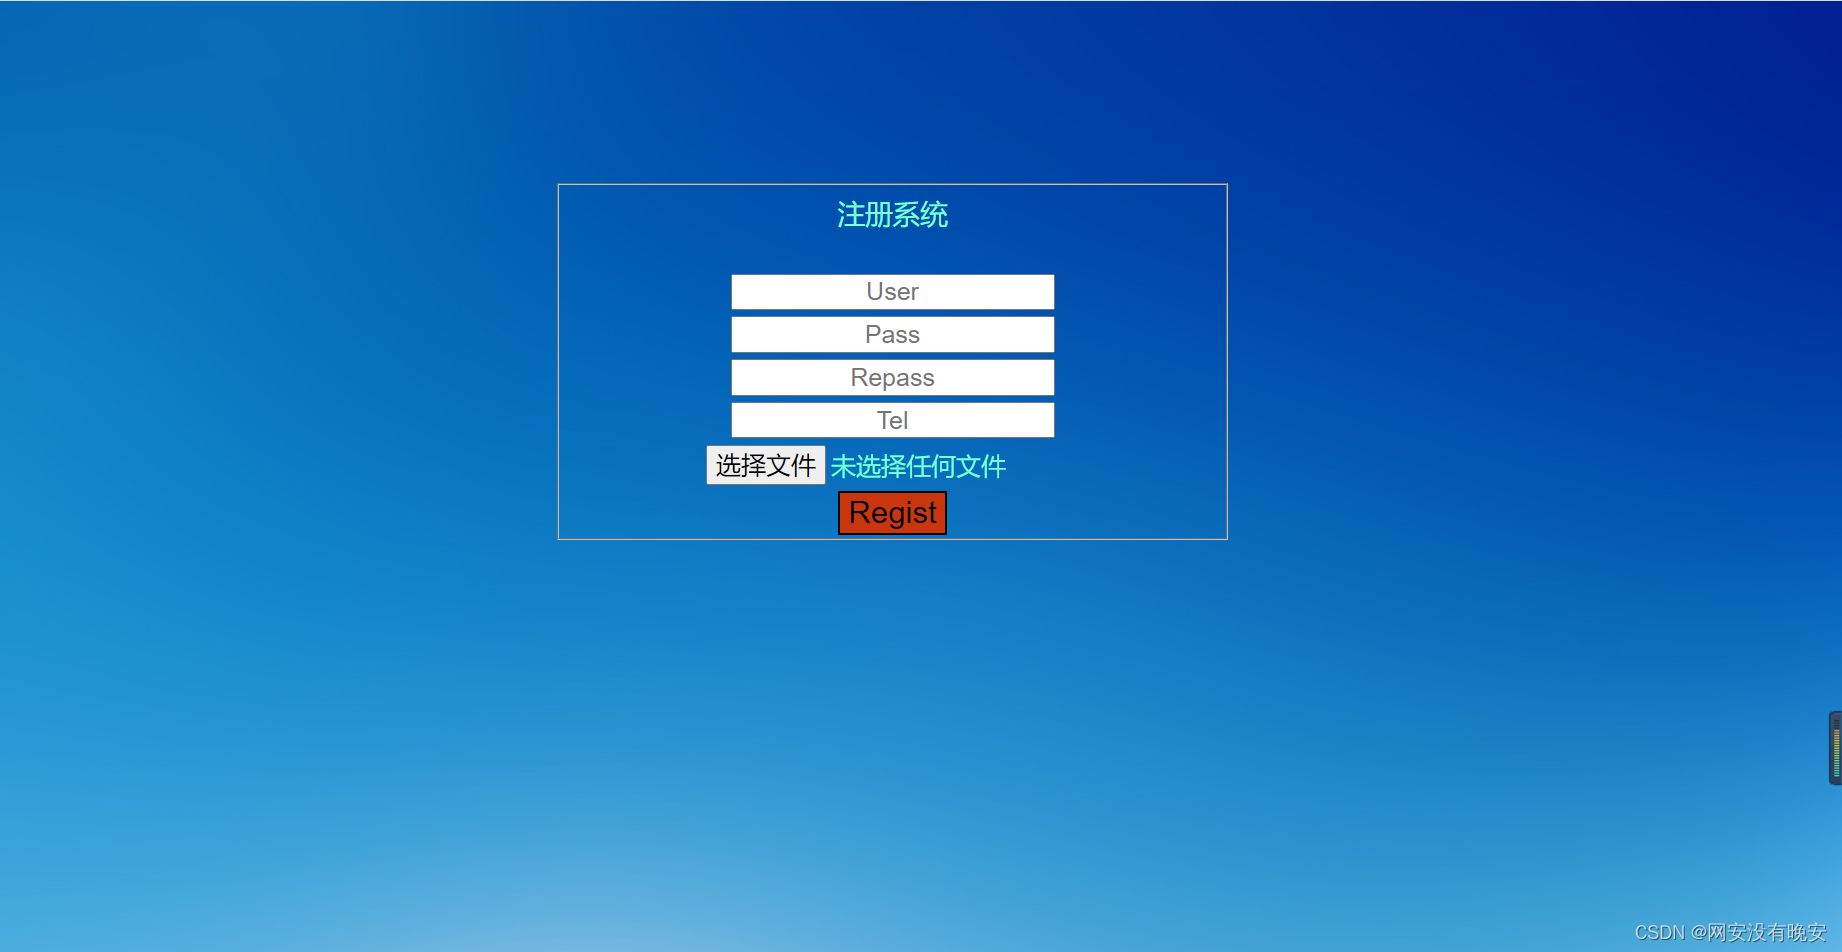
db.php,数据库操作文件;
mysqli_connect //内置连接函数
用 mysqli_query 设置字符编码及、先把连接放前面进行设置utf8
定义结果函数,暂定个空sql查询函数留作后调用。
//DML操作
<?php
function dml($sql){
    $con=mysqli_connect('localhost','root','','blog','3306');
    mysqli_query($con,"set names utf8");
    $res=mysqli_query($con,$sql);
    return $res;
}
?>
三、主页
注销;删除;发表; 编辑;注销;
思路流程;
style标签弄点css样式渲染按钮图标
引用jQuery库
单机调用do_die()函数;用来注销用户
单机调用doDel(id)函数;用来删除文章
开启服务器session校验session_start();
include ‘db.php’;引入数据库操作,将数据库所有的值取出来,用foreach遍历,echo出来div盒子,盒子中放填变量,及单机击触发某函数事件,触发功能。
这里简单仍外面两个div一个发表一个注销
单机发表跳转另一个页面,在新的页面里发表文章上传至数据库、编辑也是,跳转至编辑后台进行处理编辑结果
不仍里面的原因,懒得调整css样式,仍里面会将里面内容乱挤
大的div 样式选择out,将第一排的列头先放进去。
<!DOCTYPE html>
<html lang="en">
<head>
    <meta charset="UTF-8">
    <meta http-equiv="X-UA-Compatible" content="IE=edge">
    <meta name="viewport" content="width=device-width, initial-scale=1.0">
    <title>主页</title>
</head>
<style>
    body{
        background-image: url('bg.jpg');
        margin:auto;
        margin-top: 200px;
        width: 500px;
        height: 600px;
    }
    #out{
    border: 0px solid red;
    width: 410px;
    height: 130px;
    margin: auto;
    margin-top: 100px;
    }
    #out div{
        border: 1px solid blue;
        height: 25px;
        width: 80px;
        float: left;
        text-align: center;
        overflow: hidden;
        white-space: nowrap;
        text-overflow: ellipsis;
    }
    button{
        font-size: 12px;

    }

    .div{
        font-size: 20px;
        color: cadetblue;
        align-items: center;
        text-align: center;
        position: relative;
        top: 90px;
    }


</style>
<script type="text/javascript" src="./jquery-3.4.1.min.js"></script>
<script>
    function do_die(){
        location.href='doDot.php';
    }
    </script>
<script>
//     function doEdit(id){
//         //edit.php?id=1
//         location.href='edit.php?id='+id
// }
        // function doEdit(id){
        //     $.get(
        //         'edit.php?id='+id,function(data){
        //             //检查响应文本的内容的某个特征
        //             //tile的内容是编辑,文本包含
        //             alert("正在进入编辑");
        //             location.href='edit.php?id='+id;
        //         }
        //     );
        // }


        function doDel(id){
            var param="id="+id;
            $.post(
                'del.php',param,function(data){
                    if (data=="success"){
                        alert('删除成功,编号为:'+id);
                        //window.location.href="./welcome.php";//当前页面刷新
                        window.location.reload();//当前页面刷新
                    }else{
                        alert("删除失败~");
                    }
                }
            );
        }
</script>

<body><div class="div">博客清单</div>
<div id="out">
        <div>博客编号</div>
        <div>博客标题</div>
        <div>作者</div>
        <div>菜单1</div>
        <div>菜单2</div>
        <?php
        //会话控制:检查$_SESSION['isLogin']=true
        //开启会话
        session_start();
        // echo $_SESSION['isLogin'];//Undefined variable: _SESSION
        // if($_SESSION['isLogin']){
            if(!@$_SESSION['isLogin']){
                die('not login');
            }
            // else{
            //     echo 'not login';
            // }
        // }
    include 'db.php';
    $sql='select * from blog';
    // $sql2='delete from blog where id=$id';
    $results=select($sql);
    foreach($results as $result){
        $id=$result['id'];
        $headline=$result['headline'];
        $author=$result['username'];
        echo "<div><a href=blog.php?id=$id>$id</a></div>";
        echo "<div><a href="."blog.php?id=$id".">$headline</a></div>";
        echo "<div>$author</div>";
        // echo "<div><a href=edit.php?id=$id>编辑</a></div>";
        // echo "<script>location.href='edit.php?id=$id'</script>";//有缺陷
        // echo "<div><button οnclick=doEdit($id)>编辑</button></div>";
        echo "<div><button οnclick=location.href='edit.php?id=$id'>编辑</button></div>";
        echo "<div><button οnclick=doDel($id)>删除</button></div>";
        // echo "<div><button οnclick=location.href='doblog.html'>发表</button></div>";
    }

    ?>
    </div>
    <div class="buton"><button onclick=location.href='doblog.html'>发表</button></div>


    <div class="buton"><button onclick="do_die()">注销</button></div>


</body>
</html>
效果图:(后面有按钮功能/后台代码)
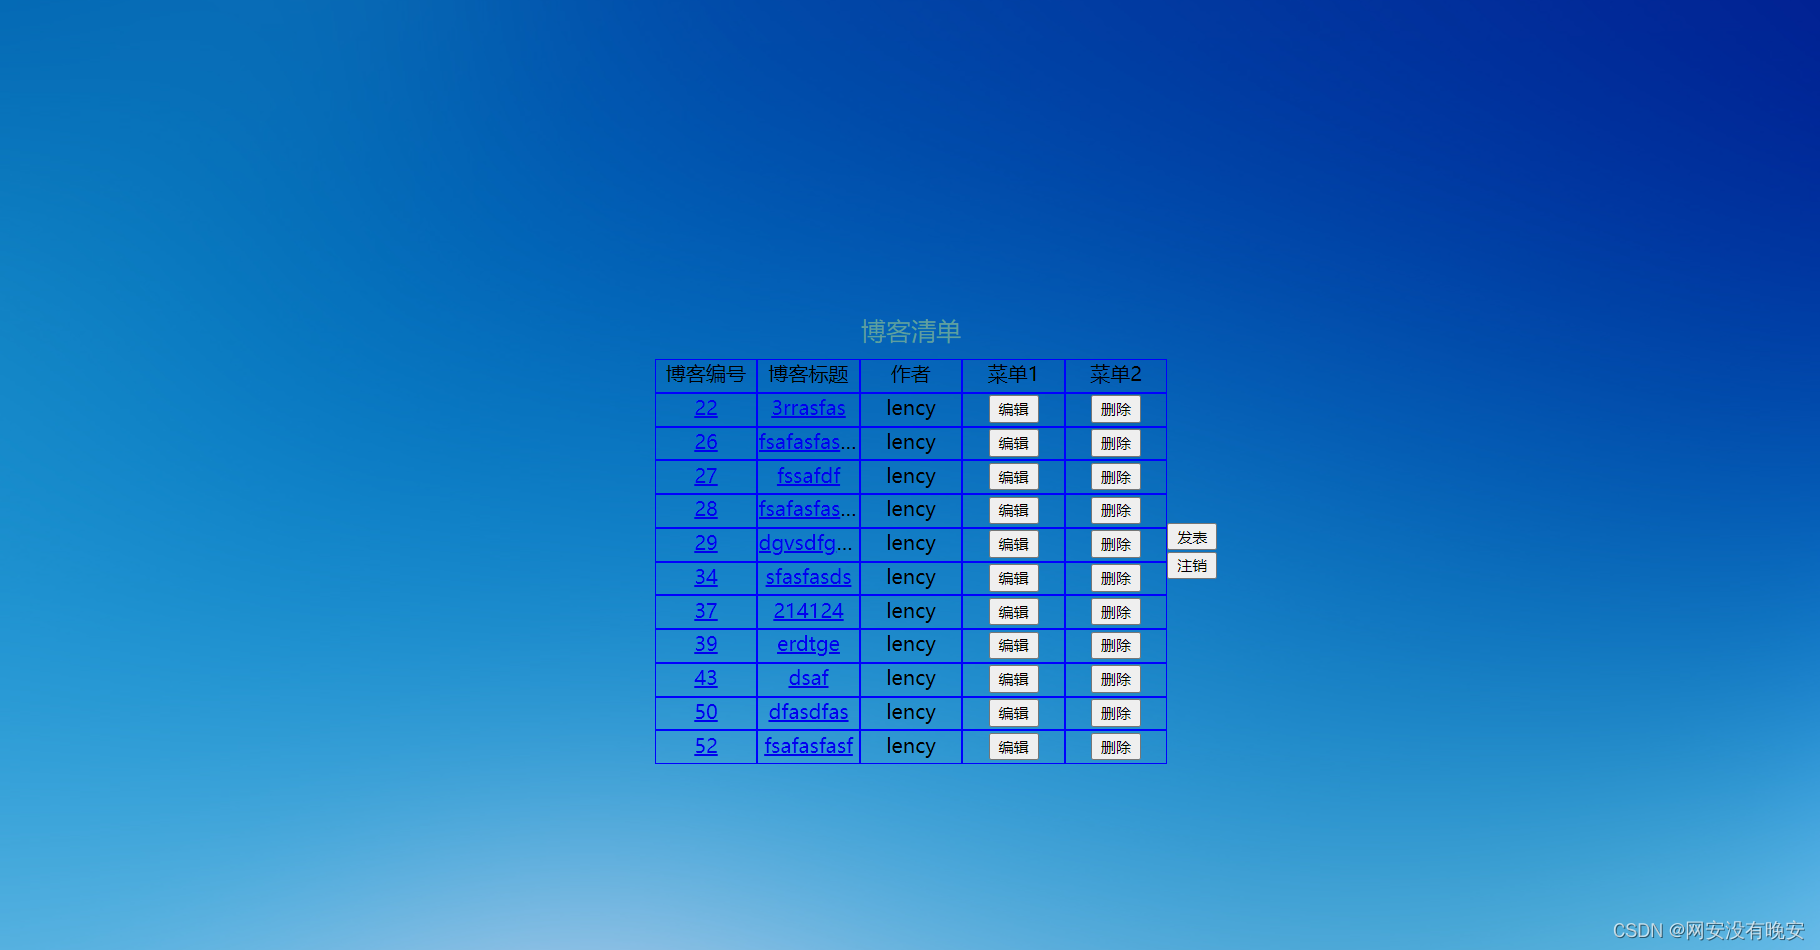
四、详情
用法及思路
主页用的a标签链接过来url添加请求参数(变量$id)获取详情页内容;
这里用了link标签 href接入式CSS;
fieldset标签组合表单相关的元素里面一个大div、放一堆小div;
因此后台是".php"文件。可以写html与php混合写,html文件却不能写php代码
在fieldset里面写<?php ?>;
引用数据库,用db文件里的select函数查询sql语句返回的结果,用变量定义用下标0取值
@是防止输入不存在的id号时展示文章内容出现报错,报错信息会暴漏服务器位置,所以用@直接屏蔽,且不展示任何内容值。
上面还用get请求出id内容,用id定义变量
下面的标签看似复杂其实简单粗暴加偷懒;
放过p标签里面写php代码将标签变量内容echo出来,作者及发表事件同样用php代码echo出来
textarea标签(长文本标签)同样echo出来content
下面再放过a标签返回列表路径
完成详情页面
<!DOCTYPE html>
<html lang="en">
<head>
<meta charset="UTF-8">
<meta http-equiv="X-UA-Compatible" content="IE=edge">
<meta name="viewport" content="width=device-width, initial-scale=1.0">
<title>博客详情</title>
<link rel="stylesheet" href="blog.css">
</head>
<body>
<div id="div">
<fieldset>博客详情<br>
<?php include 'db.php';
$id=$_GET['id'];
$res=select("select * from blog where id=$id");
$username=@$res[0]['username'];
$createtime=@$res[0]['createtime'];
$headline=@$res[0]['headline'];
$content=@$res[0]['content'];
?>
<p><?php echo $headline ?></p>
<label for="">作者:<?php echo $username?></label> <label for="">发表时间:<?php echo $createtime?></label>
<textarea name="content" id="content" cols="80" rows="22"><?php echo $content;?></textarea><br>
<a href="doblog.html">返回发表</a>
</fieldset>
</div>
</body>
</html>
效果图:(后面有css样式代码)
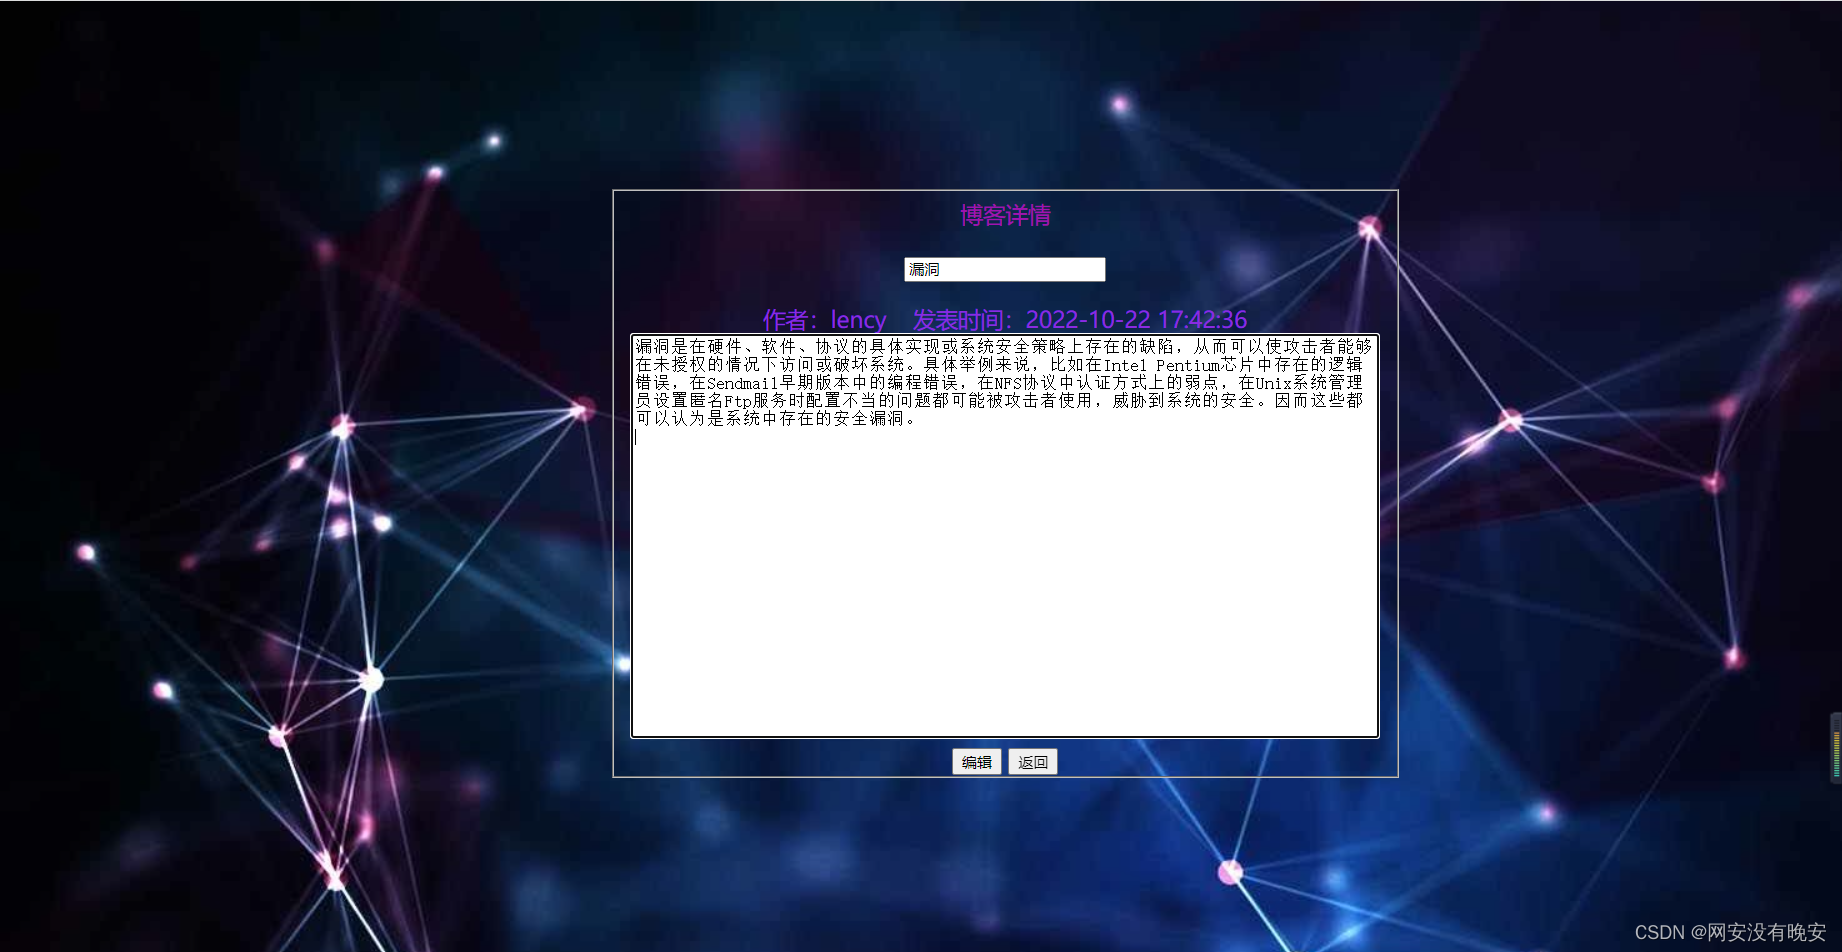
CSS样式代码(接入式);blog.css
body{
    background-image: url('black-star.jpg');
}
#div{
    border: 0px solid blue;
    width: 500px;
    height: 450px;
    margin: auto;
    margin-top: 150px;
    text-align: center;
}
fieldset{
    width: 100%;
    height: 100%;
    font-size: 18px;
    color:rgb(161, 18, 177);
}
.div{
    border: 1px solid red;
    width: 70%;
    margin: auto;
    margin-top: 30px;
}
input{
    font-size: 25px;
}
.file{
    margin-left: 30px;
}
button{
    font-size: 18px;
}
textarea {
    resize: none;
}
label{
    color: blueviolet;
}
五、编辑
按钮:编辑/保存与返回
思路及流程;
接入式CSS;引用jQuery库;
'编辑’按钮触发函数,返回按钮超链接;
详细内容输出参照详情页面输出出来;引用数据库select函数同理
注意:不通的是标题用text标签,为了可修改
session校验,防止未登录过的用户前端绕过,url请求参数访问编辑页面。
编辑且保存调用doEdit(id);
var定义一些数据用content收集起来打包
发送post请求;
后端执行sql修改语句,用if语句作判断前后端data内容如果后端执行成功返回edit-pass一致弹出编辑成功,反之,编辑失败。
<!DOCTYPE html>
<html lang="en">
<head>
<meta charset="UTF-8">
<meta http-equiv="X-UA-Compatible" content="IE=edge">
<meta name="viewport" content="width=device-width, initial-scale=1.0">
<title>编辑</title>
<link rel="stylesheet" href="blog.css">
<script src="jquery-3.4.1.min.js"></script>
<script>
function doEdit(id){
//收集数据,打包数据
var headline=$('#headline').val();
var content=$('#content').val();
var param="headline="+headline+"&content="+content+"&id="+id;
//发post请求
$.post(
'doedit.php',param,function(data){
if(data=='edit-pass'){
// alert(data);
alert('编辑成功');
location.href='list1.html';
}else{
// alert(data);
alert('编辑失败');
}
}
);
}
</script>
<style>
input{
font-size: 12px;
}
</style>
</head>
<body>
<div id="div">
<fieldset>博客详情
<?php include 'db.php';
//session校验
session_start();
if(!@$_SESSION['isLogin']){
die('not login');
}
$id=$_GET['id'];
$res=select("select * from blog where id=$id");
$username=@$res[0]['username'];
$createtime=@$res[0]['createtime'];
$headline=@$res[0]['headline'];
$content=@$res[0]['content'];
?>
<p><?php echo "<input type=text name=headline id=headline value=$headline>" ?></p>
<label for="">作者:<?php echo $username?></label> <label for="">发表时间:<?php echo $createtime?></label>
<textarea name="content" id="content" cols="80" rows="22"><?php echo $content;?></textarea><br>
<!-- <input type="button" value="编辑" onclick="doEdit(<?php echo $id;?>)"> -->
<?php echo "<input type=button value=编辑 οnclick=doEdit($id)>"?>
<input type="button" value="返回" onclick="location.href='list.php'">
</fieldset>
</div>
</body>
</html>
效果图:(后面有更新sql语句后台代码)
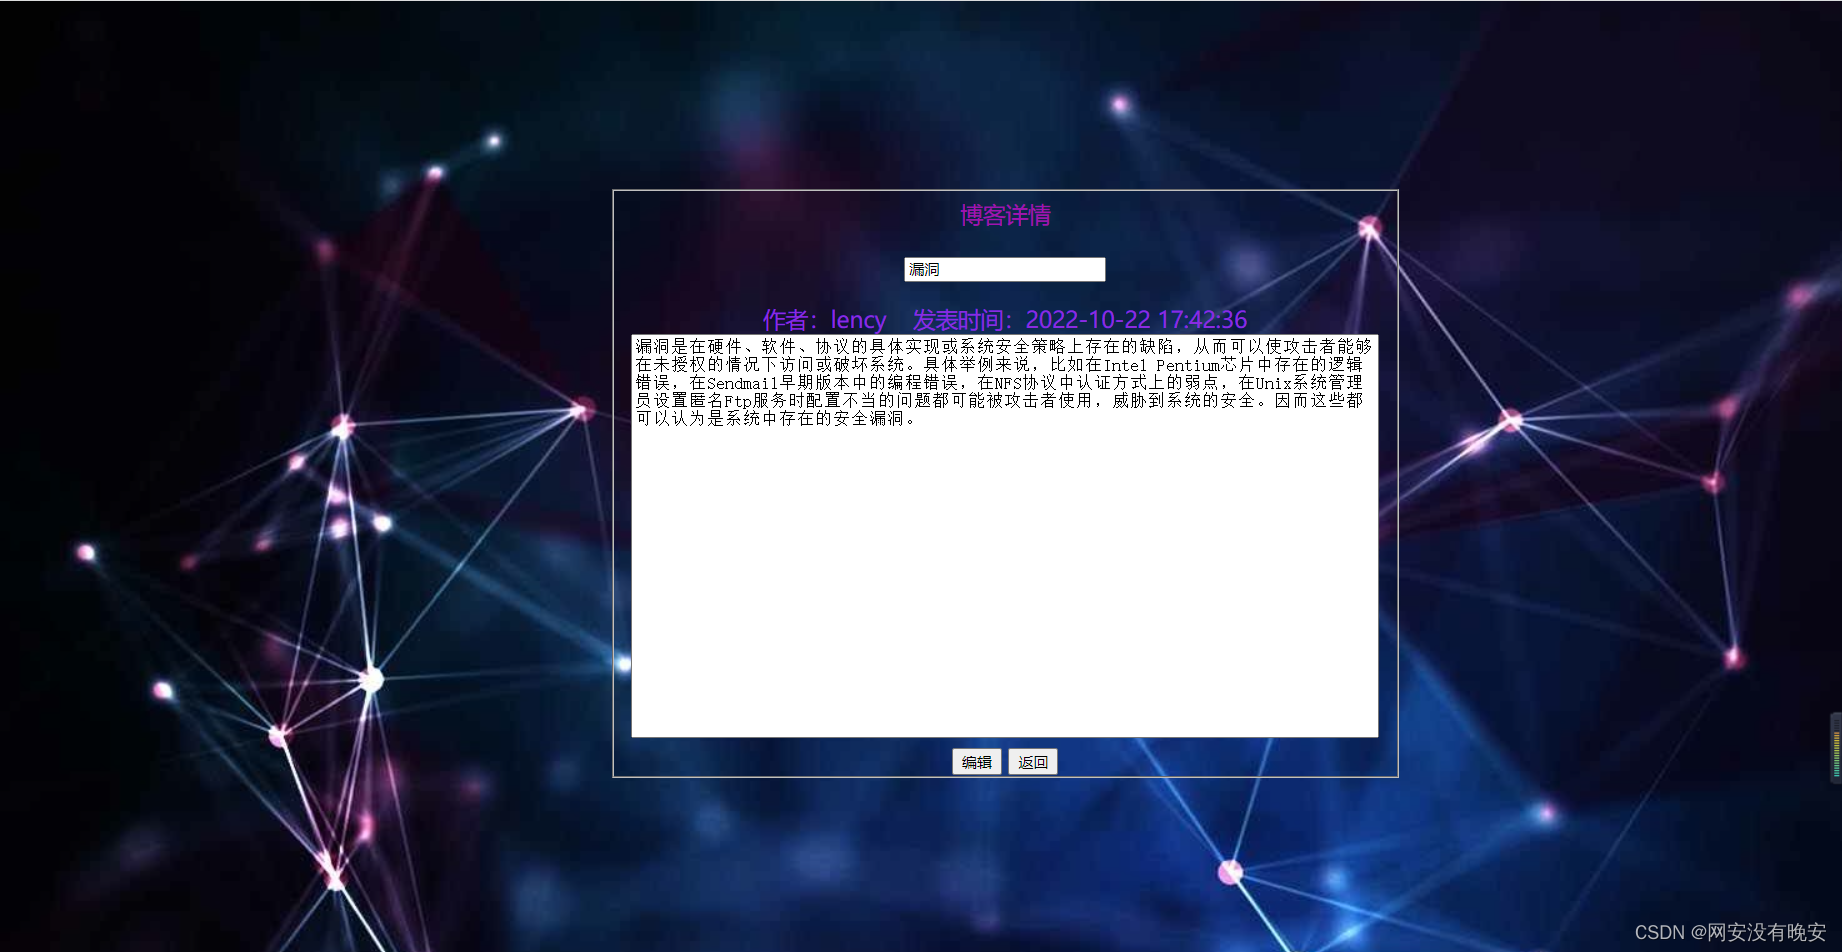
doedit.php;
收集表单,开启校验,更新sql语句与成功执行判断
<?php
//收集表单数据:post请求,headline,content
$headline=$_POST['headline'];
$content=$_POST['content'];
$id=$_POST['id'];
//session校验
session_start();
if(!@$_SESSION['isLogin']){
    die('not login');
}

//操纵数据库
include 'db.php';
$sql="update blog set headline='$headline' ,content='$content' where id=$id";
$res=dml($sql);
if($res==1){
    echo 'edit-pass';
}else{
    echo 'edit-fail';
}

?>
六、删除
方法
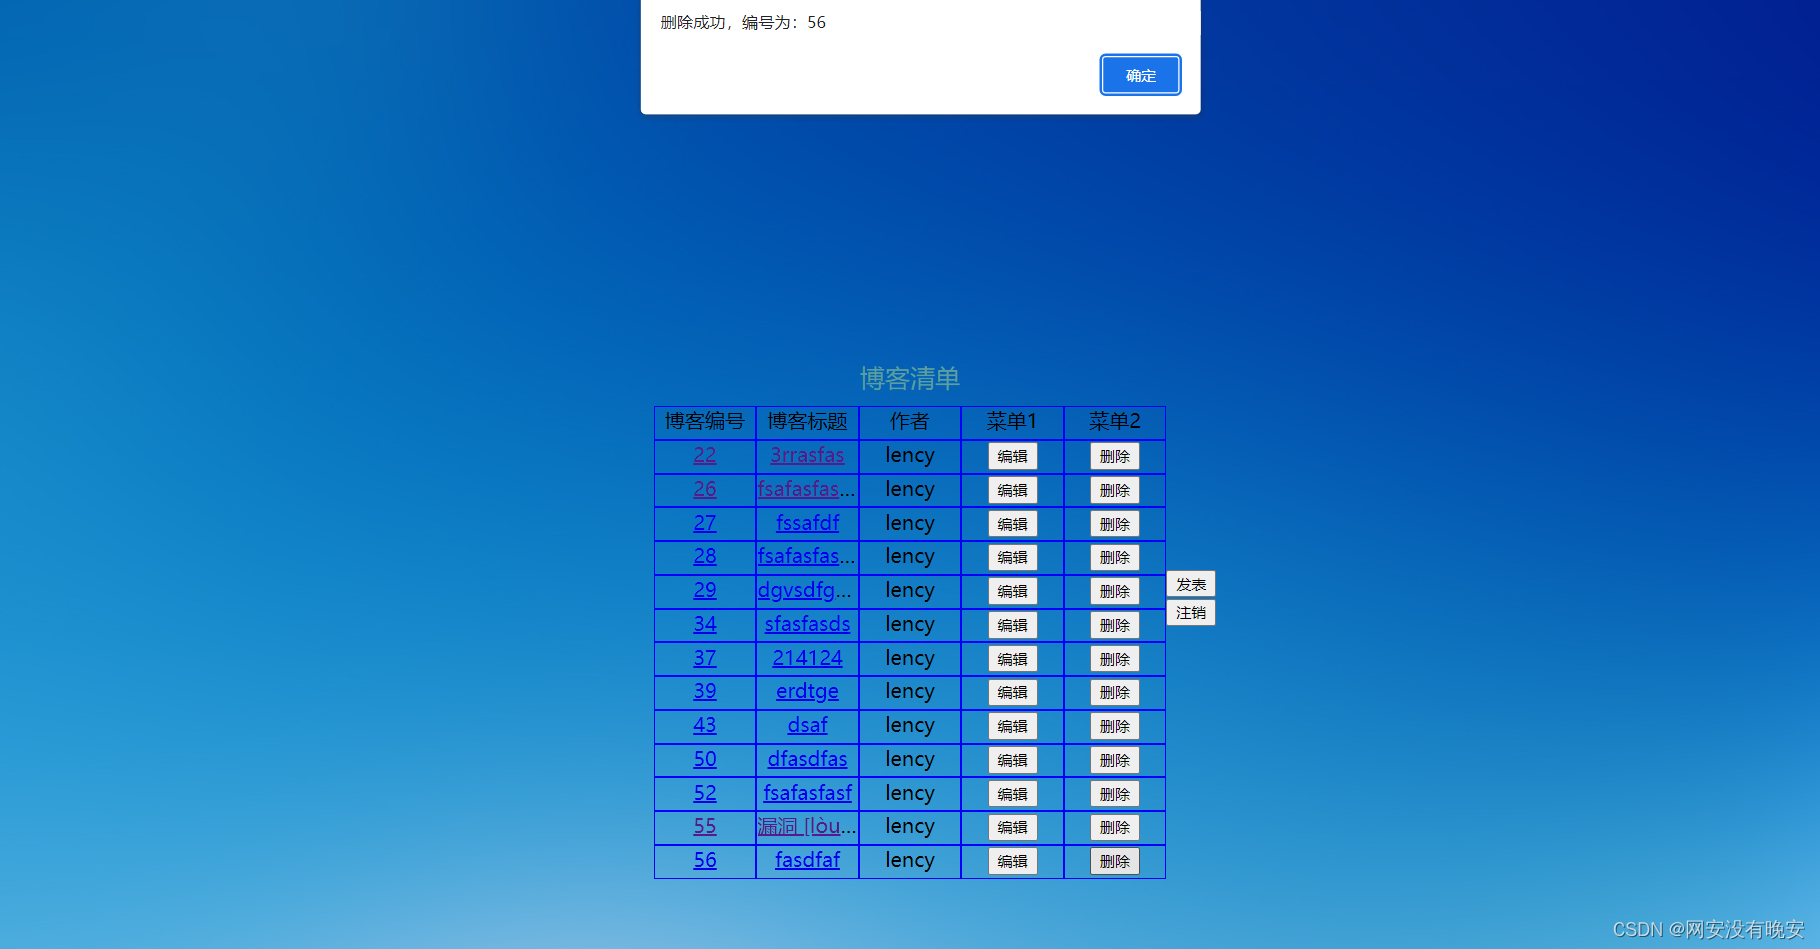
回查主页代码中的删除按钮使用方法如下;
div盒子单击触发事件,调用函数doDel();
用id收集取值,发送post请求
调用del.php后台,后台执行删除sql语句,前后端data用if判断返回结果success,前后端一致则成功,反之删除失败。
下方删除了部分与删除无关的代码;
<!DOCTYPE html>
<html lang="en">
<head>
    <meta charset="UTF-8">
    <meta http-equiv="X-UA-Compatible" content="IE=edge">
    <meta name="viewport" content="width=device-width, initial-scale=1.0">
    <title>主页</title>
</head>
<script type="text/javascript" src="./jquery-3.4.1.min.js"></script>
        function doDel(id){
            var param="id="+id;
            $.post(
                'del.php',param,function(data){
                    if (data=="success"){
                        alert('删除成功,编号为:'+id);
                        //window.location.href="./welcome.php";//当前页面刷新
                        window.location.reload();//当前页面刷新
                    }else{
                        alert("删除失败~");
                    }
                }
            );
        }
</script>

<body><div class="div">主页</div>
<div id="out">
        <?php
        echo "<div><button οnclick=doDel($id)>删除</button></div>";
    	?>
</div>
</body>
</html>
效果图:(后面有删除sql语句后台代码)
del.php;
开启校验,删除对应编号的文章id,删除sql语句与成功执行判断
<?php
//session校验
session_start();
if(!@$_SESSION['isLogin']){
    die('not login');
}

$id=$_POST['id'];
//删除对应编号的文章记录
include 'db.php';
$sql="delete from blog where id=$id";
$res=dml($sql);
if ($res==1){
    echo 'success';
}else{
    echo 'failed';
}
?>
七、注销
方法
回查主页代码中的注销按钮使用方法如下;
div盒子单击触发事件,调用函数do_die();
非常简单就一个逻辑,单机注销按钮后,直接跳转注销后台(doDot.php),处理注销。
下方删除了部分与注销无关的代码;
<!DOCTYPE html>
<html lang="en">
<head>
    <meta charset="UTF-8">
    <meta http-equiv="X-UA-Compatible" content="IE=edge">
    <meta name="viewport" content="width=device-width, initial-scale=1.0">
    <title>主页</title>
</head>
<script type="text/javascript" src="./jquery-3.4.1.min.js"></script>
<script>
    function do_die(){
        location.href='doDot.php';
    }
    </script>
</script>
<body>
	<div class="div">主页</div>
	<div id="out">
    </div>

    <div class="buton"><button onclick="do_die()">注销</button></div>


</body>
</html>
效果图&没有效果图,注销后直接返回至登录界面:(下面有注销后台的代码)
doDot.php
开启会话校验,将isLogin直接关掉(这里isLogin是布尔值型,只有开和关session)
<?php
session_start();

$_SESSION['isLogin']=false;
echo "您已注销";
echo "<script>location.href='login.html'</script>";

?>
八、发表
思路及方法
回看主页代码中的发表按钮使用方法如下;
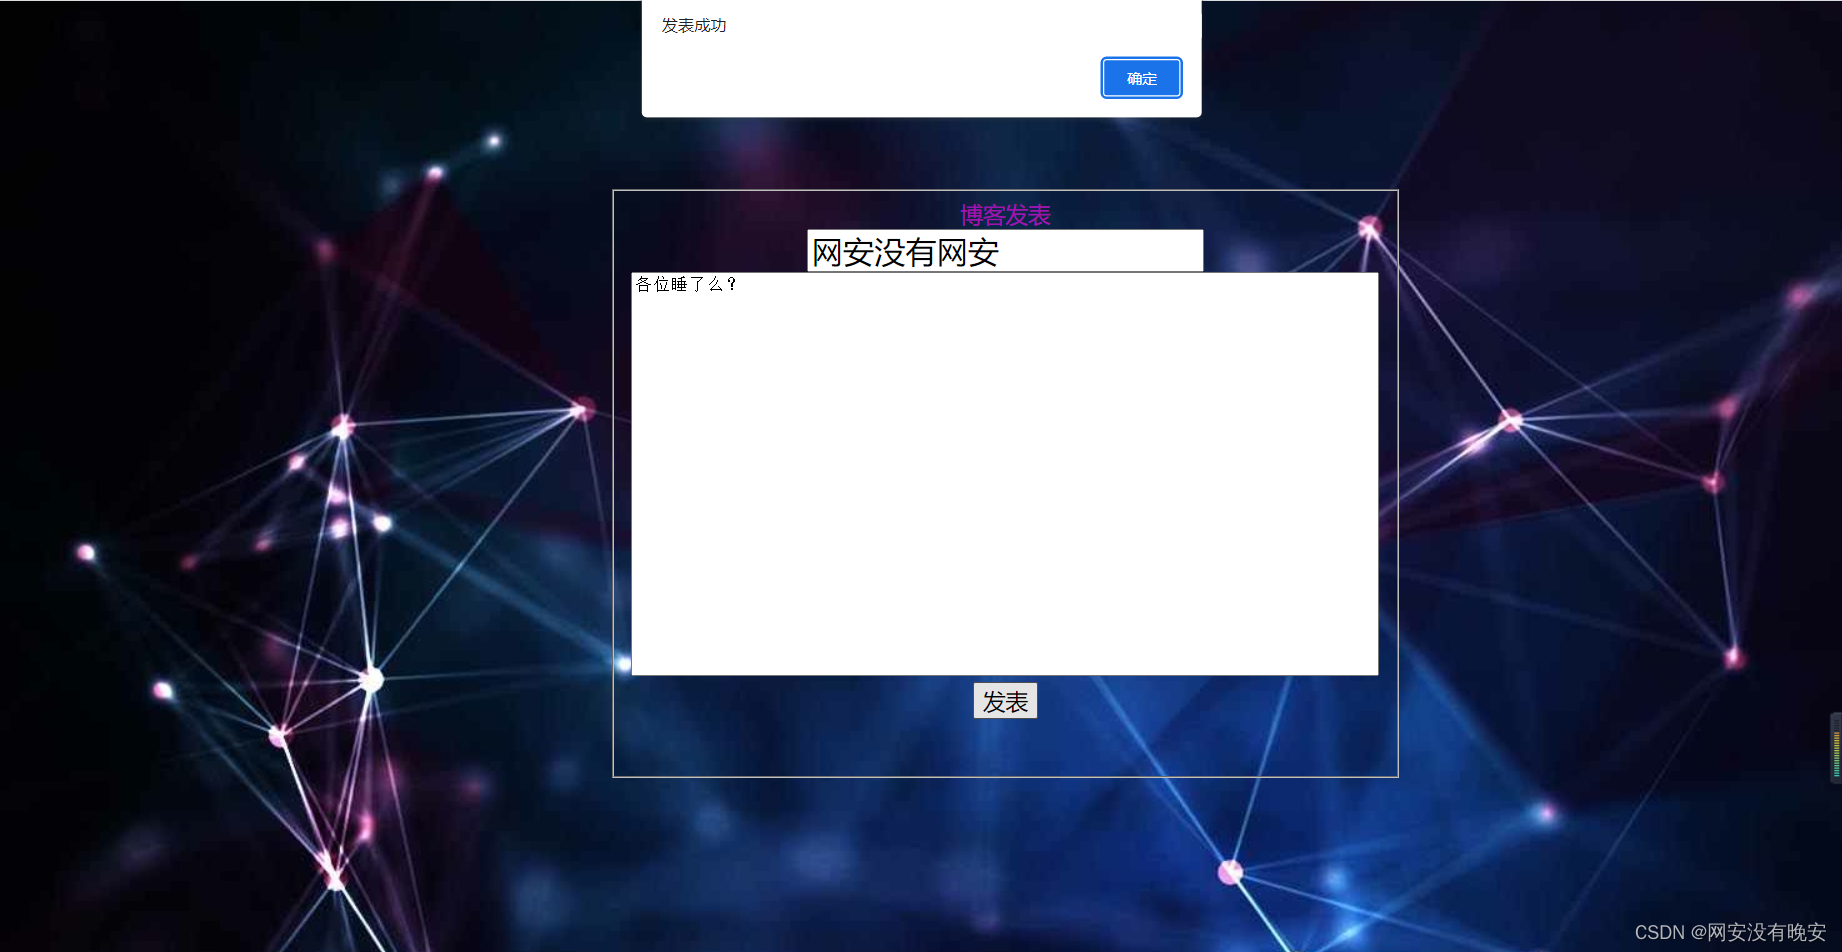
主页面代码单击发表div盒子就一个跳转链接,链接地点:doblog.html
下面是发表前端代码;
接入式CSS;引用jQuery库
大div里放个标题text与textarea,和一个发表按钮
单机按钮触发doAdd()自定义函数
准备数据:定位,获取,拼装URL编码,post请求及前后端data比较
if判断,后端发表成功返回add-pass,与前端一致则发表成功,反之发表失败。
发表成功后跳转至主页。
	<!DOCTYPE html>
<html lang="en">
<head>
    <meta charset="UTF-8">
    <meta http-equiv="X-UA-Compatible" content="IE=edge">
    <meta name="viewport" content="width=device-width, initial-scale=1.0">
    <title>发表</title>
    <link rel="stylesheet" href="blog.css">
    <script src="jquery-3.4.1.min.js"></script>
    <script>
        function doAdd(){
            //准备数据:定位,获取,拼装URL编码
            var headline=$('#headline').val();
            var content=$('#content').val();
            var param="headline="+headline+"&content="+content;
            $.post(
            'doblog.php',param,function(data){
            if(data=='add-pass'){
                alert('发表成功');
                location.href='list.html';
            }else{
                alert('发表失败');
            }
            }
            );
        }
    </script>
</head>
<body>
    <div id="div">
        <fieldset>博客发表<br>
            <input type="text" id="headline" name="headline"><br>
            <textarea name="content" id="content" cols="80" rows="22"></textarea><br>
            <button onclick="doAdd()" type="submit">发表</button>
        </fieldset>
    </div>
</body>
</html>
效果图:(后面有发表后台代码)
前端文件:doblog.html 后端文件:doblog.php
<?php
$headline=$_POST['headline'];
$content=$_POST['content'];
session_start();
//空校验、及session校验
if(($headline=='')||($content=='')||(!@$_SESSION['isLogin'])){
    die('data null');
}

//写数据进入数据库
include 'db.php';
$sql="insert blog(headline,content,createtime,username) value('$headline','$content',now(),'lency')";
$res=dml($sql);
if($res==1){
    // echo "<script>alert('发表成功')</script>";
    // echo "<script>location.href='listt.html'</script>";
    echo "add-pass";
}else{
    echo 'add-fail';
}
?>
全部文件
login.html(登录页) | regist.html(注册页) | regist.php(注册后台)
list.php(主页) | blog.php(详情页) | edit.php(编辑页)
doedit.php(编辑后台) | del.php(删除后台) | doDot.php(注销后台)
doblog.html(发表页) | doblog.php(发表后台)
blog.css(样式文件) | jquery-3.4.1.min.js(JS文件) | db.php(数据库后台)
xampp-linux-x64-5.6.40-1-installer.run(环境部署文件)
手敲报错信息排查方法:
1、查找多写少些字符,标点符号使用规范;
2、出现代码执行成功,或数据写入成功,却反向报错失败。检查php代码结尾的?>下方是否有回车,有则应当清空;
3、如页面无任何反应,无报错信息,应当地毯式从头到尾用echo或alert打印、弹出排查代码执行结果;
4、如无响应,无跳转,可浏览器F12查看network网络及控制台等等。分析走向及局部报错信息;
5、注意类型及运算符;" 等等于 " 与 “绝对等于” && " 数字1 " 与 " 字符串1 " && " 布尔true " && " 字符串true "等等 … …
6、切记*;修改代码后应当习惯刷新浏览器在进行功能测试;
总结
一些简单的系统web应用开发,前台与后台交互及登录校验,和一些PHP代码基础使用技术
不管是哪个岗位的IT小白,多少掌握点开发基础能力,也会对自己有所帮助
此文章及web系统纯博主手打/开发
希望能帮助到你
早安?