【OpenHarmony】测试代码编译执行流程
之前的文章我们搭建了小熊派的开发环境,并且拉取了源码到本地编译后烧写到了小熊派中,这一章将在上一章的基础上,编写一个用户态的执行程序,按照 OpenHarmony 的编译框架编译程序,然后在串口命令行执行程序
一、编译目录结构
首先先看一下要修改添加的文件架构
./applications/BearPi/BearPi-HM_Micro/samples
├── helloworld
    ├── BUILD.gn
    ├── include
    │   └── helloworld.h
    └── src
        └── helloworld.c
./build
├── lite
    ├── components
        └──applications.json
./vendor
└── bearpi
    └── bearpi_hm_micro
        └── config.json
一个用户态的业务代码设计到的文件框架基本如上面所示,下面进入代码编写
二、编写测试代码
首先编译业务测试代码,业务代码目录如下:
./applications/BearPi/BearPi-HM_Micro/samples
├── helloworld
    ├── BUILD.gn
    ├── include
    │   └── helloworld.h
    └── src
        └── helloworld.c
include 用于存放头文件,src 则存放源文件,BUILD.gn 则是编译组织文件,用于编译当前目录下面的工程文件
首先编写 .h 文件,声明一个函数 HelloPrint,同时声明编译器使用 c 编译
#ifndef HELLOWORLD_H
#define HELLOWORLD_H

#ifdef __cplusplus
#if __cplusplus
    extern "C" {
#endif
#endif

void HelloPrint();

#ifdef __cplusplus
#if __cplusplus
}
#endif
#endif
#endif
再编写 .c 源文件,编写函数内容,显示 helloworld
#include <stdio.h>
#include "helloworld.h"

int main(int argc, char **argv)
{
    HelloPrint();
    return 0;
}

void HelloPrint()
{
    printf("\n************************************************\n");
    printf("\n\t\tHello World!\n");
    printf("\n************************************************\n");
    printf("OpenHarmony Code Test! JeckXu - Top嵌入式");
}
三、编写构建脚本
然后编写编译脚本文件 BUILD.gn
先导入编译组件,源码hello_world.c 编译成 hello_world_lib 模块文件:
# 导入编译组件
import("//build/lite/config/component/lite_component.gni")
然后编写可执行模块的详细信息,
# 可执行模块
executable("hello_world_lib") {
  output_name = "helloworld"
  sources = [ "src/helloworld.c" ]
  include_dirs = ["include"]
  defines = []
  cflags_c = []
  ldflags = []
}
最后由模块编译生成的 lib 模块生成 my_app 组件:
lite_component("my_app") {
    features = [
       ":hello_world_lib",
    ]
}
四、添加组件
编译脚本将编译生成的文件和组件关联,下面我们进入到
./build
├── lite
    ├── components
        └──applications.json
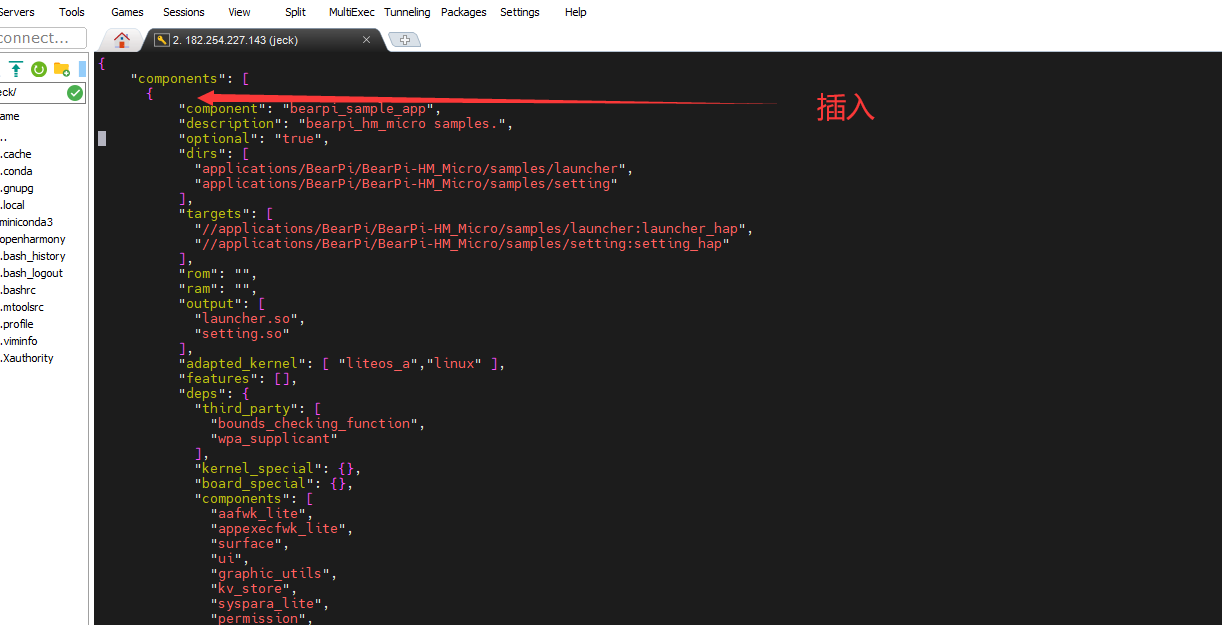
进一步修改组件信息,在如下位置插入新的组件信息:

新组件信息如下:
    {
        "component": "helloworld_app",
        "description": "helloworld samples",
        "optional": "true",
        "dirs": [
        "applications/BearPi/BearPi-HM_Micro/samples/helloworld"
        ],
        "targets": [
        "//applications/BearPi/BearPi-HM_Micro/samples/helloworld:my_app"
        ],
        "rom": "",
        "ram": "",
        "output": [],
        "adapted_kernel": [ "liteos_a" ],
        "features": [],
        "deps": {
        "components": [],
        "third_party": [ ]
        }
    },
不同组件主要就是依赖和名称不同
五、修改开发板配置文件
最后就是修改开发板的配置文件,添加对应的hello部件:
./vendor
└── bearpi
    └── bearpi_hm_micro
        └── config.json
在应用子系统下添加组件

组件代码如下:
{ "component": "helloworld_app", "features":[] },
添加完如下:
{
    "subsystem": "applications",
    "components": [
        { "component": "helloworld_app", "features":[] },
        { "component": "bearpi_sample_app", "features":[] },
        { "component": "bearpi_screensaver_app", "features":[] },
        { "component": "bearpi_sample_communication", "features":[] }
    ]
}
六、运行结果
到此一个应用程序组件添加完成,下面就是编译烧录,可以参考我之前的文章
编译指令
hb build -t notest --tee -f
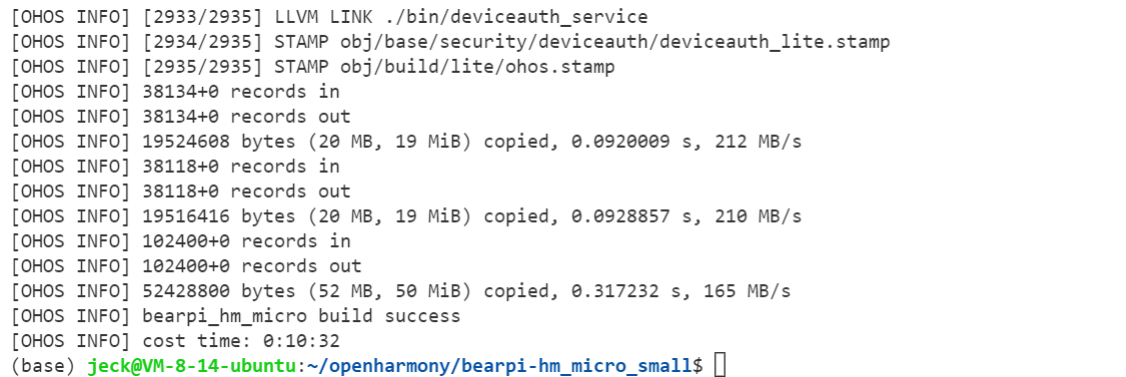
这里我在腾讯云服务器上编译的,编译完成如下

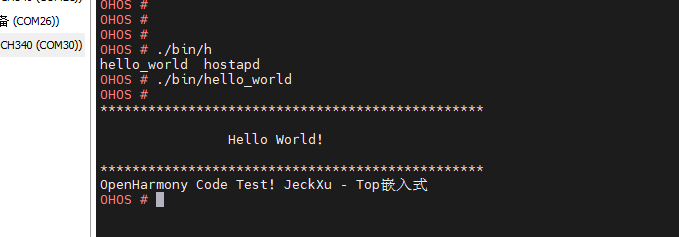
拷贝结果文件,然后下载程序,下载后启动系统,在串口命令行执行业务代码:
./bin/hello_world
执行结果如下,执行成功

总结一下用户代码的编译流程,编写 BUILD.gn 编译代码生成执行文件,然后根据执行文件生成对应模块,编写组件关联调用模块