如果要在接收端得到数据包的传输时延,那么就需要在接收端得到数据包的发送时间和数据包到达时间,后者非常简单,直接在收到包的时候
Simulator::Now ().GetSeconds ()
即可,而怎样得到数据包的发送时间呢。有三种方法:
- 创建跟踪源并使用回调来获取每个数据包的创建/发送时间和发送/接收时间。 然后你可以计算延迟
- 使用标签来标记数据包的创建/发送时间,并在收到时读取此标签并计算延迟
- 使用标头(或仅标头中的字段)包含创建/发送的时间,并在收到标头时读取该标头
这里介绍第二种方法,第二种方法在examples/stats/wifi-example-apps.cc中使用过,其建立了一个TimestampTag的标签类。单独拿出来的话是这样的
一、建立TimestampTag.h文件
#ifndef TIMESTAMPTAG_H
#define TIMESTAMPTAG_H


#include "ns3/core-module.h"
#include "ns3/network-module.h"
#include "ns3/internet-module.h"
#include "ns3/application.h"

#include "ns3/stats-module.h"
#include <ostream>

using namespace  ns3;

class TimestampTag : public Tag {
public:
  static TypeId GetTypeId (void);
  virtual TypeId GetInstanceTypeId (void) const;

  virtual uint32_t GetSerializedSize (void) const;
  virtual void Serialize (TagBuffer i) const;
  virtual void Deserialize (TagBuffer i);

  // these are our accessors to our tag structure
  void SetTimestamp (Time time);
  Time GetTimestamp (void) const;

  void Print (std::ostream &os) const;

private:
  Time m_timestamp;

  // end class TimestampTag
};

#endif
二、建立TimestampTag.cc
#include "ns3/core-module.h"
#include "ns3/network-module.h"
#include   "ns3/internet-module.h"
#include "ns3/application.h"
#include "ns3/stats-module.h"

#include "TimestampTag.h"

#include <ostream>

using namespace  ns3;

TypeId
TimestampTag::GetTypeId (void)
{
  static TypeId tid = TypeId ("TimestampTag")
    .SetParent<Tag> ()
    .AddConstructor<TimestampTag> ()
    .AddAttribute ("Timestamp",
                   "Some momentous point in time!",
                   EmptyAttributeValue (),
                   MakeTimeAccessor (&TimestampTag::GetTimestamp),
                   MakeTimeChecker ())
  ;
  return tid;
}
TypeId
TimestampTag::GetInstanceTypeId (void) const
{
  return GetTypeId ();
}

uint32_t
TimestampTag::GetSerializedSize (void) const
{
  return 8;
}
void
TimestampTag::Serialize (TagBuffer i) const
{
  int64_t t = m_timestamp.GetNanoSeconds ();
  i.Write ((const uint8_t *)&t, 8);
}
void
TimestampTag::Deserialize (TagBuffer i)
{
  int64_t t;
  i.Read ((uint8_t *)&t, 8);
  m_timestamp = NanoSeconds (t);
}

void
TimestampTag::SetTimestamp (Time time)
{
  m_timestamp = time;
}
Time
TimestampTag::GetTimestamp (void) const
{
  return m_timestamp;
}

void
TimestampTag::Print (std::ostream &os) const
{
  os << "t=" << m_timestamp;
}
三、建立wscript文件
def build(bld):
    obj = bld.create_ns3_module('BwProb', ['core','network','internet'])
    obj.source = [
        'model/TimestampTag.cc',
        ]
    headers = bld(features='ns3header')
    headers.module = 'BwProb'
    headers.source = [
        'model/TimestampTag.h',
        ]
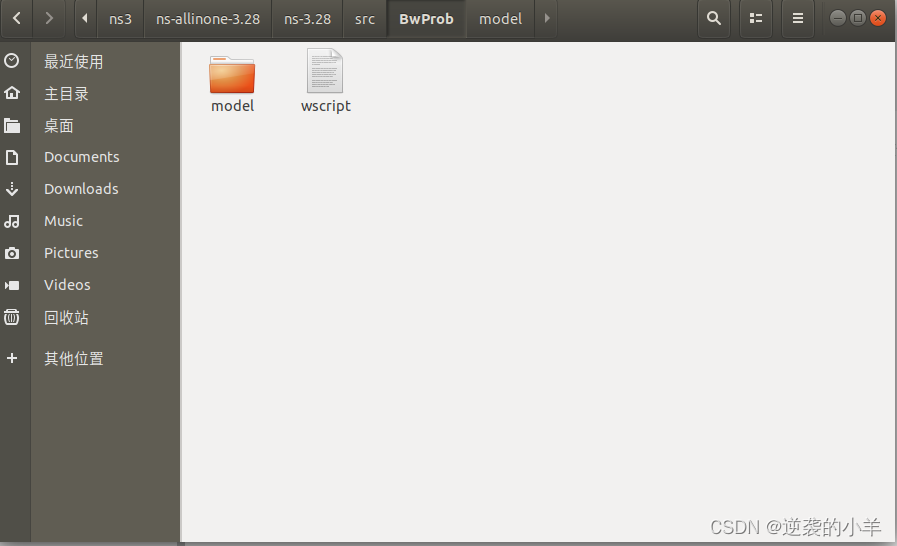
然后将TimestampTag.cc和TimestampTag.h放在model文件夹下,建立个文件夹,文件夹的名字要与wscript文件中的create_ns3_module的一致,我这里是BwProb,将model文件夹和wscript文件放在进去,如:

然后
./waf  configure
./waf bulid
之后就能一直用了
四、计算时延
在发送数据包和接收数据包的文件中引用头文件#include "ns3/TimestampTags.h"
发出数据包之前:
      p = Create<Packet> (m_size);

      TimestampTag timestamp;
      timestamp.SetTimestamp(Simulator::Now());
      p->AddByteTag(timestamp);
接受数据包时:
TimestampTag timestamp;
packet->FindFirstMatchingByteTag (timestamp);
Time tx = timestamp.GetTimestamp();

//计算时延,并转换为double类型,方便计算
Time txdelay = Simulator::Now() - tx;
double delay = txdelay.ToDouble(Time::MS);
参考:https://groups.google.com/g/ns-3-users/c/4ZIBw4O0UfQ
