认证和授权
- 首先导入Srcurity依赖
     <dependency>
            <groupId>org.springframework.boot</groupId>
            <artifactId>spring-boot-starter-security</artifactId>
        </dependency>
-
创建config包结构并创建Security类
-
在Security类中继承WebSecurityConfigurerAdapter方法并重写
- 这个类中的方法大多数都使用了重载的思想
- 要在Security主类上添加@EnableWebSecurity注解 表明这个类被Spring托管
-
首先重写这个方法
protected void configure(HttpSecurity http) throws Exception { } -
在里面设置页面查看权限
  //权限设置
        //permitall 设置所有人都可以访问主页
        //hasrole  设置什么样的人 可以访问什么样的界面
        http
                .authorizeRequests().antMatchers("/").permitAll()
                .antMatchers("/level1/**").hasRole("vip1")
                 .antMatchers("/level2/**").hasRole("vip2")
                 .antMatchers("/level3/**").hasRole("vip3");
antMatchers 表示要访问的页面路径 可以是Controller的一个请求
hasRole 表示要拥有的权限
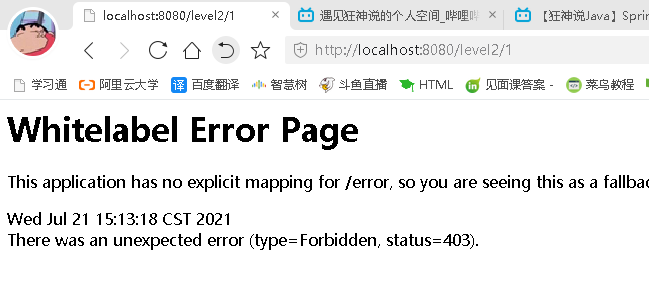
- 设置完成之后,访问页面报错403

403 错误 权限不足错误 Access Denied
说明我们的权限设置已经起作用了 ,然后按照常规逻辑,我们应该自动弹出登录页面 于是进行登陆页面的自动跳转
-
login页面跳转
//没有权限 默认跳到登录页面
        http.formLogin();
继续访问 出现500错误
![[外链图片转存失败,源站可能有防盗链机制,建议将图片保存下来直接上传(img-ykVwNvoW-1626861377585)(C:\Users\machenike\AppData\Roaming\Typora\typora-user-images\image-20210721145207921.png)]](https://img-blog.csdnimg.cn/img_convert/d9dd0d1e7524a9a2fc45781a8f64f60b.png)
? 500错误 需要密码编码
原因:在security5.0中 加入了密码编码的功能 ,他认为你的密码不通过编码,容易被反编译之后泄露,这样子是不安全的
于是我们再进行密码的加密
- 密码加密
密码加密我们需要重写这个方法
protected void configure(AuthenticationManagerBuilder auth) throws Exception {
}
 protected void configure(AuthenticationManagerBuilder auth) throws Exception {
       auth.inMemoryAuthentication().passwordEncoder(new BCryptPasswordEncoder() {
       })
               .withUser("llf").password(new BCryptPasswordEncoder().encode("123456")).roles("vip2","vip3").and()
               .withUser("root").password(new BCryptPasswordEncoder().encode("123456")).roles("vip1","vip2","vip3").and()
               .withUser("guest").password(new BCryptPasswordEncoder().encode("123456") ).roles("vip1");
    }
加密完成 继续访问 成功 不同的人只能访问设置好的页面

我们登录guest 访问level2下的页面 就会报权限不足的错误
注销及权限控制
- 注销
首先需要在Security配置中添加注销方法
- 我们可以利用logout的logoutSuccessUrl(“ ”)方法 指定注销之后跳转的页面 默认情况下会重新跳到登录页面
//注销
http.logout();

//注销 并跳到首页
http.logout().logoutSuccessUrl("/");
然后在前端页面中的注销按钮上添加链接到logout即可
  <a class="item" th:href="@{/logout}">
     	 <i class="sign out icon"></i> 注销
   </a>
这个logout请求是Security自动帮我们写的

这样一个注销功能就实现了
-
权限控制
按照常规来说,不同的人进入首页后 应该显示不同权限所显示的内容 这个时候我们就需要thymeleaf与Security的整合
首先导入依赖
<!--thymeleaf-security5 --> <dependency> <groupId>org.thymeleaf.extras</groupId> <artifactId>thymeleaf-extras-springsecurity5</artifactId> <version>3.0.4.RELEASE</version>-
未登录的人显示登录按钮 登录的人显示注销按钮
-
首先在页面中导入thymeleaf-Security的命名空间
xmlns:sec="http://www.thymeleaf.org/thymeleaf-extras-springsecurity5" -
然后对登录和注销按钮进行判断
<!--登录注销--> <div class="right menu"> <!--未登录 显示登录按钮--> <div sec:authorize="!isAuthenticated()"> <a class="item" th:href="@{/toLogin}"> <i class="address card icon"></i> 登录 </a> </div> <!-- 已登录 显示注销 和用户信息--> <div sec:authorize="isAuthenticated()"> <a class="item"> 用户名:<span sec:authentication="name"></span> 权限:<span sec:authentication="principal.Authorities"></span> </a> <a class="item" th:href="@{/logout}"> <i class="sign out icon"></i> 注销 </a> </div>sec:authorize="!isAuthenticated()"核心是这句判断,
IsAuthenticated 属性是一个布尔值,指示当前用户是否已通过身份验证(已登录)明白了这个属性的作用 就等于理清了我们上面的思路
-
-

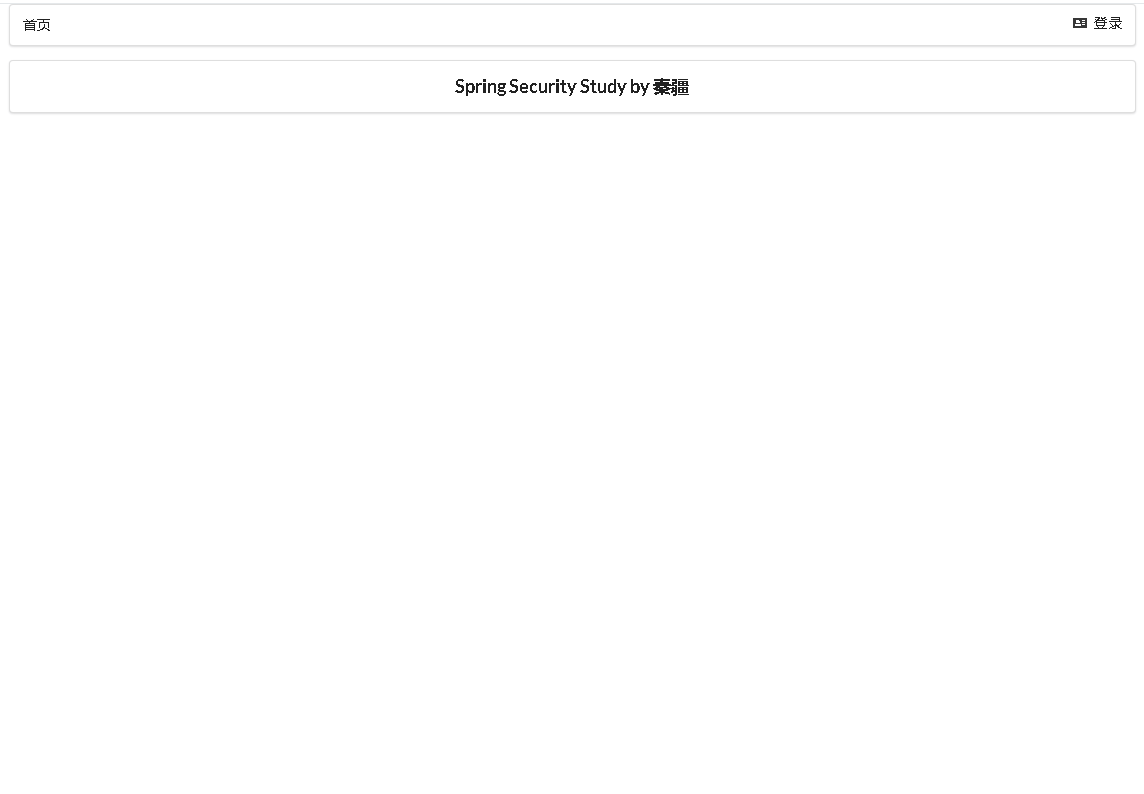
没有登陆之前 我们只有登录按钮

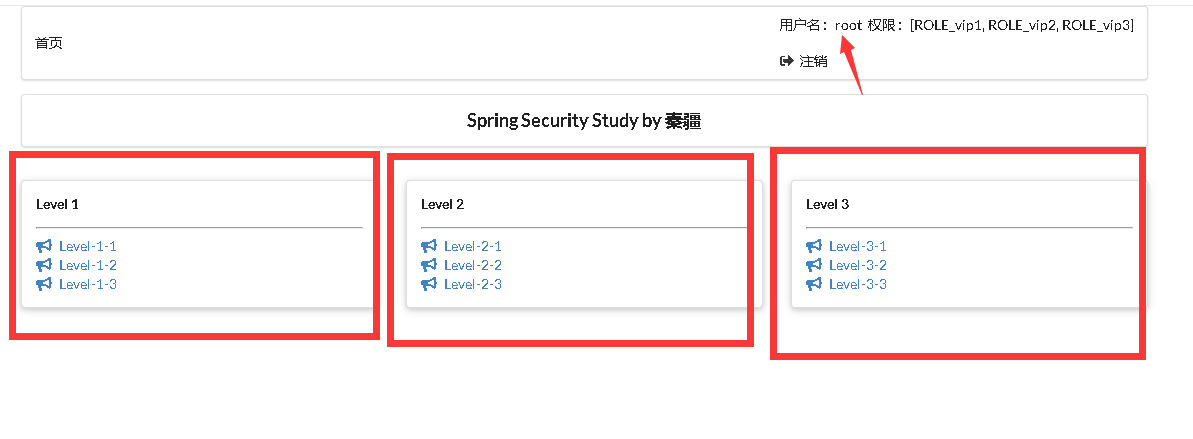
登录之后 有了登录角色的信息
-
接下来就是思考 vip不同等级的人应该有不同的展示页面
<div class="column"  sec:authorize="hasRole('vip1')">
<div class="column"  sec:authorize="hasRole('vip2')">
<div class="column"  sec:authorize="hasRole('vip3')">
将对应的语句 放在对应权限才能访问的页面的第一个div标签中 进行判断
hasRole:拥有了角色 在这 我们可以理解为拥有的权限 大致意思就是 有vip1权限就显示vip1的内容 以此类推
设置完成后进行测试访问
- 没有登陆的情况下 我们没有任何权限 所以不显示任何内容

- 登录了root账户 拥有所有权限

这样一来 权限控制的功能我们也完成了
记住我和登录页定制
-
记住我
- 记住我功能和注销功能一样 只需要在配置中添加一个方法即可
http.rememberMe();

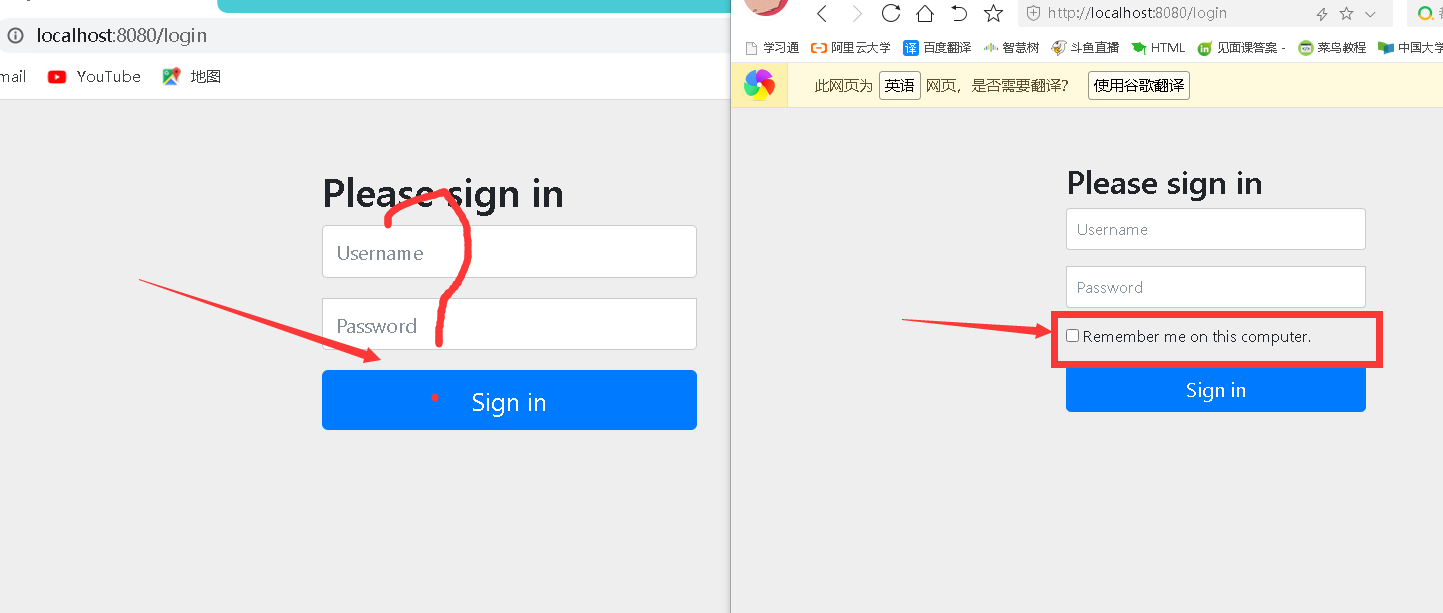
上图就是设置与否的区别 这里的记住我的功能 相当于是将cookie保存了起来 即使我们页面关闭也不会丢失 cookie有效期为15天
-
登录页面定制
如果我们不想用Security自带的登录页面 想要我们自己的登录页面 也是可以的
     //没有权限 默认跳到登录页面
        http.formLogin().loginPage("/tologin");
在formlogin的后面加上loginpage的方法即可 括号里写上登录的请求链接
如果我们前端登录页面的action请求和这个请求一样 并且账号密码的name是username和password 我们就可以不用写登录的判断 Security会自动帮我们做出判断
如果不一样 我们可以在配置中加上登录的账号密码的name
http.formLogin().loginPage("/tologin").passwordParameter().usernameParameter()-
思考 使用自己的页面如何实现记住我功能及注销
使用自己的登录页面 首先需要在登录页面添加 记住我的多选框按钮
<div style="text-align: center">
        <input type="checkbox" name="remember" >记住我
  </div>
然后将这个name的参数 传给配置中的http.remember()这个方法
   //记住我功能
        http.rememberMe().rememberMeParameter("remember");
这样就实现了记住我的功能 在我们关闭网页之后 重新访问 一样可以不用登录
-
注销
使用自己的登录页面完成注销功能 会有一个404的错误 这是Secruity自动开启了CSRF的脚本攻击校验 我们只需要关闭它即可
http.csrf().disable();
-
总结
-
Security采用链式编程,所有方法之间使用.连接 ,分号表示重写的这个方法的结束
如果想要多次使用一个方法,可以使用and()将其连接起来 就像我们设置用户和密码一样
设计用户、密码我们采用了内存加载的方式,在实际业务中,应该从后台接受这些值
inMemoryAuthentication()
jdbcAuthentication()
Security采用AOP的思想 横向切入 在不影响程序运行的前提下 进行增强
使用Security 我们可以不用再写登录和注销的逻辑判断
Security是拦截器、过滤器功能的延申
Security总配置
package com.llf.config;

import org.springframework.security.config.annotation.authentication.builders.AuthenticationManagerBuilder;
import org.springframework.security.config.annotation.web.builders.HttpSecurity;
import org.springframework.security.config.annotation.web.configuration.EnableWebSecurity;
import org.springframework.security.config.annotation.web.configuration.WebSecurityConfigurerAdapter;
import org.springframework.security.crypto.bcrypt.BCryptPasswordEncoder;
import org.springframework.security.crypto.password.PasswordEncoder;

@EnableWebSecurity
public class Securitty extends WebSecurityConfigurerAdapter {


    @Override
    protected void configure(HttpSecurity http) throws Exception {

        //权限设置
        //permitall 设置所有人都可以访问主页
        //hasrole  设置什么样的人 可以访问什么样的界面
        http
                .authorizeRequests().antMatchers("/").permitAll()
                .antMatchers("/level1/**").hasRole("vip1")
                 .antMatchers("/level2/**").hasRole("vip2")
                 .antMatchers("/level3/**").hasRole("vip3");

        http.csrf().disable();
        //没有权限 默认跳到登录页面
        http.formLogin().loginPage("/tologin");
        //注销 并跳到首页
        http.logout().logoutSuccessUrl("/");
        //记住我功能
        http.rememberMe().rememberMeParameter("remember");


    }
    @Override
    //用户认证

    protected void configure(AuthenticationManagerBuilder auth) throws Exception {
       auth.inMemoryAuthentication().passwordEncoder(new BCryptPasswordEncoder() {
       })
               .withUser("llf").password(new BCryptPasswordEncoder().encode("123456")).roles("vip2","vip3").and()
               .withUser("root").password(new BCryptPasswordEncoder().encode("123456")).roles("vip1","vip2","vip3").and()
               .withUser("guest").password(new BCryptPasswordEncoder().encode("123456") ).roles("vip1");
    }
}