spring-boot重头再来 5
文章目录
页面国际化
有的时候,我们的网站会去涉及中英文甚至多语言的切换,这时候我们就需要用到国际化。
准备工作
我们用的编译器是IDEA,我们现在其中统一配置编码,全部改为UTF-8

国际化是前端页面的国际化,所以我们需要一个前端的页面,我们随便写一个index.html,首页映射之前有提到,这里我们将这个index.html放在 classpath: META-INF / resources 中
<!DOCTYPE html>
<html lang="zh_cn">
<head>
    <meta charset="UTF-8">
    <title>欢迎</title>
    <style>
        * {
            margin: 0;
            padding: 0;
        }
        body {
            background-color: #666666;
        }
        .w {
            margin: 0 auto;
        }
        .login {
            position: absolute;
            top: calc(50% - 150px);
            left: calc(50% - 250px);
            width: 500px;
            height: 300px;
        }
        .login-content{
            width: 485px;
            height: 300px;
            border-radius: 20px;
            border:5px solid transparent;
            background-clip:padding-box,border-box;
            background-origin:padding-box,border-box;
            background-image:linear-gradient(#5A5A5A,#5A5A5A),linear-gradient(#3c5cef, #b45b9b);
        }
        .login-title {
            width: 100%;
            height: 65px;
            padding-top: 20px ;
            line-height: 65px;
            font-family: 微软雅黑,serif;
            text-align: center;
            color: azure;
            font-size: 24px;
            font-weight: 100;
        }
        .login-input-frame {
            width: 80%;
            height: 60px;
            text-align: center;
        }
        .login-input {
            display: inline-block;
            width: 60%;
            height: 30px;
            margin: 15px 0;
            text-align: center;
            outline:none;
            border-radius: 10px;
            border:2px solid transparent;
            transition: width 1s ease 0s;
            background-clip:padding-box,border-box;
            background-origin:padding-box,border-box;
            background-image:linear-gradient(rgba(90,90,90,.9),rgba(90,90,90,.9)),linear-gradient(#3c5cef, #b45b9b);
            color: white;
        }
        .login-input:hover,
        .login-input:focus {
            width: 80%;
            transition: width 1s ease 0s;
        }
        .placeholder-light:hover::-webkit-input-placeholder{
            color: rgba(255,255,255,.3);
        }
        .login-button-frame {
            width: 80%;
            height: 95px;
            text-align: center;
        }
        .login-button {
            position: relative;
            width: 30%;
            height: 30px;
            margin: 17px 0 47px 0;
            border:2px solid transparent;
            background-clip:padding-box,border-box;
            background-origin:padding-box,border-box;
            background-image:linear-gradient(rgba(90,90,90,.9),rgba(90,90,90,.9)),linear-gradient(#3c5cef, #b45b9b);
            color: rgba(255,255,255,.5);
            z-index: 0;
        }
        .login-button:before{
            content: '';
            position: absolute;
            left: 0; top: 0; right: 0; bottom: 0;
            background-image:linear-gradient(rgba(90,90,90,.9),rgba(90,90,90,.9)),linear-gradient(#5476fd, #ff82d9);
            opacity: 0;
            transition: opacity .5s;
            z-index: -1;
        }
        .login-button:hover {
            color: rgba(255,255,255,.8);
        }
        .login-button:hover::before {
            opacity: 1;
        }
    </style>
</head>
<body>
    <div class="login">
        <div class="login-content w">
            <h3 class="login-title ">登录</h3>
            <div class="login-input-frame w">
                <label>
                    <input type="text" class="login-input placeholder-light" placeholder="请输入用户名">
                </label>
            </div>
            <div class="login-input-frame w">
                <label>
                    <input type="password" class="login-input placeholder-light" placeholder="请输入密码">
                </label>
            </div>
            <div class="login-button-frame w">
                <button class="login-button">
                    登录
                </button>
            </div>
        </div>
    </div>
</body>
</html>
运行主程序,进入/,看到首页
配置文件编写
-
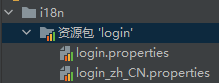
我们在resources资源文件夹下新建一个i18n(含义为 internationalization)目录,存放国际化配置文件
-
在其中建立一个login.properties文件,还有一个login_zh_CN.properties;发现IDEA自动识别了我们要做国际化操作,i18n文件夹下的图标发生变化
- 右击自动出现的
资源包‘login’,点击 新建->将属性文件添加到资源包

- 在弹出的窗口中点击如下按钮
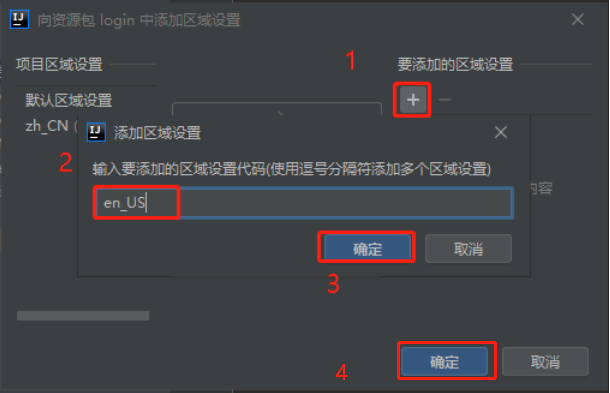
可见成功添加了一个新的配置文件

-
接下来开始编写配置
随意点击一个资源包’login’下的properties,我们强大的IDEA会在编辑区下面显示一个文本/资源包的标签页

点击资源包,
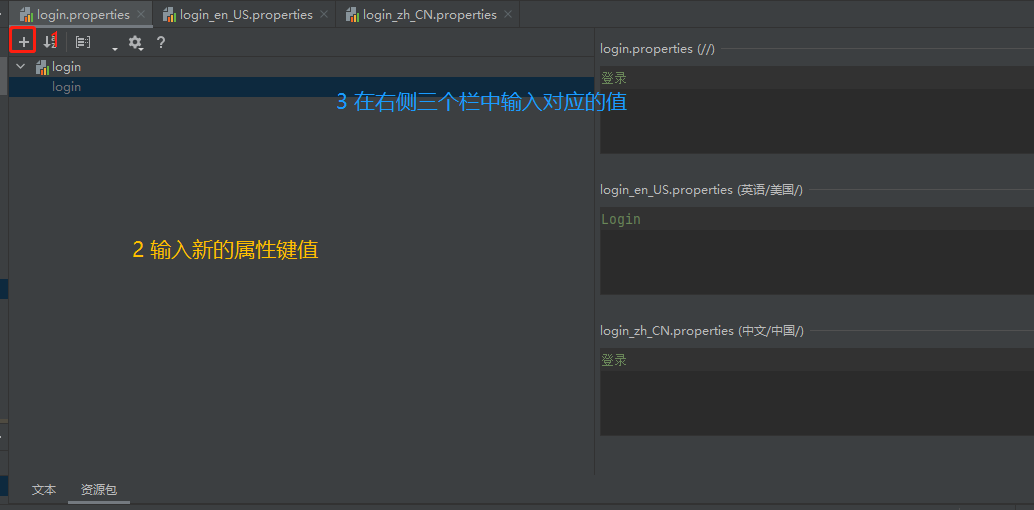
由于我们的界面中只有4个文字值,分别对应
- 欢迎
- 登录(提示)
- 请输入用户名
- 请输入密码
- 登录(按钮)
那我们就依次添加如下几个属性键即可:

-
通过对源码的探究(MessageSourceAutoConfiguration下的messageSource)我们知道,springboot会从
spring.messages中获取一个basename属性值,来作为国际化的配置路径,那我们就给我们的application.properties中添加一行spring.messages.basename=i18n.login -
页面中获取国际化的值的取值操作为#{…}
先给原先的html界面的html标签添加
xmlns:th="http://www.thymeleaf.org"属性,并将原有的属性值替换成占位符的摸样,并添加一对语言切换的按钮<!DOCTYPE html> <html lang="en_US" xmlns:th="http://www.thymeleaf.org"> <head> <meta charset="UTF-8"> <title th:text="#{login.welcome}">欢迎</title> <style> * { margin: 0; padding: 0; } body { background-color: #666666; } .w { margin: 0 auto; } .login { position: absolute; top: calc(50% - 150px); left: calc(50% - 250px); width: 500px; height: 300px; } .login-content{ width: 485px; height: 300px; border-radius: 20px; border:5px solid transparent; background-clip:padding-box,border-box; background-origin:padding-box,border-box; background-image:linear-gradient(#5A5A5A,#5A5A5A),linear-gradient(#3c5cef, #b45b9b); } .login-title { width: 100%; height: 65px; padding-top: 20px ; line-height: 65px; font-family: 微软雅黑,serif; text-align: center; color: azure; font-size: 24px; font-weight: 100; } .login-input-frame { width: 80%; height: 60px; text-align: center; } .login-input { display: inline-block; width: 60%; height: 30px; margin: 15px 0; text-align: center; outline:none; border-radius: 10px; border:2px solid transparent; transition: width 1s ease 0s; background-clip:padding-box,border-box; background-origin:padding-box,border-box; background-image:linear-gradient(rgba(90,90,90,.9),rgba(90,90,90,.9)),linear-gradient(#3c5cef, #b45b9b); color: white; } .login-input:hover, .login-input:focus { width: 80%; transition: width 1s ease 0s; } .placeholder-light:hover::-webkit-input-placeholder{ color: rgba(255,255,255,.3); } .login-button-frame { width: 80%; height: 65px; text-align: center; } .login-button { position: relative; width: 30%; height: 30px; margin: 17px 0 47px 0; border:2px solid transparent; background-clip:padding-box,border-box; background-origin:padding-box,border-box; background-image:linear-gradient(rgba(90,90,90,.9),rgba(90,90,90,.9)),linear-gradient(#3c5cef, #b45b9b); color: rgba(255,255,255,.5); transition: color .5s; z-index: 0; } .login-button:before{ content: ''; position: absolute; left: 0; top: 0; right: 0; bottom: 0; background-image:linear-gradient(rgba(90,90,90,.9),rgba(90,90,90,.9)),linear-gradient(#5476fd, #ff82d9); opacity: 0; transition: opacity .5s; z-index: -1; } .login-button:hover { color: rgba(255,255,255,.8); } .login-button:hover::before { opacity: 1; } .language-select-frame { height: 30px; line-height: 20px; text-align: center; } a { color: #888888; text-decoration: none; transition: color .5s; } a:hover { color: white; } </style> </head> <body> <div class="login"> <div class="login-content w"> <h3 class="login-title " th:text="#{login.tip}">登录</h3> <div class="login-input-frame w"> <label> <input type="text" class="login-input placeholder-light" th:placeholder="#{login.usernamePlaceholder}"> </label> </div> <div class="login-input-frame w"> <label> <input type="password" class="login-input placeholder-light" th:placeholder="#{login.passwordPlaceholder}"> </label> </div> <div class="login-button-frame w"> <button class="login-button" th:text="#{login.button}"> 登录 </button> </div> <div class="language-select-frame w"> <a href="#">中文</a> <a href="#">English</a> </div> </div> </div> </body> </html> -
前面有讲到,thymeleaf的默认目录是 classpath:/templates/,而我们现在的index.html的目录却是在classpath:/META-INF/resources/,我们需要添加spring 配置
spring.thymeleaf.prefix=classpath:/META-INF/resources/ -
这样就能找到我们的index.html,但是thymeleaf需要视图解析器来解析出是要转发并通过thymeleaf自动渲染的,所以我们可以通过不带@ResponseBody的controller,也可以通过上一篇博客中讲到的重写WebMvcConfigurer.addViewControllers来完成,这里我们采用第二种方法
package com.example.springbootsix.config; import org.springframework.context.annotation.Configuration; import org.springframework.web.bind.annotation.ResponseBody; import org.springframework.web.servlet.config.annotation.ViewControllerRegistry; import org.springframework.web.servlet.config.annotation.WebMvcConfigurer; /** * @author BIANG * @Date 2021/7/15 22:46 */ @Configuration public class MyMvcConfig implements WebMvcConfigurer { /** * Configure simple automated controllers pre-configured with the response * status code and/or a view to render the response body. This is useful in * cases where there is no need for custom controller logic -- e.g. render a * home page, perform simple site URL redirects, return a 404 status with * HTML content, a 204 with no content, and more. * */ @Override public void addViewControllers(ViewControllerRegistry registry) { registry.addViewController("/").setViewName("index"); registry.addViewController("/index.html").setViewName("index"); } } -
运行主程序,访问
/,确实访问到了该界面
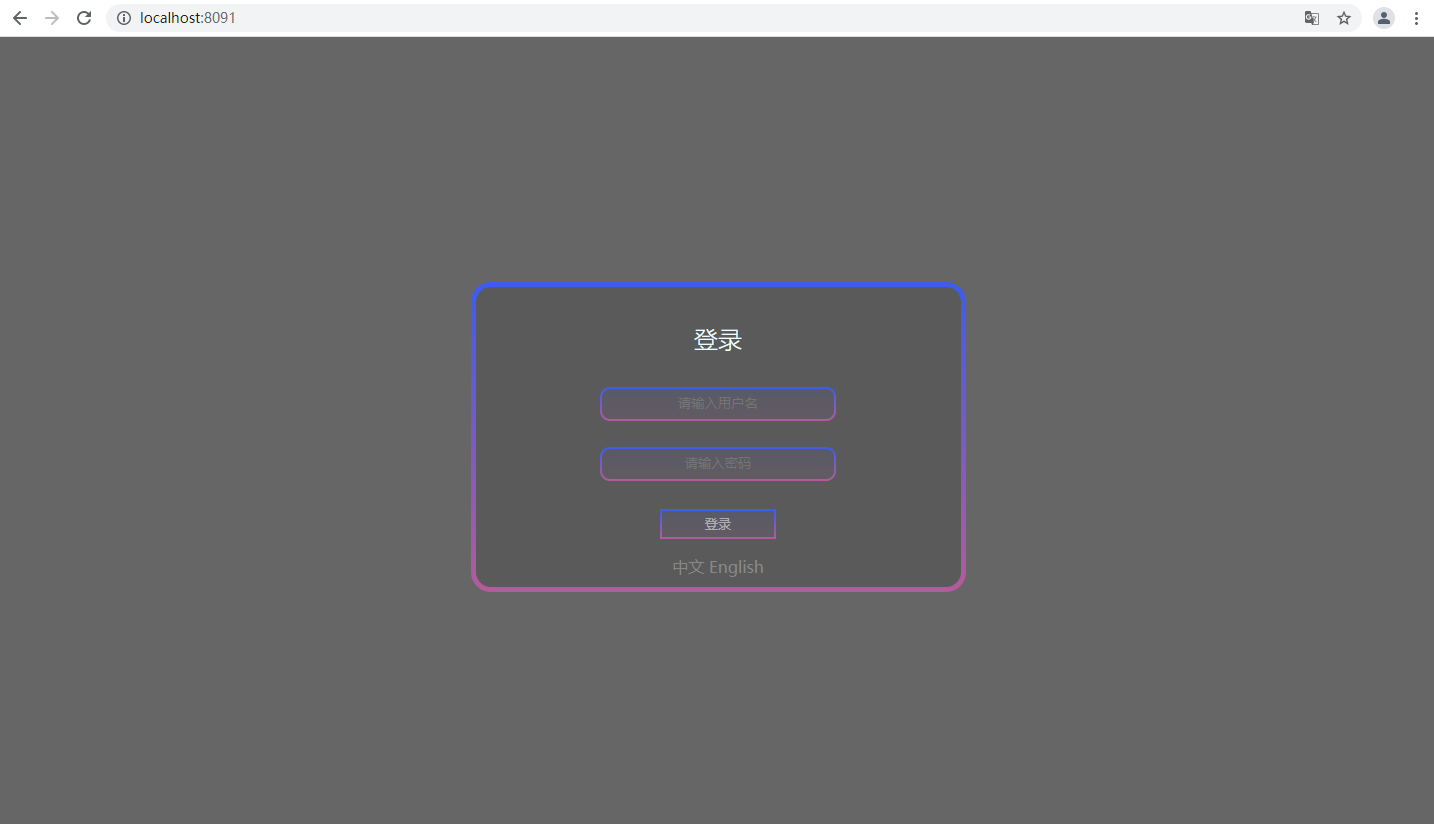
-
但是现在的语言选择按钮并没有任何的效果
我们需要更进一步的操作
在对LocaleResolver 一番探究后,发现如果容器中如果有用户自己配置的 LocaleResolver ,会自动使用用户配置的而不是默认配置的。而spring 默认配置的LocaleResolver . resolveLocale 是这样子的,也就是说根据请求头带来的区域信息获取Locale进行国际化
public Locale resolveLocale(HttpServletRequest request) {
    Locale defaultLocale = this.getDefaultLocale();
    if (defaultLocale != null && request.getHeader("Accept-Language") == null) {
        return defaultLocale;
    } else {
        Locale requestLocale = request.getLocale();
        List<Locale> supportedLocales = this.getSupportedLocales();
        if (!supportedLocales.isEmpty() && !supportedLocales.contains(requestLocale)) {
            Locale supportedLocale = this.findSupportedLocale(request, supportedLocales);
            if (supportedLocale != null) {
                return supportedLocale;
            } else {
                return defaultLocale != null ? defaultLocale : requestLocale;
            }
        } else {
            return requestLocale;
        }
    }
}
那我们就去写一个我们去自己写一个可以在链接上携带区域信息的LocaleResolver,我们新建一个component包,在里头新建一个LocaleResolver的实现类
package com.example.springbootsix.component;

import org.springframework.util.StringUtils;
import org.springframework.web.servlet.LocaleResolver;

import javax.servlet.http.HttpServletRequest;
import javax.servlet.http.HttpServletResponse;
import java.util.Locale;

/**
 * @author BIANG
 * @Date 2021/7/17 18:24
 */
public class MyLocaleResolver implements LocaleResolver {
    /**
     * Resolve the current locale via the given request.
     * Can return a default locale as fallback in any case.
     *
     * @param request the request to resolve the locale for
     * @return the current locale (never {@code null})
     */
    @Override
    public Locale resolveLocale(HttpServletRequest request) {
        String language = request.getParameter("lang");
        // 如果没有获取到就使用系统默认的
        Locale locale = Locale.getDefault();
        //如果请求链接不为空
        if (!StringUtils.isEmpty(language)){
            //分割请求参数
            String[] split = language.split("_");
            //国家,地区
            locale = new Locale(split[0],split[1]);
        }
        return locale;
    }

    /**
     * Set the current locale to the given one.
     *
     * @param request  the request to be used for locale modification
     * @param response the response to be used for locale modification
     * @param locale   the new locale, or {@code null} to clear the locale
     * @throws UnsupportedOperationException if the LocaleResolver
     *                                       implementation does not support dynamic changing of the locale
     */
    @Override
    public void setLocale(HttpServletRequest request, HttpServletResponse response, Locale locale) {

    }
}
然后再做一个对应的Bean再MyMvcConfig中
@Bean public LocaleResolver localeResolver(){ return new MyLocaleResolver(); } -
现在可以通过,访问对应的
路径?lang=xxx来指定语言以及地区了那我们就给两个选择语言的a标签加上合适的href就可以了,
值得注意的是,@{
url}中添加query参数不是直接在后头跟?key=value,而是用(key=value)的形式<a th:href="@{/index.html(lang='zh_CN')}">中文</a><a th:href="@{/index.html(lang='en_US')}">English</a> -
测试 国际化完成!
有点可惜,本来这里想放个视频的,可惜csdn貌似没有自带的视频上传功能呢
集成Swagger
相信无论是前端还是后端开发,都或多或少地被接口文档折磨过。前端经常抱怨后端给的接口文档与实际情况不一致。后端又觉得编写及维护接口文档会耗费不少精力,经常来不及更新。
而Swagger就是用来解决这个一问题的,我们只需要按照他的规范去定义接口以及接口相关的的信息,再通过Swagger的一些工具便可以生成各种格式的接口文档。
官网:https://swagger.io/
SpringBoot集成Swagger => springfox,两个jar包
- Springfox-swagger2
- springfox-swagger-ui
使用Swagger
要求:jdk 1.8 + 否则swagger2无法运行
步骤:
-
新建一个SpringBoot-web项目,依赖项将spring-web点上
-
添加Maven依赖(版本3.0.0后续可能会出现访问ui时404,我没有去研究文档所以选择了降版本)
<!-- https://mvnrepository.com/artifact/io.springfox/springfox-swagger2 --><dependency> <groupId>io.springfox</groupId> <artifactId>springfox-swagger2</artifactId> <version>2.9.2</version></dependency><!-- https://mvnrepository.com/artifact/io.springfox/springfox-swagger-ui --><dependency> <groupId>io.springfox</groupId> <artifactId>springfox-swagger-ui</artifactId> <version>2.9.2</version></dependency> -
编写HelloController,测试确保运行成功
package com.example.springbootseven.controller; import org.springframework.stereotype.Controller; import org.springframework.web.bind.annotation.RequestMapping; import org.springframework.web.bind.annotation.ResponseBody; /** * @author BIANG * @Date 2021/7/19 15:01 */ @Controller public class HelloController { @ResponseBody @GetMapping("/test") public String test(){ return "success"; } } -
要使用Swagger,我们需要编写一个配置类SwaggerConfig来配置 Swagger,我们新建一个config包,在下面创建一个配置类SwaggerConfig
package com.example.springbootseven.config; import org.springframework.context.annotation.Configuration; import springfox.documentation.swagger2.annotations.EnableSwagger2; //配置类 @Configuration //开启Swagger2的自动配置 @EnableSwagger2 /** * @author BIANG * @Date 2021/7/19 15:10 */ public class SwaggerConfig { } -
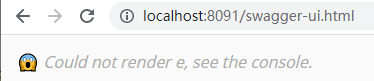
运行主程序,访问测试 :
http://localhost:8091/swagger-ui.html,可以看到swagger的界面;(8091是自己在application.properties中修改的)

配置Swagger
-
Swagger实例Bean是Docket,所以通过配置Docket实例来配置Swagger,在SwaggerConfig下写下以下代码
@Bean //配置docket以配置Swagger具体参数 public Docket docket() { return new Docket(DocumentationType.SWAGGER_2); } -
我们可以使用我们自己的Api信息
在SwaggerConfig下写下ApiInfo
/**
* 配置文档信息
*/
private ApiInfo apiInfo() {
    Contact contact = new Contact("\"姓名name\"", "\"统一资源定位符url\"", "\"电子邮箱email\"");
    return new ApiInfo(
        // 标题
        "\"标题title\"",
        // 描述
        "\"描述Description\"",
        // 版本
        "\"版本version\"",
        // 组织链接
        "\"服务组织统一资源定位符termsOfServiceUrl\"",
        // 联系人信息
        contact,
        // 许可
        "\"许可license\"",
        // 许可连接
        "\"许可统一资源定位符licenceUrl\"",
        // 扩展
        new ArrayList<>()
    );
}
并且将Docket修改为
/*** 配置docket以配置Swagger具体参数*/@Beanpublic Docket docket() { return new Docket(DocumentationType.SWAGGER_2).apiInfo(apiInfo());} -
重启后访问
http://localhost:8091/swagger-ui.html

配置扫描接口
有时候我们并不是所有接口都需要被写入文档,这时候扫描接口这一操作就尤为重要。
-
修改docket方法为以下代码
@Bean public Docket docket() { return new Docket(DocumentationType.SWAGGER_2).apiInfo(apiInfo()) //通过.select()方法,去配置扫描接口, .select() //RequestHandlerSelectors配置如何扫描接口 .apis(RequestHandlerSelectors.basePackage("com.example.springbootseven.controller")) .build(); } -
重启项目测试,由于我们配置根据包的路径扫描接口,所以我们只能看到一个类

-
除了通过包路径配置扫描接口外,还可以通过配置其他方式扫描接口,以下是其他的一些配置方式:(RequestHandlerSelectors类下的方法)
-
any() : 扫描所有,项目中的所有接口都会被扫描到
-
none() : 不扫描接口
-
withMethodAnnotation(final Class<? extends Annotation> annotation) : 通过方法上的注解扫描
如withMethodAnnotation(GetMapping.class)只扫描get请求
-
withClassAnnotation(final Class<? extends Annotation> annotation) : 通过类上的注解扫描
如withClassAnnotation(Controller.class)只扫描有controller注解的类中的接口
-
basePackage(final String basePackage) : 根据包路径扫描接口
我们示例中就用了这个
-
-
除此之外,我们还可以配置接口扫描过滤(比如筛选出url中是
BASE_URL/biang/**的):@Beanpublic Docket docket() { return new Docket(DocumentationType.SWAGGER_2).apiInfo(apiInfo()).select() .apis(RequestHandlerSelectors.basePackage("com.example.springbootseven.controller")) // 配置如何通过path过滤,即这里只扫描请求以/biang开头的接口 .paths(PathSelectors.ant("/biang/**")) .build();}当然PathSelectors类肯定不止这些功能,以下就是他的其他方法
- any() 任何请求都扫描
- none() 任何请求都不扫描
- regex(final String pathRegex) 通过正则表达式控制
- ant(final String antPattern) 通过ant()控制
配置Swagger开关
-
通过enable()方法配置是否启用swagger,如果是false,那么swagger就不能在浏览器中访问了
@Bean public Docket docket() { return new Docket(DocumentationType.SWAGGER_2).apiInfo(apiInfo()) //配置是否启用Swagger,如果是false,在浏览器将无法访问 .enable(false) .select() .apis(RequestHandlerSelectors.basePackage("com.example.springbootseven.controller")) .paths(PathSelectors.ant("/test/**")) .build(); } -
重启主程序,进入swagger-ui.html
-
所以我们也可以通过用一个经过判断的布尔值作为.enable的参数,我们拿以下的情形作为背景,编写代码
动态配置当项目处于test、dev环境时显示swagger,处于prod时不显示
public Docket docket(Environment environment) { // 设置要显示swagger的环境 Profiles profilesOf = Profiles.of("dev", "test"); // 判断当前是否处于该环境 boolean isAccept = environment.acceptsProfiles(profilesOf); return new Docket(DocumentationType.SWAGGER_2).apiInfo(apiInfo()) //通过 enable() 接收isAccept判断是否要显示 .enable(isAccept) .select() .apis(RequestHandlerSelectors.basePackage("com.example.springbootseven.controller")) .paths(PathSelectors.ant("/test/**")) .build(); } -
测试:新建3个properties

-
在application.properties中添加以下代码
# spring.profiles.active=dev# spring.profiles.active=prod# spring.profiles.active=test分别解开注释(一次只有一个解开),并重启运行主程序并访问
http://localhost:8091/swagger-ui.html发现完成目标
配置API分组
-
如果没有配置分组,默认是default。通过groupName()方法即可配置分组
@Beanpublic Docket docket(Environment environment) { Profiles profilesOf = Profiles.of("dev", "test"); boolean isAccept = environment.acceptsProfiles(profilesOf); return new Docket(DocumentationType.SWAGGER_2).apiInfo(apiInfo()) //添加组名,默认是default(这不是在教英文!) .groupName("测试") .enable(isAccept) .select() .apis(RequestHandlerSelectors.basePackage("com.example.springbootseven.controller")) .paths(PathSelectors.ant("/test/**")) .build();} -
如何配置多个分组?配置多个分组只需要配置多个docket即可
@Beanpublic Docket testDocket(Environment environment) { Profiles profilesOf = Profiles.of("dev", "test"); boolean isAccept = environment.acceptsProfiles(profilesOf); return new Docket(DocumentationType.SWAGGER_2).apiInfo(apiInfo()) .groupName("测试") .enable(isAccept) .select() .apis(RequestHandlerSelectors.basePackage("com.example.springbootseven.controller")) .paths(PathSelectors.ant("/test/**")) .build();}/*** 新建了一个组名为biang的分组*/@Beanpublic Docket biangDocket() { return new Docket(DocumentationType.SWAGGER_2) .groupName("biang");} -
重启主程序,访问
http://localhost:8091/swagger-ui.html

实体配置
-
写一个实体
package com.example.springbootseven.pojo;/** * @author BIANG * @Date 2021/7/19 17:52 */public class Pokemon { private Integer no; private String name;} -
添加对应的注解
package com.example.springbootseven.pojo; import io.swagger.annotations.ApiModel; import io.swagger.annotations.ApiModelProperty; /** * @author BIANG * @Date 2021/7/19 17:52 */ @ApiModel("宝可梦实体") public class Pokemon { @ApiModelProperty("序号") private Integer no; @ApiModelProperty("名字") private String name; } -
运行主程序,会发现下面的model多了个宝可梦实体,但是里面什么都没有,那是因为,no和name都是私有的,如果他们是共有的,或者有公有的getter和setter,他们就会被显示出来
package com.example.springbootseven.pojo;

import io.swagger.annotations.ApiModel;
import io.swagger.annotations.ApiModelProperty;

/**
 * @author BIANG
 * @Date 2021/7/19 17:52
 */
@ApiModel("宝可梦实体")
public class Pokemon {
    @ApiModelProperty("序号")
    public Integer no;
    @ApiModelProperty("名字")
    private String name;

    public String getName() {
        return name;
    }

    public void setName(String name) {
        this.name = name;
    }
}
重新运行,再次查看

果然显示出来了,不过值得注意的是,并不是因为@ApiModel这个注解让实体显示在这里了,而是只要出现在接口方法的返回值上的实体都会显示在这里,而@ApiModel和@ApiModelProperty这两个注解只是为实体添加注释的。
常用注解
| Swagger注解 | 简单说明 |
|---|---|
| @Api(tags = “xxx模块说明”) | 作用在模块类上 |
| @ApiOperation(“xxx接口说明”) | 作用在接口方法上 |
| @ApiModel(“xxxPOJO说明”) | 作用在模型类上 |
| @ApiModelProperty(value = “xxx属性说明”,hidden = true) | 作用在类方法和属性上,hidden设置为true可以隐藏该属性 |
| @ApiParam(“xxx参数说明”) | 作用在参数、方法和字段上,类似@ApiModelProperty |
下面我们用一些例子来解释这些注解
package com.example.springbootseven.controller;

import io.swagger.annotations.Api;
import io.swagger.annotations.ApiOperation;
import io.swagger.annotations.ApiParam;
import org.springframework.stereotype.Controller;
import org.springframework.web.bind.annotation.GetMapping;
import org.springframework.web.bind.annotation.ResponseBody;

/**
 * @author BIANG
 * @Date 2021/7/19 15:01
 */
@Controller
@Api(tags = "模块说明")
public class HelloController {
    @ApiOperation("接口说明")
    @ResponseBody
    @GetMapping("/returnParameter")
    public String returnParameter(@ApiParam("参数说明")String param){
        return "返回参数: "+param;
    }
}
运行主程序后查看

不过好像get请求用了@ApiParam注解后,swagger识别接口后会出现请求体
,而get请求并不是接受请求体的,所以没办法直接用try it out按钮进行接口测试,将@ApiParam去除后即可,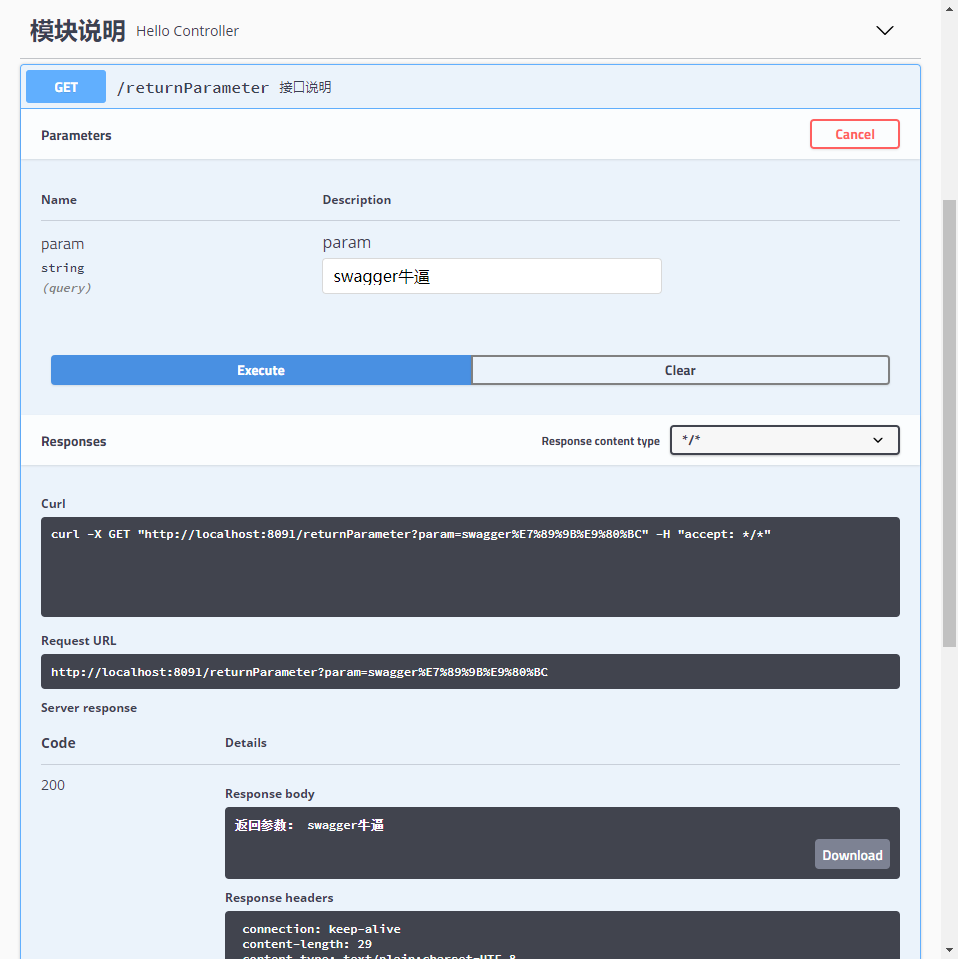
拓展:其他皮肤
我们可以导入不同的依赖实现不同的皮肤定义:
- 默认的 访问
http://localhost:8091/swagger-ui.html
<dependency>
   <groupId>io.springfox</groupId>
   <artifactId>springfox-swagger-ui</artifactId>
   <version>2.9.2</version>
</dependency>
- bootstrap-ui 访问
http://localhost:8091/doc.html
<!-- 引入swagger-bootstrap-ui包 /doc.html-->
<dependency>
   <groupId>com.github.xiaoymin</groupId>
   <artifactId>swagger-bootstrap-ui</artifactId>
   <version>1.9.1</version>
</dependency>

- Layui-ui 访问
http://localhost:8091/docs.html
<!-- 引入swagger-ui-layer包 /docs.html-->
<dependency>
   <groupId>com.github.caspar-chen</groupId>
   <artifactId>swagger-ui-layer</artifactId>
   <version>1.1.3</version>
</dependency>
没有成功访问到
- mg-ui 访问
http://localhost:8091/document.html
<!-- 引入swagger-ui-layer包 /document.html-->
<dependency>
   <groupId>com.zyplayer</groupId>
   <artifactId>swagger-mg-ui</artifactId>
   <version>1.0.6</version>
</dependency>

异步、定时、邮件任务
异步任务
我们直到,有一些任务如果后台处理太久,前端等太久的反馈,会给用户带来很不好的体验,所以我们一般会采用多线程的方式去处理这些任务。而手动去书写多线程是肉眼可见的复杂与麻烦,我们只需要将方法变成异步方法就可以!
同步情况
新建service包,在其下新建一个HelloService.java的接口,并在包下新建impl包以及HelloService.java
package com.example.springbootseven.service.impl;

import com.example.springbootseven.service.HelloService;
import org.springframework.stereotype.Service;

/**
 * @author BIANG
 * @Date 2021/7/20 14:37
 */
@Service
public class HelloServiceImpl implements HelloService {
    /**
     * 一个比较耗时的进程
     */
    @Override
    public void hello() {
        double time = 3000;
        try {
            Thread.sleep(3000);
        } catch (InterruptedException e) {
            e.printStackTrace();
        }
        System.out.println("花了整整"+time/1000+"秒!");
    }
}
HelloController.java中添加如下代码
@Autowired
HelloService helloService;

@ResponseBody
@GetMapping("/hello")
public String hello(){
    helloService.hello();
    return "success";
}
运行后,和想的一样,访问那个接口需要等待3s种才可以显示出success
修改为异步
修改为异步十分简单!
我们在我们需要异步的方法上方加上@Async注解
/**
* 一个比较耗时的进程
*/
@Override
@Async
public void hello() {
    double time = 3000;
    try {
        Thread.sleep(3000);
    } catch (InterruptedException e) {
        e.printStackTrace();
    }
    System.out.println("花了整整"+time/1000+"秒!");
}
然后给Application类加上@EnableAsync注解
@EnableAsync
@SpringBootApplication
public class Springboot07Application {

    public static void main(String[] args) {
        SpringApplication.run(Springboot07Application.class, args);
    }

}
完成!
定时任务
有时候我们需要定时执行一个方法,这可能会让我们比较为难实现的方法,springboot给了我们一个非常强悍的功能,定时任务
我们先上例子
package com.example.springbootseven.service.impl;

import com.example.springbootseven.service.HelloService;
import org.springframework.scheduling.annotation.Async;
import org.springframework.scheduling.annotation.Scheduled;
import org.springframework.stereotype.Service;

/**
 * @author BIANG
 * @Date 2021/7/20 14:37
 */
@Service
public class HelloServiceImpl implements HelloService {
    /**
     * 定时的hello
     */
    @Override
    @Scheduled(cron = "0/2 20-50 17 * * 0-7")
    public void scheduledHello() {
        System.out.println("hello~");
    }
}
然后给我们的Application.java的公有类加上@EnableScheduling注解
我先描述一下效果,现在的话就是周一到周日的17点从20分到50分,每2s秒调用一次这个方法
这是cron表达式的语法
参考这个网站可以生成自己想要的cron表达式 https://www.bejson.com/othertools/cron/
格式是:秒 分 时 日 月 周几,*表示全部
邮件任务
邮件发送在我们日常开发中并不少见,spring boot 也给我们提供了支持
- 邮件发送需要引入spring-boot-start-mail
- SpringBoot 自动配置MailSenderAutoConfiguration
- 定义MailProperties内容,配置在application.yml中
- 自动装配JavaMailSender
- 测试邮件发送
步骤
-
引入pom依赖
<dependency> <groupId>org.springframework.boot</groupId> <artifactId>spring-boot-starter-mail</artifactId> </dependency> -
添加对应的properties
spring.mail.username=xxx@qq.com #邮箱 spring.mail.password=xxx #邮箱POP3/SMTP服务码 spring.mail.host=smtp.qq.com # qq需要配置ssl spring.mail.properties.mail.smtp.ssl.enable=true -
我们在测试类中测试
package com.example.springbootseven;

import org.junit.jupiter.api.Test;
import org.springframework.beans.factory.annotation.Autowired;
import org.springframework.boot.test.context.SpringBootTest;
import org.springframework.mail.SimpleMailMessage;
import org.springframework.mail.javamail.JavaMailSenderImpl;
import org.springframework.mail.javamail.MimeMessageHelper;

import javax.mail.MessagingException;
import javax.mail.internet.MimeMessage;
import java.io.File;

@SpringBootTest
class Springboot07ApplicationTests {

    @Autowired
    JavaMailSenderImpl mailSender;

    @Test
    void contextLoads() {
        SimpleMailMessage message = new SimpleMailMessage();
        message.setSubject("标题subject");
        message.setText("内容text");

        message.setTo("yyy@qq.com");
        message.setFrom("xxx@qq.com");
        mailSender.send(message);
    }

    @Test
    public void contextLoads2() throws MessagingException {
        //邮件设置2:一个复杂的邮件
        MimeMessage mimeMessage = mailSender.createMimeMessage();
        MimeMessageHelper helper = new MimeMessageHelper(mimeMessage, true);

        helper.setSubject("标题subject");
        helper.setText("<b style='color:red'>内容text(可以用HTML的哦)</b>",true);

        //发送附件
        helper.addAttachment("附件.jpg",new File("D:\\暂存\\C++.jpg"));

        helper.setTo("yyy@qq.com");
        helper.setFrom("xxx@qq.com");

        mailSender.send(mimeMessage);
    }
}
十分方便