欢迎访问我的GitHub
这里分类和汇总了欣宸的全部原创(含配套源码):https://github.com/zq2599/blog_demos
FFmpeg、JavaCPP、JavaCV的关系
- 先简单的梳理一下FFmpeg、JavaCPP、JavaCV的关系:
- FFmpeg、OpenCV可以理解成C语言版的本地库(Native library),Java应用无法直接使用
- JavaCPP将FFmpeg、OpenCV这些常用库做了包装(wrapper),使得Java应用也能使用这些Native API(JavaCPP的底层实现是JNI)
- 这些JavaCPP包装后的API,被JavaCV封装成了工具类(utility classes),这些工具类比原生API更简单易用
- 简单的说如下图所示,JavaCPP是Native API转Java API,JavaCV是Java API封装成工具类,这些工具类更加简单易用:

学习目的
- 欣宸的目标是学习和掌握JavaCV,而深入JavaCV内部去了解它用到的JavaCPP,就相当于打好基础,今后使用JavaCV的时候,也能看懂其内部的实现原理;
- 于是乎,通过JavaCPP使用FFmpeg就成了基本功,本文会开发一个java应用,调用JavaCPP的API完成以下任务:
- 打开指定的流媒体
- 取一帧解码,得到YUV420P格式的图像
- 将YUV420P格式的图像转为YUVJ420P格式
- 将图像用jpg格式保存在指定位置
- 释放所有打开的资源
- 可见上述一系列步骤已覆盖编解码和图像处理等常见操作,对咱们了解FFmpeg库有很大帮助
知识储备
- 在实际编码前,建议您对FFmpeg的重要数据结构和API做一些了解,这方面最经典的资料莫过于雷神的系列教程了,尤其是解协议、解封装、解码涉及到的数据结构(上下文)和API,都应该简单了解一遍
- 如果您实在太忙没有时间翻阅这些经典,我这准备了一份快餐版,对重要知识点做了简单的小结,这里要申明一下:欣宸的快餐版远不如雷神的经典系列…
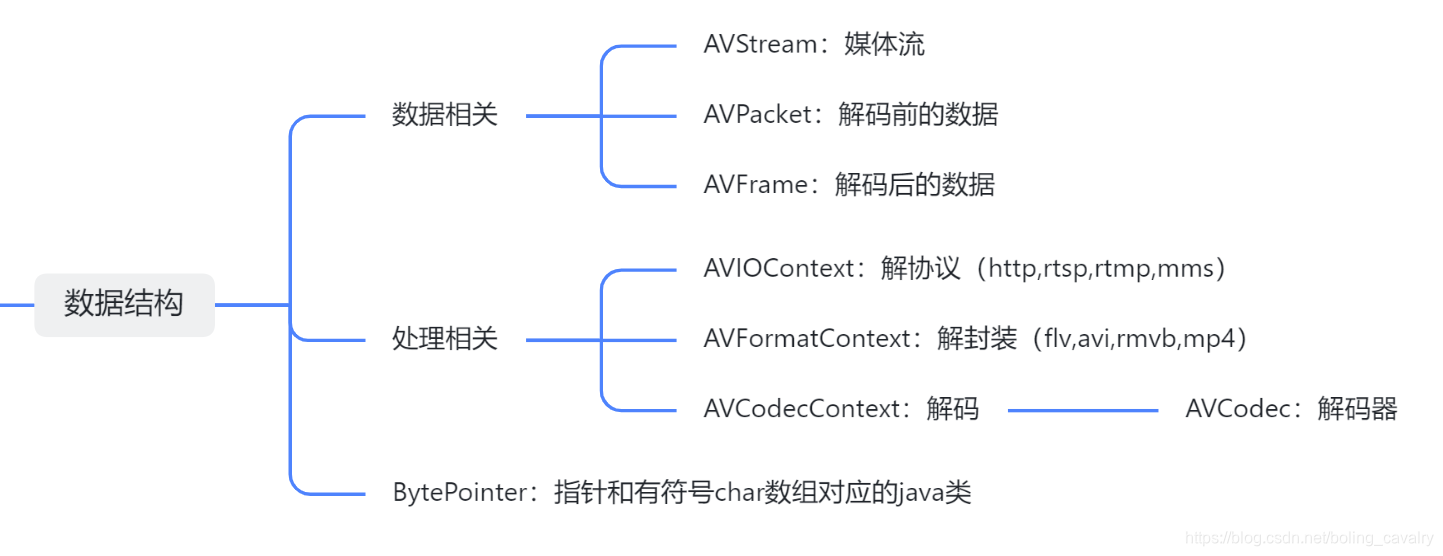
- 先看数据结构,主要分为媒体数据和上下文两大类,以及底层指针对应的java类:
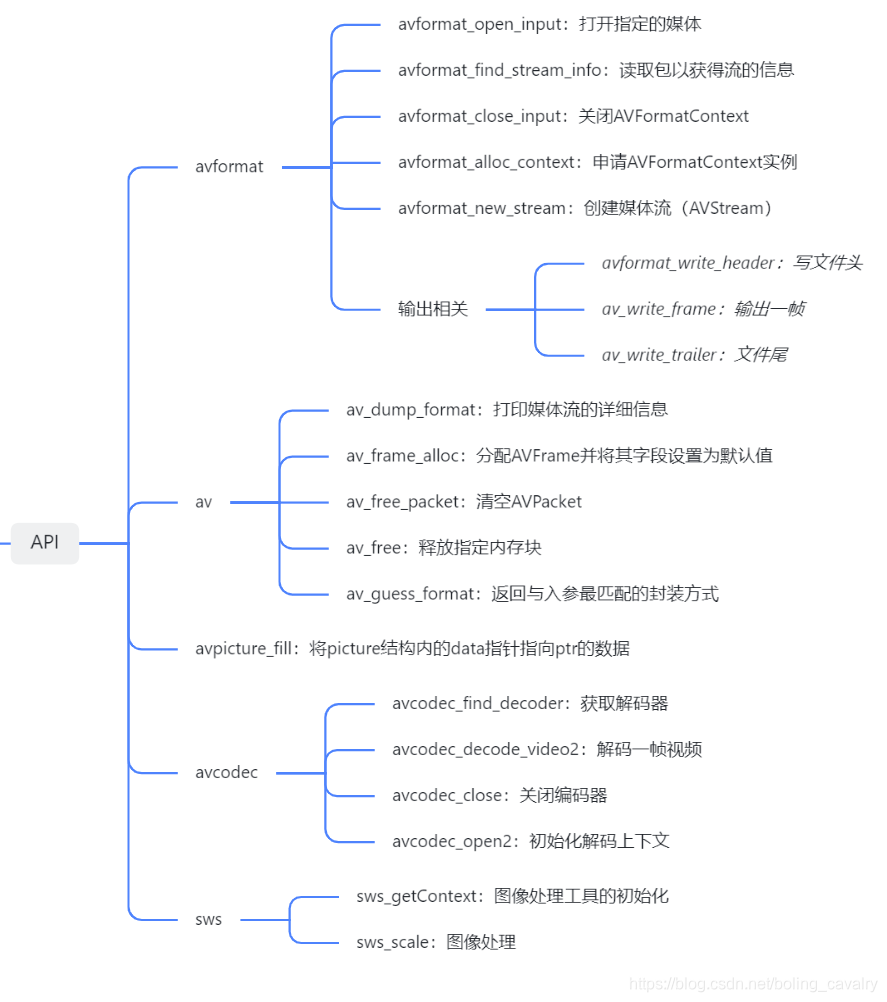
- 接着是常用API,按照雷神的解协议、解封装、解码思路(还有反过来的编码和封装处理)去分类和理解,很容易将它们梳理清楚:
版本信息
本次编码涉及的操作系统、软件、库的版本信息如下:
- 操作系统:win10 64位
- IDE:IDEA 2021.1.3 (Ultimate Edition)
- JDK:1.8.0_291
- maven:3.8.1
- javacpp:1.4.3
- ffmpeg:4.0.2(所以ffmpeg-platform库的版本是4.0.2-1.4.3)
源码下载
- 本篇实战中的完整源码可在GitHub下载到,地址和链接信息如下表所示(https://github.com/zq2599/blog_demos):
| 名称 | 链接 | 备注 |
|---|---|---|
| 项目主页 | https://github.com/zq2599/blog_demos | 该项目在GitHub上的主页 |
| git仓库地址(https) | https://github.com/zq2599/blog_demos.git | 该项目源码的仓库地址,https协议 |
| git仓库地址(ssh) | git@github.com:zq2599/blog_demos.git | 该项目源码的仓库地址,ssh协议 |
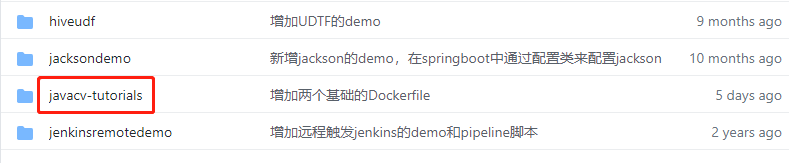
- 这个git项目中有多个文件夹,本篇的源码在javacv-tutorials文件夹下,如下图红框所示:
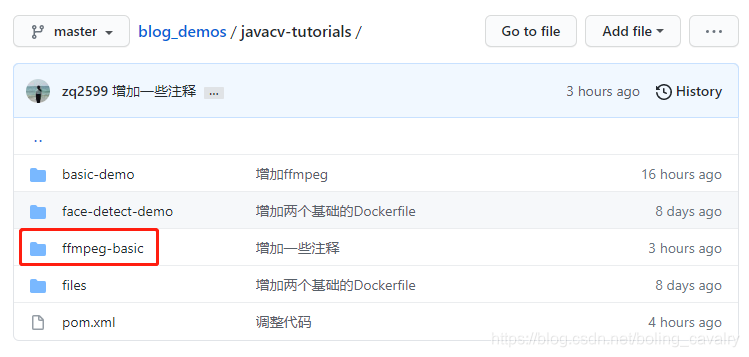
- javacv-tutorials文件夹下有多个子工程,本篇的源码在ffmpeg-basic文件夹下,如下图红框:
开始编码
- 为了统一管理源码和jar依赖,项目采用了maven父子结构,父工程名为javacv-tutorials,里面有一些jar的版本定义,就不多说了
- 在javacv-tutorials下面新建名为ffmpeg-basic的子工程,其pom.xml内容如下,可见仅用了JavaCPP,并未用到JavaCV:
<?xml version="1.0" encoding="UTF-8"?>
<project xmlns="http://maven.apache.org/POM/4.0.0"
         xmlns:xsi="http://www.w3.org/2001/XMLSchema-instance"
         xsi:schemaLocation="http://maven.apache.org/POM/4.0.0 http://maven.apache.org/xsd/maven-4.0.0.xsd">
    <parent>
        <artifactId>javacv-tutorials</artifactId>
        <groupId>com.bolingcavalry</groupId>
        <version>1.0-SNAPSHOT</version>
    </parent>
    <modelVersion>4.0.0</modelVersion>

    <artifactId>ffmpeg-basic</artifactId>

    <dependencies>
        <dependency>
            <groupId>org.bytedeco</groupId>
            <artifactId>javacpp</artifactId>
        </dependency>
        <dependency>
            <groupId>org.bytedeco.javacpp-presets</groupId>
            <artifactId>ffmpeg-platform</artifactId>
        </dependency>

        <dependency>
            <groupId>org.projectlombok</groupId>
            <artifactId>lombok</artifactId>
        </dependency>

        <dependency>
            <groupId>org.slf4j</groupId>
            <artifactId>slf4j-api</artifactId>
        </dependency>

        <dependency>
            <groupId>ch.qos.logback</groupId>
            <artifactId>logback-classic</artifactId>
        </dependency>
    </dependencies>
</project>
- 接下来开始编码,先写一个最简单的内部类,将AVFrame和它对应的数据指针BytePointer都放在这个类中,在调用方法的时候便于传递:
class FrameData {

    AVFrame avFrame;
    BytePointer buffer;

    public FrameData(AVFrame avFrame, BytePointer buffer) {
        this.avFrame = avFrame;
        this.buffer = buffer;
    }
}
- 接下来是整个程序最重要的方法openMediaAndSaveImage,该方法是整个程序的主体,负责将打开流媒体、解码、转格式、保存、释放等五个步骤串起来,外部只要调用这个方法就能完成整个功能:
/**
     * 打开流媒体,取一帧,转为YUVJ420P,再保存为jpg文件
     * @param url
     * @param out_file
     * @throws IOException
     */
    public void openMediaAndSaveImage(String url,String out_file) throws IOException {
        log.info("正在打开流媒体 [{}]", url);

        // 打开指定流媒体,进行解封装,得到解封装上下文
        AVFormatContext pFormatCtx = getFormatContext(url);

        if (null==pFormatCtx) {
            log.error("获取解封装上下文失败");
            return;
        }

        // 控制台打印流媒体信息
        av_dump_format(pFormatCtx, 0, url, 0);

        // 流媒体解封装后有一个保存了所有流的数组,videoStreamIndex表示视频流在数组中的位置
        int videoStreamIndex = getVideoStreamIndex(pFormatCtx);

        // 找不到视频流就直接返回
        if (videoStreamIndex<0) {
            log.error("没有找到视频流");
            return;
        }

        log.info("视频流在流数组中的第[{}]个流是视频流(从0开始)", videoStreamIndex);

        // 得到解码上下文,已经完成了初始化
        AVCodecContext pCodecCtx = getCodecContext(pFormatCtx, videoStreamIndex);

        if (null==pCodecCtx) {
            log.error("生成解码上下文失败");
            return;
        }

        // 从视频流中解码一帧
        AVFrame pFrame = getSingleFrame(pCodecCtx,pFormatCtx, videoStreamIndex);

        if (null==pFrame) {
            log.error("从视频流中取帧失败");
            return;
        }

        // 将YUV420P图像转成YUVJ420P
        // 转换后的图片的AVFrame,及其对应的数据指针,都放在frameData对象中
        FrameData frameData = YUV420PToYUVJ420P(pCodecCtx, pFrame);

        if (null==frameData) {
            log.info("YUV420P格式转成YUVJ420P格式失败");
            return;
        }

        // 持久化存储
        saveImg(frameData.avFrame,out_file);

        // 按顺序释放
        release(true, null, null, pCodecCtx, pFormatCtx, frameData.buffer, frameData.avFrame, pFrame);

        log.info("操作成功");
    }
- 现在整体逻辑已经清楚了,再来看里面openMediaAndSaveImage里面调用的那些方法的源码,先看打开流媒体的getFormatContext:
    /**
     * 生成解封装上下文
     * @param url
     * @return
     */
    private AVFormatContext getFormatContext(String url) {
        // 解封装上下文
        AVFormatContext pFormatCtx = new avformat.AVFormatContext(null);

        // 打开流媒体
        if (avformat_open_input(pFormatCtx, url, null, null) != 0) {
            log.error("打开媒体失败");
            return null;
        }

        // 读取流媒体数据,以获得流的信息
        if (avformat_find_stream_info(pFormatCtx, (PointerPointer<Pointer>) null) < 0) {
            log.error("获得媒体流信息失败");
            return null;
        }

        return pFormatCtx;
    }
- 流媒体解封装后有一个保存了所有流的数组,getVideoStreamIndex方法会找到视频流在数组中的位置:
    /**
     * 流媒体解封装后得到多个流组成的数组,该方法找到视频流咋数组中的位置
     * @param pFormatCtx
     * @return
     */
    private static int getVideoStreamIndex(AVFormatContext pFormatCtx) {
        int videoStream = -1;

        // 解封装后有多个流,找出视频流是第几个
        for (int i = 0; i < pFormatCtx.nb_streams(); i++) {
            if (pFormatCtx.streams(i).codec().codec_type() == AVMEDIA_TYPE_VIDEO) {
                videoStream = i;
                break;
            }
        }

        return videoStream;
    }
- 解封装之后就是解码,getCodecContext方法得到解码上下文对象:
    /**
     * 生成解码上下文
     * @param pFormatCtx
     * @param videoStreamIndex
     * @return
     */
    private AVCodecContext getCodecContext(AVFormatContext pFormatCtx, int videoStreamIndex) {
        //解码器
        AVCodec pCodec;

        // 得到解码上下文
        AVCodecContext pCodecCtx = pFormatCtx.streams(videoStreamIndex).codec();

        // 根据解码上下文得到解码器
        pCodec = avcodec_find_decoder(pCodecCtx.codec_id());

        if (pCodec == null) {
            return null;
        }

        // 用解码器来初始化解码上下文
        if (avcodec_open2(pCodecCtx, pCodec, (AVDictionary)null) < 0) {
            return null;
        }

        return pCodecCtx;
    }
- 紧接着从视频流解码取帧解码:
    /**
     * 取一帧然后解码
     * @param pCodecCtx
     * @param pFormatCtx
     * @param videoStreamIndex
     * @return
     */
    private AVFrame getSingleFrame(AVCodecContext pCodecCtx, AVFormatContext pFormatCtx, int videoStreamIndex) {
        // 分配帧对象
        AVFrame pFrame = av_frame_alloc();

        // frameFinished用于检查是否有图像
        int[] frameFinished = new int[1];

        // 是否找到的标志
        boolean exists = false;

        AVPacket packet = new AVPacket();

        try {
            // 每一次while循环都会读取一个packet
            while (av_read_frame(pFormatCtx, packet) >= 0) {
                // 检查packet所属的流是不是视频流
                if (packet.stream_index() == videoStreamIndex) {
                    // 将AVPacket解码成AVFrame
                    avcodec_decode_video2(pCodecCtx, pFrame, frameFinished, packet);// Decode video frame

                    // 如果有图像就返回
                    if (frameFinished != null && frameFinished[0] != 0 && !pFrame.isNull()) {
                        exists = true;
                        break;
                    }
                }
            }
        } finally {
            // 一定要执行释放操作
            av_free_packet(packet);
        }

        // 找不到就返回空
        return exists ?  pFrame : null;
    }
- 解码后的图像是YUV420P格式,咱们将其转成YUVJ420P:
    /**
     * 将YUV420P格式的图像转为YUVJ420P格式
     * @param pCodecCtx 解码上下文
     * @param sourceFrame 源数据
     * @return 转换后的帧极其对应的数据指针
     */
    private static FrameData YUV420PToYUVJ420P(AVCodecContext pCodecCtx, AVFrame sourceFrame) {
        // 分配一个帧对象,保存从YUV420P转为YUVJ420P的结果
        AVFrame pFrameRGB = av_frame_alloc();

        if (pFrameRGB == null) {
            return null;
        }

        int width = pCodecCtx.width(), height = pCodecCtx.height();

        // 一些参数设定
        pFrameRGB.width(width);
        pFrameRGB.height(height);
        pFrameRGB.format(AV_PIX_FMT_YUVJ420P);

        // 计算转为YUVJ420P之后的图片字节数
        int numBytes = avpicture_get_size(AV_PIX_FMT_YUVJ420P, width, height);

        // 分配内存
        BytePointer buffer = new BytePointer(av_malloc(numBytes));

        // 图片处理工具的初始化操作
        SwsContext sws_ctx = sws_getContext(width, height, pCodecCtx.pix_fmt(), width, height, AV_PIX_FMT_YUVJ420P, SWS_BICUBIC, null, null, (DoublePointer) null);

        // 将pFrameRGB的data指针指向刚才分配好的内存(即buffer)
        avpicture_fill(new avcodec.AVPicture(pFrameRGB), buffer, AV_PIX_FMT_YUVJ420P, width, height);

        // 转换图像格式,将解压出来的YUV420P的图像转换为YUVJ420P的图像
        sws_scale(sws_ctx, sourceFrame.data(), sourceFrame.linesize(), 0, height, pFrameRGB.data(), pFrameRGB.linesize());

        // 及时释放
        sws_freeContext(sws_ctx);

        // 将AVFrame和BytePointer打包到FrameData中返回,这两个对象都要做显示的释放操作
        return new FrameData(pFrameRGB, buffer);
    }
- 然后就是另一个很重要方法saveImg,里面是典型的编码和输出流程,咱们前面已经了解了打开媒体流解封装解码的操作,现在要看看怎么制作媒体流,包括编码、封装和输出:
    /**
     * 将传入的帧以图片的形式保存在指定位置
     * @param pFrame
     * @param out_file
     * @return 小于0表示失败
     */
    private int saveImg(avutil.AVFrame pFrame, String out_file) {
        av_log_set_level(AV_LOG_ERROR);//设置FFmpeg日志级别(默认是debug,设置成error可以屏蔽大多数不必要的控制台消息)

        AVPacket pkt = null;
        AVStream pAVStream = null;

        int width = pFrame.width(), height = pFrame.height();

        // 分配AVFormatContext对象
        avformat.AVFormatContext pFormatCtx = avformat_alloc_context();

        // 设置输出格式(涉及到封装和容器)
        pFormatCtx.oformat(av_guess_format("mjpeg", null, null));

        if (pFormatCtx.oformat() == null) {
            log.error("输出媒体流的封装格式设置失败");
            return -1;
        }

        try {
            // 创建并初始化一个和该url相关的AVIOContext
            avformat.AVIOContext pb = new avformat.AVIOContext();

            // 打开输出文件
            if (avio_open(pb, out_file, AVIO_FLAG_READ_WRITE) < 0) {
                log.info("输出文件打开失败");
                return -1;
            }

            // 封装之上是协议,这里将封装上下文和协议上下文关联
            pFormatCtx.pb(pb);

            // 构建一个新stream
            pAVStream = avformat_new_stream(pFormatCtx, null);

            if (pAVStream == null) {
                log.error("将新的流放入媒体文件失败");
                return -1;
            }

            int codec_id = pFormatCtx.oformat().video_codec();

            // 设置该stream的信息
            avcodec.AVCodecContext pCodecCtx = pAVStream.codec();
            pCodecCtx.codec_id(codec_id);
            pCodecCtx.codec_type(AVMEDIA_TYPE_VIDEO);
            pCodecCtx.pix_fmt(AV_PIX_FMT_YUVJ420P);
            pCodecCtx.width(width);
            pCodecCtx.height(height);
            pCodecCtx.time_base().num(1);
            pCodecCtx.time_base().den(25);

            // 打印媒体信息
            av_dump_format(pFormatCtx, 0, out_file, 1);

            // 查找解码器
            avcodec.AVCodec pCodec = avcodec_find_encoder(codec_id);
            if (pCodec == null) {
                log.info("获取解码器失败");
                return -1;
            }

            // 用解码器来初始化解码上下文
            if (avcodec_open2(pCodecCtx, pCodec, (PointerPointer<Pointer>) null) < 0) {
                log.error("解码上下文初始化失败");
                return -1;
            }

            // 输出的Packet
            pkt = new avcodec.AVPacket();

            // 分配
            if (av_new_packet(pkt, width * height * 3) < 0) {
                return -1;
            }

            int[] got_picture = { 0 };

            // 把流的头信息写到要输出的媒体文件中
            avformat_write_header(pFormatCtx, (PointerPointer<Pointer>) null);

            // 把帧的内容进行编码
            if (avcodec_encode_video2(pCodecCtx, pkt, pFrame, got_picture)<0) {
                log.error("把帧编码为packet失败");
                return -1;
            }

            // 输出一帧
            if ((av_write_frame(pFormatCtx, pkt)) < 0) {
                log.error("输出一帧失败");
                return -1;
            }

            // 写文件尾
            if (av_write_trailer(pFormatCtx) < 0) {
                log.error("写文件尾失败");
                return -1;
            }

            return 0;
        } finally {
            // 资源清理
            release(false, pkt, pFormatCtx.pb(), pAVStream.codec(), pFormatCtx);
        }
    }
- 最后是释放资源的操作,请注意释放不同对象要用到的API也不同,另外AVFormatContext的场景不同用到的API也不同(输入输出场景),用错了就会crash,另外release方法一共被调用了两次,也就说打开媒体流和输出媒体流用到的资源和对象,最终都需要释放和回收:
   /**
     * 释放资源,顺序是先释放数据,再释放上下文
     * @param pCodecCtx
     * @param pFormatCtx
     * @param ptrs
     */
    private void release(boolean isInput, AVPacket pkt, AVIOContext pb, AVCodecContext pCodecCtx, AVFormatContext pFormatCtx, Pointer...ptrs) {

        if (null!=pkt) {
            av_free_packet(pkt);
        }

        // 解码后,这是个数组,要遍历处理
        if (null!=ptrs) {
            Arrays.stream(ptrs).forEach(avutil::av_free);
        }

        // 解码
        if (null!=pCodecCtx) {
            avcodec_close(pCodecCtx);
        }

        // 解协议
        if (null!=pb) {
            avio_close(pb);
        }

        // 解封装
        if (null!=pFormatCtx) {
            if (isInput) {
                avformat_close_input(pFormatCtx);
            } else {
                avformat_free_context(pFormatCtx);
            }
        }
    }
- 最后写个main方法,调用openMediaAndSaveImage试试,传入媒体流的地址,以及存放图片的路径:
    public static void main(String[] args) throws Exception {
        // CCTV13,1920*1080分辨率,不稳定,打开失败时请多试几次
        String url = "http://ivi.bupt.edu.cn/hls/cctv13hd.m3u8";

        // 安徽卫视,1024*576分辨率,较为稳定
//        String url = "rtmp://58.200.131.2:1935/livetv/ahtv";
        // 本地视频文件,请改为您自己的本地文件地址
//        String url = "E:\\temp\\202107\\24\\test.mp4";

        // 完整图片存放路径,注意文件名是当前的年月日时分秒
        String localPath = "E:\\temp\\202107\\24\\save\\" + new SimpleDateFormat("yyyyMMddHHmmss").format(new Date()) + ".jpg";

        // 开始操作
        new Stream2Image().openMediaAndSaveImage(url, localPath);
    }
- 以上所有代码都在子工程ffmpeg-basic的Stream2Image.java文件中,运行main方法,控制台输出如下,可见流媒体打开成功,并且输出了详细的媒体信息:
18:28:35.553 [main] INFO com.bolingcavalry.basic.Stream2Image - 正在打开流媒体 [http://ivi.bupt.edu.cn/hls/cctv13hd.m3u8]
18:28:37.062 [main] INFO com.bolingcavalry.basic.Stream2Image - 视频流在流数组中的第[0]个流是视频流(从0开始)
18:28:37.219 [main] INFO com.bolingcavalry.basic.Stream2Image - 操作成功
[hls,applehttp @ 00000188548ab140] Opening 'http://ivi.bupt.edu.cn/hls/cctv13hd-1627208880000.ts' for reading
[hls,applehttp @ 00000188548ab140] Opening 'http://ivi.bupt.edu.cn/hls/cctv13hd-1627208890000.ts' for reading
[NULL @ 000001887ba68bc0] non-existing SPS 0 referenced in buffering period
[NULL @ 000001887ba68bc0] SPS unavailable in decode_picture_timing
[h264 @ 000001887ba6aa80] non-existing SPS 0 referenced in buffering period
[h264 @ 000001887ba6aa80] SPS unavailable in decode_picture_timing
Input #0, hls,applehttp, from 'http://ivi.bupt.edu.cn/hls/cctv13hd.m3u8':
  Duration: N/A, start: 1730.227267, bitrate: N/A
  Program 0
    Metadata:
      variant_bitrate : 0
    Stream #0:0: Video: h264 (Main) ([27][0][0][0] / 0x001B), yuv420p, 1920x1080 [SAR 1:1 DAR 16:9], 25 fps, 25 tbr, 90k tbn, 50 tbc
    Metadata:
      variant_bitrate : 0
    Stream #0:1: Audio: aac (LC) ([15][0][0][0] / 0x000F), 48000 Hz, 5.1, fltp
    Metadata:
      variant_bitrate : 0
[swscaler @ 000001887cb28bc0] deprecated pixel format used, make sure you did set range correctly

Process finished with exit code 0
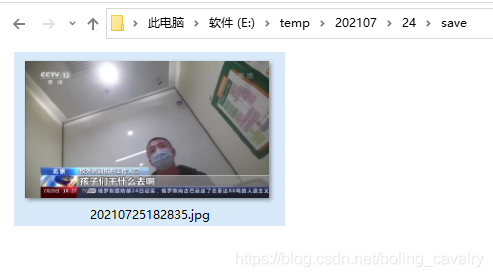
- 去存储图片的目录下检查,图片已经生成:
- 至此,Java版流媒体解码存图的实战就完成了,咱们对JavaCPP包装的FFmpeg常用函数有了基本的了解,知道了编解码和图像处理的常见套路,后面在使用JavaCV工具类时,也明白了其内部基本原理,在定位问题、性能优化、深入研究等场景拥有了更多优势。