打包
点击右方的Gradle -> gradleJava ->Tasks ->build ->jar
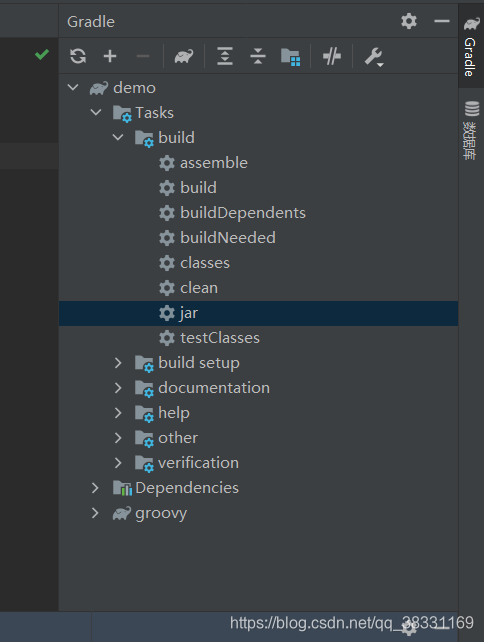
生成jar包位置:
build/libs/***.jar
执行jar
左下角打开终端
java -classpath build\libs***.jar com.justTest.App
安卓Gradle
因为mini项目的原因,要做一个gradle插件用来做APP注入,从而测试APP的稳定性。
我们小队将通过Gradle插件+ASM的方式来完成整个项目。
现阶段,则需要熟悉Gradle插件的编写。
总目标的话,需要掌握gradle插件编写、.class字节码扫描与分析、ASM框架的使用。
现在可以小谈一下gradle插件
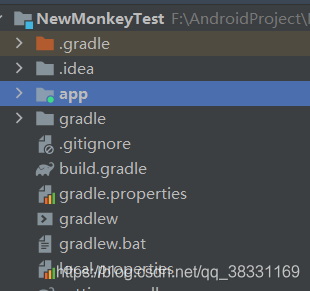
首先使用的是Android Studio
使用Android Studio的话,需要自己建立模块。
这将是一个有毒的过程…
接着要创建一个空项目
最麻烦的配置
- 第一层的build.gradle
可以直接复制我的,我这也是看着教程的…
// Top-level build file where you can add configuration options common to all sub-projects/modules.
buildscript {
    repositories {
        maven{ url rootProject.file("./app/repo-local") }
        maven { url 'http://maven.aliyun.com/nexus/content/groups/public/' }
        google()
        jcenter()
    }
    dependencies {
        classpath "com.android.tools.build:gradle:4.2.2"
        classpath 'com.github.dcendents:android-maven-gradle-plugin:1.4.1'
        classpath 'com.jfrog.bintray.gradle:gradle-bintray-plugin:1.4'
        classpath 'com.billy.android:newmonkey:1.4.2-SNAPSHOT'
//        classpath 'com.billy.android:autoregister:1.4.2'
        // NOTE: Do not place your application dependencies here; they belong
        // in the individual module build.gradle files
    }
}

allprojects {
    repositories {
        google()
        jcenter()
    }
}

task clean(type: Delete) {
    delete rootProject.buildDir
}

tasks.withType(JavaCompile) {
    options.encoding = "UTF-8"
}
- app层的build.gradle
plugins {
    id 'com.android.application'
}

android {
    compileSdkVersion 30
    buildToolsVersion '30.0.3'

    defaultConfig {
        applicationId "com.monkeybase.newmonkeytest"
        minSdkVersion 16
        targetSdkVersion 30
        versionCode 1
        versionName "1.0"

        testInstrumentationRunner "androidx.test.runner.AndroidJUnitRunner"
    }

    buildTypes {
        release {
            minifyEnabled false
            proguardFiles getDefaultProguardFile('proguard-android-optimize.txt'), 'proguard-rules.pro'
        }
    }
    compileOptions {
        sourceCompatibility JavaVersion.VERSION_1_8
        targetCompatibility JavaVersion.VERSION_1_8
    }
}

dependencies {

    implementation 'androidx.appcompat:appcompat:1.2.0'
    implementation 'com.google.android.material:material:1.2.1'
    implementation 'androidx.constraintlayout:constraintlayout:2.0.1'
    testImplementation 'junit:junit:4.+'
    androidTestImplementation 'androidx.test.ext:junit:1.1.2'
    androidTestImplementation 'androidx.test.espresso:espresso-core:3.3.0'
}
apply plugin:'newmonkey'
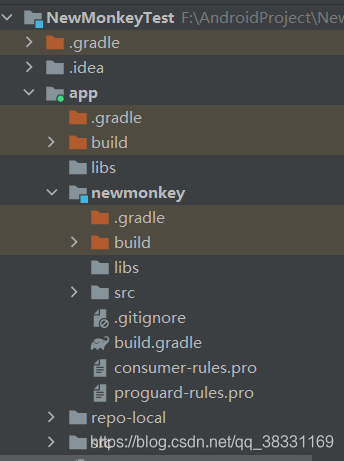
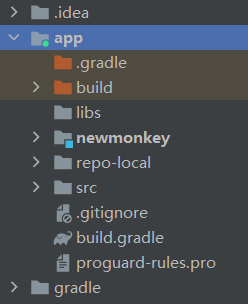
app里新建一个模块,作为gradle插件的项目位置

把gradle项目结构建立起来
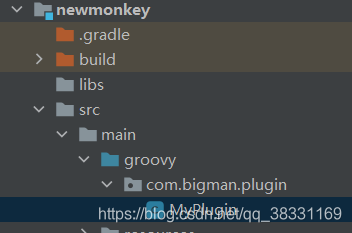
必须是groovy语言
当然你还是需要配置build.gradle
apply plugin: 'groovy'
apply plugin: 'maven'

apply plugin: 'com.jfrog.bintray'

compileGroovy {
    sourceCompatibility = 1.7
    targetCompatibility = 1.7
    options.encoding = "UTF-8"
}

dependencies {
    //基本的必须的配置
    implementation gradleApi()
    implementation localGroovy()
}

repositories {
    mavenCentral()
}
dependencies {
    implementation 'com.android.tools.build:gradle:3.5.2'
}

//无视就好
//加载本地maven私服配置(在工程根目录中的local.properties文件中进行配置)
Properties properties = new Properties()
properties.load(project.rootProject.file('local.properties').newDataInputStream())
def artifactory_user = properties.getProperty("artifactory_user")
def artifactory_password = properties.getProperty("artifactory_password")
def artifactory_contextUrl = properties.getProperty("artifactory_contextUrl")
def artifactory_snapshot_repoKey = properties.getProperty("artifactory_snapshot_repoKey")
def artifactory_release_repoKey = properties.getProperty("artifactory_release_repoKey")

def maven_type_snapshot = true
// 项目引用的版本号,比如implementation 'com.yanzhenjie:andserver:1.0.1'中的1.0.1就是这里配置的。
def artifact_version='1.4.2'
// 唯一包名,比如implementation 'com.yanzhenjie:andserver:1.0.1'中的com.yanzhenjie就是这里配置的。
def artifact_group = 'com.billy.android'
def artifact_id = 'newmonkey'
group = artifact_group
version = artifact_version
def debug_flag = true //true: 发布到本地maven仓库, false: 发布到maven私服

task sourcesJar(type: Jar) {
    from project.file('src/main/groovy')
    classifier = 'sources'
}

artifacts {
    archives sourcesJar
}
uploadArchives {
    repositories {
        mavenDeployer {
            //deploy到maven仓库
            if (debug_flag) {
                repository(url: uri('../repo-local')) //deploy到本地仓库
            } else {//deploy到maven私服中
                def repoKey = maven_type_snapshot ? artifactory_snapshot_repoKey : artifactory_release_repoKey
                repository(url: "${artifactory_contextUrl}/${repoKey}") {
                    authentication(userName: artifactory_user, password: artifactory_password)
                }
            }

            pom.groupId = artifact_group
            pom.artifactId = artifact_id
            pom.version = artifact_version + (maven_type_snapshot ? '-SNAPSHOT' : '')

            pom.project {
                licenses {
                    license {
                        name 'The Apache Software License, Version 2.0'
                        url 'http://www.apache.org/licenses/LICENSE-2.0.txt'
                    }
                }
            }
        }
    }
}


// 定义两个链接,下面会用到。
def siteUrl = 'https://github.com/luckybilly/NewMonkey' // 项目主页。
def gitUrl = 'git@github.com:luckybilly/NewMonkey.git' // Git仓库的url。

install {
    repositories.mavenInstaller {
        // 生成pom.xml和参数
        pom {
            project {
                packaging 'jar'
                // 项目描述,复制我的话,这里需要修改。
                name 'NewMonkey'// 可选,项目名称。
                description 'a gradle plugin project for android AOP.'// 可选,项目描述。
                url siteUrl // 项目主页,这里是引用上面定义好。

                // 软件开源协议,现在一般都是Apache License2.0吧,复制我的,这里不需要修改。
                licenses {
                    license {
                        name 'The Apache Software License, Version 2.0'
                        url 'http://www.apache.org/licenses/LICENSE-2.0.txt'
                    }
                }

                //填写开发者基本信息,复制我的,这里需要修改。
                developers {
                    developer {
                        id 'billy' // 开发者的id。
                        name 'billy' // 开发者名字。
                        email 'okkanan@hotmail.com' // 开发者邮箱。
                    }
                }

                // SCM,复制我的,这里不需要修改。
                scm {
                    connection gitUrl // Git仓库地址。
                    developerConnection gitUrl // Git仓库地址。
                    url siteUrl // 项目主页。
                }
            }
        }
    }
}

// 这里是读取Bintray相关的信息,我们上传项目到github上的时候会把gradle文件传上去,所以不要把帐号密码的信息直接写在这里,写在local.properties中,这里动态读取。
//Properties properties = new Properties()
//properties.load(project.rootProject.file('local.properties').newDataInputStream())
bintray {
    user = properties.getProperty("bintray.user") // Bintray的用户名。
    key = properties.getProperty("bintray.apikey") // Bintray刚才保存的ApiKey。

    configurations = ['archives']
    pkg {
        repo = "android"  // 上传到maven库。(这里要特别注意,如果写了maven报404错误,请在bintray创建一个仓库,这里填改成你创建的仓库的名字,如何创建请看下图。)
        name = "NewMonkey"  // 发布到Bintray上的项目名字,这里的名字不是implementation 'com.yanzhenjie:andserver:1.0.1'中的andserver。
        userOrg = properties.getProperty("bintray.userOrg") // Bintray的用户名,2016年11月更新。
        websiteUrl = siteUrl
        vcsUrl = gitUrl
        licenses = ["Apache-2.0"]
        publish = true // 是否是公开项目。
    }
}
删掉一些没用的文件
最后剩下这些
跑gradle的时候到了
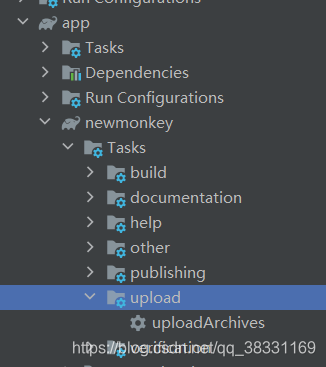
找到模块下的upload中的uploadArchives,双击跑起来,gradle会自动进行构建,在这之后产生的不需要删除了
到了这一步…终于可以开始写代码了
Code
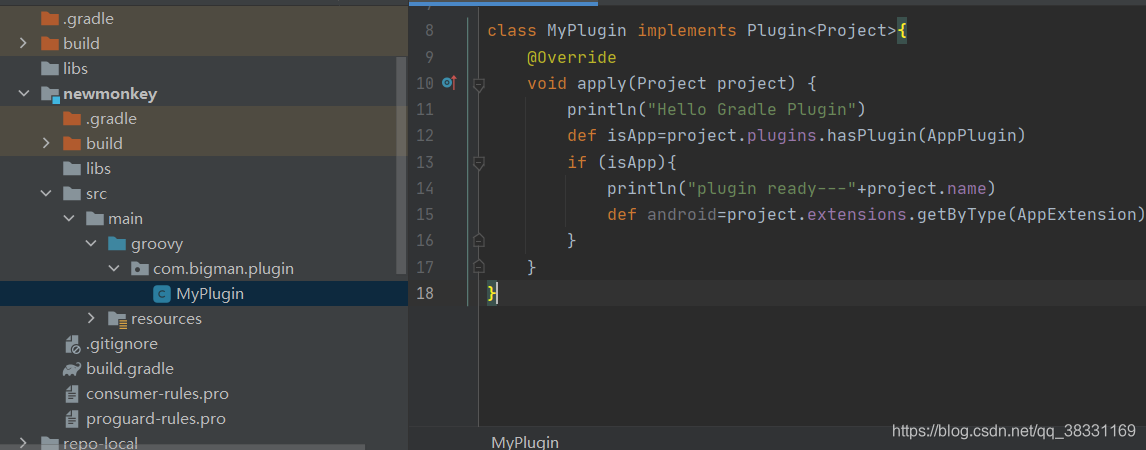
在这里调试,上边新建的时候就应该把代码写一部分
package com.bigman.plugin
import com.android.build.gradle.AppExtension
import com.android.build.gradle.AppPlugin
import org.gradle.api.Plugin
import org.gradle.api.Project;
class MyPlugin implements Plugin<Project>{
@Override
void apply(Project project) {
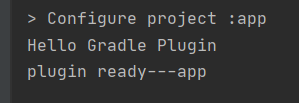
println("Hello Gradle Plugin")
def isApp=project.plugins.hasPlugin(AppPlugin)
if (isApp){
println("plugin ready---"+project.name)
def android=project.extensions.getByType(AppExtension)
}
}
}
和Java完全兼容,我们完全可以用java写,不过groovy提供了很多简单便捷的方法。
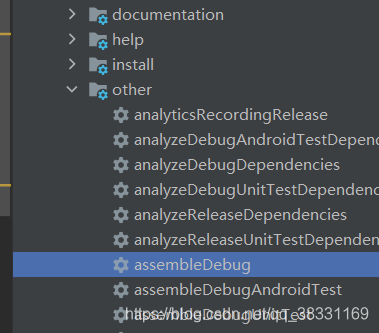
运行
Tasks->other->assembleDebug,这次不是自己的模块包
RES