简介
Thymleaf支持html原型,既可以让前端工程师在网页中打开,又可以让后端工程师结合真实数据查看效果。同时,Spring boot提供了Thymeleaf自动装配的解决方案,因此在Sping boot当中使用Thymeleaf非常方便。
步骤1:创建工程,添加依赖
这个就不用我细说了,直接建立一个Spring boot工程,然后在里面添加依赖即可,源码附上:
<?xml version="1.0" encoding="UTF-8"?>
<project xmlns="http://maven.apache.org/POM/4.0.0" xmlns:xsi="http://www.w3.org/2001/XMLSchema-instance"
         xsi:schemaLocation="http://maven.apache.org/POM/4.0.0 https://maven.apache.org/xsd/maven-4.0.0.xsd">
    <modelVersion>4.0.0</modelVersion>
    <parent>
        <groupId>org.springframework.boot</groupId>
        <artifactId>spring-boot-starter-parent</artifactId>
        <version>2.5.3</version>
        <relativePath/> <!-- lookup parent from repository -->
    </parent>
    <groupId>com.example</groupId>
    <artifactId>demo</artifactId>
    <version>0.0.1-SNAPSHOT</version>
    <name>Themeleaf</name>
    <description>Demo project for Spring Boot</description>
    <properties>
        <java.version>11</java.version>
    </properties>
    <dependencies>
        <dependency>
            <groupId>org.springframework.boot</groupId>
            <artifactId>spring-boot-starter-thymeleaf</artifactId>
        </dependency>
        <dependency>
            <groupId>org.springframework.boot</groupId>
            <artifactId>spring-boot-starter-web</artifactId>
        </dependency>

        <dependency>
            <groupId>org.springframework.boot</groupId>
            <artifactId>spring-boot-starter-test</artifactId>
            <scope>test</scope>
        </dependency>
    </dependencies>

    <build>
        <plugins>
            <plugin>
                <groupId>org.springframework.boot</groupId>
                <artifactId>spring-boot-maven-plugin</artifactId>
            </plugin>
        </plugins>
    </build>

</project>
步骤2:配置Thymeleaf
在配置之前,我首先想要向大家介绍的就是,Spring boot向Thymeleaf提供了自动化配置类ThemeleafAutoConfiguration,相关的配置属性在ThymeleafProperties中,其中,ThymeleafProperties的部分源码如图所示:
public class ThymeleafProperties {
    private static final Charset DEFAULT_ENCODING;
    public static final String DEFAULT_PREFIX = "classpath:/templates/";
    public static final String DEFAULT_SUFFIX = ".html";
    private boolean checkTemplate = true;
    private boolean checkTemplateLocation = true;
    private String prefix = "classpath:/templates/";
    private String suffix = ".html";
    private String mode = "HTML";
    private Charset encoding;
    private boolean cache;
    private Integer templateResolverOrder;
    private String[] viewNames;
    private String[] excludedViewNames;
    private boolean enableSpringElCompiler;
    private boolean renderHiddenMarkersBeforeCheckboxes;
    private boolean enabled;
    private final ThymeleafProperties.Servlet servlet;
    private final ThymeleafProperties.Reactive reactive;
当然,如果开发者想要对默认的Thymeleaf进行自定义的配置,那么代码可以如下:appliaction.properties
#是否开启缓存
spring.thymeleaf.cache=true
#检查模板是否存在
spring.thymeleaf.check-template=true
#检查模板位置是否存在,默认为true
spring.thymeleaf.check-template-location=true
#模板文件编码
spring.thymeleaf.encoding=UTF-8
#模板文件位置
spring.thymeleaf.prefix=classpath:/templates/
#Content-type配置
spring.thymeleaf.servlet.content-type=text/html
#模板文件后缀
spring.thymeleaf.suffix=.html
步骤3:配置实体类
这个实体类,我建立在一个dao的包下面,然后我引入的是一个lombook的依赖,这样会为我减少很多不必要的getter、setter的配置,代码如下:
package com.example.dao;

import jdk.jfr.DataAmount;
import lombok.Data;
import org.springframework.boot.context.properties.ConfigurationProperties;
import org.springframework.context.annotation.Configuration;

@Configuration
@Data
@DataAmount
public class Book {
    private  Integer id;
    private  String name;
    private String author;
}
配置Controller控制器
这一步是相当关键的,因为你需要在前端显示的内容就是在这里面进行编写的,所以说你这里面少不了@GetMapping还有@Controller的注解,然后的话return 就不要去直接返回对应的html,而是mv.setViewName(“books")
代码如下:
package com.example.controller;

import com.example.dao.Book;
import org.springframework.stereotype.Controller;
import org.springframework.web.bind.annotation.GetMapping;
import org.springframework.web.bind.annotation.RestController;
import org.springframework.web.servlet.ModelAndView;

import java.util.ArrayList;
import java.util.List;

@Controller
public class BookController {
    @GetMapping("/books")
        public ModelAndView books(){
        List<Book> books=new ArrayList<>();
        Book b1=new Book();
        b1.setId(1);
        b1.setAuthor("罗贯中");
        b1.setName("三国演义");
        Book b2=new Book();
        b2.setId(2);
        b2.setAuthor("曹雪芹");
        b2.setName("红楼梦");
        books.add(b1);
        books.add(b2);
        ModelAndView mv=new ModelAndView();
        mv.addObject("books",books);
        mv.setViewName("books");
        return mv;

    }
}
创建视图
这就直接在templates包下面进行创建
<!DOCTYPE html>
<html lang="en" xmlns:th="http://www.thymeleaf.org">
<head>
    <meta charset="UTF-8">
    <title>图书列表</title>
</head>
<body>
<table border="1">
    <tr>
        <td>图书编号</td>
        <td>图书名称</td>
        <td>图书作者</td>
    </tr>
    <tr th:each="book:${books}">
    <td th:text="${book.id}"></td>
    <td th:text="${book.name}"></td>
    <td th:text="${book.author}"></td>
    </tr>

</table>
</body>
</html>
进行测试
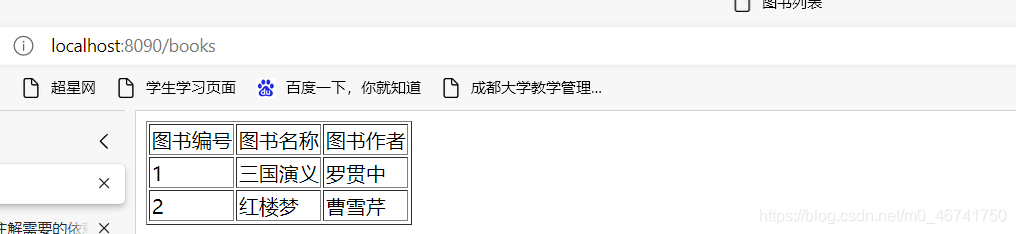
假如你显示的不是我下面这个页面,那么说明你的默认包配置错了,你需要在那个demo包下面的类当中进行一个注解的配置,像我这样:
package com.example.demo;

import org.springframework.boot.SpringApplication;
import org.springframework.boot.autoconfigure.SpringBootApplication;
import org.springframework.boot.autoconfigure.thymeleaf.ThymeleafAutoConfiguration;
@SpringBootApplication(scanBasePackages = "com.example.controller")

public class ThemeleafApplication {

    public static void main(String[] args) {
        SpringApplication.run(ThemeleafApplication.class, args);
    }

}
这个注解就是@SpringBootApplication
结构目录

总结
反正Spring这个大家族当中学习的东西还是很多的,明怀我写的不对的地方希望大家可以和我一起分享并且指正出我的错误来,蟹蟹大家啦!!!