spring boot项目基于redis集成Spring Cache实现缓存
一、环境
1、运行环境
目前场景是springboot项目集成了redis,如果还没有集成redis,建议浏览下面两篇文章
腾讯云服务器安装redis
spring boot项目集成redis
2、添加依赖
<!--   spring cache     -->
<dependency>
    <groupId>org.springframework.boot</groupId>
    <artifactId>spring-boot-starter-cache</artifactId>
</dependency>
二、编写缓存配置类
import com.fasterxml.jackson.annotation.JsonAutoDetect;
import com.fasterxml.jackson.annotation.PropertyAccessor;
import com.fasterxml.jackson.databind.ObjectMapper;
import com.fasterxml.jackson.databind.SerializationFeature;
import com.fasterxml.jackson.datatype.jsr310.JavaTimeModule;
import lombok.extern.slf4j.Slf4j;
import org.springframework.cache.CacheManager;
import org.springframework.cache.annotation.EnableCaching;
import org.springframework.cache.interceptor.KeyGenerator;
import org.springframework.context.annotation.Bean;
import org.springframework.context.annotation.Configuration;
import org.springframework.data.redis.cache.RedisCacheConfiguration;
import org.springframework.data.redis.cache.RedisCacheManager;
import org.springframework.data.redis.cache.RedisCacheWriter;
import org.springframework.data.redis.connection.RedisConnectionFactory;
import org.springframework.data.redis.serializer.Jackson2JsonRedisSerializer;
import org.springframework.data.redis.serializer.RedisSerializationContext;
import java.time.Duration;
import java.util.HashMap;
import java.util.Map;

/**
 * @className: CacheConfig
 * @description: 缓存配置类
 * @author: zzy
 * @create: 2021-07-20 15:39
 **/
@Slf4j
@Configuration
// 开启缓存
@EnableCaching
public class CacheConfig {


    // 默认超时时间:秒
    private final static int DEFAULT_EXIRE_TIME = 7200;

    /**
     * 以【类名全限定名】为缓存的key值
     * @return
     */
    @Bean
    public KeyGenerator classKey() {
        return (target, method, params) -> {
            StringBuilder sb = new StringBuilder();
            sb.append(target.getClass().getName());
            return sb.toString();
        };

    }

    /**
     * 以【类名+方法名+参数】为缓存的key值
     * @return
     */
    @Bean
    public KeyGenerator classMethodKey() {
        return (target, method, params) -> {
            StringBuilder sb = new StringBuilder();
            sb.append(target.getClass().getName());
            sb.append(".");
            sb.append(method.getName());
            return sb.toString();
        };
    }


    /**
     * 以【类名+方法名+参数】为缓存的key值
     * @return
     */
    @Bean
    public KeyGenerator classMethodParamsKey() {
        return (target, method, params) -> {
            StringBuilder sb = new StringBuilder();
            sb.append(target.getClass().getName());
            sb.append(".");
            sb.append(method.getName());
            for (Object obj : params) {
                sb.append("#");
                sb.append(obj == null ? "" : obj.toString());
            }
            return sb.toString();
        };
    }

    /**
     * 设置cache缓存过期时间
     * @param redisConnectionFactory
     * @return
     */
    @Bean
    public CacheManager cacheManager(RedisConnectionFactory redisConnectionFactory) {
        return new RedisCacheManager(
                RedisCacheWriter.nonLockingRedisCacheWriter(redisConnectionFactory),
                this.getRedisCacheConfigurationWithTtl(DEFAULT_EXIRE_TIME), // 默认策略,未配置的 key 会使用这个
                this.getRedisCacheConfigurationMap() // 指定 key 策略
        );
    }
    /**
     * 给指定类型的key设置过期时间
     * @return
     */
    private Map<String, RedisCacheConfiguration> getRedisCacheConfigurationMap() {
        Map<String, RedisCacheConfiguration> redisCacheConfigurationMap = new HashMap<>();
        //指定cache头名称为sysUser的方法缓存过期时间为100s
//        redisCacheConfigurationMap.put("sysUser", this.getRedisCacheConfigurationWithTtl(100));
        return redisCacheConfigurationMap;
    }

    /**
     * 设置默认过期时间
     * @param seconds
     * @return
     */
    private RedisCacheConfiguration getRedisCacheConfigurationWithTtl(Integer seconds) {
        Jackson2JsonRedisSerializer<Object> jackson2JsonRedisSerializer = new Jackson2JsonRedisSerializer<>(Object.class);
        ObjectMapper om = new ObjectMapper();
        om.setVisibility(PropertyAccessor.ALL, JsonAutoDetect.Visibility.ANY);
        om.enableDefaultTyping(ObjectMapper.DefaultTyping.NON_FINAL);
        // LocalDateTime时间类型存入redis中反序列化(spring cache)
        om.disable(SerializationFeature.WRITE_DATES_AS_TIMESTAMPS);
        om.registerModule(new JavaTimeModule());

        jackson2JsonRedisSerializer.setObjectMapper(om);
        RedisCacheConfiguration redisCacheConfiguration = RedisCacheConfiguration.defaultCacheConfig();
        redisCacheConfiguration = redisCacheConfiguration.serializeValuesWith(
                RedisSerializationContext
                        .SerializationPair
                        .fromSerializer(jackson2JsonRedisSerializer)
        ).entryTtl(Duration.ofSeconds(seconds));

        return redisCacheConfiguration;
    }
}
三、简单使用
缓存的操作主要有@Cacheable、@CachePut、@CacheEvict
这里以@Cacheable和@CacheEvict的简单使用做个示例
1、@Cacheable
Spring 在执行 @Cacheable 标注的方法前先查看缓存中是否有数据,如果有数据,则直接返回缓存数据;若没有数据,执行该方法并将方法返回值放进缓存。 参数: value缓存名、 key缓存键值、 condition满足缓存条件、unless否决缓存条件
// 代码仅为注解的使用做一个示例
@Cacheable(value = "student", key = "'com.study.coursehelper.demo.controller.StudentController'")
@RequestMapping("listAll")
@ResponseBody
public Msg listAll(Student student,
                  @RequestParam(defaultValue = "1") int page,
                  @RequestParam(defaultValue = "5") int limit) {
   log.info("listAll入参: {} page:{} limit:{}",student,page,limit);
   Page<Student> studentPage = new Page<>(page,limit);
   LambdaQueryWrapper<Student> studentLambdaQueryWrapper = new LambdaQueryWrapper<>();
   //姓名模糊查询
   if(!StringUtils.isEmpty(student.getName())){
       studentLambdaQueryWrapper.like(Student::getName,student.getName());
   }
   IPage<Student> studentIPage = studentService.page(studentPage,studentLambdaQueryWrapper);
   Msg result = Msg.okCountData(studentIPage.getTotal(),studentIPage.getRecords());
   log.info("listAll出参: {}",result);
   return result;
}
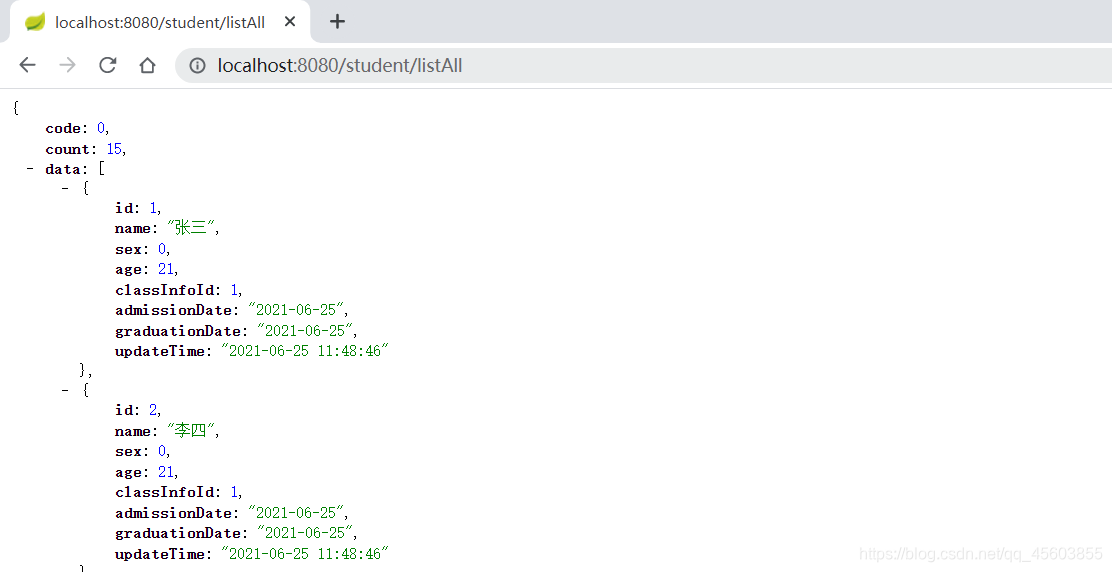
在浏览器请求http://localhost:8080/student/listAll

可以看到redis数据库已经存入数据

并且可以看到第一次请求时,查询数据库,之后的请求会直接从缓存中获取,所以控制台只打印了一次sql

2、@CacheEvict
方法执行成功后会从缓存中移除相应数据。 参数: value缓存名、 key缓存键值、 condition满足缓存条件、 unless否决缓存条件、 allEntries是否移除所有数据(设置为true时会移除所有缓存)
// 代码仅为注解的使用做一个示例
@CacheEvict(value = "student", key = "'com.study.coursehelper.demo.controller.StudentController'")
@RequestMapping("/update")
@ResponseBody
public boolean update(Student student){
    log.info("update入参: {}",student);
    return studentService.updateById(student);
}
调用该方法后会发现redis数据库中对应的数据被清除了
