SpringMVC实现CURD
没有用到mybatis,spring,单纯的SpringMVC,更好去理解SpringMVC的工作流程和原理。
数据库设计

配置文件操作
一、基本流程:
1.创建Maven项目,pom.xml文件导入依赖
2.配置文件
bean.xml(前端控制器,初始化springmvc配置文件)
springmvc.xml配置文件(组件扫描器scan,开启注解)
要连接数据库:
一个db.properties,以及三个自己写的封装类(连接数据库,写sql语句,测试两个有没有通)
3. pojo,dao,service,controller,tools
4.添加、修改、显示所有的三个页面(jsp的话记得头部加jstl等一些库)
二、项目结构

pom.xml
<?xml version="1.0" encoding="UTF-8"?>
<project xmlns="http://maven.apache.org/POM/4.0.0" xmlns:xsi="http://www.w3.org/2001/XMLSchema-instance"
         xsi:schemaLocation="http://maven.apache.org/POM/4.0.0 http://maven.apache.org/xsd/maven-4.0.0.xsd">
  <modelVersion>4.0.0</modelVersion>

  <groupId>com.yty</groupId>
  <artifactId>SpringMVC_07</artifactId>
  <version>1.0-SNAPSHOT</version>
  <packaging>war</packaging>

  <dependencies>
    <dependency>
      <groupId>junit</groupId>
      <artifactId>junit</artifactId>
      <version>3.8.1</version>
      <scope>test</scope>
    </dependency>

    <dependency>
      <groupId>javax.servlet</groupId>
      <artifactId>javax.servlet-api</artifactId>
      <version>3.0.1</version>
      <scope>provided</scope>
    </dependency>

    <!-- springmvc需要的依赖 -->
    <dependency>
      <groupId>org.springframework</groupId>
      <artifactId>spring-test</artifactId>
      <version>4.3.14.RELEASE</version>
    </dependency>

    <dependency>
      <groupId>org.springframework</groupId>
      <artifactId>spring-webmvc</artifactId>
      <version>4.3.14.RELEASE</version>
    </dependency>

    <!-- 返回数据要在页面展示;使用jsp的方式来展示数据 -->
    <dependency>
      <groupId>javax.servlet</groupId>
      <artifactId>jstl</artifactId>
      <version>1.2</version>
    </dependency>

    <dependency>
      <groupId>org.springframework</groupId>
      <artifactId>spring-orm</artifactId>
      <version>4.3.14.RELEASE</version>
    </dependency>

    <dependency>
      <groupId>org.springframework</groupId>
      <artifactId>spring-oxm</artifactId>
      <version>4.3.14.RELEASE</version>
    </dependency>

    <dependency>
      <groupId>taglibs</groupId>
      <artifactId>standard</artifactId>
      <version>1.1.2</version>
    </dependency>

    <dependency>
      <groupId>org.aspectj</groupId>
      <artifactId>aspectjrt</artifactId>
      <version>1.9.1</version>
    </dependency>
    <dependency>
      <groupId>org.aspectj</groupId>
      <artifactId>aspectjweaver</artifactId>
      <version>1.9.1</version>
    </dependency>

    <dependency>
      <groupId>org.projectlombok</groupId>
      <artifactId>lombok</artifactId>
      <version>1.16.18</version>
      <scope>provided</scope>
    </dependency>

    <dependency>
      <groupId>mysql</groupId>
      <artifactId>mysql-connector-java</artifactId>
      <version>5.1.18</version>
    </dependency>

    <dependency>
      <groupId>com.mchange</groupId>
      <artifactId>c3p0</artifactId>
      <version>0.9.5.3</version>
    </dependency>

    <dependency>
      <groupId>commons-dbutils</groupId>
      <artifactId>commons-dbutils</artifactId>
      <version>1.6</version>
    </dependency>

   </dependencies>

  </project>
springmvc.xml(springmvc的配置文件)
<?xml version="1.0" encoding="UTF-8"?>
<beans xmlns="http://www.springframework.org/schema/beans"
       xmlns:xsi="http://www.w3.org/2001/XMLSchema-instance"
       xmlns:context="http://www.springframework.org/schema/context"
       xmlns:mvc="http://www.springframework.org/schema/mvc"
       xsi:schemaLocation="http://www.springframework.org/schema/mvc http://www.springframework.org/schema/mvc/spring-mvc-4.0.xsd
        http://www.springframework.org/schema/beans http://www.springframework.org/schema/beans/spring-beans-4.0.xsd
        http://www.springframework.org/schema/context http://www.springframework.org/schema/context/spring-context-4.0.xsd">

    <!--1.组件扫描器,扫包-->
    <context:component-scan base-package="com.yty.controller"></context:component-scan>
    <!--2.开启注解-->
    <mvc:annotation-driven></mvc:annotation-driven>
</beans>
web.xml
<!DOCTYPE web-app PUBLIC
 "-//Sun Microsystems, Inc.//DTD Web Application 2.3//EN"
 "http://java.sun.com/dtd/web-app_2_3.dtd" >

<web-app>
  <display-name>Archetype Created Web Application</display-name>

  <!--1.前端控制器-->
  <servlet>
    <servlet-name>OneServlet</servlet-name>
    <servlet-class>org.springframework.web.servlet.DispatcherServlet</servlet-class>
    <!--2.初始化配置文件-->
    <init-param>
      <param-name>contextConfigLocation</param-name>
      <param-value>classpath:springmvc.xml</param-value>
    </init-param>
  </servlet>
  <servlet-mapping>
    <servlet-name>OneServlet</servlet-name>
    <url-pattern>*.do</url-pattern>
  </servlet-mapping>

</web-app>
c3p0.properties数据库文件
driver=com.mysql.jdbc.Driver
url=jdbc:mysql://localhost:3306/test?characterEncoding=utf-8
username=root
password=123456

initialSize=30
maxTotal=30
maxIdle=10
minIdle=5
maxSize=100
maxWaitMillis=1000
三个工具类:
1.C3p0Comm.java
连接数据库。
public class C3p0Comm {
	public static Connection getConnection() throws IOException, PropertyVetoException, SQLException {

		FileInputStream fileInputStream=new FileInputStream("数据库文件");
		Properties properties=new Properties();
		properties.load(fileInputStream);

		String driver=properties.getProperty("driver");
		String url=properties.getProperty("url");
		String username=properties.getProperty("username");
		String password=properties.getProperty("password");

		ComboPooledDataSource comboPooledDataSource=new ComboPooledDataSource();
		comboPooledDataSource.setDriverClass(driver);
		comboPooledDataSource.setJdbcUrl(url);
		comboPooledDataSource.setUser(username);
		comboPooledDataSource.setPassword(password);

		return comboPooledDataSource.getConnection();
	}
}
2.Dbutils.java
将增删改查方法封装到这个类中来。
public class Dbutils {
    Connection connection=null;

    //查询所有
    public List<User> queryAllUser() throws Exception{
        connection=C3p0Comm.getConnection();
        String sql="select * from user_nt";
        QueryRunner queryRunner=new QueryRunner();
        System.out.println("查询所有成功!");
        return queryRunner.query(connection,sql,new BeanListHandler<User>(User.class));
    }

    //添加数据到数据库中
    public void addUser(User user) throws Exception {
        connection=C3p0Comm.getConnection();
        String sql="insert into user_nt(name,age,address) values(?,?,?)";
        QueryRunner queryRunner=new QueryRunner();
        int count= queryRunner.update(connection, sql, user.getName(),user.getAge(),user.getAddress());
        System.out.println("插入"+count+"成功!!");
    }

    //删除数据
    public void delUser(int id) throws Exception {
        connection=C3p0Comm.getConnection();
        String sql="delete from user_nt where id=?";
        QueryRunner queryRunner=new QueryRunner();
        int count=queryRunner.update(connection,sql,id);
        System.out.println("删除"+count+"数据成功!!!");
    }

    //修改方法
    public void upUser(User user,int id) throws Exception {
        connection=C3p0Comm.getConnection();
        String sql="update user_nt set name=?,age=?,address=? where id=?";
        QueryRunner queryRunner=new QueryRunner();
        int count=queryRunner.update(connection, sql, user.getName(),user.getAge(),user.getAddress(),id);
        System.out.println("修改"+count+"数据成功!!!");
    }

    //根据条件查询
    public User queryUserById(int id) throws Exception{
        connection=C3p0Comm.getConnection();
        String sql="select *from user_nt where id=?";
        QueryRunner queryRunner=new QueryRunner();
        return queryRunner.query(connection,sql,new BeanHandler<User>(User.class),id);
    }
}
3.test.java
用来测试上面两个自己封装的类有没有错误!
public class test {
    public static void main(String[] args) throws Exception {
        System.out.println(C3p0Comm.getConnection());
    }
}
前期配置方面就全部弄好了,之后就进行分层来实现curd了。
三、代码编写
1.pojo层
User
@NoArgsConstructor
@Data
@AllArgsConstructor
public class User {
    private int id;
    private String name;
    private int age;
    private Date birthday;
    private String address;
}
2.dao层
UserDao
public interface UserDao {
    //查询所有
    public List<User> queryAll() throws Exception;
    //添加
    public void add(User user) throws Exception;
    //删除
    public void del(int id) throws Exception;
    //修改通过id
    public void updateById(User user,int id) throws Exception;
    //查询单个通过id
    public User queryById(int id) throws Exception;
}
UserDaoImpl
public class UserDaoImpl implements UserDao {
    //dao层引入封装好的Dbutils
    Dbutils dbutils=new Dbutils();

    //查询所有
    public List<User> queryAll() throws Exception {
        return dbutils.queryAllUser();
    }
    //添加
    public void add(User user) throws Exception {
        dbutils.addUser(user);
    }
    //删除
    public void del(int id) throws Exception {
        dbutils.delUser(id);
    }
    //修改通过id
    public void updateById(User user, int id) throws Exception {
        dbutils.upUser(user, id);
    }
    //查询单个通过id
    public User queryById(int id) throws Exception {
        return dbutils.queryUserById(id);
    }
}
3.service层
UserService
public interface UserService {
    //查询所有
    public List<User> queryAllSer() throws Exception;
    //添加
    public void addSer(User user) throws Exception;
    //删除
    public void delSer(int id) throws Exception;
    //修改通过id
    public void updateByIdSer(User user,int id) throws Exception;
    //查询单个通过id
    public User queryByIdSer(int id) throws Exception;
}
UserServiceImpl
public class UserServiceImpl implements UserService {
    //service层调dao层
    UserDaoImpl userDao=new UserDaoImpl();

    //查询所有
    public List<User> queryAllSer() throws Exception {
        return userDao.queryAll();
    }
    //添加
    public void addSer(User user) throws Exception {
        userDao.add(user);
    }
    //删除
    public void delSer(int id) throws Exception {
        userDao.del(id);
    }
    //修改通过id
    public void updateByIdSer(User user, int id) throws Exception {
        userDao.updateById(user, id);
    }
    //查询单个通过id
    public User queryByIdSer(int id) throws Exception {
        return userDao.queryById(id);
    }
}
4.controller层
UserController
@Controller
public class UserController {
    //controller层调service层
    UserServiceImpl userService=new UserServiceImpl();

    //查询所有
    @RequestMapping("/queryAll.do")
    public ModelAndView queryAll() throws Exception {
        System.out.println("进入查询所有的controller里面了!");
        List<User> list = userService.queryAllSer();
        //使用ModelAndView封装查询到的数据并返到前端
        ModelAndView modelAndView = new ModelAndView();
        modelAndView.addObject("list",list);
        modelAndView.setViewName("list.jsp");
        return modelAndView;
    }

    //添加
    //1.先接收到跳转的请求,然后跳转到添加的页面
    @RequestMapping("/add.do")
    public String add(HttpServletResponse response,HttpServletRequest request) throws Exception {
        System.out.println("第一次添加,跳转到添加页面!");
        //1.1 ModelAndView返数据
//        ModelAndView modelAndView = new ModelAndView();
//        modelAndView.setViewName("add.jsp");
//        return modelAndView;
        //1.2 重定向
//        response.sendRedirect("add.jsp");
        //1.3 请求转发
//        request.getRequestDispatcher("add.jsp").forward(request,response);
        //1.4 SpringMVC提供的简化的方式:只要在返回视图时,使用如下方式指定即可:
//        request.setAttribute("name","zhangsan");然后通过getAttribute来取值,还可以改成session,这两都是在这个域表示
//        return "redirect:add.jsp";
        return "forward:add.jsp";
    }

    //2.真正的添加
    @RequestMapping("/addTrue.do")
    public ModelAndView addTrue(User user) throws Exception {
        System.out.println("开始添加了!");
        System.out.println(user.getName()+"\t"+user.getAge()+"\t"+user.getAddress());
        userService.addSer(user);
        return queryAll();
    }

    //删除
    @RequestMapping("/del.do")
    public String del(int id) throws Exception {
        System.out.println("进入删除的controller了!");
        userService.delSer(id);
        //1.这是直接返回查询所有的方法,所以上面方法名前为ModelAndView
//        return queryAll();
        //2.这是直接返回查询所有的controller,两者差不多,方法名前为String
//        return "/queryAll.do";
        //3.还可以用重定向,转发,但是要在括号里加request,response
        //4.直接用SpringMVC提供的简化的方式:只要在返回视图时,使用如下方式指定即可(同真正的添加)
        return "redirect:/queryAll.do";
    }

    //修改(先查询单个然后修改,所有的都是)
    //1.先查询到要修改的id的全部信息,然后带数据返回到修改的页面
    @RequestMapping("update.do")
    public ModelAndView update(int id) throws Exception {
        User user = userService.queryByIdSer(id);
        System.out.println(user);
        ModelAndView modelAndView = new ModelAndView();
        modelAndView.addObject("abc",user);
        modelAndView.setViewName("update.jsp");
        return modelAndView;
    }
    //2.真正的修改
    @RequestMapping("updateTrue.do")
    public String updateTrue(User user,int id) throws Exception {
        userService.updateByIdSer(user,id);
//        return queryAll();
        return "redirect:/queryAll.do";
    }
}
其中返回的方式有很多种,上面代码的注释里面有写到。比如:


5.前端页面的编写
1.list.jsp
<%@ page contentType="text/html;charset=UTF-8" language="java" isELIgnored="false" pageEncoding="utf-8" %>
<%@ taglib prefix="c" uri="http://java.sun.com/jsp/jstl/core" %>
<%@ taglib uri="http://java.sun.com/jsp/jstl/fmt" prefix="fmt"%>
<html>
<head>
    <title>展示全部数据</title>
</head>
<body>
<center><h2>用户信息展示:</h2></center>
<table width=100% border=1>
    <tr>
        <th>用户id</th>
        <th>姓名</th>
        <th>年龄</th>
        <th>生日</th>
        <th>地址</th>
        <th>操作</th>
    </tr>

    <!-- 从第二行进行循环取值 -->
    <c:forEach items="${list}" var="user1">
        <tr>
            <td>${user1.id}</td>
            <td>${user1.name}</td>
            <td>${user1.age}</td>
            <td>${user1.birthday}</td>
            <td>${user1.address}</td>
            <td>
                <a href="update.do?id=${user1.id}">修改</a>
                <a href="del.do?id=${user1.id}">删除</a>
            </td>
        </tr>
    </c:forEach>
</table>
<a href="add.do">添加用户</a>
</body>
</html>
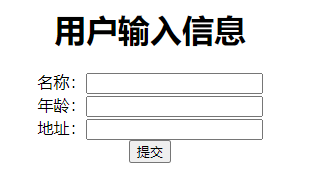
2.add.jsp
<%@ page contentType="text/html;charset=UTF-8" language="java" %>
<html>
<head>
    <title>添加页面</title>
</head>
<body>

<center>
    <h1>用户输入信息</h1>
    <form action="/addTrue.do" method="get">
        名称:<input type="text" name="name"><br>
        年龄:<input type="text" name="age"><br>
        地址:<input type="text" name="address"/><br>
        <input type="submit" value="提交" >
    </form>
</center>

</body>
</html>
3.update.jsp
<%@ page contentType="text/html;charset=UTF-8" language="java" isELIgnored="false" pageEncoding="utf-8" %>
<%@ taglib prefix="c" uri="http://java.sun.com/jsp/jstl/core" %>
<%@ taglib uri="http://java.sun.com/jsp/jstl/fmt" prefix="fmt"%>
<html>
<head>
    <title>修改页面</title>
</head>
<body>

<center>
    <h1>用户修改信息的页面</h1>
    <form action="/updateTrue.do" method="get">
        <input type="hidden" name="id" value="${abc.id }"/><br>
        姓名:<input type="text" name="name" value="${abc.name }"/><br>
        年龄:<input type="text" name="age" value="${abc.age}"/><br>
        地址:<input type="text" name="address"   value="${abc.address }"/><br>
        <input type="submit" value="提交" >
    </form>
</center>

</body>
</html>
6.测试结果
1.查询所有的界面

2.添加界面


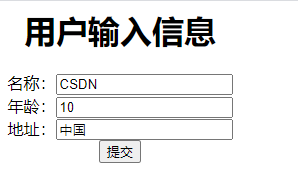
3.修改界面
