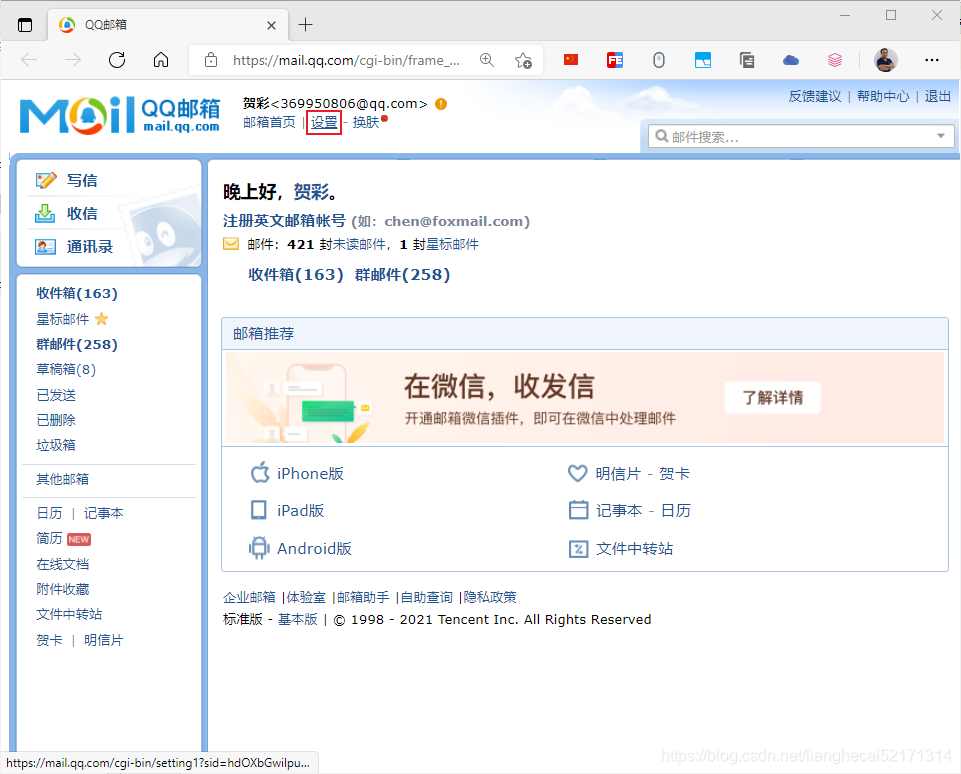
第一步:QQ邮箱开启邮箱授权码

切换到账户选项卡:

拉到下方 找到POP3/IMAP/SMTP服务,开启POP3/SMTP服务:


oxdlgmtkqtnbbjdg
第二步:导入依赖
创建SpringBoot项目,导入Maven依赖:
<dependency>
    <groupId>org.springframework.boot</groupId>
    <artifactId>spring-boot-starter-mail</artifactId>
</dependency>
第三步:配置文件
spring:
  mail:
    host: smtp.qq.com #发送邮件服务器
    username: 369950806@qq.com  #发送邮件的邮箱地址
    password: oxdlgmtkqtnbbjdg   #客户端授权码,不是邮箱密码,这个在qq邮箱设置里面自动生成的
    properties.mail.smtp.port: 465 #端口号465或587
    properties.mail.smtp.starttls.enable: true
    properties.mail.smtp.starttls.required: true
    properties.mail.smtp.ssl.enable: true
    default-encoding: utf-8
第四步:接口
public interface EmailService {

    /**
     * 发送文本邮件
     *
     * @param from    发送人
     * @param to      收件人
     * @param cc      抄送人
     * @param subject 主题
     * @param content 内容
     */
    void sendTextEmail(String from,String to,String cc, String subject, String content);

    /**
     * 发送HTML邮件
     *
     * @param from    发送人
     * @param to      收件人
     * @param subject 主题
     * @param content 内容
     */
    void sendMimeEmail(String from,String to, String subject, String content);

    /**
     * 发送带附件的邮件
     *
     * @param from    发送人
     * @param to       收件人
     * @param subject  主题
     * @param content  内容
     * @param file 附件
     */
    public void sendsAttachmentEmail(String from,String to, String subject, String content, String file);
}
第五步:实现类
@Slf4j
@Service
public class EmailServiceImpl implements EmailService {

    @Resource
    private JavaMailSender sender;

    @Override
    public void sendTextEmail(String from,String to, String cc, String subject, String content) {
        SimpleMailMessage message = new SimpleMailMessage();
        //发件人
        message.setFrom(from);
        //收件人
        message.setTo(to);
        //抄送人
        message.setCc(cc);
        //邮件主题
        message.setSubject(subject);
        //邮件内容
        message.setText(content);
        //发送邮件
        sender.send(message);
    }

    @Override
    public void sendMimeEmail(String from,String to, String subject, String content) {
        MimeMessage message = sender.createMimeMessage();
        try {
            MimeMessageHelper helper = new MimeMessageHelper(message,true);
            helper.setFrom(from);
            helper.setTo(to);
            message.setSubject(subject);
            helper.setText(content,true);
            sender.send(message);
            log.info("邮件已经发送!");
        } catch (MessagingException e) {
            log.error("发送邮件时发生异常:"+e);
        }
    }

    @Override
    public void sendsAttachmentEmail(String from,String to, String subject, String content, String file) {
        MimeMessage message = sender.createMimeMessage();
        try {
            MimeMessageHelper helper = new MimeMessageHelper(message,true);
            helper.setFrom(from);
            helper.setTo(to);
            helper.setSubject(subject);
            helper.setText(content,true);
            //携带附件
            FileSystemResource fsr = new FileSystemResource(file);
            String fileName = file.substring(file.lastIndexOf("/"));
            helper.addAttachment(fileName,fsr);

            sender.send(message);
            log.info("邮件加附件发送成功!");
        } catch (MessagingException e) {
            log.error("发送失败:"+e);
        }
    }

}
第六步:测试代码
@SpringBootTest
class MailDemoApplicationTests {

    @Resource
    private EmailService emailService;

    @Test
    public void sendSimpleEmail(){
        String content = "好好学习,天天向上";
        emailService.sendTextEmail("369950806@qq.com","3433698914@qq.com","hcitlife@hotmail.com","哈哈",content);
    }

    @Test
    public void sendMimeEmail(){
        String content = "<a href='https://blog.csdn.net/lianghecai52171314/'>注册成功,点击链接激活</a>";
        emailService.sendMimeEmail("369950806@qq.com","3433698914@qq.com","激活邮件",content);
    }

    @Test
    public void sendsAttachmentEmail1(){
        emailService.sendsAttachmentEmail("369950806@qq.com","3433698914@qq.com","带附件的邮件","美女","E:/图片/mm01.jpg");
    }

    @Test
    public void sendsAttachmentEmail2(){
        emailService.sendsAttachmentEmail("369950806@qq.com","3433698914@qq.com","带附件的邮件","美女","E:/图片/zbjbxf.mp3");
    }

    @Test
    void fun(){
        File file = new File("E:/图片/mm01.jpg");
        System.out.println(file.getName());
    }

}