环境搭建
gradle 安装
先不要安装,下文会提示安装
https://gradle.org/releases/ 下载解压
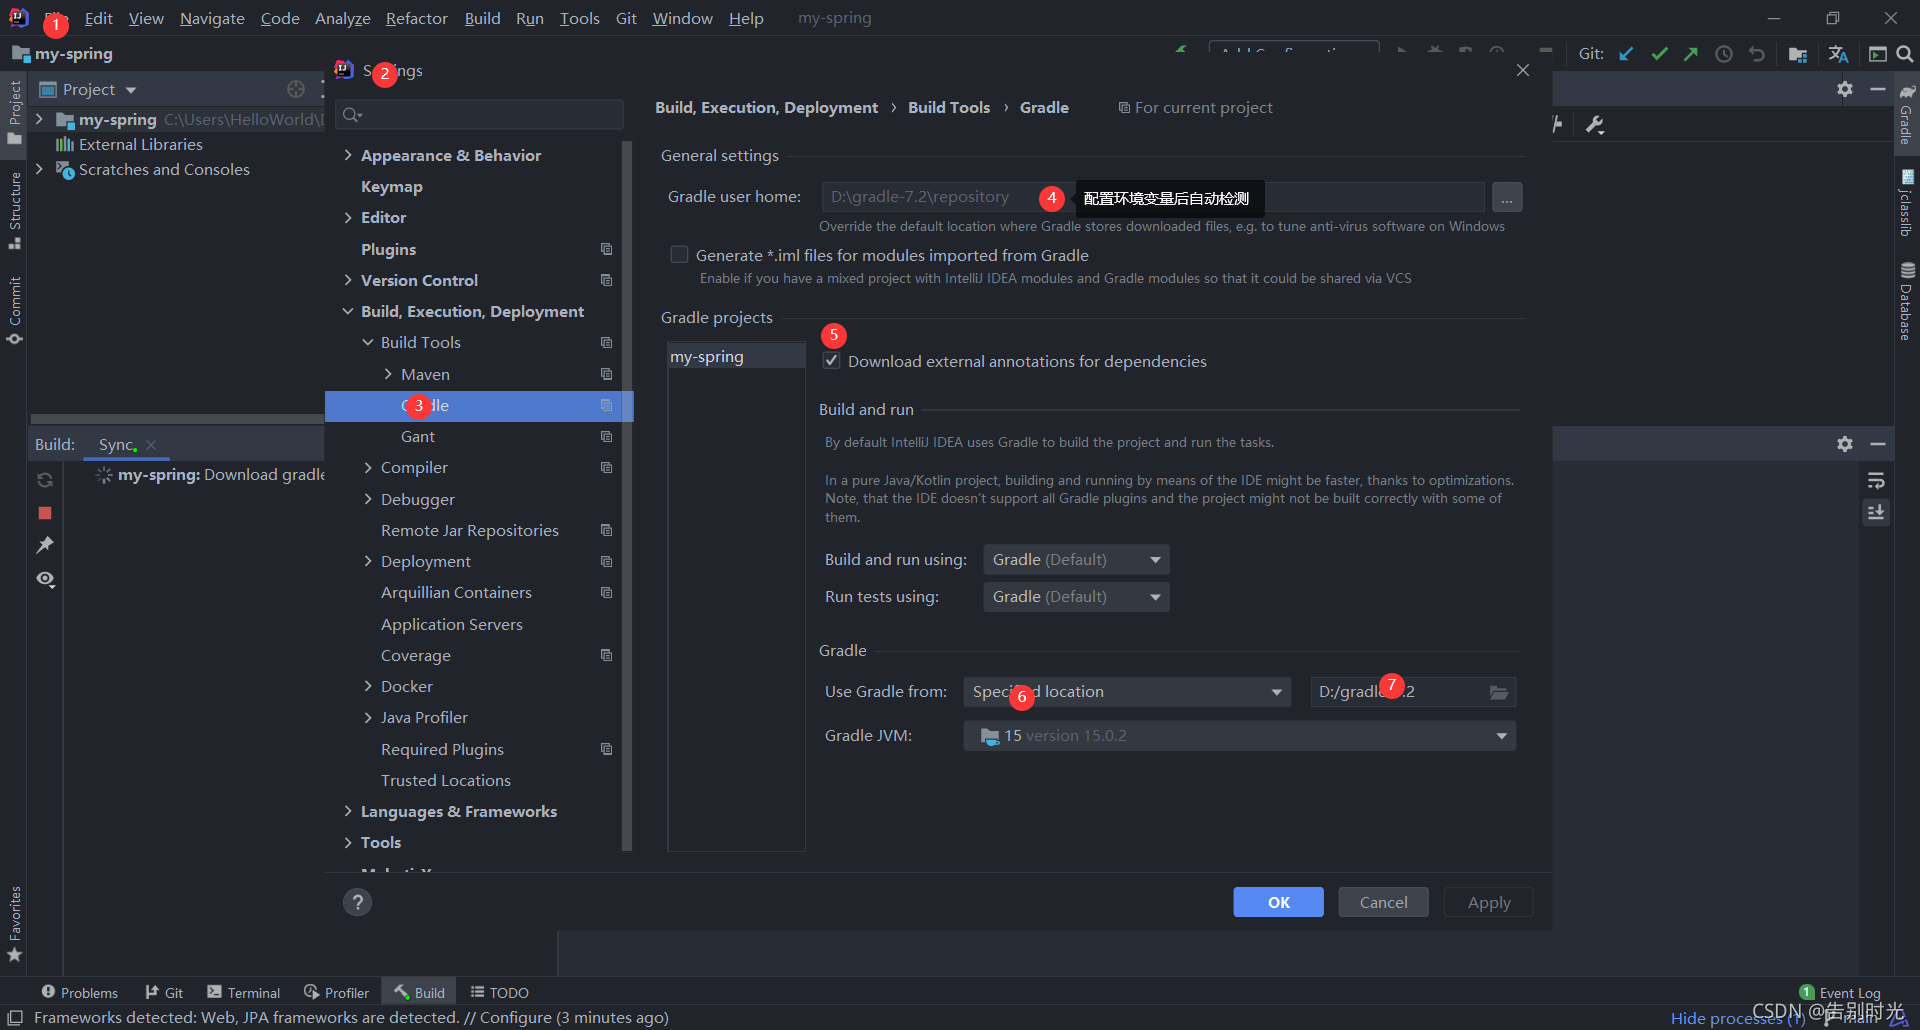
配置如下环境变量(在系统变量中配置)
GRADLE_HOME gradle 解压目录
GRADLE_USER_HOME gradle 本地仓库(自定义)
%GRADLE_HOME%\bin gradle bin 目录
给 gradle 安装目录下 init.d 文件夹下,创建一个 init.gradle 文件,内容如下
gradle.projectsLoaded {
rootProject.allprojects {
buildscript {
repositories {
def JCENTER_URL = 'https://maven.aliyun.com/repository/jcenter'
def GOOGLE_URL = 'https://maven.aliyun.com/repository/google'
def NEXUS_URL = 'https://maven.aliyun.com/nexus/content/repositories/jcenter'
all { ArtifactRepository repo ->
if (repo instanceof MavenArtifactRepository) {
def url = repo.url.toString()
if (url.startsWith('https://jcenter.bintray.com/')) {
project.logger.lifecycle "Repository ${repo.url} replaced by $JCENTER_URL."
println("buildscript ${repo.url} replaced by $JCENTER_URL.")
remove repo
}
else if (url.startsWith('https://dl.google.com/dl/android/maven2/')) {
project.logger.lifecycle "Repository ${repo.url} replaced by $GOOGLE_URL."
println("buildscript ${repo.url} replaced by $GOOGLE_URL.")
remove repo
}
else if (url.startsWith('https://repo1.maven.org/maven2')) {
project.logger.lifecycle "Repository ${repo.url} replaced by $REPOSITORY_URL."
println("buildscript ${repo.url} replaced by $REPOSITORY_URL.")
remove repo
}
}
}
jcenter {
url JCENTER_URL
}
google {
url GOOGLE_URL
}
maven {
url NEXUS_URL
}
}
}
}
后续如果构建失败,删除该文件或清空该文件的内容
idea 整合 gradle

idea 推荐 2020.3.x
jdk 推荐 jdk8 以上版本,当前使用 jdk15
源码克隆
Spring在github上的仓库地址是:https://github.com/spring-projects/spring-framework
Spring在码云上的仓库地址是:https://gitee.com/mirrors/Spring-Framework
推荐克隆到自己仓库中,如下

查看源码所需的 gradle 版本后再安装对应的 gradle 版本

源码构建
使用 idea 打开源码

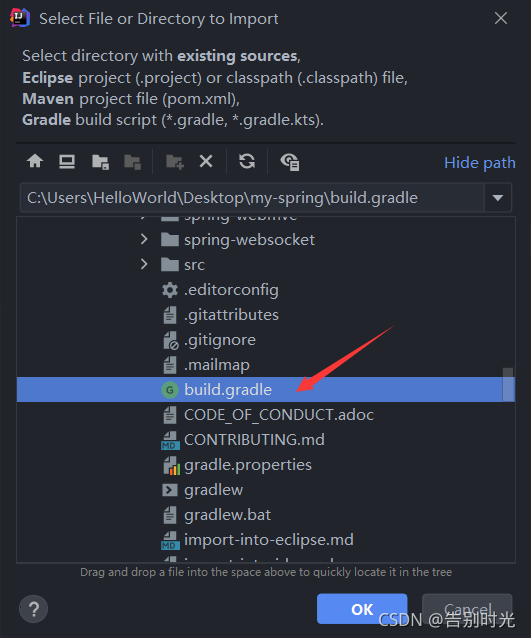
找到源码中的 build.gradle 文件点击 ok 开始源码构建(时间较长)

idea 可能会重新下载 gradle,点击取消,重新设置 gradle 即可