多环境Apollo配置中心搭建整合SpringBoot
Apollo多环境分布式部署
Apollo分布式部署,本次采用三台服务器。portal服务一台、fat环境一台(adminservice和configservice)、uat环境一台(adminservice和configservice)。环境搭建完毕,整合SpringBoot实现多环境切换。
一、 Apollo各个模块简介(引用自Apollo官网)
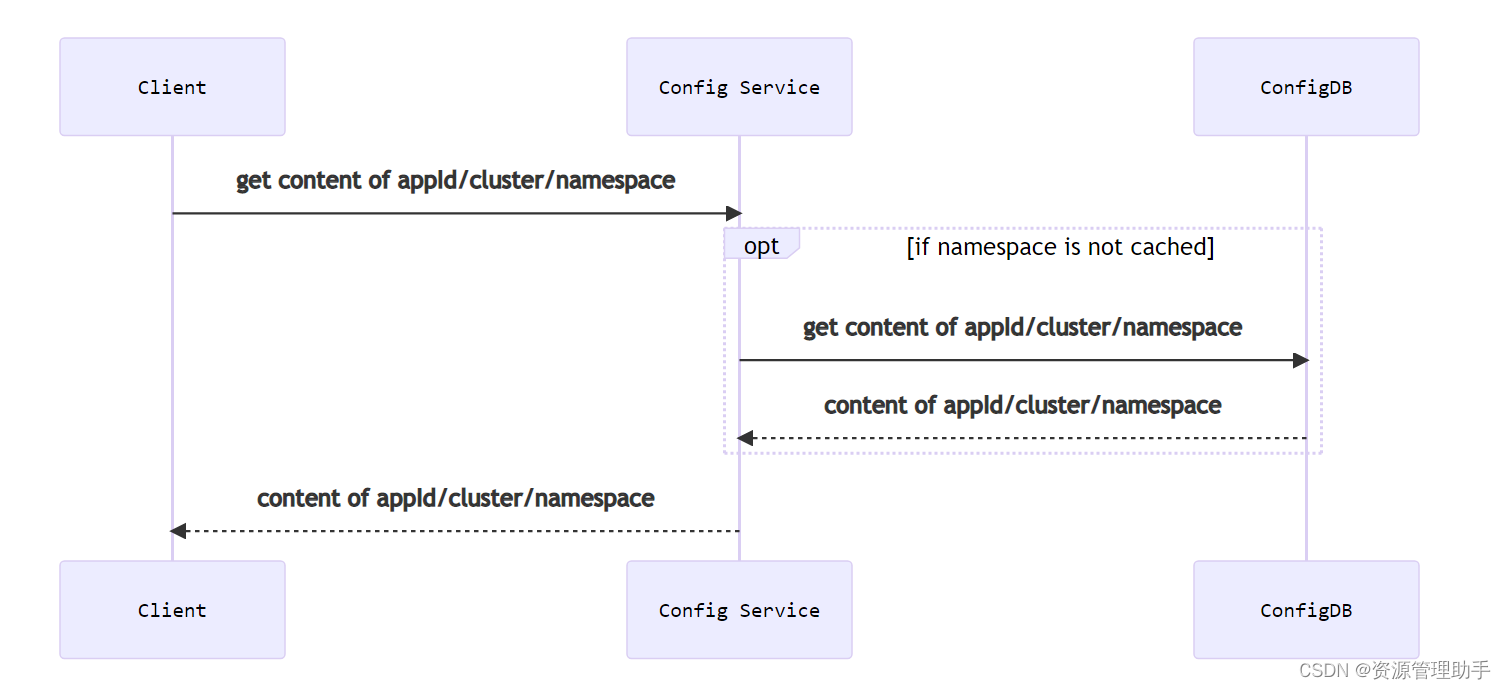
1.Config Service
- 提供配置获取接口
- 提供配置更新推送接口(基于Http long polling)
- 接口服务对象为Apollo客户端

2.Admin Service
- 提供配置管理接口
- 提供配置修改、发布等接口
- 接口服务对象为Portal
3.Meta Server
- Portal通过域名访问Meta Server获取Admin Service服务列表(IP+Port)
- Client通过域名访问Meta Server获取Config Service服务列表(IP+Port)
- Meta Server从Eureka获取Config Service和Admin Service的服务信息,相当于是一个Eureka Client
- 增设一个Meta Server的角色主要是为了封装服务发现的细节,对Portal和Client而言,永远通过一个Http接口获取Admin Service和Config Service的服务信息,而不需要关心背后实际的服务注册和发现组件
- Meta Server只是一个逻辑角色,在部署时和Config Service是在一个JVM进程中的,所以IP、端口和Config Service一致
4.Eureka
- 基于Eureka和Spring Cloud Netflix提供服务注册和发现
- Config Service和Admin Service会向Eureka注册服务,并保持心跳
- 为了简单起见,目前Eureka在部署时和Config Service是在一个JVM进程中的(通过Spring Cloud Netflix)
5.Portal
- 提供Web界面供用户管理配置
- 通过Meta Server获取Admin Service服务列表(IP+Port),通过IP+Port访问服务
- 在Portal侧做load balance、错误重试
6.Client
- Apollo提供的客户端程序,为应用提供配置获取、实时更新等功能
- 通过Meta Server获取Config Service服务列表(IP+Port),通过IP+Port访问服务
- 在Client侧做load balance、错误重试
二、 本次环境搭建说明
1.服务器说明
- Portal 192.168.16.129
- FAT环境 192.168.16.130
- UAT环境 192.168.16.131
2.服务部署说明
- Portal 服务只需要部署一个即可(数据库只需要一个),一个Portal可以管理多个环境。
- 每一个环境对应一套AdminService和ConfigService,每个环境需要对应一个数据库。
3.部署结构图

三、环境搭建
1.服务包下载
- apollo-portal
- apollo-adminservice
- apollo-configservice
解压之后目录如下:

2.配置Portal服务
- 修改数据库地址:
修改apollo-portal/config/application-github.properties文件
spring.datasource.url = jdbc:mysql://192.168.1.9:3306/apolloportaldb?characterEncoding=utf8&serverTimezone=Asia/Shanghai
spring.datasource.username = root
spring.datasource.password = 1234
- 修改portal管理的meta所在的地址
修改 apollo-portal/config/apollo-env.properties 文件
此处只有fat和uat环境因此只需配置这两个环境对应的meta地址即可
fat.meta=http://192.168.16.130:8080
uat.meta=http://192.168.16.131:8080
3.配置Admin服务
- 修改fat环境的数据库地址:
修改apollo-adminservice/config/application-github.properties文件
此处的数据地址为fat环境configservice服务所使用的的数据库
spring.datasource.url = jdbc:mysql://192.168.1.9:3306/apolloconfigdb-fat?characterEncoding=utf8&serverTimezone=Asia/Shanghai
spring.datasource.username = root
spring.datasource.password = 1234
- 修改uat环境的数据库地址:
修改apollo-adminservice/config/application-github.properties文件
此处的数据地址为uat环境configservice服务所使用的的数据库
spring.datasource.url = jdbc:mysql://192.168.1.9:3306/apolloconfigdb-uat?characterEncoding=utf8&serverTimezone=Asia/Shanghai
spring.datasource.username = root
spring.datasource.password = 1234
4.配置Config服务
- 修改fat环境的数据库地址:
修改apollo-configservice/config/application-github.properties文件
此处的数据地址为fat环境configservice服务所使用的的数据库
spring.datasource.url = jdbc:mysql://192.168.1.9:3306/apolloconfigdb-fat?characterEncoding=utf8&serverTimezone=Asia/Shanghai
spring.datasource.username = root
spring.datasource.password = 1234
- 修改uat环境的数据库地址:
修改apollo-configservice/config/application-github.properties文件
此处的数据地址为fat环境configservice服务所使用的的数据库
spring.datasource.url = jdbc:mysql://192.168.1.9:3306/apolloconfigdb-uat?characterEncoding=utf8&serverTimezone=Asia/Shanghai
spring.datasource.username = root
spring.datasource.password = 1234
5.服务启动
记得开放服务器的端口:portal 默认端口 8070; admin默认端口 8090 ; config默认端口 8080
首先启动两个环境的admin 服务和config服务
sh ./apollo-adminservice/scripts/startup.sh

sh ./apollo-configservice/scripts/startup.sh


再启动portal服务
sh ./apollo-portal/scripts/startup.sh

访问 192.168.16.129:8070 portal服务
默认用户名密码 apollo admin


四、整合SpringBoot
1.所需的依赖
<dependency>
      <groupId>com.ctrip.framework.apollo</groupId>
      <artifactId>apollo-client</artifactId>
      <version>1.9.0</version>
</dependency>
2.编写SpringBoot的配置文件
分别对应fat 和 uat环境

application.yml
app:
  id: demo           #指定Apollo应用的唯一标识

spring:
  profiles:
    active: uat      #指定激活哪一个环境的配置文件
server:
  port: 9000
application-fat.yml
apollo:
  meta: http://192.168.16.130:8080              #指定fat环境下config服务所在的地址和端口
  bootstrap:
    namespaces: application,datasource          #指定加载哪些命名空间(namespace需要和Apollo的命名空间一致;默认只加载application 需要开启下面的两个配置项)
    enabled: true
    eagerLoad:
      enabled: true
application-uat.yml
apollo:
  meta: http://192.168.16.131:8080
  bootstrap:
    namespaces: application,datasource
    enabled: true
    eagerLoad:
      enabled: true
3.编写测试接口
value注解内部的值要和Apollo服务中配置的key保持一致
@RestController
public class DemoController {

    @Value("${redis.url:127.0.0.1}")
    private String redisUrl;

    @Value("${datasource.url:127.0.0.1}")
    private String dataSource;

    @GetMapping("/apollo/demo")
    public String demo(){
        return redisUrl;
    }

    @GetMapping("/apollo/test")
    public String test(){
        return dataSource;
    }
}