前言
这是一道常见面试题,我也碰到过,下面介绍的这几种写法也是对并发编程常用工具掌握程度的一个考察,是一道很好的面试题。一共有以下几种写法,下面来分别介绍。
- join写法(两种写法)
- 线程池写法
- wait、notify写法
- Condition写法
- CountDownLatch写法
- CyclicBarrier写法
- Thread.sleep写法
- CompletableFuture写法
join写法
join()方法的作用,把指定的线程加入到当前线程,可以将两个交替执行的线程合并为顺序执行的线程。
也就是说,t.join()方法阻塞调用此方法的线程(calling thread)进入?TIMED_WAITING 状态,直到线程t完成,此线程再继续;
线程的顺序执行有两种方法,一种是在主线程中,一种是在子线程中。
主线程join
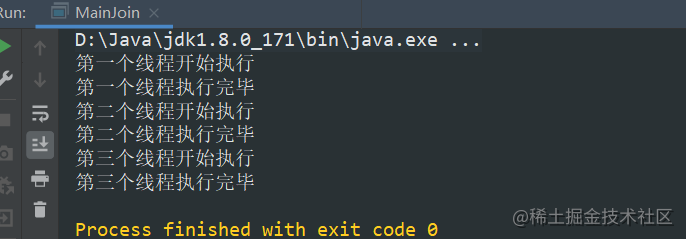
在main方法中,先是调用了t1.start方法,启动t1线程,随后调用t1的join方法,main所在的主线程就需要等待t1子线程中的run方法运行完成后才能继续运行,所以主线程卡在t2.start方法之前等待t1程序。等t1运行完后,主线程重新获得主动权,继续运行t2.start和t2.join方法,与t1子线程类似,main主线程等待t2完成后继续执行,如此执行下去,join方法就有效的解决了执行顺序问题。因为在同一个时间点,各个线程是同步状态。
public class MainJoin {

    static class MyThread implements Runnable {

        String name;

        public MyThread(String name) {
            this.name = name;
        }

        @Override
        public void run() {
            System.out.println(name + "开始执行");
            try {
                //todo 业务逻辑
                Thread.sleep(1000);
            } catch (InterruptedException e) {
                e.printStackTrace();
            }
            System.out.println(name + "执行完毕");
        }
    }

    public static void main(String[] args) throws InterruptedException {
        Thread t1 = new Thread(new MyThread("第一个线程"));
        Thread t2 = new Thread(new MyThread("第二个线程"));
        Thread t3 = new Thread(new MyThread("第三个线程"));
        t1.start();
        t1.join();
        t2.start();
        t2.join();
        t3.start();
    }

}
执行一下
子线程join
在写run方法的时候先让其他的线程join插队,等其他线程执行完以后再执行自己的逻辑。
public class SubJoin {

    static class MyThread implements Runnable {

        Thread thread;

        String name;

        public MyThread(Thread thread, String name) {
            this.thread = thread;
            this.name = name;
        }


        @Override
        public void run() {
            try {
                //先让其他线程插队执行
                if (thread != null) {
                    thread.join();
                }
                System.out.println(name + "开始执行");
                //todo 结束以后再执行自己的逻辑
                Thread.sleep(1000);
            } catch (Exception e) {
                e.printStackTrace();
            }

        }
    }


    public static void main(String[] args) {
        Thread t1 = new Thread(new MyThread(null, "第一个线程"));
        Thread t2 = new Thread(new MyThread(t1, "第二个线程"));
        Thread t3 = new Thread(new MyThread(t2, "第三个线程"));
        //打乱顺序执行
        t3.start();
        t1.start();
        t2.start();
    }

}
执行一下

线程池写法
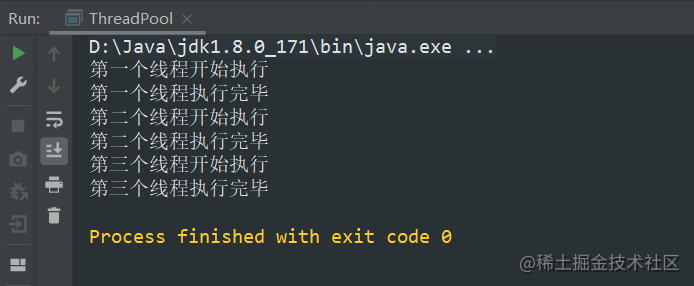
线程池也是面试中必问必考的,必须要把它的底层源码,如何执行的原理搞懂,详见可以参考《线程池源码精讲》 。这里的顺序执行是巧妙的运用了1个核心线程数,1个最大线程数,保证串行执行所有任务。
public class ThreadPool {

    private static final ExecutorService executorService = new ThreadPoolExecutor(1, 1, 0L
            , TimeUnit.MILLISECONDS, new LinkedBlockingQueue<>()
            , Executors.defaultThreadFactory(), new ThreadPoolExecutor.AbortPolicy());


    static class MyThread implements Runnable {

        String name;

        public MyThread(String name) {
            this.name = name;
        }

        @Override
        public void run() {
            System.out.println(name + "开始执行");
            try {
                //todo 执行业务逻辑
                Thread.sleep(1000);
            } catch (InterruptedException e) {
                e.printStackTrace();
            }
            System.out.println(name + "执行完毕");
        }
    }

    public static void main(String[] args) {
        executorService.submit(new MyThread("第一个线程"));
        executorService.submit(new MyThread("第二个线程"));
        executorService.submit(new MyThread("第三个线程"));
        executorService.shutdown();
    }
}
执行一下
注意:线程池shutdown方法和shutdownNow有区别,shutdown要等所有线程执行完后再关闭,shutdownNow将线程池内正在执行的线程强制停掉。
wait、notify写法
线程间的通信:
wait(): 是Object的方法,作用是让当前线程进入等待状态,同时,wait()也会让当前线程释放它所持有的锁。“直到其他线程调用此对象的 notify() 方法或 notifyAll() 方法”,当前线程被唤醒(进入“就绪状态”)
notify()和notifyAll(): 是Object的方法,作用则是唤醒当前对象上的等待线程;notify()是唤醒单个线程,而notifyAll()是唤醒所有的线程。
wait(long timeout): 让当前线程处于“等待(阻塞)状态”,“直到其他线程调用此对象的notify()方法或 notifyAll() 方法,或者超过指定的时间量”,当前线程被唤醒(进入“就绪状态”)。
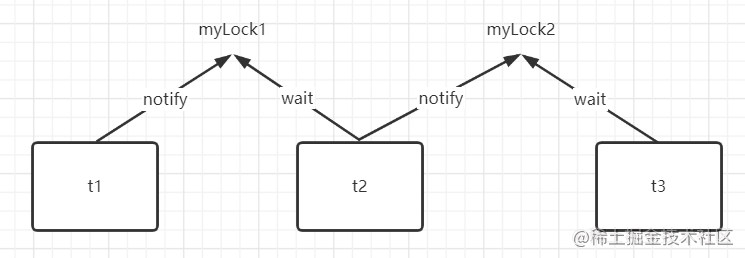
这里的原理就是线程t1、t2共用一把锁myLock1,t2先wait阻塞,等待t1执行完毕notify通知t2继续往下执行,线程t2、t3共用一把锁myLock2,t3先wait阻塞,等待t2执行完毕notify通知t3继续往下执行。
代码如下:
public class WaitNotify {

    private static Object myLock1 = new Object();
    private static Object myLock2 = new Object();

    static class MyThread implements Runnable {

        String name;
        Object startLock;
        Object endLock;

        public MyThread(String name, Object startLock, Object endLock) {
            this.name = name;
            this.startLock = startLock;
            this.endLock = endLock;
        }

        @Override
        public void run() {
            if (startLock != null) {
                synchronized (startLock) {
                    //阻塞
                    try {
                        startLock.wait();
                    } catch (InterruptedException e) {
                        e.printStackTrace();
                    }
                }
            }
            //继续往下执行
            System.out.println(name + "开始执行");
            //todo 执行业务逻辑
            try {
                Thread.sleep(1000);
            } catch (InterruptedException e) {
                e.printStackTrace();
            }
            if (endLock != null) {
                synchronized (endLock) {
                    //唤醒
                    endLock.notify();
                }
            }
        }
    }

    public static void main(String[] args) {
        Thread t1 = new Thread(new MyThread("第一个线程", null, myLock1));
        Thread t2 = new Thread(new MyThread("第二个线程", myLock1, myLock2));
        Thread t3 = new Thread(new MyThread("第三个线程", myLock2, null));
        //打乱顺序执行
        t3.start();
        t1.start();
        t2.start();
    }

}
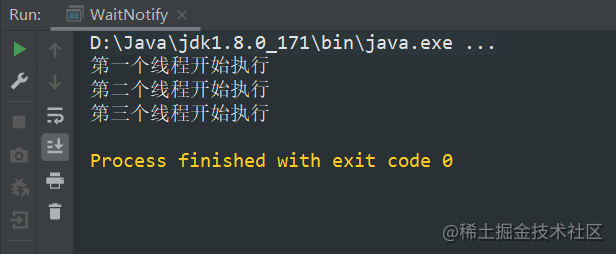
执行一下
Condition写法
Condition(条件变量): 通常与一个锁关联。需要在多个Contidion中共享一个锁时,可以传递一个Lock/RLock实例给构造方法,否则它将自己生成一个RLock实例。
- Condition中await() 方法类似于Object类中的wait()方法。
- Condition中await(long time,TimeUnit unit) 方法类似于Object类中的wait(long time)方法。
- Condition中signal() 方法类似于Object类中的notify()方法。
- Condition中signalAll() 方法类似于Object类中的notifyAll()方法。
写法与wait、notify写法类似
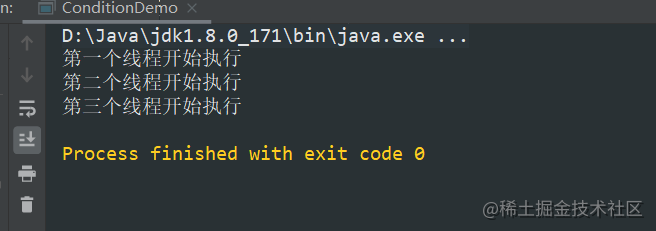
public class ConditionDemo {

    private static Lock lock = new ReentrantLock();
    private static Condition condition1 = lock.newCondition();
    private static Condition condition2 = lock.newCondition();

    static class MyThread implements Runnable {

        String name;
        Condition startCondition;
        Condition endCondition;

        public MyThread(String name, Condition startCondition, Condition endCondition) {
            this.name = name;
            this.startCondition = startCondition;
            this.endCondition = endCondition;
        }

        @Override
        public void run() {
            //阻塞
            if (startCondition != null) {
                lock.lock();
                try {
                    startCondition.await();
                } catch (Exception e) {
                    e.printStackTrace();
                } finally {
                    lock.unlock();
                }
            }
            //继续往下执行
            System.out.println(name + "开始执行");
            //todo 执行业务逻辑
            try {
                Thread.sleep(1000);
            } catch (InterruptedException e) {
                e.printStackTrace();
            }
            //唤醒
            if (endCondition != null) {
                lock.lock();
                try {
                    endCondition.signal();
                } catch (Exception e) {
                    e.printStackTrace();
                } finally {
                    lock.unlock();
                }
            }
        }
    }

    public static void main(String[] args) {
        Thread t1 = new Thread(new MyThread("第一个线程", null, condition1));
        Thread t2 = new Thread(new MyThread("第二个线程", condition1, condition2));
        Thread t3 = new Thread(new MyThread("第三个线程", condition2, null));
        //打乱顺序执行
        t3.start();
        t2.start();
        t1.start();
    }

}
执行一下
CountDownLatch写法
CountDownLatch是计数器,它有两个方法,一个是await(),这是阻塞,一个是countDown(),这是计数-1功能,当计数为0的时候,await阻塞的代码才往下执行。
它可以让一个线程阻塞,也可以让多个线程阻塞,所以它是共享锁。可以允许多个线程同时抢占到锁,然后等到计数器归零的时候,同时唤醒。
- state记录计数器
- countDown的时候,实际上就是 state–
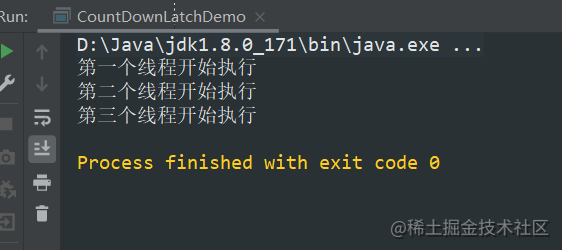
public class CountDownLatchDemo {


    static class MyThread implements Runnable {
        CountDownLatch startCountDown;
        CountDownLatch endCountDown;

        public MyThread(CountDownLatch startCountDown, CountDownLatch endCountDown) {
            this.startCountDown = startCountDown;
            this.endCountDown = endCountDown;
        }

        @Override
        public void run() {
            //阻塞
            if (startCountDown != null) {
                try {
                    startCountDown.await();
                } catch (InterruptedException e) {
                    e.printStackTrace();
                }
            }
            //执行自己的业务逻辑
            System.out.println(Thread.currentThread().getName() + "开始执行");
            //todo 执行业务逻辑
            try {
                Thread.sleep(1000);
            } catch (InterruptedException e) {
                e.printStackTrace();
            }
            if (endCountDown != null) {
                endCountDown.countDown();
            }
        }
    }

    public static void main(String[] args) {
        CountDownLatch countDownLatch1 = new CountDownLatch(1);
        CountDownLatch countDownLatch2 = new CountDownLatch(1);
        Thread t1 = new Thread(new MyThread(null, countDownLatch1), "第一个线程");
        Thread t2 = new Thread(new MyThread(countDownLatch1, countDownLatch2), "第二个线程");
        Thread t3 = new Thread(new MyThread(countDownLatch2, null), "第三个线程");
        //打乱顺序执行
        t3.start();
        t2.start();
        t1.start();
    }

}
执行一下
CyclicBarrier写法
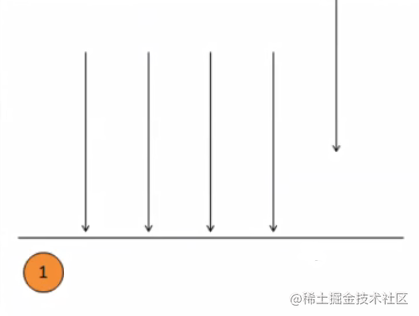
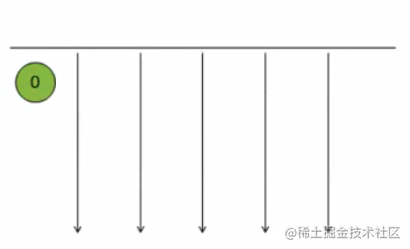
CyclicBarrier就是栅栏,它只有一个方法await(),相当于-1,然后阻塞,当减到0的时候,然后一起往下执行,相当于万箭齐发。
-1阻塞:
为0一起向下执行:
代码如下:
public class CyclicBarrierDemo {

    static class MyThread implements Runnable {

        CyclicBarrier startCyclicBarrier;

        CyclicBarrier endCyclicBarrier;

        public MyThread(CyclicBarrier startCyclicBarrier, CyclicBarrier endCyclicBarrier) {
            this.startCyclicBarrier = startCyclicBarrier;
            this.endCyclicBarrier = endCyclicBarrier;
        }

        @Override
        public void run() {
            //阻塞
            if (startCyclicBarrier != null) {
                try {
                    startCyclicBarrier.await();
                } catch (Exception e) {
                    e.printStackTrace();
                }
            }
            //执行自己的业务逻辑
            System.out.println(Thread.currentThread().getName() + "开始执行");
            //todo 执行业务逻辑
            try {
                Thread.sleep(1000);
            } catch (InterruptedException e) {
                e.printStackTrace();
            }
            if (endCyclicBarrier != null) {
                try {
                    endCyclicBarrier.await();
                } catch (Exception e) {
                    e.printStackTrace();
                }
            }
        }
    }

    public static void main(String[] args) {
        CyclicBarrier barrier1 = new CyclicBarrier(2);
        CyclicBarrier barrier2 = new CyclicBarrier(2);
        Thread t1 = new Thread(new MyThread(null, barrier1), "线程1");
        Thread t2 = new Thread(new MyThread(barrier1, barrier2), "线程2");
        Thread t3 = new Thread(new MyThread(barrier2, null), "线程3");
        //打乱顺序执行
        t3.start();
        t2.start();
        t1.start();
    }

}
执行一下:

Thread.sleep写法
这个写法是投机取巧的写法,也能够实现顺序执行的效果,但是效率不高,生产中不能这么写,而且你也不知道t1执行多少时间,sleep多长时间。面试的时候可以这么说,这是装b的资本。
try {
      t1.start();
      Thread.sleep(1000);
      t2.start();
      Thread.sleep(1000);
      t3.start();
  } catch (InterruptedException e1) {
      e1.printStackTrace();
 }
如下图:

CompletableFuture写法
在Java 8问世前想要实现任务的回调,一般有以下两种方式:
- 借助
Future isDone轮询以判断任务是否执行结束,并获取结果。 - 借助
Guava类库ListenableFuture、FutureCallback。(netty也有类似的实现)
Java8新增的CompletableFuture则借鉴了Netty等对Future的改造,简化了异步编程的复杂性,并且提供了函数式编程的能力 。这个是需要掌握的,详情请看《异步编程Future掌控未来》 。
写法如下,很简单,一句话搞定。
public class CompletableFutureDemo {

    static class MyThread implements Runnable {
        @Override
        public void run() {
            System.out.println("执行 : " + Thread.currentThread().getName());
        }
    }

    public static void main(String[] args) {
        Thread t1 = new Thread(new MyThread(), "线程1");
        Thread t2 = new Thread(new MyThread(), "线程2");
        Thread t3 = new Thread(new MyThread(), "线程3");
        CompletableFuture.runAsync(t1::start).thenRun(t2::start).thenRun(t3::start);
    }
}
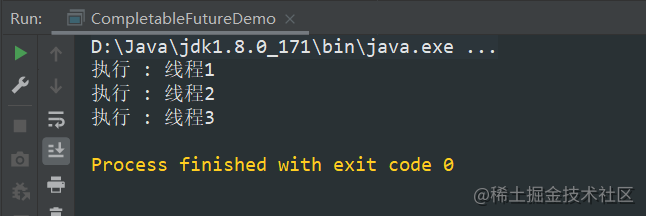
执行一下:
总结
关于多个线程顺序执行,不管是对于面试,还是工作,关于多线程顺序执行的解决方案都是非常有必要掌握的。会了这么多写法,其实已经对并发编程掌握90%了,很多写法都很巧妙,只有在掌握了它们的原理以后才能轻松写出来。今天就分享到这里,点赞,收藏,谢谢观看~
源码链接:https://gitee.com/xiaojieboshi/thread-demo