祝大家2022新年快乐!
文章目录
历史记录
-
Web项目实战 | 购物系统v2.0 | 开发记录(一)需求分析 | 技术选型 | 系统设计 | 数据表设计 | SpringBoot、SSM、Thymeleaf、Bootstrap…
-
Web项目实战 | 购物系统v2.0 | 开发记录(二)搭建SpringBoot+SSM框架环境 | 配置Druid+MyBatis | 基于Bootstrap实现登陆页面| 图片验证码接口
一、运行环境
- windows10
- IDEA 2021.1 专业版
- JDK8
- SpringBoot2
- Druid 1.2.5
- Bootstrap 4.6.0
- MySQL 8
- Navicat 11
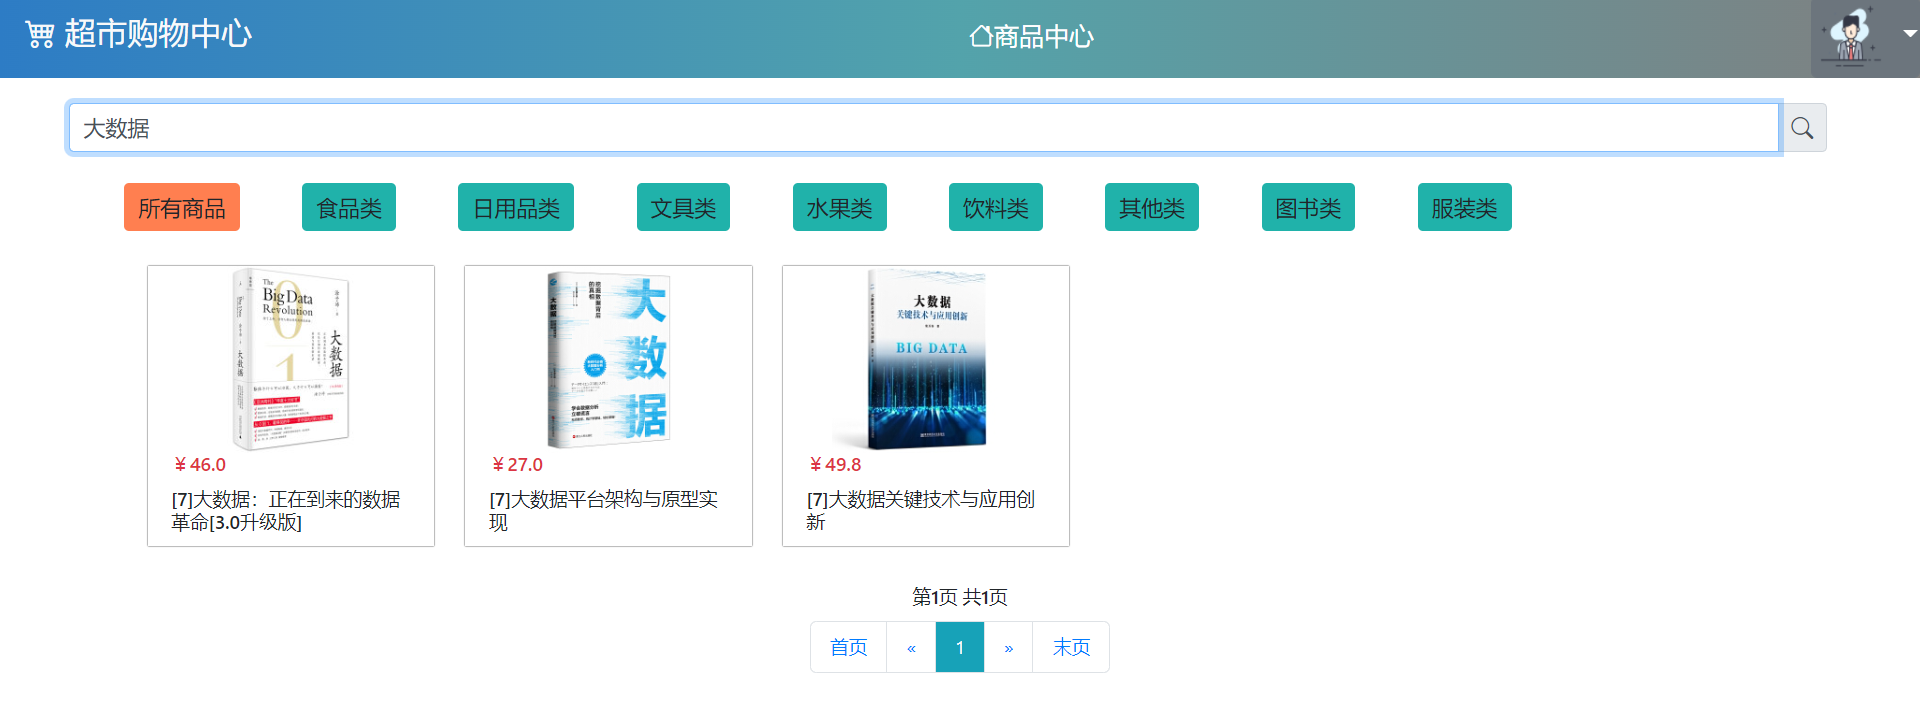
二、PagheHelper插件插件实现分页显示
PageHelper插件是基于MyBatis框架实现的,使用原先的pageHelper插件需要有配置文件,而在SpringBoot项目中只要设置起步依赖,配置即用,十分的方便
pom.xml
<dependency>
    <groupId>org.mybatis.spring.boot</groupId>
    <artifactId>mybatis-spring-boot-starter</artifactId>
    <version>2.2.1</version>
</dependency>

<dependency>
    <groupId>com.github.pagehelper</groupId>
    <artifactId>pagehelper-spring-boot-starter</artifactId>
    <version>1.4.1</version>
</dependency>

前端代码:
<!-- 商品列表 -->
<div class="container">
<ul style="list-style: none" class="row">
<!--/*@thymesVar id="comInfo" type="java.util.List<com.uni.pojo.Commodity>"*/-->
<li th:each="com : ${comInfo}" class="col-md-2 col-sm-4 u-card-body text-center">
<img th:src="${com.comImgSrc}" class="u-card-img">
<h6 class="u-text-sm text-danger">¥<span th:text="${com.comPrice}"></span></h6>
<h6 class="u-text-sm"><span th:text="'[' + ${com.comType} + ']'"></span><span th:text="${#strings.abbreviate(com.comName, 30)}"></span></h6>
</li>
</ul>
</div>
<!-- 分页部分 -->
<h1 th:text="'第' + ${pageInfo.pageNum} + '页 共' + ${pageInfo.pages} + '页'" class="u-text-sm text-center"></h1>
<nav aria-label="Page navigation" class="u-text-sm">
<!--/*@thymesVar id="pageInfo" type="com.github.pagehelper.PageInfo"*/-->
<ul class="pagination justify-content-center">
<li class="page-item"><a class="page-link" th:href="'/index.html/' + ${pageInfo.navigateFirstPage}">首页</a></li>
<li class="page-item">
<a class="page-link" th:href="'/index.html/' + ${pageInfo.prePage}" aria-label="Previous">
<span aria-hidden="true">«</span>
</a>
</li>
<li class="page-item" th:each="p : ${pageInfo.navigatepageNums}">
<a th:href="'/index.html/' + ${p}" th:text="${p}" th:class="'page-link' + ${p == pageInfo.pageNum ? ' bg-info text-light' : ''}"></a>
</li>
<li class="page-item">
<a class="page-link" th:href="'/index.html/' + ${pageInfo.nextPage}" aria-label="Next">
<span aria-hidden="true">»</span>
</a>
</li>
<li class="page-item"><a class="page-link" th:href="'/index.html/' + ${pageInfo.navigateLastPage}">末页</a></li>
</ul>
</nav>
控制层
@GetMapping("/index.html/{pageNow}")
  public String findAllByPage(ModelMap modelMap,
                              @PathVariable(value = "pageNow" , required = false)
                                      Integer pageNow,
                              @RequestParam(value = "pageSize", defaultValue = "10")
                                      Integer pageSize){

      if(pageNow == null) pageNow = new Integer(1);
      PageHelper.startPage(pageNow, pageSize);
      List<Commodity> comInfo = commodityMapper.selectByExample(new CommodityExample());
      PageInfo<Commodity> pageInfo = new PageInfo<>(comInfo);
      // 首页设置上一个页面为1,防止上一页到末页
      if(pageNow == 1) pageInfo.setPrePage(1);
      // 末页设置最后一个页面,防止下一页到首页
      if(pageInfo.getNextPage() == 0) pageInfo.setNextPage(pageInfo.getPrePage() + 1);

      modelMap.addAttribute("pageNow", pageNow);
      modelMap.addAttribute("pageSize", pageSize);
      modelMap.addAttribute("comInfo", comInfo);
      modelMap.addAttribute("pageInfo", pageInfo);
      return "index";
  }
三、根据商品名称进行模糊查询
使用MyBatis逆向工程生成的Mapper接口进行查询

前端页面:
<nav class="nav input-group input-group-sm mt-3 container" th:fragment="search">
    <input id="input-search" type="text" class="form-control" placeholder="请输入查询的商品,商品名称/种类/...">
    <div class="input-group-append">
        <button class="input-group-text btn btn-info" id="btn-search">
            <i class="bi bi-search"></i>
        </button>
    </div>
</nav>
控制层
@GetMapping("/search.html/{searchText}/{pageNow}")
public String findBySome(ModelMap modelMap,
                         @PathVariable String searchText,
                         @PathVariable(value = "pageNow" , required = false)
                                     Integer pageNow,
                         @RequestParam(value = "pageSize", defaultValue = "10")
                                     Integer pageSize){
    if(pageNow == null) pageNow = new Integer(1);
    PageHelper.startPage(pageNow, pageSize);
    CommodityExample e1 = new CommodityExample() {{
        createCriteria().andComNameLike("%" + searchText + "%");
    }};
    List<Commodity> comInfo = commodityMapper.selectByExample(e1);
    PageInfo<Commodity> pageInfo = new PageInfo<>(comInfo);
    // 首页设置上一个页面为1,防止上一页到末页
    if(pageNow == 1) pageInfo.setPrePage(1);
    // 末页设置最后一个页面,防止下一页到首页
    if(pageInfo.getNextPage() == 0) pageInfo.setNextPage(pageInfo.getPrePage() + 1);

    modelMap.addAttribute("pageNow", pageNow);
    modelMap.addAttribute("pageSize", pageSize);
    modelMap.addAttribute("comInfo", comInfo);
    modelMap.addAttribute("pageInfo", pageInfo);
    System.out.println("ok!" + searchText);
    return searchText == null ? "/index.html/1" : "index";
}
四、Thymeleaf引擎使用
基本语法:
th:fragment="名称"创建页面th:replace="页面路径::页面部分"替换指定的页面
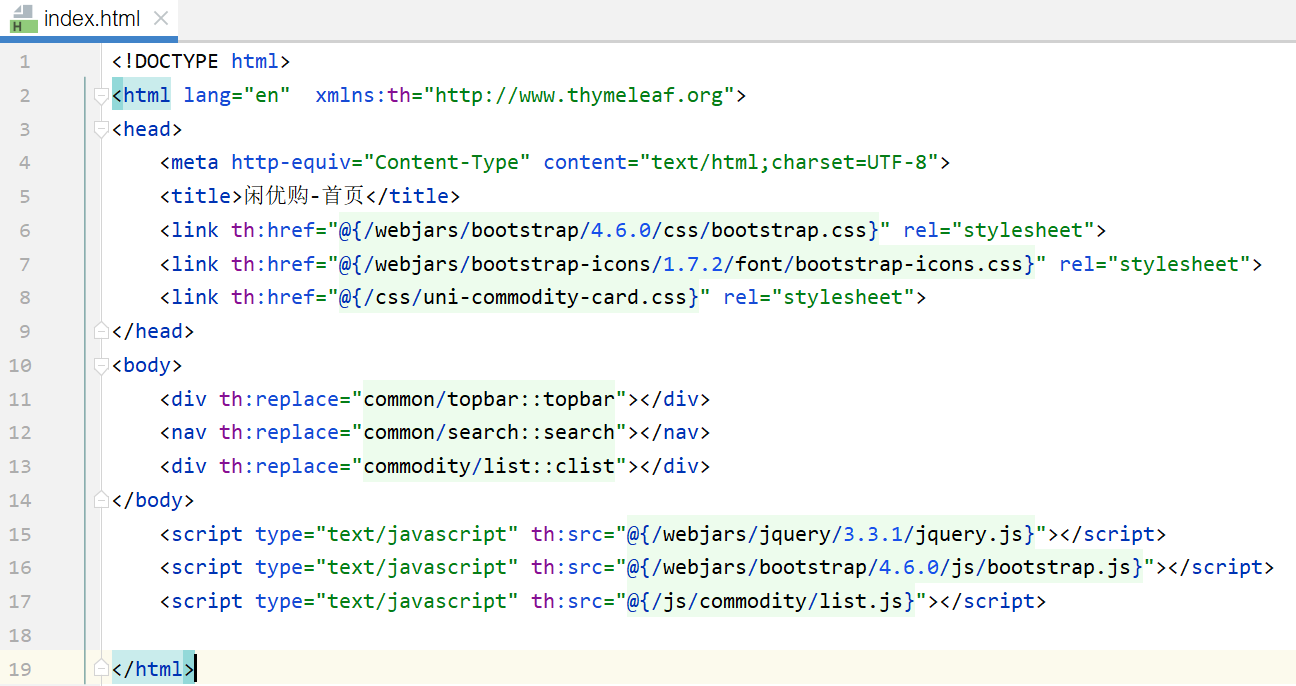
使用Thymeleaf渲染页面十分方便,能把不同的代码分为不同模块,如下图所示:

其中,除了 link 、script 标签借助 th:href、th:src 引入了pom.xml依赖里的jar包和静态资源以外,能使用其他的元素内标签借助th:replace进行替换,替换的内容就是在其他支持thymeleft的HTML页面的一部分,比如search.html的内容就是之前实现模糊查询的部分,如下图所示:

search.html 里声明当前标签的为 th:fragment="search"
五、BUG & DeBug
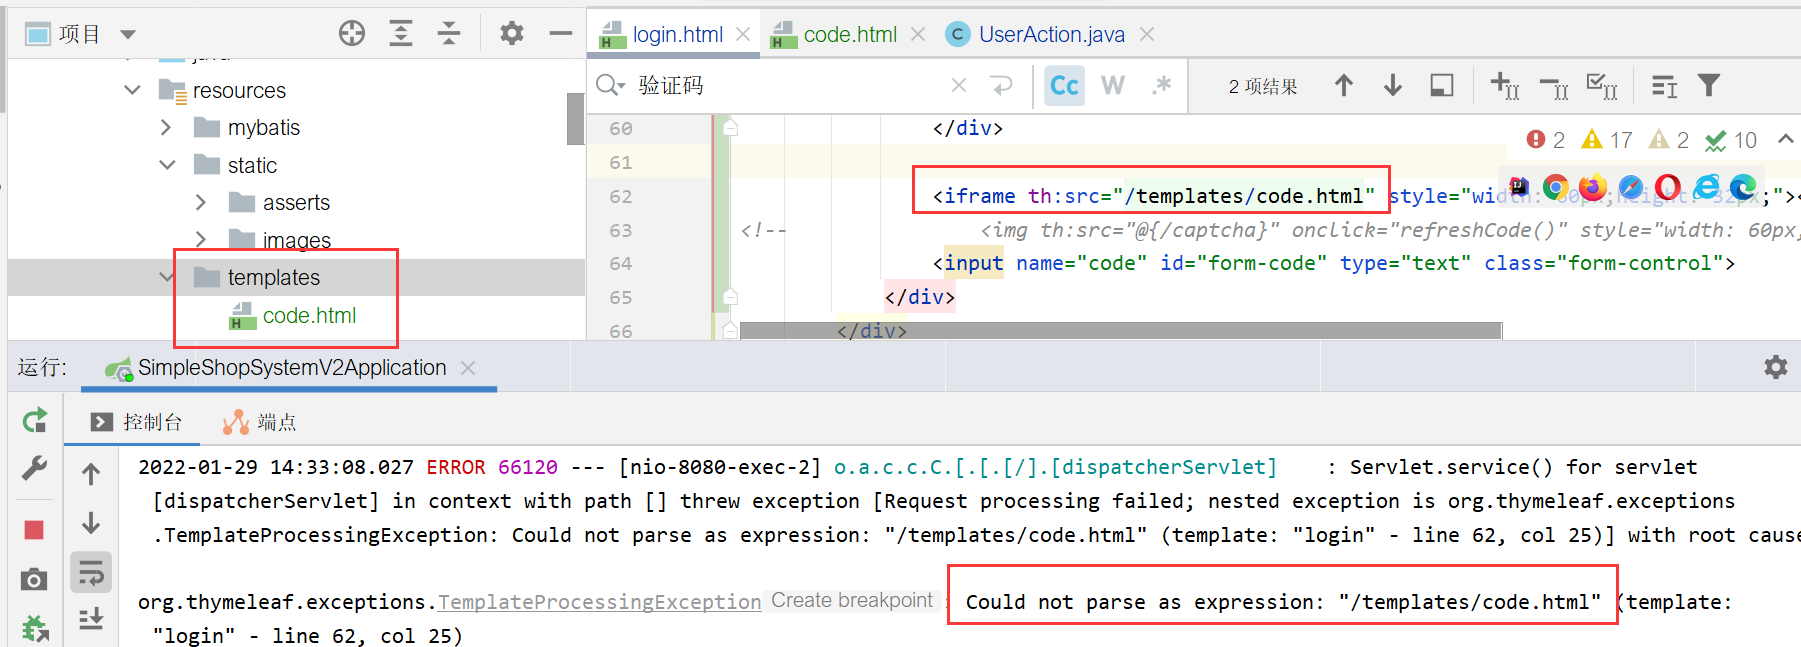
5.1 iframe指定其他页面,显示找不到路径
BUG:

解决: 在使用th:标签时指定路径,需要加上@{}符号,如:
<iframe th:src="@{/templates/code.html} ... />"
5.2 JS函数修改全局变量的形参没有作用
解决: 在JS函数最后 return 修改的全局变量,传参的同时赋一下值,如:
int a = 1
function add(a){
	return ++a;
}
a = add(a)
5.3 Thymeleaf页面获取不到session域的值
解决: 通过session域直接获取用户,然后直接获取属性值
实体类
private class User{
	private String userCode;
	private String passwrod;
}
控制层
@Controller
private class UserAction{
	@PostMapping
	public String login(User user, HttpSession session){
		// ...登陆的业务处理逻辑
		session.setAttribute("userInfo", user);
		return "index";
	}
}
前端页面
<span th:text="${session.userInfo.userCode}"/>