JAVA当中摄像头调用(并实现摄像头的滤镜效果)
摄像头的调用
1.包的导入
1.1首先进入webcam官网

1.2然后点击Download下的下载的webcam-capture-0.3.10-dist.zip

1.3下载完成包以后进入eclipse界面,右击包的选项选择 build path中的configure build path–>libraries—>Add External JAR…—>选择需要的三个包----(在下面的第二张图当中)

 三个文件的名字如下

2.调用包的具体代码以及实现摄像头滤镜效果的代码
2.1具体摄像头的打开,获取
		Webcam webcam =Webcam.getDefault();
		//将摄像头打开
		webcam.open();
2.2摄像头实现滤镜效果的代码
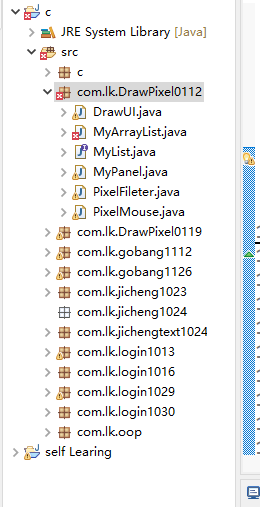
package com.lk.DrawPixel0112;
import java.awt.Color;
import java.awt.Dimension;
import java.awt.Graphics;
import java.awt.image.BufferedImage;
import java.awt.image.ColorModel;
import java.util.Random;
//今天的任务:1完成线程的博客的书写2完成图像处理效果的博客的书写3将整个代码重新写一遍,边写边总结和领悟自己书写的内容
import com.github.sarxos.webcam.Webcam;
//要写一篇关于进程,线程,程序的相关的教程
public class ThreadPixel extends Thread {
	Graphics g;
	BufferedImage bff1;
	public boolean flag=true;
	String type;
	float[][] kernel1 = { { 0, -1, 0 }, { -1, 1.99f, 1 }, { 0, -1, 0 }};
	//有三种type如果type是视频效果一,我们用灰度的效果,如果是视频效果二我们用卷积1的效果,如果是视频效果三,我们用油画的效果
	public ThreadPixel(Graphics g)
	{
		this.g=g;
	}
	//函数作用:实现摄像头的多种效果的传递
	//参数:是缓冲的图片的点
    public BufferedImage drawhd(BufferedImage bff)
    {
    	//首先是获取的摄像头的照片是有一定大小的
    	//创建了一个和bff一样大小的画布,bff1
    	//这个和数组那个的区别在哪里
        bff1 =new BufferedImage(bff.getWidth(),bff.getHeight(),BufferedImage.TYPE_INT_RGB);
        Graphics ng =bff1.getGraphics();
        //养成看源代码的习惯,getRGB先走的是x轴,然后走的是y轴,bufferedImage也是这个样子的,先是宽度然后在是高度,不然可能发生越界的情况,因为获取的摄像头的大小是不能够确认的事情
    	for(int i=0;i<bff.getWidth();i++)
    	{
    		for(int j=0;j<bff.getHeight();j++)
    		{
    			//因为获取rgb值的时候是从上往下走的,在获取rgb值的时候越界了
    			int pixel=bff.getRGB(i, j);
    			Color color =new Color(pixel);
    			//(r,g,b)
    			int red =(int)(color.getRed()*0.299);
    			int green =(int)(color.getGreen()*0.587);
    			int blue =(int)(color.getBlue()*0.114);
    			Color newcolor =new Color(red+green+blue,red+green+blue,red+green+blue);
    			ng.setColor(newcolor);
    			ng.drawLine(i, j, i, j);
    		}
    	}
		return bff1;
    }
    public BufferedImage drawyh(BufferedImage bff)
    {
    	BufferedImage bff1 =new BufferedImage(bff.getWidth(),bff.getHeight(),BufferedImage.TYPE_INT_BGR);
    	Graphics ng =bff1.getGraphics();
    	for(int i=0;i<bff.getWidth();i++)
    	{
    		for(int j=0;j<bff.getHeight();j++)
    		{
    			//因为获取RGB值的i,j是先看的宽后看的高,所以我前面用的是先列举遍宽然后在涉及到高
    			int pixel =bff.getRGB(i, j);
    			Color color =new Color(pixel);
    			ng.setColor(color);
    			Random random =new Random();
    			//这行代码的意思就是取一个20以下的数字  再加上5
    			int r =random.nextInt(20)+10;
    			ng.fillOval(i, j, r, r);
    		}
    	}
    	return bff1;
    }


    public BufferedImage juanji(BufferedImage bff,float kernel[][])
    {
		//保存卷积计算的数据大小跟kernel一致
		int temp[][]=new int[kernel.length][kernel[0].length];
		int h=bff.getHeight()-kernel.length+1;
		int l=bff.getWidth()-kernel[0].length+1;
		//保存卷积运算的有效数据
		int juanji[][] =new int [l][h];
		//两个矩阵相乘
		for(int i=0;i<l;i++)
		{
			for(int j=0;j<h;j++)
			{
				//遍历卷积核
				int num=0;
				//原来矩阵怎样列举遍的的,那么卷积核的矩阵就要怎样列举遍
				for(int m=0;m<kernel[0].length;m++)
				{
					for(int n=0;n<kernel.length;n++)
					{
						temp[m][n]=(int) (bff.getRGB(i+m, j+n)*kernel[m][n]);
						//注意一个逻辑问题,在一定的卷积效果运算当中
						num+=temp[m][n];
					}
				}
				if(num<0) num=0;
				if(num>255) num=255;
				//把矩阵相乘后的值保存到temp数组中
				juanji[i][j]=num;
			}
		}
        BufferedImage bff1 =new BufferedImage(juanji.length,juanji[0].length,BufferedImage.TYPE_INT_RGB);
        Graphics ng =bff1.getGraphics();
		for(int i=0;i<juanji.length;i++)
		{
			for(int j=0;j<juanji[0].length;j++)
			{
				//卷积得到的一个值是三原色当中颜色的一种
				int pixel =juanji[i][j];
				Color color =new Color(pixel,pixel,pixel);
				ng.setColor(color);
				ng.drawLine(i, j, i, j);
			}
		}
		return bff1;
    }
	//run方法结束的话,那样的话线程结束
	public void run()
	{
		//启动线程
		//获取摄像头
		Webcam webcam =Webcam.getDefault();
		//将摄像头打开
		webcam.open();
		while(flag)
		{
			BufferedImage bff =webcam.getImage();
			if(type.equals("灰度"))
			{
				g.drawImage(drawhd(bff),100,100,500,500,null);
			}
			if(type.equals("卷积效果1"))
			{
			g.drawImage(juanji(bff,kernel1),100,100,500,500,null);
			}
			if(type.equals("油画"))
			{
				g.drawImage(drawyh(bff),100,100,500,500,null);
			}
		}
	}
}
2.3在动作监听器当中的代码如下
**
mypanel.repaint()的作用是刷新界面
tp是用自己写的ThreadPixel创建的实例
tp.start的作用是开启tp实例当中的摄像头
其中flag是控制摄像头的开或者关闭的开关,当ThreadPixel当中的while函数结束的时候代表线程的结束**
	public class PixelMouse implements ActionListener{
	//相片旋转要解决的一个问题是宽和高不相等的情况需要考虑进来
	int [][]arr=arrpixel("F:\\java\\美颜相机图片\\lklibrary.jpg");
	int [][]arr1=arrpixel("C:\\Users\\HP\\Desktop\\pic1.jpg");
	public PixelFileter [] pixelarrf =new PixelFileter[100];
	int index=0;
	String str1;
	Graphics g;
	MyPanel mypanel =new MyPanel();
	public ThreadPixel tp;
	//重绘的概念是每次重新绘制的时候都要重新画图
    //可不可以将这些代码全部优化为一个函数只要判断出来它是字符类型就可以了
	@Override
	//因为在点击以后我们需要执行相对应的效果,所以我们需要一个滤镜的对象
	public void actionPerformed(ActionEvent e) {
		// TODO Auto-generated method stub
		System.out.println("调用了动作监听器");
		str1=e.getActionCommand();
		if(str1.equals("打开"))
		{
			mypanel.repaint();
			//为啥要让tp=null,其中的原因还不是很清楚
			if(tp==null)
			{
				tp =new ThreadPixel(g);
				tp.start();
			}
		}
		if(str1.equals("特效视频效果1"))
		{
			//mypanel.repaint();
			System.out.println("打开并实现了视频效果1");
			if(tp==null)
			{
				tp=new ThreadPixel(g);
				tp.type="灰度";
				tp.start();
				tp.type="灰度";
			}
		}
		if(str1.equals("特效视频效果2"))
		{
			mypanel.repaint();
			if(tp==null)
			{
				tp=new ThreadPixel(g);
				tp.start();
				tp.type="卷积效果1";
			}
		}
		if(str1.equals("特效视频效果3"))
		{
			mypanel.repaint();
			if(tp==null)
			{
				tp=new ThreadPixel(g);
				tp.start();
				tp.type="油画";
			}
		}
		if(str1.equals("关闭"))
		{
			mypanel.repaint();
			tp.flag=false;
			tp=null;
		}
3.滤镜效果(灰度,油画,卷积效果)的讲解以及加载在摄像头上
3.1灰度
    public BufferedImage drawhd(BufferedImage bff)
    {
    	//首先是获取的摄像头的照片是有一定大小的
    	//创建了一个和bff一样大小的画布,bff1
    	//这个和数组那个的区别在哪里
        bff1 =new BufferedImage(bff.getWidth(),bff.getHeight(),BufferedImage.TYPE_INT_RGB);
        Graphics ng =bff1.getGraphics();
        //养成看源代码的习惯,getRGB先走的是x轴,然后走的是y轴,bufferedImage也是这个样子的,先是宽度然后在是高度,不然可能发生越界的情况,因为获取的摄像头的大小是不能够确认的事情
    	for(int i=0;i<bff.getWidth();i++)
    	{
    		for(int j=0;j<bff.getHeight();j++)
    		{
    			//因为获取rgb值的时候是从上往下走的,在获取rgb值的时候越界了
    			int pixel=bff.getRGB(i, j);
    			Color color =new Color(pixel);
    			//(r,g,b)
    			int red =(int)(color.getRed()*0.299);
    			int green =(int)(color.getGreen()*0.587);
    			int blue =(int)(color.getBlue()*0.114);
    			Color newcolor =new Color(red+green+blue,red+green+blue,red+green+blue);
    			ng.setColor(newcolor);
    			ng.drawLine(i, j, i, j);
    		}
    	}
		return bff1;
    }
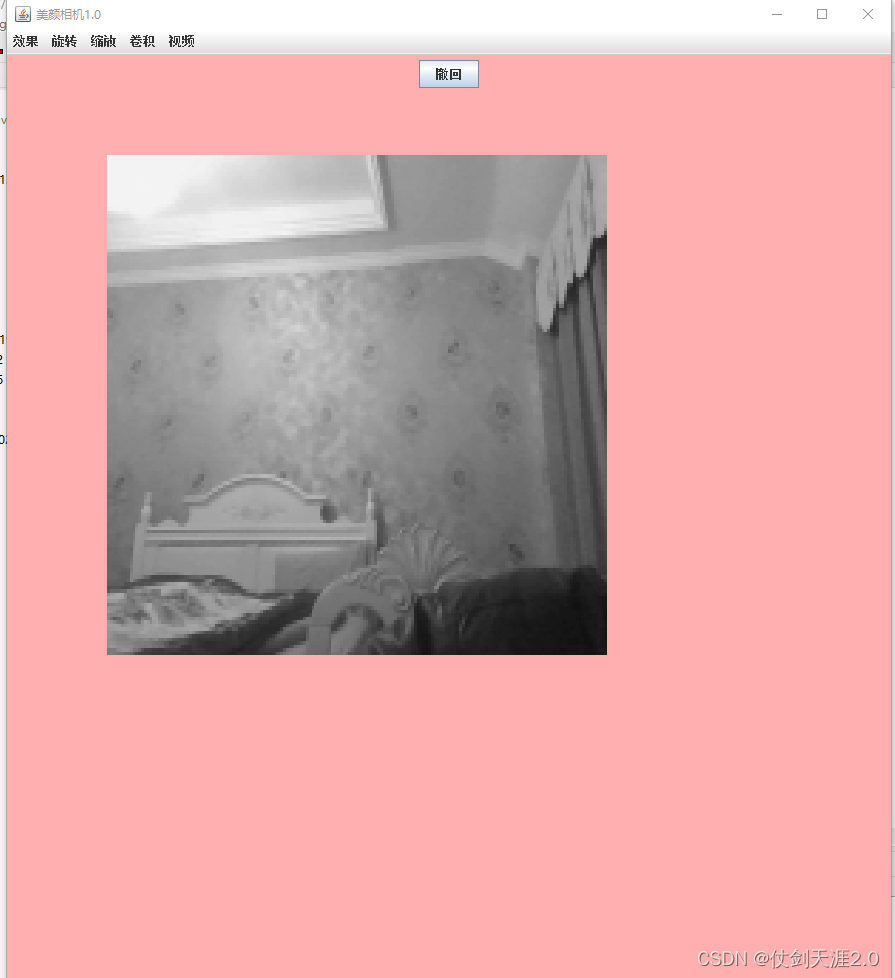
灰度的计算式是 首先获取缓冲图片的RGB值,然后将其变为color对象,用color对象中的getRed()函数以及对应的getgreen函数,乘以对应的比例,最后用缓冲区的画笔将缓冲区域给画完,最后返回的是缓冲区的bff
3.2 油画
    public BufferedImage drawyh(BufferedImage bff)
    {
    	BufferedImage bff1 =new BufferedImage(bff.getWidth(),bff.getHeight(),BufferedImage.TYPE_INT_BGR);
    	Graphics ng =bff1.getGraphics();
    	for(int i=0;i<bff.getWidth();i++)
    	{
    		for(int j=0;j<bff.getHeight();j++)
    		{
    			//因为获取RGB值的i,j是先看的宽后看的高,所以我前面用的是先列举遍宽然后在涉及到高
    			int pixel =bff.getRGB(i, j);
    			Color color =new Color(pixel);
    			ng.setColor(color);
    			Random random =new Random();
    			//这行代码的意思就是取一个20以下的数字  再加上5
    			int r =random.nextInt(20)+10;
    			ng.fillOval(i, j, r, r);
    		}
    	}
    	return bff1;
    }
注意事项:因为getRGB(i,j)函数当中,获取的最左边的i的值代表的是宽度,代表的是长度,所以在列遍bff当中的像素点的时候,首先要获取的是bff.getwidth()
3.3卷积核效果(具体关于卷积的讲解在下一篇博客中会讲到)
尤其要注意是否会超出列表的返回而超出索引范围造成出错
    public BufferedImage juanji(BufferedImage bff,float kernel[][])
    {
		//保存卷积计算的数据大小跟kernel一致
		int temp[][]=new int[kernel.length][kernel[0].length];
		int h=bff.getHeight()-kernel.length+1;
		int l=bff.getWidth()-kernel[0].length+1;
		//保存卷积运算的有效数据
		int juanji[][] =new int [l][h];
		//两个矩阵相乘
		for(int i=0;i<l;i++)
		{
			for(int j=0;j<h;j++)
			{
				//遍历卷积核
				int num=0;
				//原来矩阵怎样列举遍的的,那么卷积核的矩阵就要怎样列举遍
				for(int m=0;m<kernel[0].length;m++)
				{
					for(int n=0;n<kernel.length;n++)
					{
						temp[m][n]=(int) (bff.getRGB(i+m, j+n)*kernel[m][n]);
						//注意一个逻辑问题,在一定的卷积效果运算当中
						num+=temp[m][n];
					}
				}
				if(num<0) num=0;
				if(num>255) num=255;
				//把矩阵相乘后的值保存到temp数组中
				juanji[i][j]=num;
			}
		}
        BufferedImage bff1 =new BufferedImage(juanji.length,juanji[0].length,BufferedImage.TYPE_INT_RGB);
        Graphics ng =bff1.getGraphics();
		for(int i=0;i<juanji.length;i++)
		{
			for(int j=0;j<juanji[0].length;j++)
			{
				//卷积得到的一个值是三原色当中颜色的一种
				int pixel =juanji[i][j];
				Color color =new Color(pixel,pixel,pixel);
				ng.setColor(color);
				ng.drawLine(i, j, i, j);
			}
		}
		return bff1;
    }
4.run方法和线程的初步窥探以及代码思路讲解
	//run方法结束的话,那样的话线程结束
	public void run()
	{
		//启动线程
		//获取摄像头
		Webcam webcam =Webcam.getDefault();
		//将摄像头打开
		webcam.open();
		while(flag)
		{
			BufferedImage bff =webcam.getImage();
			if(type.equals("灰度"))
			{
				g.drawImage(drawhd(bff),100,100,500,500,null);
			}
			if(type.equals("卷积效果1"))
			{
			g.drawImage(juanji(bff,kernel1),100,100,500,500,null);
			}
			if(type.equals("油画"))
			{
				g.drawImage(drawyh(bff),100,100,500,500,null);
			}
		}
	}
注意:1 tp.start()是在调用run方法,因为run方法进行的时候,如果flag是真的话,那么程序会不断的运行,程序不会终止,这样我们如果在动作监听器当中,检测到需要关闭的信息的时候,将flag的值改变为false,所以run方法结束
2 视频的形成其实就是很多的图片连续形成的结果,所以这个循环使得不断获取当前图片,进而形成了视频的效果
3 g.drawImage(参数1:缓冲图片的像素的具体信息,x坐标,y坐标,长度,宽度,null)


