目录
关于继承WebSecurityConfigurerAdapter类的使用
1、通过配置文件,老规矩:一般starterxxx都有对应springboot封装的类(xxxAutoConfiguration,找到对应的Properties就可以知道咋地配置了)
2.基于配置类对用户名密码进行设置:继承WebConfigurerAdapter并重写里面的Configure方法,将用户名密码放在内存中
用户认证:
验证用户是否为系统中的合法主体,有没有资格访问;
一般来说,用户认证——>用户提供用户名和密码,系统通过用户名密码进行验证;
用户授权:
用户是否有权限执行某个操作;
特点:
权限可以达到全面控制;
专门为web环境设计;
重量级,依赖多,组件多;——>我们可以用springboot来简化配置
功能相对于shiro更加强大;

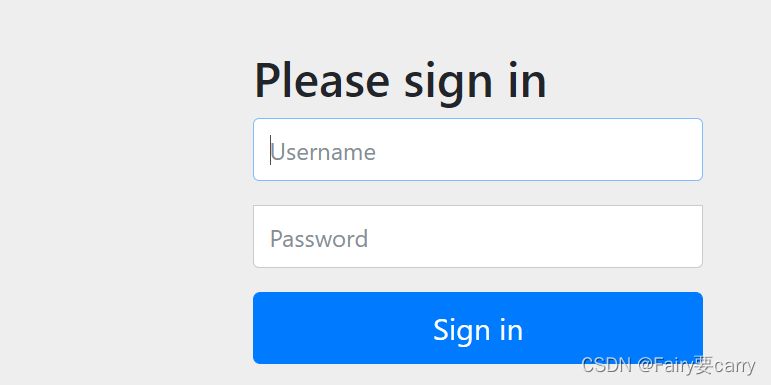
默认用户名:user
密码:项目启动时会随机给一个密码
?
SpringSecurity本质上是一个过滤链(有多个过滤器,只有doFilter()方法放行为true就到下一个过滤器)?
自定义逻辑:
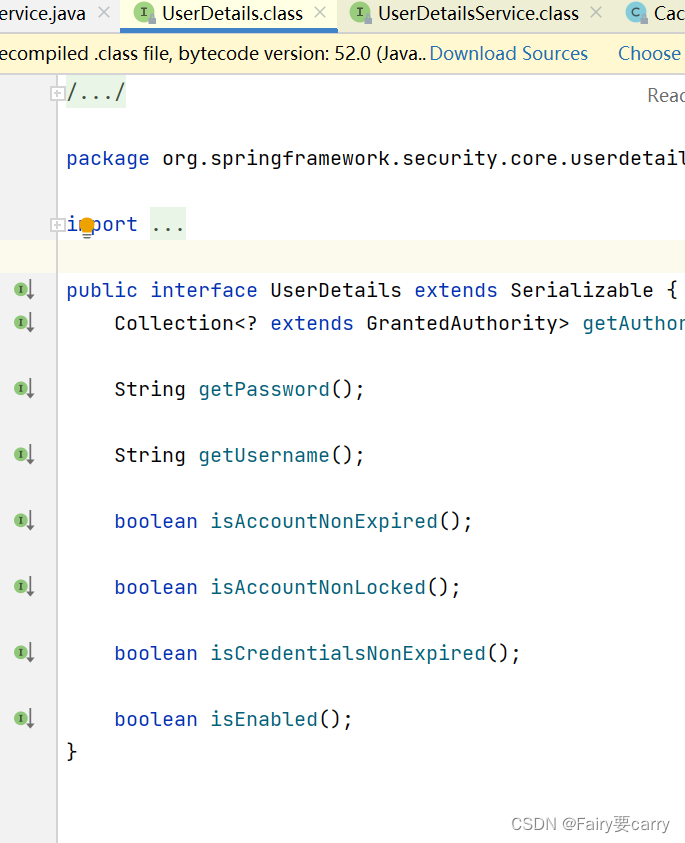
需要实现UserDetailService接口——>因为实际开发中账号密码都是从数据库中查询出来的,所以我们需要自定义逻辑控制认证逻辑;
UserDetailService接口:查询数据库用户名和密码过程;
1.创建一个类继承UsernamePasswordAuthenticationnFilter:重写三个方法
2.创建类实现UserDetailService:编写查询数据过程,返回User对象(由安全框架提供)
 protected void successfulAuthentication(HttpServletRequest request, HttpServletResponse response, FilterChain chain, Authentication authResult) throws IOException, ServletException {
        SecurityContext context = SecurityContextHolder.createEmptyContext();
        context.setAuthentication(authResult);
        SecurityContextHolder.setContext(context);
        if (this.logger.isDebugEnabled()) {
            this.logger.debug(LogMessage.format("Set SecurityContextHolder to %s", authResult));
        }

        this.rememberMeServices.loginSuccess(request, response, authResult);
        if (this.eventPublisher != null) {
            this.eventPublisher.publishEvent(new InteractiveAuthenticationSuccessEvent(authResult, this.getClass()));
        }

        this.successHandler.onAuthenticationSuccess(request, response, authResult);
    }

    protected void unsuccessfulAuthentication(HttpServletRequest request, HttpServletResponse response, AuthenticationException failed) throws IOException, ServletException {
        SecurityContextHolder.clearContext();
        this.logger.trace("Failed to process authentication request", failed);
        this.logger.trace("Cleared SecurityContextHolder");
        this.logger.trace("Handling authentication failure");
        this.rememberMeServices.loginFail(request, response);
        this.failureHandler.onAuthenticationFailure(request, response, failed);
    }
?实现UserDetailService接口:
当需要提供自定义用户服务时,需要实现UserDetailService接口
@Service
public class MyUserDetailsService implements UserDetailsService {

    @Autowired
    private UserRepository userRepository;

    @Override
    public UserDetails loadUserByUsername(String username) {
        User user = userRepository.findByUsername(username);
        if (user == null) {
            throw new UsernameNotFoundException(username);
        }
        return new MyUserPrincipal(user);
    }
}
关于继承WebSecurityConfigurerAdapter类的使用
作用:增加Authoration权限,重写configure方法
第一个configure方法,配置的是认证信息,AuthenticationManagerBuilder意思就是管理员建造(也就是认证的入口,向security提供真实的用户身份);——>像我们这里配置的是自定义的UserDetailService,目的是获取的用户信息是来自于数据库中的,这数据库的这些用户就是认证入口的管理员;
第二个configure方法,配置的是security的认证策略,并且每个模块都要用and结尾;
authorizeRequests()配置路径拦截,表明路径访问所对应的权限,角色,认证信息。
formLogin()对应表单认证相关的配置
logout()对应了注销相关的配置
httpBasic()可以配置basic登录/** * @author diao 2022/2/23 */ //继承WebSecurityAdapter可以得到Security默认的安全功能 @Configuration public class SecurityConfig extends WebSecurityConfigurerAdapter{ @Autowired private UserDetailsService userDetailsService; //configure方法可以配置用户名和密码,并且利用BCryptPasswordEncoder进行密码加密 @Override protected void configure(AuthenticationManagerBuilder auth) throws Exception { auth.userDetailsService(userDetailsService).passwordEncoder(password()); } @Bean PasswordEncoder password(){ return new BCryptPasswordEncoder(); } @Override protected void configure(HttpSecurity http) throws Exception { http.formLogin()//自定义自己编写的前端页面 .loginPage("/login.html")//登录页面设置 .loginProcessingUrl("/url/login")//登录访问路径 .defaultSuccessUrl("/test/index").permitAll()//登录成功后跳转路径 .and().authorizeRequests() .antMatchers("/","/test/hello","/user/login").permitAll()//设置哪些路径可以直接访问,不需要认证 .anyRequest().authenticated() .and().csrf().disable();//关闭csrf防护 } }
?如何设置登录的用户名密码:
1、通过配置文件,老规矩:一般starterxxx都有对应springboot封装的类(xxxAutoConfiguration,找到对应的Properties就可以知道咋地配置了)

2.基于配置类对用户名密码进行设置:继承WebConfigurerAdapter并重写里面的Configure方法,将用户名密码放在内存中
/**
 * @author diao 2022/2/23
 */
@Configuration
public class SecurityConfig extends WebSecurityConfigurerAdapter {
    @Override
    protected void configure(AuthenticationManagerBuilder auth) throws Exception {

        //利用BCryptPasswordEncoder进行密码加密
        BCryptPasswordEncoder passwordEncoder = new BCryptPasswordEncoder();
        String password = passwordEncoder.encode("2002514wyh11");

        //将认证信息放到内存中
        auth.inMemoryAuthentication().withUser("Fairy").password(password).roles("admin");
    }

   /*因为我们需要用到BCryptPasswordEncoder
      所以我们需要弄一个BCryptPasswordEncoder接口
      所以这里我们定义一个返回BCryptPasswordEncoder接口的方法
      * */
    @Bean
    PasswordEncoder password(){
        return new BCryptPasswordEncoder();
    }
}
3.自定义UserDetailsService来实现Security用户名密码设置:
package com.wuyuhang.security.service;

import org.springframework.security.core.GrantedAuthority;
import org.springframework.security.core.authority.AuthorityUtils;
import org.springframework.security.core.userdetails.User;
import org.springframework.security.core.userdetails.UserDetails;
import org.springframework.security.core.userdetails.UserDetailsService;
import org.springframework.security.core.userdetails.UsernameNotFoundException;
import org.springframework.security.crypto.bcrypt.BCryptPasswordEncoder;
import org.springframework.stereotype.Service;

import java.util.List;

/**
 * @author diao 2022/2/23
 */
//自定义一个名为userDetailsService的组件注入到容器中
@Service("userDetailsService")
public class MyUserDetailService implements UserDetailsService {
    @Override
    public UserDetails loadUserByUsername(String username) throws UsernameNotFoundException {
        //设置权限
        List<GrantedAuthority> authorityList = AuthorityUtils.commaSeparatedStringToAuthorityList("role");
        //返回security中的User,本质上就是自己定义的用户实现(用户名,密码,权限)
        return new User("Fairy",new BCryptPasswordEncoder().encode("2002514wyh11"),authorityList);
    }
}
?实际上就是返回Security中自定义的UserDetails

package com.wuyuhang.security.config;

import org.springframework.beans.factory.annotation.Autowired;
import org.springframework.beans.factory.annotation.Qualifier;
import org.springframework.context.annotation.Bean;
import org.springframework.context.annotation.Configuration;
import org.springframework.security.config.annotation.authentication.builders.AuthenticationManagerBuilder;
import org.springframework.security.config.annotation.web.configuration.WebSecurityConfigurerAdapter;
import org.springframework.security.core.userdetails.UserDetailsService;
import org.springframework.security.crypto.bcrypt.BCryptPasswordEncoder;
import org.springframework.security.crypto.password.PasswordEncoder;

/**
 * @author diao 2022/2/23
 */
@Configuration
public class UserLoginConfig extends WebSecurityConfigurerAdapter {

    //注入自定义的userDetailService组件
    @Autowired
    private UserDetailsService userDetailsService;

    @Override
    protected void configure(AuthenticationManagerBuilder auth) throws Exception {
        //设置自己的实现类,并且设置密码加密(密码加密方式:BCryptPasswordEncoder)
        auth.userDetailsService(userDetailsService).passwordEncoder(password());
    }

    @Bean
    PasswordEncoder password(){
        return new BCryptPasswordEncoder();
    }
}

3.数据库方式实现登录:用的mybatis
package com.wuyuhang.security.service;

import com.baomidou.mybatisplus.core.conditions.query.QueryWrapper;
import com.wuyuhang.security.Utils.ToMap;
import com.wuyuhang.security.mapper.UserMapper;
import org.springframework.beans.factory.annotation.Autowired;
import org.springframework.security.core.GrantedAuthority;
import org.springframework.security.core.authority.AuthorityUtils;
import org.springframework.security.core.userdetails.User;
import org.springframework.security.core.userdetails.UserDetails;
import org.springframework.security.core.userdetails.UserDetailsService;
import org.springframework.security.core.userdetails.UsernameNotFoundException;
import org.springframework.security.crypto.bcrypt.BCryptPasswordEncoder;
import org.springframework.stereotype.Service;

import java.util.List;

/**
 * @author diao 2022/2/23
 */
//自定义一个名为userDetailsService的组件注入到容器中

@Service("userDetailsService")
public class MyUserDetailService implements UserDetailsService {

    @Autowired
    private UserMapper userMapper;

    @Override
    public UserDetails loadUserByUsername(String username) throws UsernameNotFoundException {
        User user = userMapper.selectOne(ToMap.getInstance().addUser(username).getMap());
//判断
        if (user == null) {
            throw new UsernameNotFoundException("用户名不存在!");
        }

        /*当数据库查询用户信息不为null,给user设置权限,并且返回用户信息
        * */
        //授权
        List<GrantedAuthority> authorityList = AuthorityUtils.commaSeparatedStringToAuthorityList("role");
//    返回用户信息,返回后我们就可以正常访问controller了
        return new User(user.getUsername(), new BCryptPasswordEncoder().encode(user.getPassword()), authorityList);
    }
}
?配置类(将UserDetailsService加载):
package com.wuyuhang.security.config;

import org.springframework.beans.factory.annotation.Autowired;
import org.springframework.context.annotation.Bean;
import org.springframework.context.annotation.Configuration;
import org.springframework.security.config.annotation.authentication.builders.AuthenticationManagerBuilder;
import org.springframework.security.config.annotation.web.builders.HttpSecurity;
import org.springframework.security.config.annotation.web.configuration.WebSecurityConfiguration;
import org.springframework.security.config.annotation.web.configuration.WebSecurityConfigurerAdapter;
import org.springframework.security.core.userdetails.UserDetailsService;
import org.springframework.security.crypto.bcrypt.BCryptPasswordEncoder;
import org.springframework.security.crypto.password.PasswordEncoder;

/**
 * @author diao 2022/2/23
 */
@Configuration
public class SecurityConfig extends WebSecurityConfigurerAdapter{

    @Autowired
    private UserDetailsService userDetailsService;

    //configure方法可以配置用户名和密码,并且利用BCryptPasswordEncoder进行密码加密
    @Override
    protected void configure(AuthenticationManagerBuilder auth) throws Exception {
        auth.userDetailsService(userDetailsService).passwordEncoder(password());
    }

    @Bean
    PasswordEncoder password(){
      return new BCryptPasswordEncoder();
    }

    @Override
    protected void configure(HttpSecurity http) throws Exception {
        http.formLogin()//自定义自己编写的前端页面
                .loginPage("/login.html")//登录页面设置
                .loginProcessingUrl("/url/login")//登录访问路径
                .defaultSuccessUrl("/test/index").permitAll()//登录成功后跳转路径
                .and().authorizeRequests()
                .antMatchers("/","/test/hello","/user/login").permitAll()//设置哪些路径可以直接访问,不需要认证
                .anyRequest().authenticated()
                .and().csrf().disable();//关闭csrf防护
    }
}