SpringCloud版本:2021.0.1? ? ?SpringBoot版本:2.6.3
之前的文章?
一、创建项目
1、打开IDEA,新建项目,因为之前已经建好Eureka项目了,所以这次打开Eureka项目再新建一个Module项目,这样两个项目就会在同一个界面了。

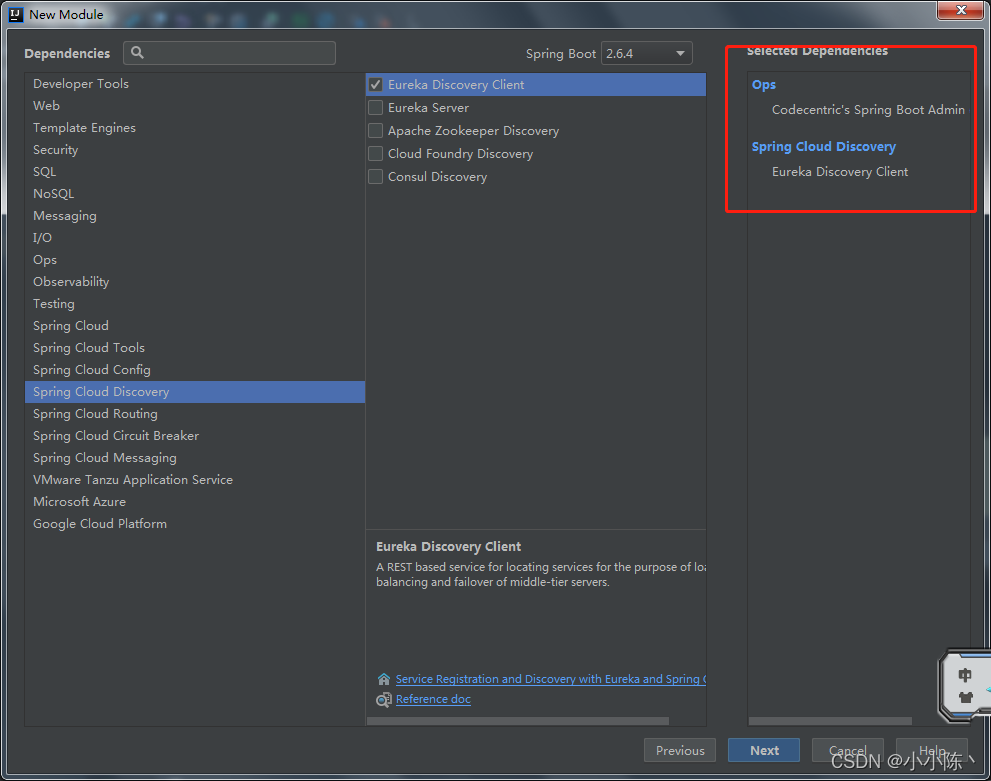
2、前面的和之前新建Eureka项目一样,不过这次选的依赖不一样了,这次选了SpringBoot admin 的server服务和Eureka的client服务,这样以后注册到Eureka的服务就会自动同步到SpringBoot admin,不用再对SpringBoot admin进行注册。

?3、在项目的启动类上面加上@EnableDiscoveryClient和@EnableAdminServer这个注解,一个是说明像Eureka注册的,一个是说明当前服务为SpringBoot admin服务端的

4、修改application.yml的配置,记得如果要注册的Eureka有设置账号密码,那么这里的配置文件就得加上去。
server:
  port: 8769
spring:
  application:
    name: test-admin
eureka:
  instance:
    leaseRenewalIntervalInSeconds: 10
    health-check-url-path: /actuator/health
    hostname: 127.0.0.1
  client:
    register-with-eureka: true
    fetch-registry: true
    registryFetchIntervalSeconds: 5
    ##Eureka账号密码
    service-url:
      defaultZone: http://test:123456@${eureka.instance.hostname}:8001/eureka/
management:
  endpoints:
    web:
      exposure:
        include: "*"
  endpoint:
    health:
      show-details: ALWAYS
?5、启动Eureka和SpringBoot admin 服务后进入http://127.0.0.1:8769/,就可看到admin服务已经注册到Eureka并可以看到监控页面了。
 ?
?
 ?
?
二、给SpringBoot Admin加上密码登陆的验证
1、修改application.yml的配置文件,加上账号密码,
server:
  port: 8769
spring:
  application:
    name: test-admin
  security:
    user:
      name: test
      password: 123456
eureka:
  instance:
    leaseRenewalIntervalInSeconds: 10
    health-check-url-path: /actuator/health
    hostname: 127.0.0.1
    metadata-map:
      user.name: ${spring.security.user.name}
      user.password: ${spring.security.user.password}
  client:
    register-with-eureka: true
    fetch-registry: true
    registryFetchIntervalSeconds: 5
    service-url:
      defaultZone: http://${spring.security.user.name}:${spring.security.user.password}@${eureka.instance.hostname}:8001/eureka/

management:
  endpoints:
    web:
      exposure:
        include: "*"
  endpoint:
    health:
      show-details: ALWAYS
2、pom.xml配置文件也得加上新依赖
<dependency>
            <groupId>org.springframework.boot</groupId>
            <artifactId>spring-boot-starter-security</artifactId>
</dependency>?3、新建config文件夹,新建配置文件MonitorWebSecurityConfigure
@EnableWebSecurity
public class MonitorWebSecurityConfigure extends WebSecurityConfigurerAdapter {
    private final AdminServerProperties adminServer;

    public MonitorWebSecurityConfigure(AdminServerProperties adminServer) {
        this.adminServer = adminServer;
    }

    @Override
    protected void configure(HttpSecurity http) throws Exception {
        SavedRequestAwareAuthenticationSuccessHandler successHandler =
                new SavedRequestAwareAuthenticationSuccessHandler();
        successHandler.setTargetUrlParameter("redirectTo");
        successHandler.setDefaultTargetUrl(this.adminServer.getContextPath() + "/");

        http
                .authorizeRequests()
                .antMatchers(this.adminServer.getContextPath() + "/assets/**").permitAll()
                .antMatchers(this.adminServer.getContextPath() + "/login").permitAll()
                .anyRequest().authenticated()
                .and()
                .formLogin()
                .loginPage(this.adminServer.getContextPath() + "/login")
                .successHandler(successHandler)
                .and()
                .logout()
                .logoutUrl(this.adminServer.getContextPath() + "/logout")
                .and()
                .httpBasic()
                .and()
                .csrf()
                .csrfTokenRepository(CookieCsrfTokenRepository.withHttpOnlyFalse())
                .ignoringRequestMatchers(
                        new AntPathRequestMatcher(this.adminServer.getContextPath() +
                                "/instances", HttpMethod.POST.toString()),
                        new AntPathRequestMatcher(this.adminServer.getContextPath() +
                                "/instances/*", HttpMethod.DELETE.toString()),
                        new AntPathRequestMatcher(this.adminServer.getContextPath() + "/actuator/**"))
                .and()
                .rememberMe()
                .key(UUID.randomUUID().toString())
                .tokenValiditySeconds(1209600);
    }
}
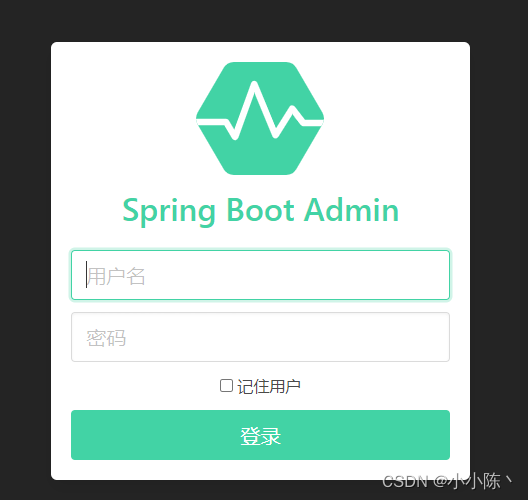
4、再重启,就需要输入账号和密码了??
