一、打包后台项目(springboot)
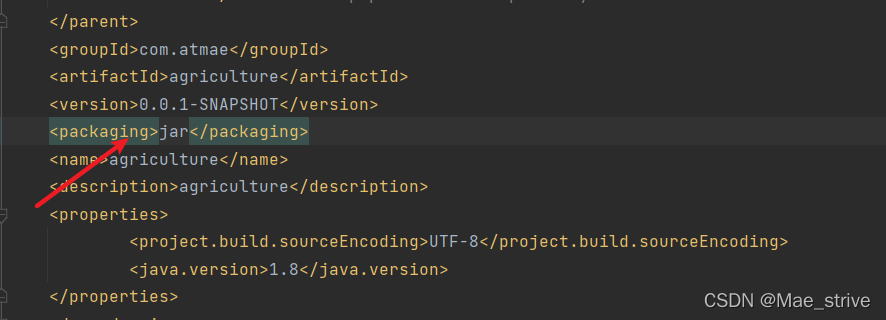
1、pom.xml
打包方式一定为jar

添加插件:
	<plugin>
              <groupId>org.springframework.boot</groupId
              <artifactId>spring-boot-maven-plugin</artifactId>
    </plugin>
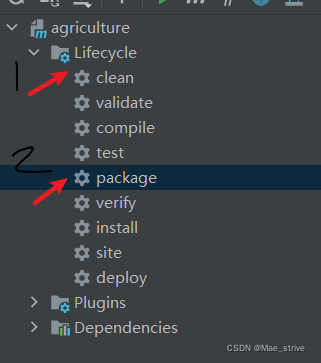
2、使用maven的打包工具
先clean后package

3、将文件传到服务器上
4、部署
nohup java -jar agriculture-0.0.1-SNAPSHOT.jar &

然后回车就可以
附:
如果端口被占用 则需要关闭 或者 换一个端口
关闭:
ps -ef |grep java
杀死进程
kill -9 进程号
 使用
使用ps -ef |grep java 查看当前进程

说明成功!
二、部署vue项目
1、打包vue项目
npm run build
会出现一个dist文件夹 将dist文件夹上传到服务器
使用nginx代理
2、前提需要nginx
如果已经用于nginx 跳过即可
1、安装依赖和相关库:
[root@localhost ~]# yum -y install gcc-c++ zlib-devel openssl-devel libtool
2、下载nginx安装包并解压:
[root@localhost ~]# cd /usr/local
[root@localhost local]# wget http://nginx.org/download/nginx-1.14.0.tar.gz
[root@localhost local]# tar -zxvf nginx-1.14.0.tar.gz
3、配置和安装
[root@localhost local]# cd nginx-1.14.0
[root@localhost nginx-1.14.0]# ./configure --prefix=/usr/local/nginx
[root@localhost nginx-1.14.0]# make && make install
4、启动nginx:
[root@localhost nginx-1.14.0]# cd ../nginx/sbin
[root@localhost sbin]# ./nginx
5、查看nginx:
[root@localhost nginx]# ps -ef | grep nginx
root      13850      1  0 17:01 ?        00:00:00 nginx: master process ./nginx
nobody    13851  13850  0 17:01 ?        00:00:00 nginx: worker process
root      13879   1128  0 17:11 pts/0    00:00:00 grep --color=auto nginx
6、停止和重启nginx:
./nginx -s reload   #重启
./nginx -s stop #关闭
7、安装 anywhere前端静态资源服务器插件:
npm install anywhere -g
8、进入nginx配置目录
cd /usr/local/nginx/conf
vim nginx.conf
修改:
location / {
            root [dist文件夹的位置];
            index index.html index.htm;
            try_files $uri $uri/ /index.html;
        }
9、nginx重启
cd ../sbin/
/nginx -s reload
注意
如果按照过nginx 只需要改conf文件夹下的location即可