CyclicBarrier详解
CyclicBarrier
字面意思回环栅栏(循环屏障),通过它可以实现让一组线程等待至某个状态(屏障点)之后再全部同时执行。叫做回环是因为当所有等待线程都被释放以后,CyclicBarrier可以被重用
CyclicBarrier的使用
重要方法
// parties表示屏障拦截的线程数量,每个线程调用 await 方法告诉 CyclicBarrier 我已经到达了屏障,然后当前线程被阻塞。
 public CyclicBarrier(int parties)
 // 用于在线程到达屏障时,优先执行 barrierAction,方便处理更复杂的业务场景(该线程的 执行时机是在到达屏障之后再执行)
 public CyclicBarrier(int parties, Runnable barrierAction)
 //屏障 指定数量的线程全部调用await()方法时,这些线程不再阻塞
 // BrokenBarrierException 表示栅栏已经被破坏,破坏的原因可能是其中一个线程 await() 时被中断或者超时
 public int await() throws InterruptedException, BrokenBarrierException
 public int await(long timeout, TimeUnit unit) throws InterruptedException, Bro kenBarrierException, TimeoutException
 //循环 通过reset()方法可以进行重置
 public void reset()
案例
@Slf4j
public class CyclicBarrierLOL {
	private static final CyclicBarrier cbr = new CyclicBarrier(6);
	private static int aa ;

	private void ChooseHero(String route) {
		new Thread(()->{
			log.info(route + "选择好了英雄,等待进入游戏");
			try {
				cbr.await();
			} catch (InterruptedException e) {
				e.printStackTrace();
				log.info(route+"已被中断,无法进行游戏");
			} catch (BrokenBarrierException e) {
				e.printStackTrace();
				log.info(route+"等待超时,无法进行游戏");
			}
		}).start();
	}
	public static void main(String[] args) throws Exception {
		CyclicBarrierLOL lol = new CyclicBarrierLOL();
		String[] rotes = {"上单","打野","中单","ADC","辅助"};
		while (true){
			log.info("进入英雄选择界面,等待英雄选择");
			for (int i = 0; i < 5; i++) {
				String rote = rotes[i];
				lol.ChooseHero(rote);
			}
			cbr.await();
			log.info("英雄选择完成,开始进入游戏");
			aa++;
			if (aa == 2) return ;
		}
	}
}
源码分析
CyclicBarrier的源码分析需要有ReentrantLock源码的基础。
CyclicBarrier的构造方法,第一个参数:资源数 第二个参数:执行任务 当资源数为0的时候调用这个任务
这个资源数可以理解为Semaphore和CountDownLatch的资源数,只不过Semaphore中持有资源数的线程才能通过,CountDownLatch中资源数不为0的时候线程阻塞。
在CyclicBarrier中定义的parties和count都等于资源数。其中this.parties用于线程重置,this.count 用于计数器控制线程是否阻塞

阻塞部分
当调用await()方法的时候进入阻塞路程

private int dowait(boolean timed, long nanos)
		//如果通过await调用dowait 那么timed = false
		//如果通过await(long timeout, TimeUnit unit) 调用dowait 那么timed  就为true
        throws InterruptedException, BrokenBarrierException,
               TimeoutException {
        //上锁操作 为什么要上锁  后续逻辑用到ReentrantLock条件锁的await方法 必须要先加锁才能使用await方法
        final ReentrantLock lock = this.lock;
        lock.lock();
        try {
        	//这部分不是逻辑重点 不用管
            final Generation g = generation;
            if (g.broken)
                throw new BrokenBarrierException();
            if (Thread.interrupted()) {
                breakBarrier();
                throw new InterruptedException();
            }
            //重点逻辑从这里了开始
            //资源数减一
            int index = --count;
           //当资源数变成0
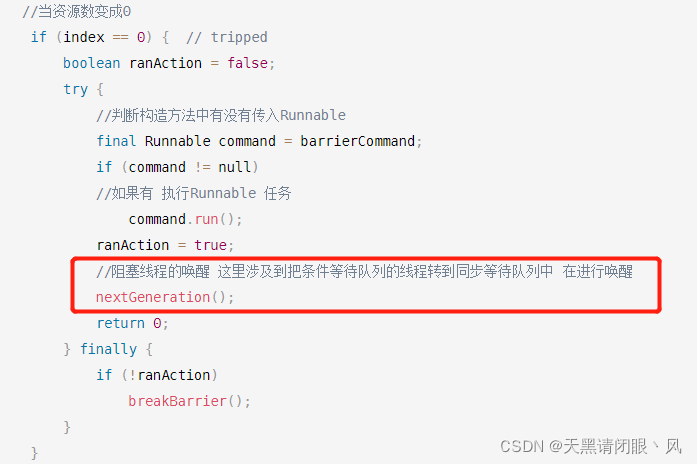
            if (index == 0) {  // tripped
                boolean ranAction = false;
                try {
                	//判断构造方法中有没有传入Runnable
                    final Runnable command = barrierCommand;
                    if (command != null)
                    //如果有 执行Runnable 任务
                        command.run();
                    ranAction = true;
                    //阻塞线程的唤醒 这里涉及到把条件等待队列的线程转到同步等待队列中 在进行唤醒
                    nextGeneration();
                    return 0;
                } finally {
                    if (!ranAction)
                        breakBarrier();
                }
            }
            // 当资源数不为0的时候执行自旋逻辑
            for (;;) {
                try {

                    if (!timed)
                    //这个trip 是 private final Condition trip = lock.newCondition();
                    //这里用到了ReentrantLock的条件队列, trip.await()阻塞当前线程并且进入条件阻塞队列
                    //同时await方法会释放锁对象
                        trip.await();
                       //如果传入等待超时时间
                    else if (nanos > 0L)
                    	//调用含有等待超时的阻塞方法
                        nanos = trip.awaitNanos(nanos);
                } catch (InterruptedException ie) {
                   //抛出中断异常的后续操作
                    if (g == generation && ! g.broken) {
                    //底层的代码就是唤醒线程
                        breakBarrier();
                        throw ie;
                    } else {
                        Thread.currentThread().interrupt();
                    }
                }
                if (g.broken)
                    throw new BrokenBarrierException();
                if (g != generation)
                    return index;
                    //等待超时后执行的逻辑
                if (timed && nanos <= 0L) {
                	//底层的代码就是唤醒线程
                    breakBarrier();
                    throw new TimeoutException();
                }
            }
        } finally {
        	//当资源数=0的那部分代码执行完成后 最终还会执行这行代码
        	//释放锁 这是ReentrantLock 释放锁的逻辑 唤醒同步等待队列中线程  这部分逻辑不在分析
        	// 如果资源数不为0 不会执行该行代码 因为不为0 线程阻塞并且在条件等待队列中 不会往下执行
            lock.unlock();
        }
    }
阻塞流程一个重点就是阻塞进入队列对应着就是trip.await();在看这部分源码之前先来看下AQS对于条件阻塞队列的实现


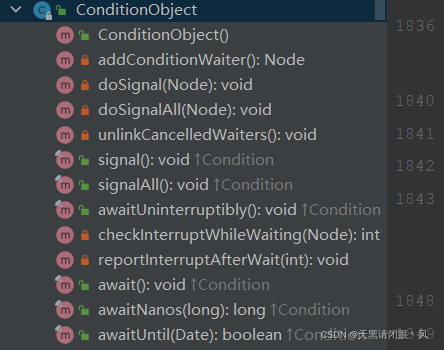
条件阻塞队列是一个单向链表,如何创造这个链表就在addConditionWaiter()方法当中
private Node addConditionWaiter() {
			//定义一个节点等于链表的尾节点  一开始这个尾节点自然是null 因为还没有链表
            Node t = lastWaiter;
            // If lastWaiter is cancelled, clean out.
            if (t != null && t.waitStatus != Node.CONDITION) {
                unlinkCancelledWaiters();
                t = lastWaiter;
            }
            //创建一个节点 Node.CONDITION 表示一个状态 等于-2 把当前线程和状态赋值给头节点
            Node node = new Node(Thread.currentThread(), Node.CONDITION);
            //如果尾节点为null
            if (t == null)
            	//链表的头节点等于创建出来的节点
                firstWaiter = node;
            else
            	//否则链表的下一个节点等于创建出来的节点
                t.nextWaiter = node;
            //链表的尾节点等于创建出来的节点
            lastWaiter = node;
            //到此创建了一个新链表并且完成线程入队操作
            return node;
        }
总结就是addConditionWaiter();方法如果没有链表创建链表完成入队,如果已经创建了链表就直接入队
在回过头来看trip.await();
  public final void await() throws InterruptedException {
            if (Thread.interrupted())
                throw new InterruptedException();
             //创建链表并且如队
            Node node = addConditionWaiter();
            //解锁操作
            int savedState = fullyRelease(node);
            int interruptMode = 0;
          //阻塞操作
            while (!isOnSyncQueue(node)) {
            	//线程被阻塞在这个地方
                LockSupport.park(this);
                if ((interruptMode = checkInterruptWhileWaiting(node)) != 0)
                    break;
            }
            //当线程被唤醒的时候重新获取锁acquireQueued(node, savedState)底层通过CAS获取锁
            //为什么要重新获取锁 dowait的finlly方法中时解锁操作 所以要先获取锁
            //如果此时有其他线程竞争,CAS获取锁失败后继续阻塞
            //acquireQueued这个方法就是ReentrantLock底层获取锁的方法 不再分析了
            if (acquireQueued(node, savedState) && interruptMode != THROW_IE)
                interruptMode = REINTERRUPT;
            if (node.nextWaiter != null) // clean up if cancelled
                unlinkCancelledWaiters();
            if (interruptMode != 0)
                reportInterruptAfterWait(interruptMode);
        }
来看下解锁方法fullyRelease(node)
final int fullyRelease(Node node) {
        boolean failed = true;
        try {
        	//获取资源状态 之前有说过如果要加锁 通过CAS把State从0改成1
            int savedState = getState();
           //解锁的逻辑 这部分和之前ReentrantLock解锁逻辑是一样的通过CAS把1改成0然后设置独占的线程为null 就不在展开了
            if (release(savedState)) {
             //解锁成功返回资源状态
                failed = false;
                return savedState;
            } else {
                throw new IllegalMonitorStateException();
            }
        } finally {
            if (failed)
                node.waitStatus = Node.CANCELLED;
        }
    }
总结下来就是 trip.await(); 作用就是创建链表入队,释放锁 阻塞入队线程。
dowait(boolean timed, long nanos)中当CyclicBarrier的资源数不为0的时候,进行上述操作阻塞当前线程然后进入条件等待队列,然后释放锁,进行下一个线程的操作。
当资源数等于0的时候就执行了这部分代码,重点是nextGeneration(); 这个是比较精髓的点

  private void nextGeneration() {
        //重点就在于这个方法
        trip.signalAll();
        // 重复利用资源数,开始新一轮的屏障
        count = parties;
        generation = new Generation();
    }
  public final void signalAll() {
            if (!isHeldExclusively())
                throw new IllegalMonitorStateException();
            //获取等待条件队列的头节点
            Node first = firstWaiter;
            if (first != null)
            	//把头节点传入
                doSignalAll(first);
        }
 private void doSignalAll(Node first) {
 			//把首尾节点设置为null
            lastWaiter = firstWaiter = null;
            do {
            	//设置一个节点等于 头节点的下一个节点
                Node next = first.nextWaiter;
                //设置头节点的下一个节点为null  也就是说把头节点指向下一个节点的指针设置为null
                //由于之前就设置了头节点==null 再把指针也设置为null 这样头节点就被删除了 也就是出队的意思
                first.nextWaiter = null;
                //进入同步队列
                transferForSignal(first);
                //由于第一个头节点被删除了  那么第二个节点就要成为头节点
                first = next;
                //精髓点在于 当头节点不为空进行了do while 的循环 直到把所有节点都出队并且进入到同步队列
            } while (first != null);
        }
doSignalAll方法就是单向链表出队,进入同步等待队列
再来看进入同步队列的方法
final boolean transferForSignal(Node node) {
        if (!compareAndSetWaitStatus(node, Node.CONDITION, 0))
            return false;
         //如果双向链表不存在,创建双向链表,同时把节点添加到双向链表中
         //这部分就是把条件等待队列的线程全部添加到同步等待队列中
         //这部分的源码在ReentrantLock源码解析的时候分析过就不在分析了
        Node p = enq(node);
        //获取链表的一个状态(是否可以唤醒)
        int ws = p.waitStatus;
        //如果状态满足唤醒阻塞线程
        if (ws > 0 || !compareAndSetWaitStatus(p, ws, Node.SIGNAL))
            LockSupport.unpark(node.thread);
        return true;
    }
当nextGeneration()执行完成后,return 0 最后还会执行dowait(boolean timed, long nanos) finally中的lock.unlock();方法。这个方法就是唤醒同步等待队列的方法。这部分逻辑就是ReentrantLock的解锁逻辑。
CyclicBarrier源码流程总结
CyclicBarrier cbr = new CyclicBarrier(3, new Runnable() {
		@Override
		public void run() {
			System.out.println("begin run");
		}
	});
一上面构造出的CyclicBarrier为例子,此时的资源数是3
当调用cbr.await();的时候底层调用dowait(false, 0L)方法。
dowait(false, 0L)的执行流程:
一开始就加了ReentrantLock的锁,资源数(一开始是3)减1,判断资源数是不是等于0,如果不等于0通过自旋调用 trip.await();其中trip是ReentrantLock的条件锁,
trip.await();的作用:
- 底层调用
addConditionWaiter()完成创建单向链表并且进入该队列 - 调用
fullyRelease(node)完成释放锁 - 调用
LockSupport.park(this);阻塞线程 此时线程就是阻塞在这个地方 - 当线程被唤醒的时候调用
acquireQueued(node, savedState)通过CAS获取ReentrantLock的锁
当资源数判断为0时,执行构造方法中的Runnable任务。然后条用nextGeneration(); nextGeneration();底层调用trip.signalAll(); 内部调用了doSignalAll。doSignalAll作用是条件等待队列的线程出队并且进入同步等待队列中。
nextGeneration();执行完成后 执行 dowait(false, 0L)的finally里面的方法 lock.unlock();此时释放ReentrantLock的锁。
释放锁自然会唤醒ReentrantLock同步等待队列中阻塞的线程。
到此CyclicBarrier完成一轮的阻塞-唤醒流程