MyBatisX一款基于 IDEA 的快速开发插件,为效率而生。
官网地址:https://baomidou.com/pages/ba5b24
1、安装
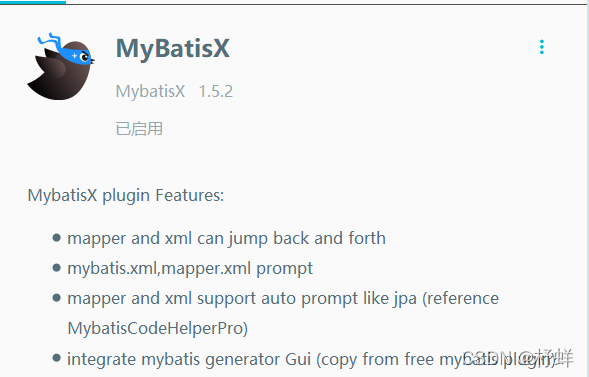
打开 IDEA,进入 File -> Settings -> Plugins -> Browse Repositories,输入 mybatisx 搜索并安装。如下图:

2、代码快速生成
快速创建新的SpringBoot工程,参考MyBatisPlus–入门案例_杼蛘的博客-CSDN博客
a>在IDEA中打开数据库,选择数据源,如下:

b>会显示如下界面,填入数据库相关信息:

c>点击测试连接,如下图:

若填入信息均正确,但是连接失败,可选择低版本MySQL,如下图:
d>点击确定,会显示如下图,会将该数据库所有的表显示出来:

e>选中任意一个表,右键->MybatisX-Generator,会弹出如下图:

| 描述 | 说明 |
|---|---|
| module path | 工程路径 |
| base package | 基础包,所有生成的内容都会在该包下,一般自定义 |
| encoding | 编码,保持默认 |
| superClass | 父类 |
| base path | 主程序路径 |
| relative package | 实体类生成的包,一般命名为pojo或entity |
| ignore field prefix | 忽略表中字段前缀,如t_id,生成实体属性时,将忽略前缀t_ |
| ignore field suffix | 忽略表中字段后缀,如id_s,生成实体属性时,将忽略后缀_s |
| ignore table prefix | 忽略表前缀,如t_user,生成实体类时,将忽略前缀t_ |
| ignore table suffix | 忽略表后缀,如user_s,生成实体类时,将忽略后缀_s |
若IDEA版本无该右键选项,建议重启IDEA或升级一下
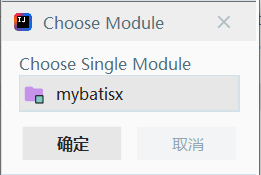
f>点击module path框,弹出如下,直接选择新创建工程:

g>填好相关内容,如下:

h>点击Next,如下图,并选择如下:

t>点击Finish,查看工程的项目结构,如下图:

3、快速生成CRUD
插入
打开自动生成的UserMapper接口,输入名称,如插入一条用户记录,将不为null的字段进行插入,如下:

名称必须规范,查询以select开头、插入用insert开头、修改用update开头、删除用delete开头
不过MyBatisX会有名称提示,一般直接选择,如敲
inser,选择第一个:
光标位于名称后面,按alt+回车,如下图(选择第二个):

此时方法自动补全,如下:
int insertSelective(User user);
查看对应mapper映射文件,路径src/main/resources/mapper/UserMapper.xml,自动生成:
<insert id="insertSelective">
    insert into user
    <trim prefix="(" suffix=")" suffixOverrides=",">
        <if test="id != null">id,</if>
        <if test="name != null">name,</if>
        <if test="age != null">age,</if>
        <if test="email != null">email,</if>
    </trim>
    values
    <trim prefix="(" suffix=")" suffixOverrides=",">
        <if test="id != null">#{id,jdbcType=BIGINT},</if>
        <if test="name != null">#{name,jdbcType=VARCHAR},</if>
        <if test="age != null">#{age,jdbcType=INTEGER},</if>
        <if test="email != null">#{email,jdbcType=VARCHAR},</if>
    </trim>
</insert>
删除
若根据id和age组合条件来进行删除,如下:

光标位于名称后面,按alt+回车,选择[MyBatisX]Generate MyBatis Sql,自动补全方法如下:
int deleteByIdAndAge(@Param("id") Long id, @Param("age") Integer age);
查看对应mapper映射文件,路径src/main/resources/mapper/UserMapper.xml,自动生成:
<delete id="deleteByIdAndAge">
    delete
    from user
    where id = #{id,jdbcType=NUMERIC}
    AND age = #{age,jdbcType=NUMERIC}
</delete>
修改
若通过id修改age和email,如下:

光标位于名称后面,按alt+回车,选择[MyBatisX]Generate MyBatis Sql,自动补全方法如下:
int updateAgeAndEmailById(@Param("age") Integer age, @Param("email") String email, @Param("id") Long id);
查看对应mapper映射文件,路径src/main/resources/mapper/UserMapper.xml,自动生成:
<update id="updateAgeAndEmailById">
    update user
    set age   = #{age,jdbcType=NUMERIC},
    email = #{email,jdbcType=VARCHAR}
    where id = #{id,jdbcType=NUMERIC}
</update>
查询
若根据name来进行模糊查询,如下:

光标位于名称后面,按alt+回车,选择[MyBatisX]Generate MyBatis Sql,自动补全方法如下:
List<User> selectAllByNameLike(@Param("name") String name);
查看对应mapper映射文件,路径src/main/resources/mapper/UserMapper.xml,自动生成:
<resultMap id="BaseResultMap" type="com.aiw.mybatisx.pojo.User">
    <id property="id" column="id" jdbcType="BIGINT"/>
    <result property="name" column="name" jdbcType="VARCHAR"/>
    <result property="age" column="age" jdbcType="INTEGER"/>
    <result property="email" column="email" jdbcType="VARCHAR"/>
</resultMap>
<select id="selectAllByNameLike" resultMap="BaseResultMap">
    select
    <include refid="Base_Column_List"/>
    from user
    where
    name like #{name,jdbcType=VARCHAR}
</select>
其它查询自测,步骤是一样的
4、测试
添加测试方法,测试类路径为src/test/java/com/aiw/mybatisx/MybatisxApplicationTests.java
@SpringBootTest
class MybatisxApplicationTests {

    @Autowired(required = false)
    private UserMapper userMapper;

    @Test
    public void testMyBatisX() {
        userMapper.insertSelective(null);
        userMapper.deleteByIdAndAge(1L, 18);
        userMapper.updateAgeAndEmailById(20, "100@qq.com", 3L);
        userMapper.selectAllByNameLike("王");
    }

}


