【学习笔记】Hello SpringBoot

文章目录
SpringBoot介绍
什么是 SpringBoot?
Spring Boot是由Pivotal团队提供的全新框架,其设计目的是用来简化Spring应用初始搭建以及开发过程。 该框架使用了特定的方式来进行配置,从而使开发人员不再需要定义样板化的配置。 Spring Boot其实就是一个整合很多可插拔的组件(框架),内嵌了使用工具(比如内嵌了Tomcat、Jetty等),方便开发人员快速搭建和开发的一个框架。
SpringBoot的优缺点
优点:
-
Create stand-alone Spring applications
-
- 创建独立Spring应用
-
Embed Tomcat, Jetty or Undertow directly (no need to deploy WAR files)
-
- 内嵌web服务器
-
Provide opinionated ‘starter’ dependencies to simplify your build configuration
-
- 自动starter依赖,简化构建配置
-
Automatically configure Spring and 3rd party libraries whenever possible
-
- 自动配置Spring以及第三方功能
-
Provide production-ready features such as metrics, health checks, and externalized configuration
-
- 提供生产级别的监控、健康检查及外部化配置
-
Absolutely no code generation and no requirement for XML configuration
-
- 无代码生成、无需编写XML
缺点:
- 人称版本帝,迭代快,需要时刻关注变化
- 封装太深,内部原理复杂,不容易精通
SpringBoot的环境配置
1、系统要求
SpringBoot要求的环境一般是:
-
JDK版本1.8以上。
-
Maven版本3.3以上。
2、maven设置
能在maven的配置文件中设置阿里云镜像,提高下载速度。
且配置JDK1.8.
<mirrors>
      <mirror>
        <id>nexus-aliyun</id>
        <mirrorOf>central</mirrorOf>
        <name>Nexus aliyun</name>
        <url>http://maven.aliyun.com/nexus/content/groups/public</url>
      </mirror>
  </mirrors>

  <profiles>
         <profile>
              <id>jdk-1.8</id>
              <activation>
                <activeByDefault>true</activeByDefault>
                <jdk>1.8</jdk>
              </activation>
              <properties>
                <maven.compiler.source>1.8</maven.compiler.source>
                <maven.compiler.target>1.8</maven.compiler.target>
                <maven.compiler.compilerVersion>1.8</maven.compiler.compilerVersion>
              </properties>
         </profile>
  </profiles>
3、引入依赖
在之前学习 SpringMVC 的时候我们则需要在 pom.xml中导入非常多的依赖包,而 SpringBoot 则是简化了此步骤。
我们在 SpringBoot 中只需要导入一个依赖即可。
        <dependency>
            <groupId>org.springframework.boot</groupId>
            <artifactId>spring-boot-starter-web</artifactId>
            <version>2.0.2.RELEASE</version>
        </dependency>
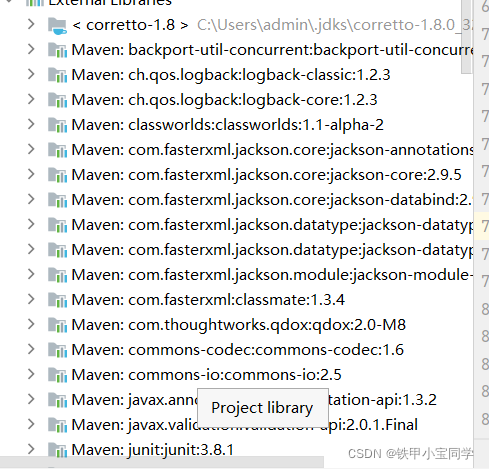
导入后我们能发现此依赖则是把之前所有 WEB 的依赖都导入其中。

Hello SpringBoot
1、编写主程序
在 Java 包下面我们创建 com.xiaobao.boot.MainApplication.java ,且编写一下程序:
/**
 * 主程序类
 * @SpringBootApplication:这是一个SpringBoot应用
 */
@SpringBootApplication
public class MainApplication {
    //固定写法,让SpringBoot跑起来
    public static void main(String[] args) {
        SpringApplication.run(MainApplication.class,args);
    }
}
2、编写业务
在 bean 目录下创建 controller 包,且创建一个 Java 程序。
@RestController
public class ControllerHello {
        @RequestMapping("/hello")
        public String handle01(){
            return "Hello, Spring Boot 2!";
        }
    }
@RestController介绍
源码:
@Target({ElementType.TYPE})
@Retention(RetentionPolicy.RUNTIME)
@Documented
@Controller
@ResponseBody
public @interface RestController {
    @AliasFor(
        annotation = Controller.class
    )
    String value() default "";
}
通过源码我们能很熟悉的看见 @Controller 和 @ResponseBody 。相信学过 SpringMVC 的小伙伴都已经知道这两者的作用了。
所以引入注解 ResController 能为我们简化很多的代码。
3、测试
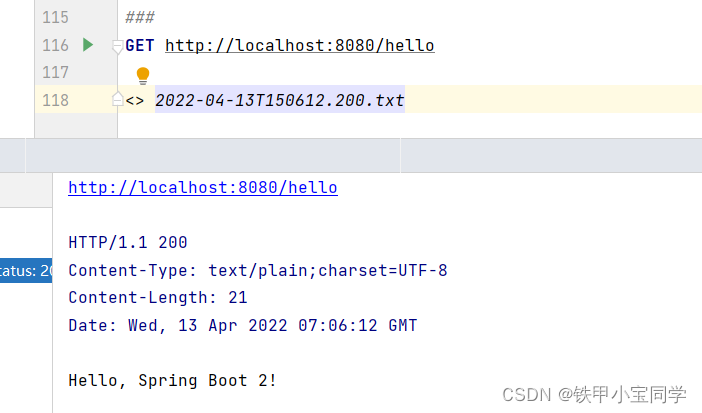
我们使用 IDEA 自带的测试工具对其进行一个测试。
测试结果:

由此可见,我们最基础的 Hello SpringBoot环境配置完毕!
简化配置
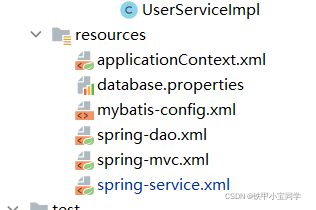
在学习 SpringMVC 的过程中,我们需要写很多的 xml 文件配置。

而在 SpringBoot 中我们则是需要编写 application.properties 即可。
例如:
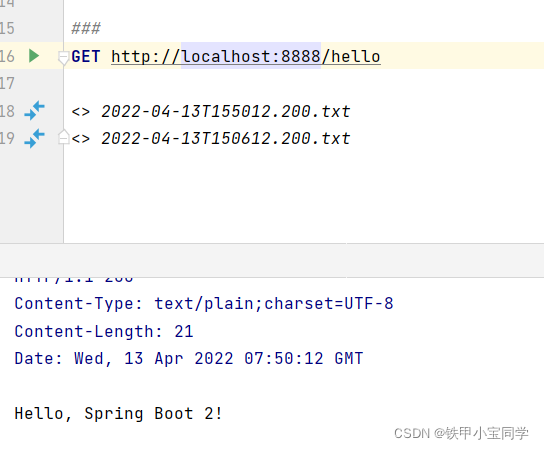
server.port=8888
修改端口号为 8888。
测试 :
端口号为 8888 时:


