目录
在application.properties配置数据库等信息
概述
我们在开发项目的时候经常会使用到springboot整合Mybatis(后续会有springboot整合mybatisplus的介绍)。那么我们的步骤是什么样的呢?
建表
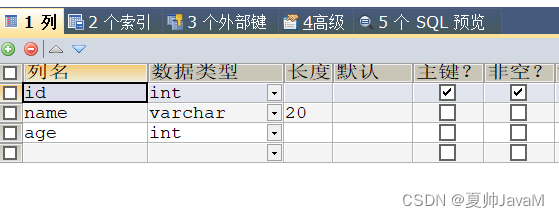
比如我们在数据库内创建一个student表,结构如下。
创建springboot工程
使用idea创建springboot工程并加入相关依赖
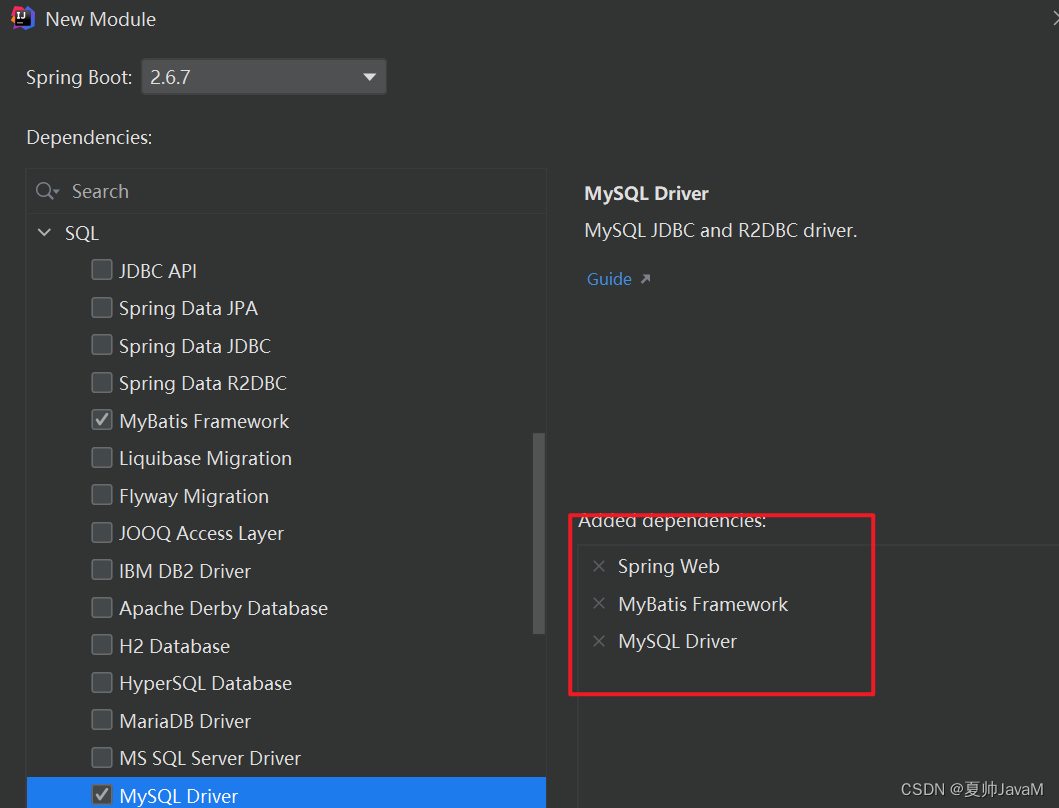
以上三个依赖即为
 <dependency>
            <groupId>org.springframework.boot</groupId>
            <artifactId>spring-boot-starter-web</artifactId>
        </dependency>
        <dependency>
            <groupId>org.mybatis.spring.boot</groupId>
            <artifactId>mybatis-spring-boot-starter</artifactId>
            <version>2.2.2</version>
        </dependency>

        <dependency>
            <groupId>mysql</groupId>
            <artifactId>mysql-connector-java</artifactId>
        </dependency>
创建student实体类
package com.aoshensoft.entity;

/**
 * @author summer
 * @date 2022-05-04  15:07
 */
public class Student {
    private Integer id;
    private String name;
    private Integer age;

    public Integer getId() {
        return id;
    }

    public void setId(Integer id) {
        this.id = id;
    }

    public String getName() {
        return name;
    }

    public void setName(String name) {
        this.name = name;
    }

    public Integer getAge() {
        return age;
    }

    public void setAge(Integer age) {
        this.age = age;
    }

    @Override
    public String toString() {
        return "Student{" +
                "id=" + id +
                ", name='" + name + '\'' +
                ", age=" + age +
                '}';
    }
}
创建Mapper接口(第一种方式 : @Mapper )
package com.aoshensoft.mapper;

import com.aoshensoft.entity.Student;
import org.apache.ibatis.annotations.Mapper;
import org.apache.ibatis.annotations.Param;

/**
 * @author summer
 * @date 2022-05-04  15:09
 */
@Mapper
public interface StudentMapper {
//    添加一个根据id查询对象的方法
    Student selectStudentById(@Param("stuid") Integer id);
}
?创建mapper配置文件
<?xml version="1.0" encoding="UTF-8" ?>
<!DOCTYPE mapper
        PUBLIC "-//mybatis.org//DTD Mapper 3.0//EN"
        "http://mybatis.org/dtd/mybatis-3-mapper.dtd">
<mapper namespace="com.aoshensoft.mapper.StudentMapper">


    <select id="selectStudentById" resultType="com.aoshensoft.entity.Student">
        SELECT id, name, age
        FROM student
        where id = #{stuid}
    </select>
</mapper>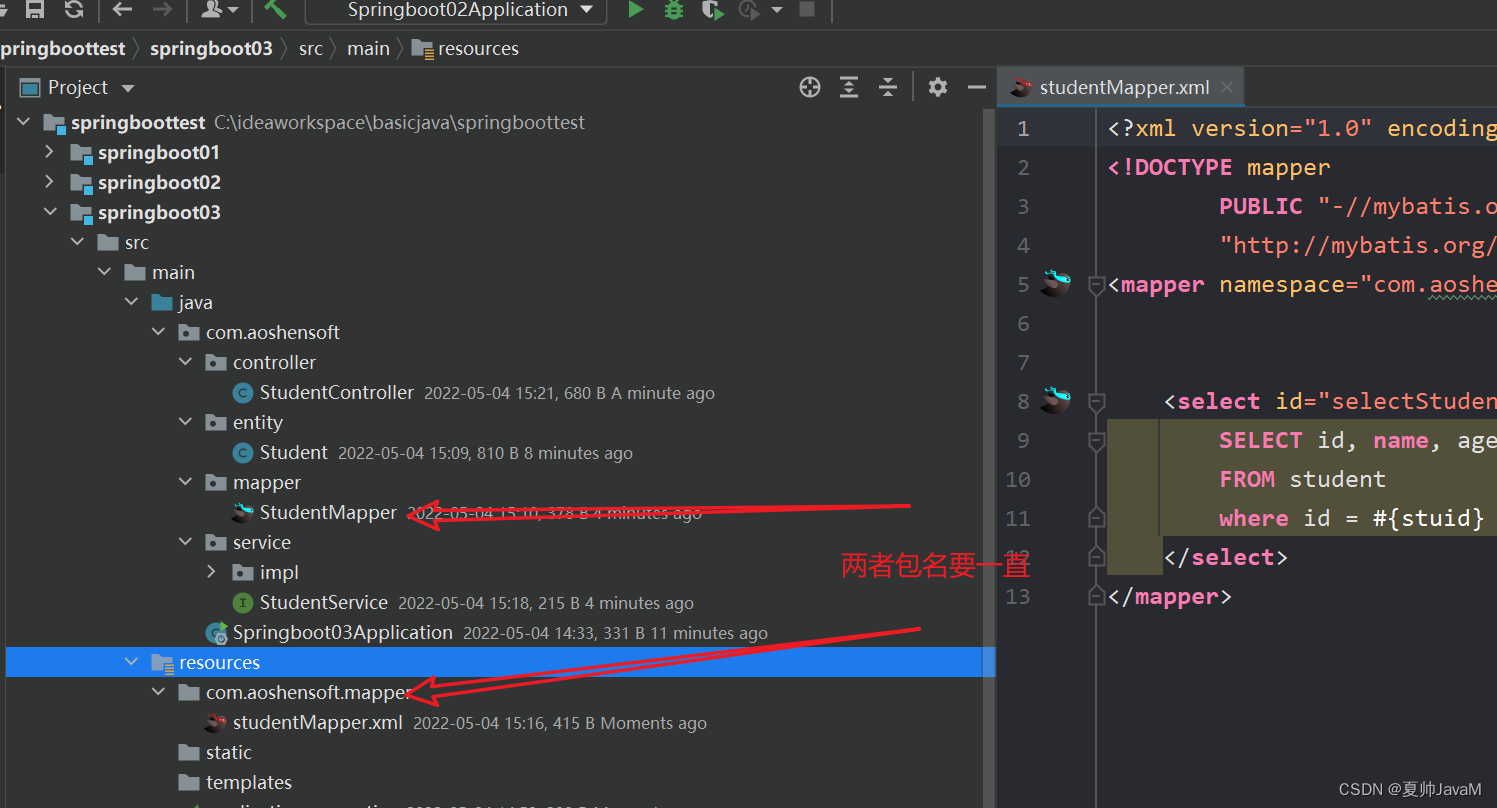
?
编写Service接口以及其实现类
package com.aoshensoft.service;

import com.aoshensoft.entity.Student;

/**
 * @author summer
 * @date 2022-05-04  15:16
 */
public interface StudentService {
     Student queryStudentById(Integer id);
}
package com.aoshensoft.service.impl;

import com.aoshensoft.entity.Student;
import com.aoshensoft.mapper.StudentMapper;
import com.aoshensoft.service.StudentService;
import org.springframework.beans.factory.annotation.Autowired;
import org.springframework.stereotype.Service;

/**
 * @author summer
 * @date 2022-05-04  15:17
 */
@Service
public class StudentServiceImpl implements StudentService {

    @Autowired
    private StudentMapper studentMapper;

    @Override
    public Student queryStudentById(Integer id) {
        return studentMapper.selectStudentById(id);
    }
}
编写Controller测试
package com.aoshensoft.controller;

import com.aoshensoft.entity.Student;
import com.aoshensoft.service.StudentService;
import org.springframework.beans.factory.annotation.Autowired;
import org.springframework.web.bind.annotation.RequestMapping;
import org.springframework.web.bind.annotation.ResponseBody;

/**
 * @author summer
 * @date 2022-05-04  15:19
 */
public class StudentController {

    @Autowired
    private StudentService studentService;

    @RequestMapping("/getStudent")
    @ResponseBody
    public String getStudent(Integer id) {
        Student student = studentService.queryStudentById(id);
        return student.toString();
    }
}
在application.properties配置数据库等信息
server.port=9090
server.servlet.context-path=/orm
spring.datasource.driver-class-name=com.mysql.cj.jdbc.Driver
spring.datasource.username=root
spring.datasource.password=1230
spring.datasource.url=jdbc:mysql://localhost:3306/mybatis_plus?serverTimezone=GMT%2B8&characterEncoding=utf-8&useSSL=false
运行测试

第二种方式 @MapperScan
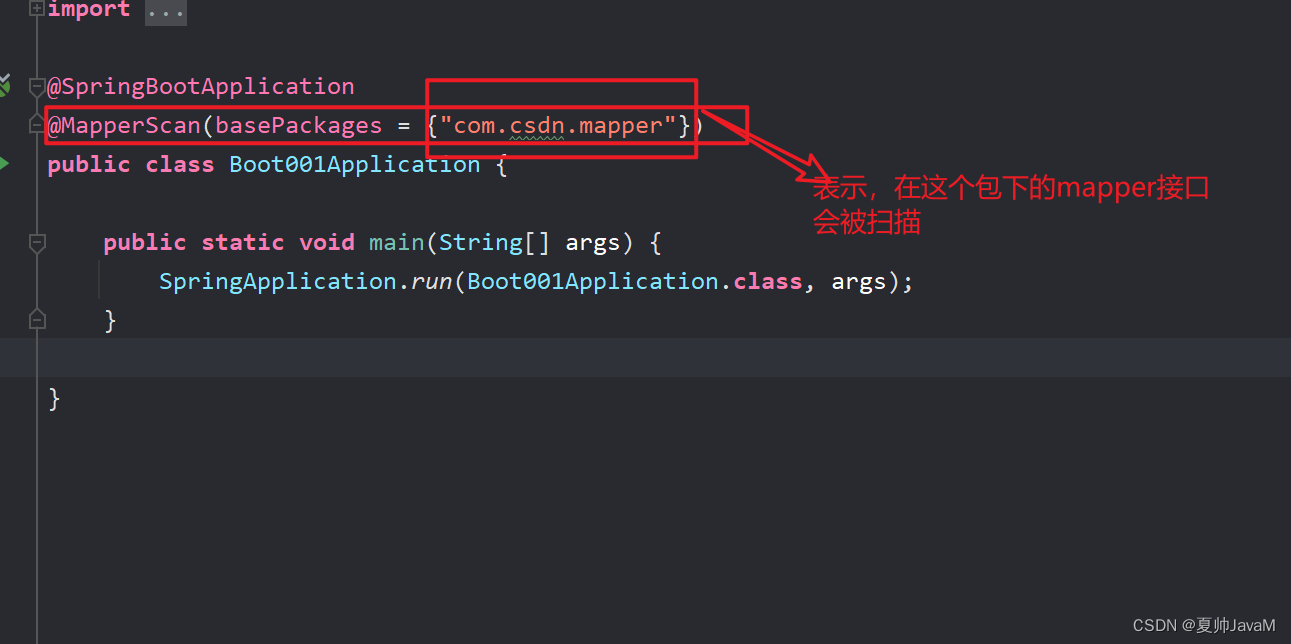
上述方式中我们使在Mapper接口上使用@Mapper注解,如果我们接口有上百个的话,在每个接口上都加上注解@Mapper就显得过于繁琐了。因此我们使用@MapperScan。
此时,我们先将之前的@Mapper注解去掉

在启动类上加上?@MapperScan
?启动运行

mapper配置文件自定义
目前我们的mapper的xml文件所在的文件的目录跟其mapper接口包名是一致的。
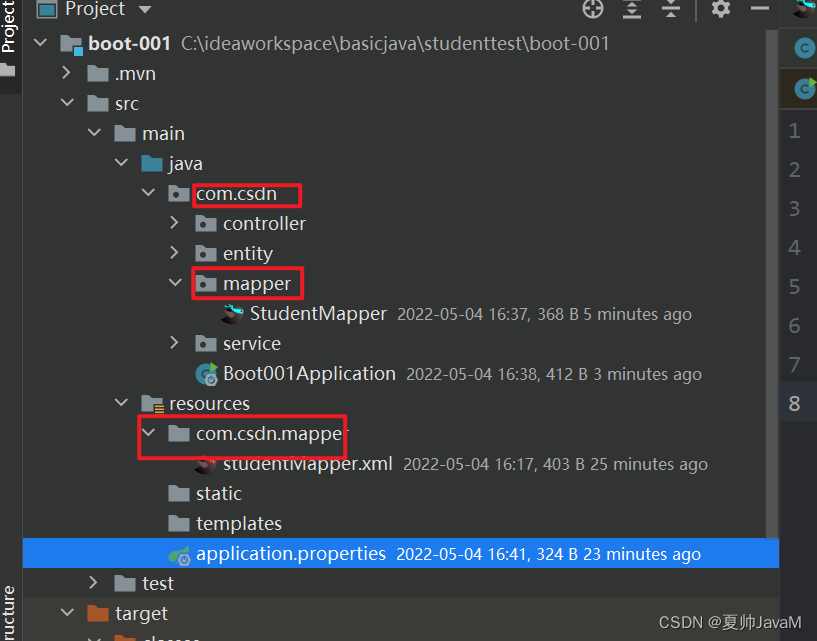
如果我们的mapper的xml不放在这个文件下就不会成功。比如,我们将其放在我们创建的一个文件mapper下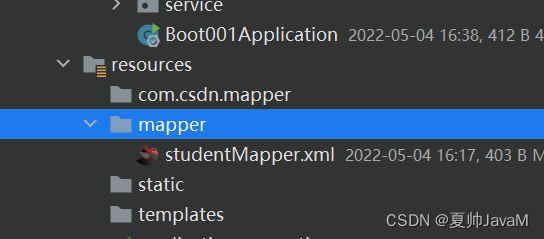 ?
?
运行不会成功

?
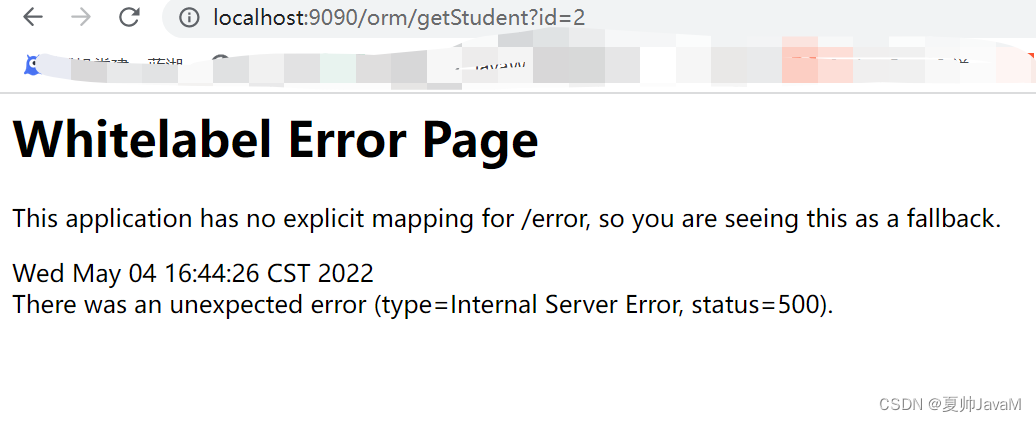 ?
?
此时我们可以指定xml所在的文件目录
 ?
?
?运行成功

?如果想看sql语句打印可以在配置中加入如下配置

?这样运行方法后就会看到控制台打印语句

?
