文章目录
创建module工程
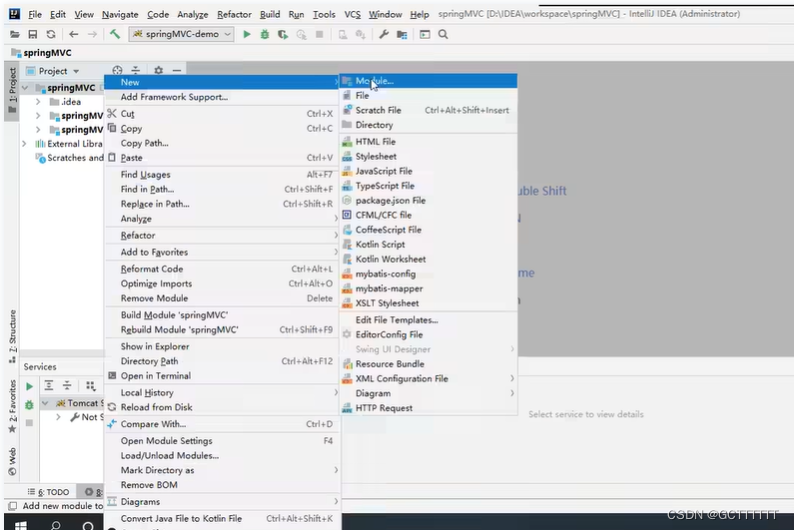
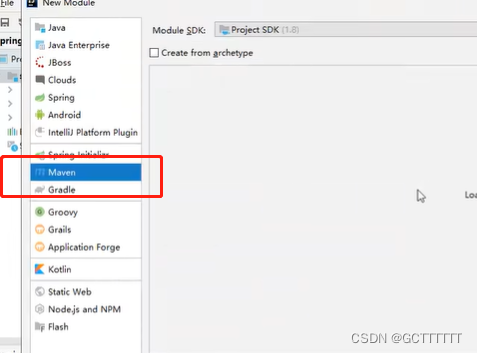
注意要是maven工程
给项目起个名,点击finish
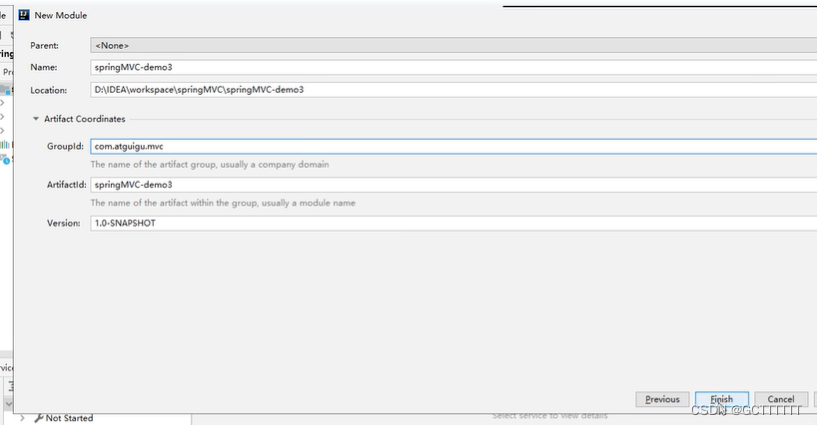

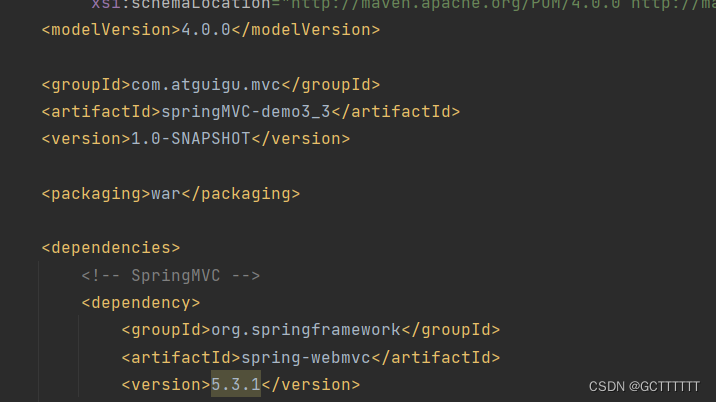
在pom.xml中配置依赖
<!-- 设置打包方式为war包 -->
 <packaging>war</packaging>

    <dependencies>
        <!-- SpringMVC -->
        <dependency>
            <groupId>org.springframework</groupId>
            <artifactId>spring-webmvc</artifactId>
            <version>5.3.1</version>
        </dependency>

        <!-- 日志 -->
        <dependency>
            <groupId>ch.qos.logback</groupId>
            <artifactId>logback-classic</artifactId>
            <version>1.2.3</version>
        </dependency>

        <!-- ServletAPI -->
        <dependency>
            <groupId>javax.servlet</groupId>
            <artifactId>javax.servlet-api</artifactId>
            <version>3.1.0</version>
            <scope>provided</scope>
        </dependency>

        <!-- Spring5和Thymeleaf整合包 -->
        <dependency>
            <groupId>org.thymeleaf</groupId>
            <artifactId>thymeleaf-spring5</artifactId>
            <version>3.0.12.RELEASE</version>
        </dependency>
    </dependencies>
将上面的配置代码复制到pom.xml中
在main中新建webapp文件夹

!!注意此处webapp文件夹要有一个小点才说明建立成功
若像上图一样没有小点可尝试刷新pom.xml配置文件!!

然后webapp文件夹就有小点了!

新建web.xml
在项目结构中添加配置web.xml
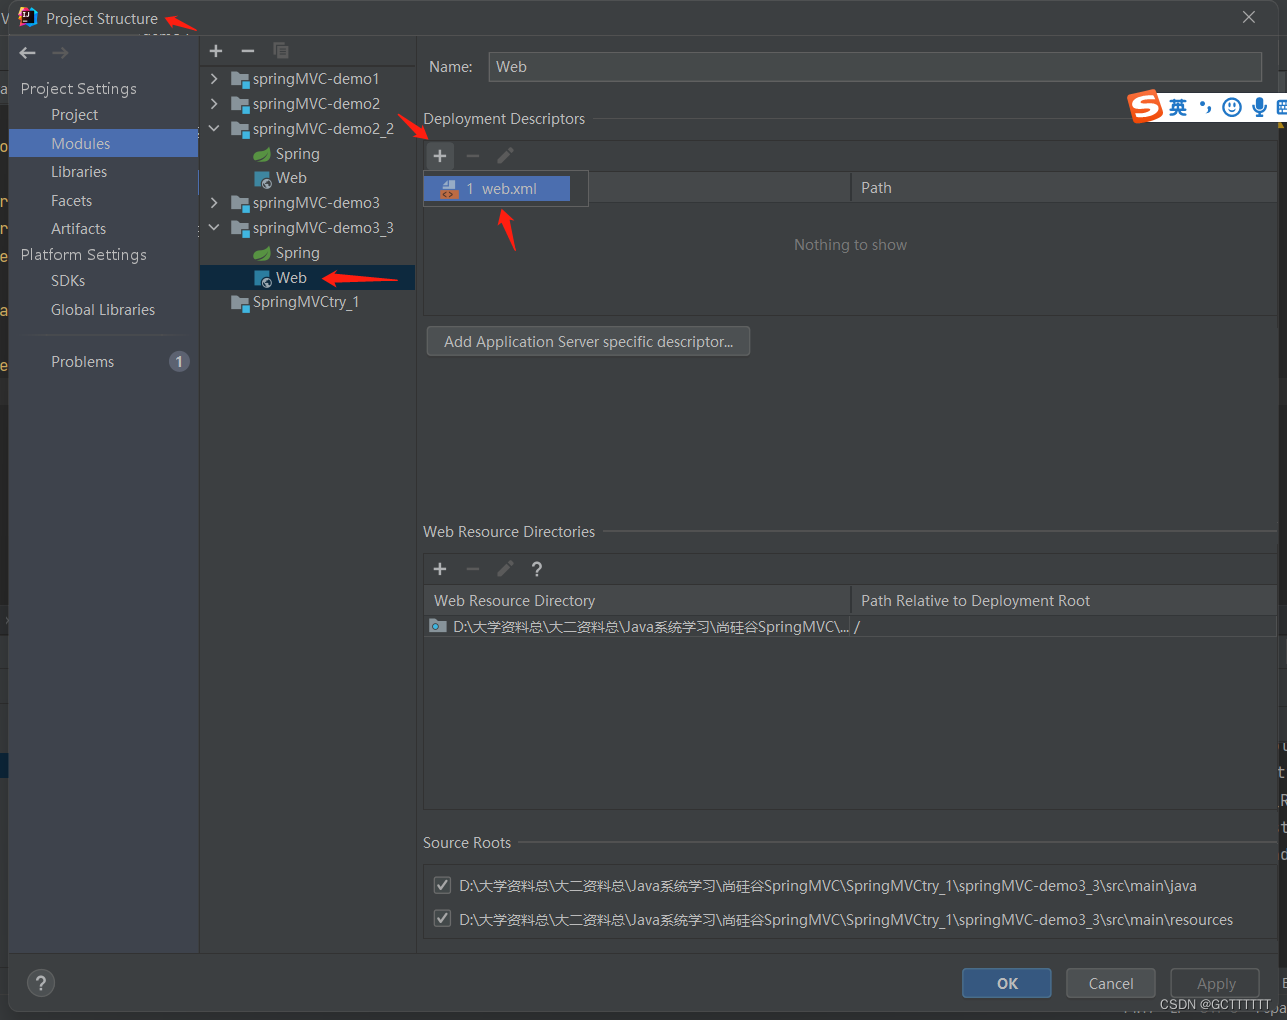
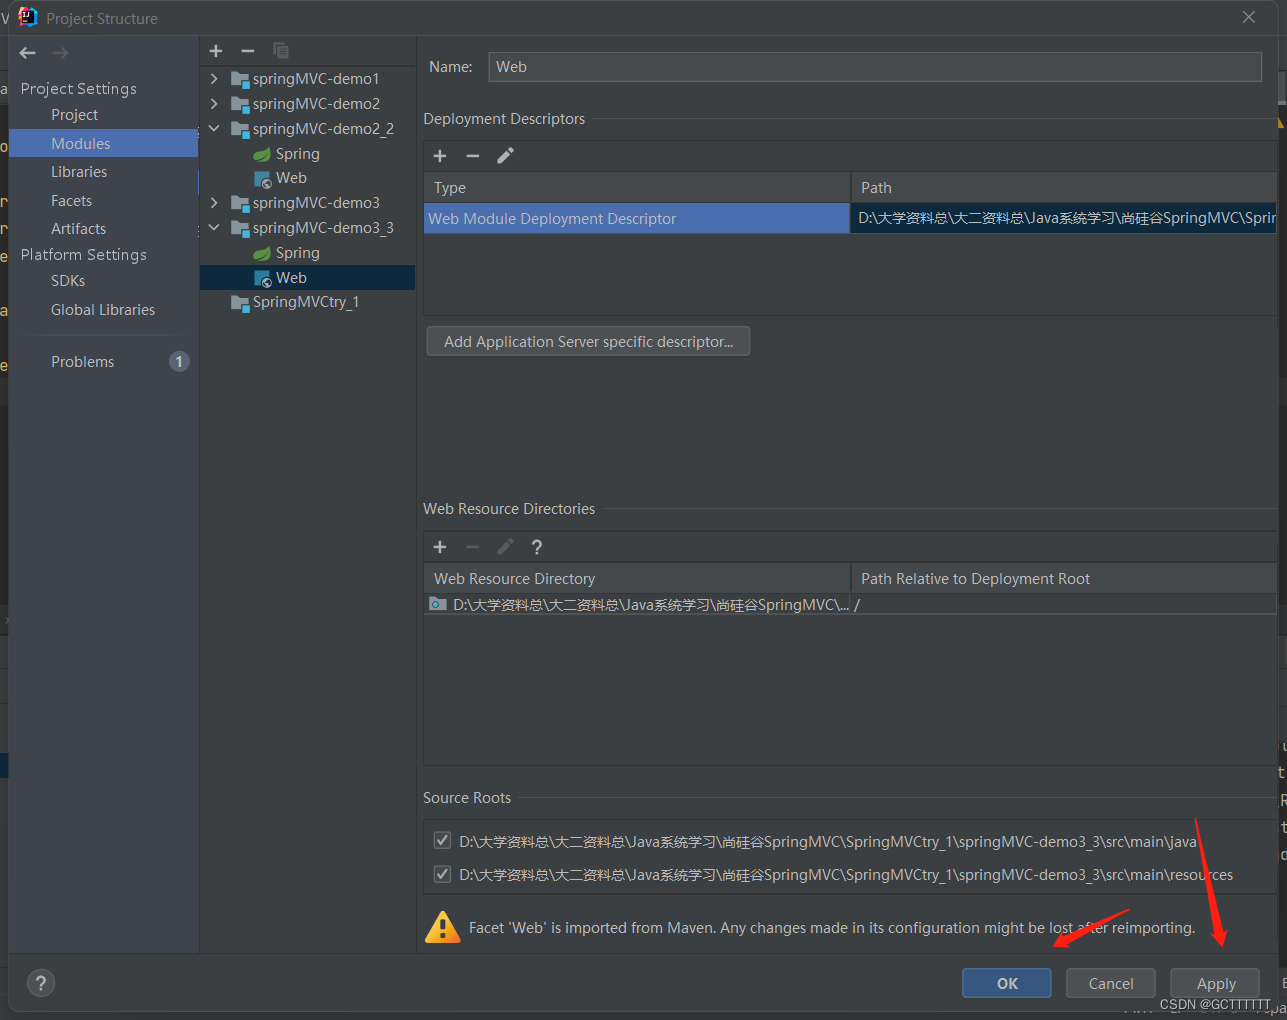
注意它的默认路径是这个样子的

我们要把它配置成下面这样

在WEB-INF前添加:
src\main\webapp\
点击ok,apply,ok
配置web.xml
在web.xml中配置编码过滤器和springMVC的前端控制器DispatcherServlet
<!--    配置编码过滤器-->
    <filter>
        <filter-name>CharacterEncodingFilter</filter-name>
        <filter-class>org.springframework.web.filter.CharacterEncodingFilter</filter-class>

        <init-param>
            <param-name>encoding</param-name>
            <param-value>UTF-8</param-value>
        </init-param>
        <init-param>
            <param-name>forceResponseEncoding</param-name>
            <param-value>true</param-value>
        </init-param>

    </filter>
    <filter-mapping>
        <filter-name>CharacterEncodingFilter</filter-name>
        <url-pattern>/*</url-pattern>
    </filter-mapping>

	 <!--    配置HiddenHttpMethodFilter-->
    <filter>
        <filter-name>HiddenHttpMethodFilter</filter-name>
        <filter-class>org.springframework.web.filter.HiddenHttpMethodFilter</filter-class>
    </filter>
    <filter-mapping>
        <filter-name>HiddenHttpMethodFilter</filter-name>
        <url-pattern>/*</url-pattern>
    </filter-mapping>


<!--    配置springMVC的前端控制器DispatcherServlet-->
    <servlet>
        <servlet-name>DispatcherServlet</servlet-name>
        <servlet-class>org.springframework.web.servlet.DispatcherServlet</servlet-class>

        <init-param>
            <param-name>contextConfigLocation</param-name>
            <param-value>classpath:springMVC.xml</param-value>
            <!-- 注意此处的springMVC.xml会爆红,因为还没有创建,后续步骤中会创建-->
        </init-param>
<!--        将当前servlet的初始化时间提前到服务器启动时-->
        <load-on-startup>1</load-on-startup>

    </servlet>
    <servlet-mapping>
        <servlet-name>DispatcherServlet</servlet-name>
        <url-pattern>/</url-pattern>
    </servlet-mapping>
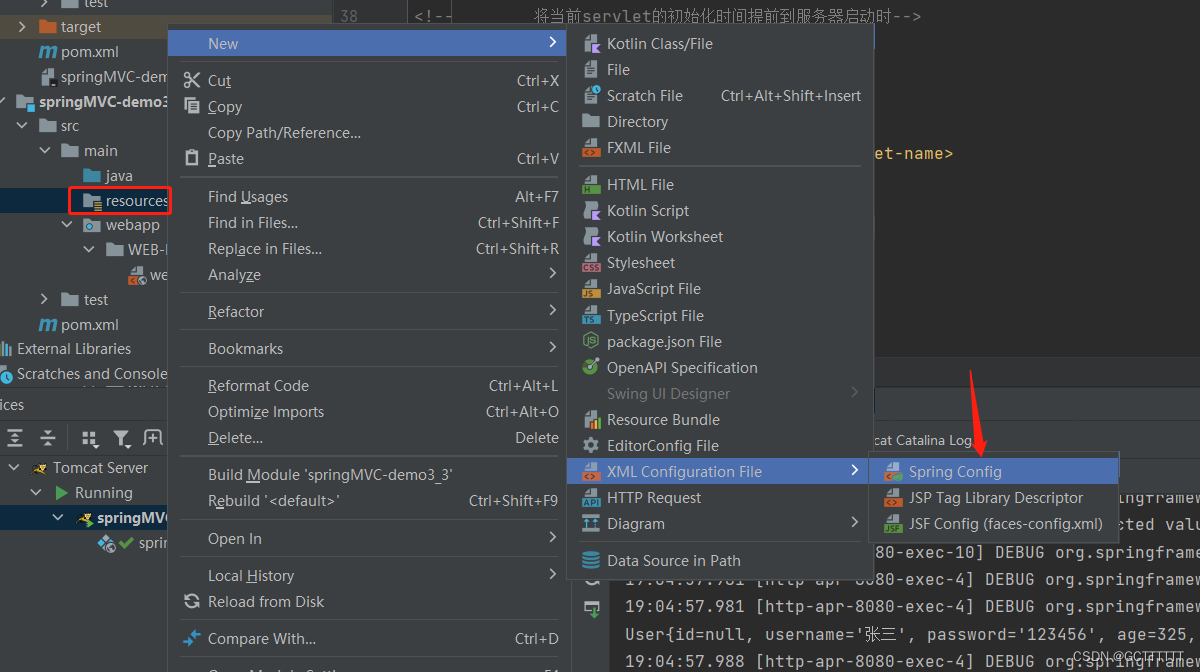
在resources中创建和配置springMVC.xml

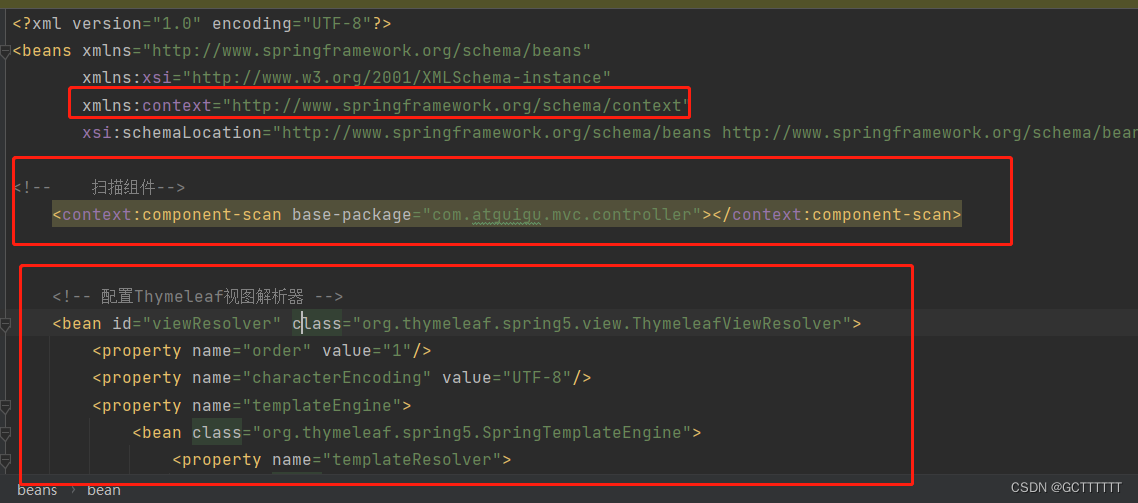
配置扫描组件

注意没有声明命名空间要在beans中声明一下
xmlns:context="http://www.springframework.org/schema/context"
springMVC.xml中完整的头部配置:
<?xml version="1.0" encoding="UTF-8"?>
<beans xmlns="http://www.springframework.org/schema/beans"
       xmlns:xsi="http://www.w3.org/2001/XMLSchema-instance"
       xmlns:context="http://www.springframework.org/schema/context"
       xsi:schemaLocation="http://www.springframework.org/schema/beans http://www.springframework.org/schema/beans/spring-beans.xsd http://www.springframework.org/schema/context https://www.springframework.org/schema/context/spring-context.xsd">
配置扫描组件
<context:component-scan base-package="com.atguigu.mvc.controller"></context:component-scan>
package中写自己项目中controller文件夹对应的路径
配置Thymeleaf视图解析器
<!-- 配置Thymeleaf视图解析器 -->
    <bean id="viewResolver" class="org.thymeleaf.spring5.view.ThymeleafViewResolver">
        <property name="order" value="1"/>
        <property name="characterEncoding" value="UTF-8"/>
        <property name="templateEngine">
            <bean class="org.thymeleaf.spring5.SpringTemplateEngine">
                <property name="templateResolver">
                    <bean class="org.thymeleaf.spring5.templateresolver.SpringResourceTemplateResolver">

                        <!-- 视图前缀 -->
                        <property name="prefix" value="/WEB-INF/templates/"/>

                        <!-- 视图后缀 -->
                        <property name="suffix" value=".html"/>
                        <property name="templateMode" value="HTML5"/>
                        <property name="characterEncoding" value="UTF-8" />
                    </bean>
                </property>
            </bean>
        </property>
    </bean>
springMVC.xml中
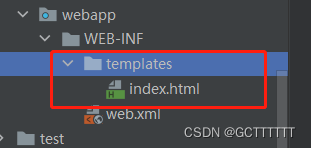
注意Thymeleaf中的视图前缀是这个

所以要在WEB-INF中创建templates文件夹存放html文件
springMVC.xml中可选配置
<!--    配置视图控制器-->
    <mvc:view-controller path="/" view-name="index"></mvc:view-controller>

<!--    开放对静态资源的访问-->
    <mvc:default-servlet-handler/>

<!--    开启mvc注解驱动-->
    <mvc:annotation-driven />
测试
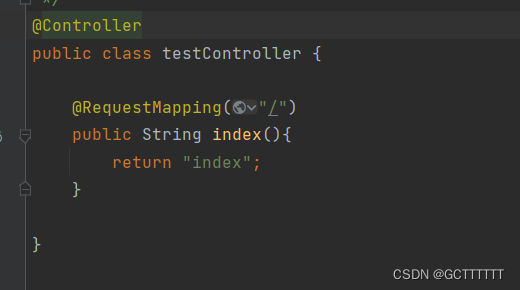
在测试类testController中写一个测试方法
新建一个用于测试的html
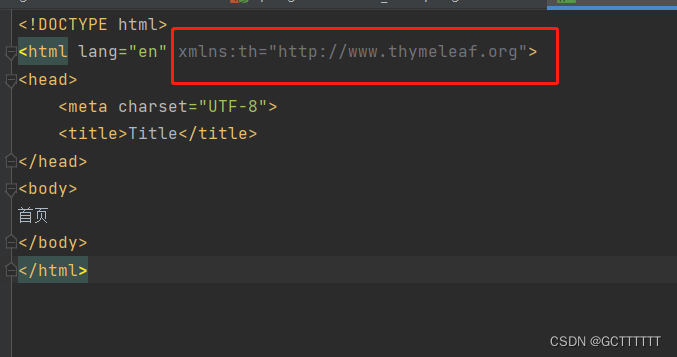
注意html标签中要添加
xmlns:th="http://www.thymeleaf.org"
配置tomcat服务器

启动tomcat服务器后成功显示就证明springMVC配置成功了!!
