前言
最近在学习分布式事务seata时遇到了一些问题,做个总结记录一下
搭建工程
我们先搭建一个简单的微服务工程(因为是针对解决seata问题,搭建仅展示核心代码)
如果只需要解决问题请跳过
pom
 <dependencies>
        <dependency>
            <groupId>mysql</groupId>
            <artifactId>mysql-connector-java</artifactId>
            <version>8.0.11</version>
        </dependency>

        <dependency>
            <groupId>com.baomidou</groupId>
            <artifactId>mybatis-plus-boot-starter</artifactId>
            <version>3.4.2</version>
        </dependency>

        <dependency>
            <groupId>org.springframework.boot</groupId>
            <artifactId>spring-boot-starter-freemarker</artifactId>
        </dependency>

        <dependency>
            <groupId>org.springframework.boot</groupId>
            <artifactId>spring-boot-starter-web</artifactId>
        </dependency>

        <dependency>
            <groupId>com.alibaba.cloud</groupId>
            <artifactId>spring-cloud-starter-alibaba-seata</artifactId>
        </dependency>

        <dependency>
            <groupId>com.alibaba.cloud</groupId>
            <artifactId>spring-cloud-starter-alibaba-nacos-discovery</artifactId>
        </dependency>

        <dependency>
            <groupId>com.alibaba.cloud</groupId>
            <artifactId>spring-cloud-starter-alibaba-nacos-config</artifactId>
        </dependency>

        <dependency>
            <groupId>org.springframework.boot</groupId>
            <artifactId>spring-boot-starter-actuator</artifactId>
        </dependency>

        <!--最新的alibabacloud在加载bootstrap.yml文件的会报错-->
        <dependency>
            <groupId>org.springframework.cloud</groupId>
            <artifactId>spring-cloud-starter-bootstrap</artifactId>
        </dependency>

        <dependency>
            <groupId>org.projectlombok</groupId>
            <artifactId>lombok</artifactId>
            <version>1.18.22</version>
        </dependency>

        <dependency>
            <groupId>org.springframework.boot</groupId>
            <artifactId>spring-boot-starter-test</artifactId>
            <scope>test</scope>
        </dependency>
    </dependencies>
bootstrap.yml
server:
  port: ${port:8011}


spring:
  profiles:
    active: prod
  application:
    # 这里一定要用-定义,不能用下划线,因为负载均衡器如果用下划线会找不到服务。
    name: xq-pug-user-service
  cloud:
    sentinel:
      enabled: true
      web-context-unify: false
#      filter:
#        # 默认情况下对项目中所有的springmvc请求进行流量监控
#        enabled: true
#        url-patterns: /**
      transport:
        # 指定sentinel的服务地址
        dashboard: 127.0.0.1:8080
        # 如果被占用就 +1
        port: 8791

    nacos:
      discovery:
        # 服务的注册与发现 默认是true
        enabled: true
        server-addr: 127.0.0.1:8848
      config:
        # 集群版本
        #server-addr: 127.0.0.1:8848,127.0.0.1:8868,127.0.0.1:8858
        # 单机版本
        server-addr: 127.0.0.1:8848
        # 命名空间 默认是public,不用指定
        namespace: 52adf7ed-1664-453a-9c1e-78f461d7fe11
        # 如果你要修改,可以自己去指定dataid的名字
        prefix: ${spring.application.name}-${spring.profiles.active}.${spring.cloud.nacos.config.file-extension}
        # 指定配置中心文件的后缀
        file-extension: yaml
        # group 默认:DEFAULT_GROUP
        group: DEFAULT_GROUP
        shared-configs[0]:
          data_id: redis.yaml
          group: COMMON_GROUP
          refresh: true

# 暴露监控断点,给后续的Admin进行监控处理
# 获取单独访问http://localhost:8011/actuator
management:
  endpoints:
    web:
      exposure:
        include: '*'

seata:
  tx-service-group: mygroup # 事务组名称,要和服务端对应
  service:
    vgroup-mapping:
      mygroup: default
application
#监控配置
management:
  endpoints:
    web:
      exposure:
        include: '*'
spring:
  datasource:
    type: com.zaxxer.hikari.HikariDataSource
    # type: com.alibaba.druid.pool.DruidDataSource
    driver-class-name: com.mysql.cj.jdbc.Driver
    url: jdbc:mysql://127.0.0.1:3306/lele_alibaba?serverTimezone=GMT%2b8&useUnicode=true&characterEncoding=utf-8&useSSL=false
    username: root
    password: root
  boot:
    admin:
      client:
        url:  http://localhost:8800 #监控服务器的地址
        instance:
          service-url: http://127.0.0.1:8011 #当前系统api地址
数据库中添加回滚日志表undo_log
CREATE TABLE `sys_seata_undo_log` (
  `id` bigint(20) NOT NULL AUTO_INCREMENT,
  `branch_id` bigint(20) NOT NULL,
  `xid` varchar(100) NOT NULL,
  `context` varchar(128) NOT NULL,
  `rollback_info` longblob NOT NULL,
  `log_status` int(11) NOT NULL,
  `log_created` datetime NOT NULL,
  `log_modified` datetime NOT NULL,
  PRIMARY KEY (`id`),
  UNIQUE KEY `ux_undo_log` (`xid`,`branch_id`)
) ENGINE=InnoDB AUTO_INCREMENT=1 DEFAULT CHARSET=utf8;
at模式下必须要有回滚日志表
seata的使用
AT模式
AT模式搭建非常的简单,写好示例,启动工程查看即可,也可以直接用官网的示例
官网示例地址:https://github.com/seata/seata-samples/tree/master
这里我用转账来模拟事务,是在同一个微服务下的事务,如果想严谨些也可以用多个微服务通过fegin进行调用(我觉得原理都一样的)
新建一个简单的账单表
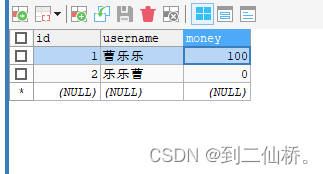
编写各层级代码(这里我使用了mybatis-plus,也是后面的踩坑关键所在)
@Mapper
public interface UserMapper extends BaseMapper<User> {
}
public interface UserService extends IService<User> {

    public void get();

    public void set();
}
@Service
public class UserServiceImpl extends ServiceImpl<UserMapper, User> implements UserService {
    @Autowired
    private UserService userService;

    public void get(){
        User user = userService.getById(1L);
        user.setMoney(user.getMoney()-50);
        userService.updateById(user);
    }

    public void set(){
        User user = userService.getById(2L);
        user.setMoney(user.getMoney()+50);
        userService.updateById(user);
    }
}
    @GetMapping("/getUser2")
    @GlobalTransactional
    public List<User> getUser2(){
        userService.get();
        int i = 1/0; // 自己故意写一个异常代码验证事务回滚
        userService.set();

        return userService.list();
    }
seata事务关键代码:@GlobalTransactional
启动项目后,访问接口,在 int i = 1/0; 处打断点调试
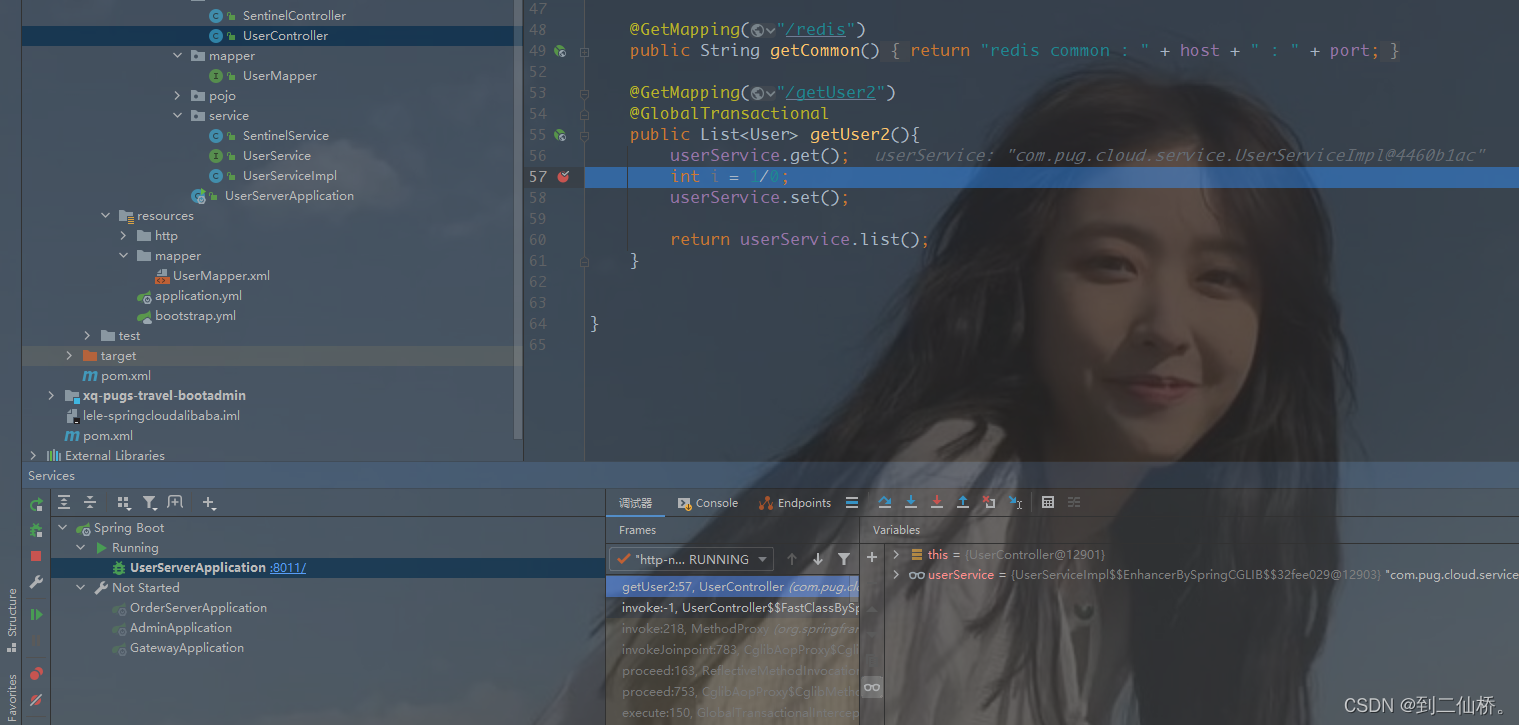
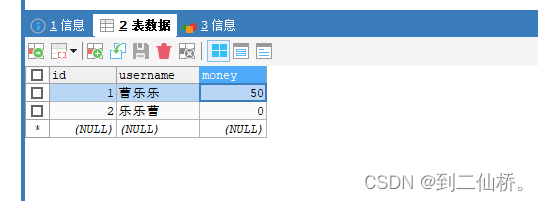
这时查看数据库表中的数据变化

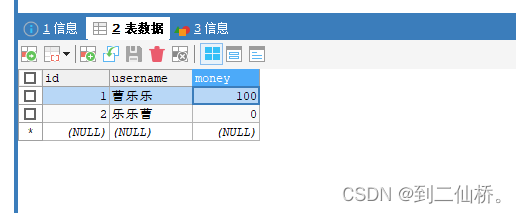
释放断点,出现异常,事务回滚,undo_log中的临时数据清空了

XA模式
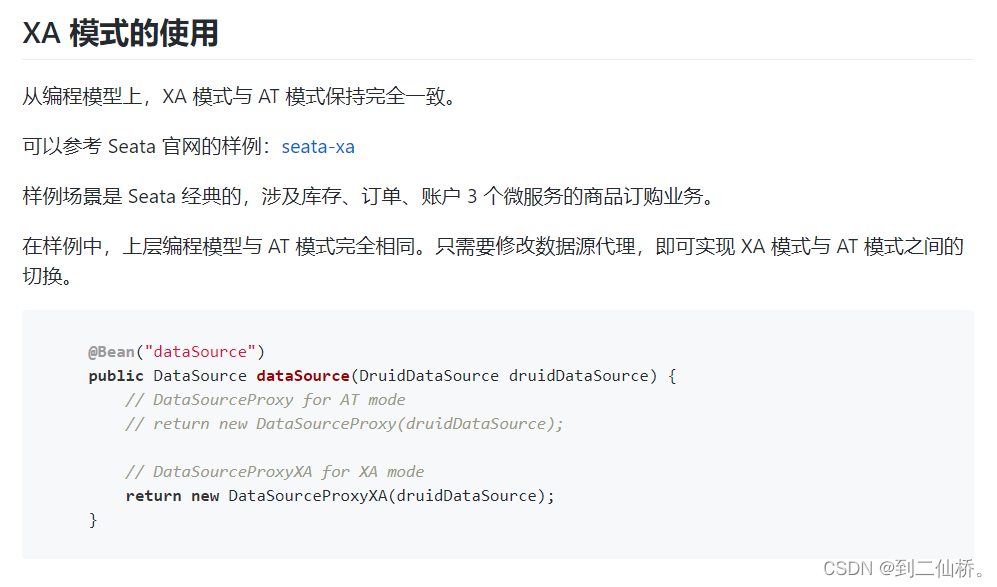
XA模式的使用和AT模式非常相似
官网描述:https://seata.io/zh-cn/docs/dev/mode/xa-mode.html
解决问题一:seata的XA模式修改数据源代理导致mapper无法注入
问题描述
我在使用XA模式的时候,用配置类切换数据源,启动就会报错

这是照着官网说的,写的配置类

这个问题我从昨晚卡到今天下午,看了很多论坛和文章,各种方法都试了,还是没能解决,今天下午打完一把排位之后,瞬间来了灵感,自己解决了。下面是我的解决方案:
解决方案
首先,使用XA模式修改数据源代理时,要先把seata的数据源自动代理关闭
seata:
  tx-service-group: mygroup # 事务组名称,要和服务端对应
  service:
    vgroup-mapping:
      mygroup: default
  enable-auto-data-source-proxy: false # 关闭seata的数据源自动代理
其次,上面说到我用了mp才导致的错误,用jdbctemplate的时候没有出现这个问题
查看mp的启动源码发现,mp启动类里的sqlSessionFactory方法也是注入一个数据源
所以去掉配置类中SqlSessionFactory的配置,并且加上@Primary注解,让mp优先使用我们自己配置的数据源,这样就解决了因为seata代理数据源导致mapper无法注入的bug
(@Primary:在多个相同的bean中,优先使用@Primary注解的bean,在多数据源的时候,使用@Primary注解用于指定其中一个作为主数据源)
下面是最终的配置类:
@Configuration
public class UserDataSourceConfiguration {

    @Bean
    @ConfigurationProperties(prefix = "spring.datasource")
    public DruidDataSource druidDataSource() {
        return new DruidDataSource();
    }

    @Bean("dataSourceProxy")
    @Primary
    public DataSource dataSource(DruidDataSource druidDataSource) {
        // DataSourceProxy for AT mode
        // return new DataSourceProxy(druidDataSource);

        // DataSourceProxyXA for XA mode
        return new DataSourceProxyXA(druidDataSource);
    }
}
解决问题二:java.lang.NoSuchMethodException
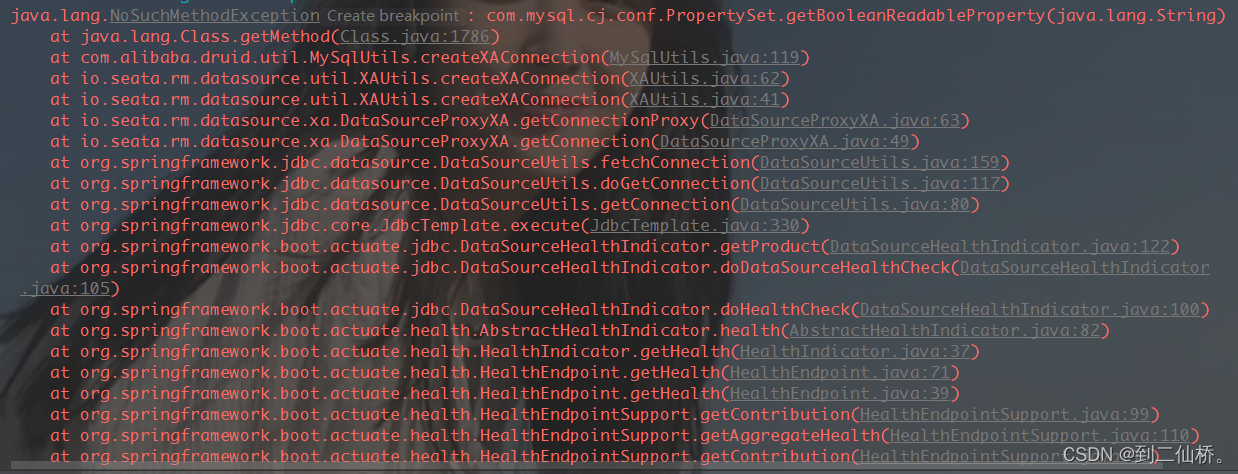
问题一解决之后,再次启动有可能会报新的错误
原因
高版本mysql驱动中的接口com.mysql.cj.conf.PropertySet不存在getBooleanReadableProperty方法,也就是兼容性的问题了
解决
看到源码注释// maybe 8.0.11 or higher version.,于是把mysql依赖更改为8.0.11版本问题解决