之前在学习 Spring Security 就对第三方登录比较感兴趣,但是一直没有去研究,最近因为业务需求需要去集成 Google 登录,便开始研究,从开始一头雾水,到现在算是清楚了 OAuth2 Login 的认证授权流程。我会从如何去使用、源码解析角度给大家分享,也会分享一些开发中遇到一些坑。
1.申请Google API和服务
首先我们需要到 Google Developers Console 开发者控制台去申请。然后,需要创建一个 Project,找到 API和服务,最后去创建 OAuth 同意屏幕 和 凭据。需要注意的是,重定向URI设置,我们需要在后续Spring Boot中application.yml 使用到,还需要在 Spring Security Config 配置类去配置。
2.Google OAuth2 Login 认证授权流程
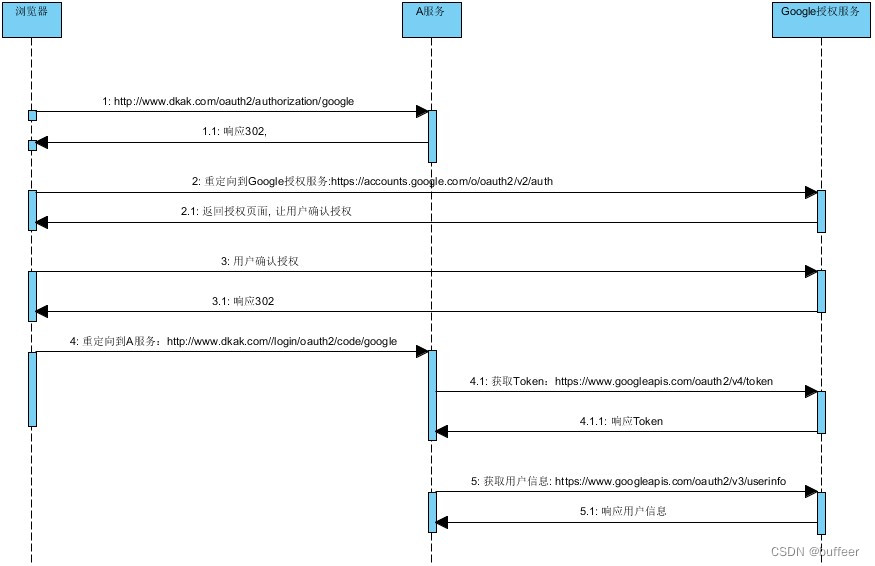
一开始不知道这背后的原理是什么,为什么几行代码集成第三方登录。其实这里就是接口来获取Google 用户信息。这里梳理了Google OAuth2 Login 认证授权的时序图,可以更好帮助我们理解其背后原理。

3.Maven依赖
<dependency>
 <groupId>org.springframework.boot</groupId>
    <artifactId>spring-boot-starter-webflux</artifactId>
</dependency>
<dependency>
    <groupId>org.springframework.boot</groupId>
    <artifactId>spring-boot-starter-security</artifactId>
</dependency>
<dependency>
    <groupId>org.springframework.boot</groupId>
    <artifactId>spring-boot-starter-oauth2-client</artifactId>
</dependency>
<dependency>
    <groupId>org.springframework.boot</groupId>
    <artifactId>spring-boot-configuration-processor</artifactId>
    <optional>true</optional>
</dependency>
<dependency>
    <groupId>org.springframework.boot</groupId>
    <artifactId>spring-boot-starter-thymeleaf</artifactId>
</dependency>
<dependency>
    <groupId>org.projectlombok</groupId>
    <artifactId>lombok</artifactId>
</dependency>
4.application.yml配置
logging:
  level:
    org.springframework: DEBUG


spring:
  thymeleaf:
    cache: false
    prefix: classpath:/templates/
    encoding: UTF-8 #??
    suffix: .html #????
    mode: HTML #??
  security:
    oauth2:
      client:
        registration:
          google:
            clientId: 你的clientId
            clientSecret: 你的clientSecret
            redirectUri: http://localhost:8080/oauth2/code/google
            scope:
              - email
              - profile
server:
  port: 8080
5.SecurityConfig 配置类
@Configuration
@EnableWebFluxSecurity
@Slf4j
public class SecurityConfig {

    @Autowired
    private ReactiveClientRegistrationRepository clientRegistrationRepository;

    @Bean
    public SecurityWebFilterChain securityWebFilterChain(ServerHttpSecurity http) {
        return http.csrf().disable()
                .exceptionHandling()
                .authenticationEntryPoint(new RedirectServerAuthenticationEntryPoint("/auth/login"))
                .and()
                .authorizeExchange(authorizeExchangeSpec -> authorizeExchangeSpec
                        .pathMatchers("/auth/**", "/oauth2/**").permitAll()
                        .anyExchange()
                        .authenticated())
                .oauth2Login(oauth2Login -> oauth2Login
                        // 发起 OAuth2 登录的地址(服务端)
                        .authorizationRequestResolver(new DefaultServerOAuth2AuthorizationRequestResolver(
                                clientRegistrationRepository,
                                new PathPatternParserServerWebExchangeMatcher(
                                        "/oauth2/authorization/{registrationId}")))
                        // OAuth2 外部用户登录授权后的跳转地址(服务端)
                        .authenticationMatcher(new PathPatternParserServerWebExchangeMatcher(
                                "/oauth2/code/{registrationId}"))
                        // OAuth2 登录成功后
                        .authenticationSuccessHandler(new OAuth2AuthenticationSuccessHandler())
                        // OAuth2 登录失败后
                        .authenticationFailureHandler(new OAuth2AuthenticationFailureHandler()))
                .build();
    }
}
6.登录页面
在登录页面,会有 Login With Google 登录链接,这是发起Google OAuth2 Login 授权的入口。
<!DOCTYPE html>
<html lang="en" xmlns:th="https://www.thymeleaf.org/">
<head>
    <meta charset="UTF-8">
    <title>Title</title>
</head>
<body>
<div>
  <h2>Please Login</h2>
  <br/>
</div>
<div>
  <h4><a th:href="@{/oauth2/authorization/google}">Login with Google</a></h4>
</div>
<div><p>OR</p></div>

<form th:action="@{/login}" method="post" style="max-width: 400px; margin: 0 auto;">
  <div class="border border-secondary rounded p-3">
    <div th:if="${param.error}">
      <p class="text-danger">Invalid username or password.</p>
    </div>
    <div th:if="${param.logout}">
      <p class="text-warning">You have been logged out.</p>
    </div>
    <div>
      <p><input type="email" name="email" required class="form-control" placeholder="E-mail" /></p>
    </div>
    <div>
      <p><input type="password" name="pass" required class="form-control" placeholder="Password" /></p>
    </div>
    <div>
      <p><input type="submit" value="Login" class="btn btn-primary" /></p>
    </div>
  </div>
</form>
</body>
</html>
7.授权成功回调
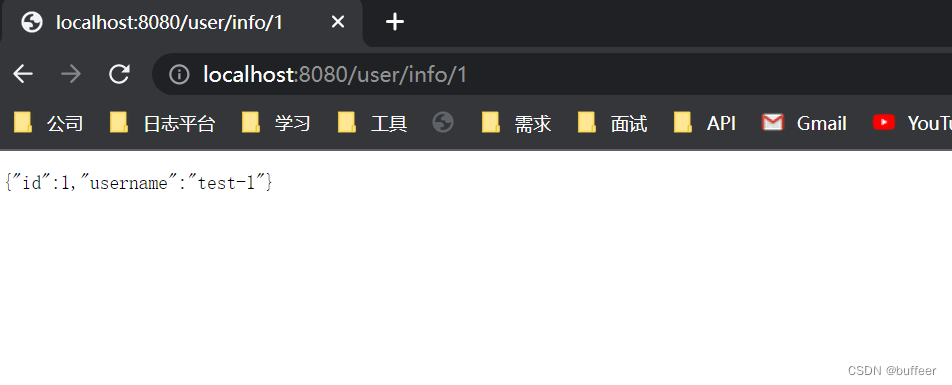
当认证授权成功后,我们会让请求重定向到 /user/info/1 接口。
@Slf4j
public class OAuth2AuthenticationSuccessHandler implements ServerAuthenticationSuccessHandler {

    private ServerRedirectStrategy redirectStrategy = new DefaultServerRedirectStrategy();

    @SneakyThrows
    @Override
    public Mono<Void> onAuthenticationSuccess(WebFilterExchange webFilterExchange, Authentication authentication) {
        log.info("oauth2 authentication success");
        return Mono.empty().then(redirectStrategy.sendRedirect(webFilterExchange.getExchange(), new URI("/user/info/1")));
    }
}
8.授权失败回调
当认证授权失败后,我们会让请求重定向到 /auth/login 登录接口。
@Slf4j
public class OAuth2AuthenticationSuccessHandler implements ServerAuthenticationSuccessHandler {

    private ServerRedirectStrategy redirectStrategy = new DefaultServerRedirectStrategy();

    @SneakyThrows
    @Override
    public Mono<Void> onAuthenticationSuccess(WebFilterExchange webFilterExchange, Authentication authentication) {
        log.info("oauth2 authentication success");
        return Mono.empty().then(redirectStrategy.sendRedirect(webFilterExchange.getExchange(), new URI("/user/info/1")));
    }
}
9.测试
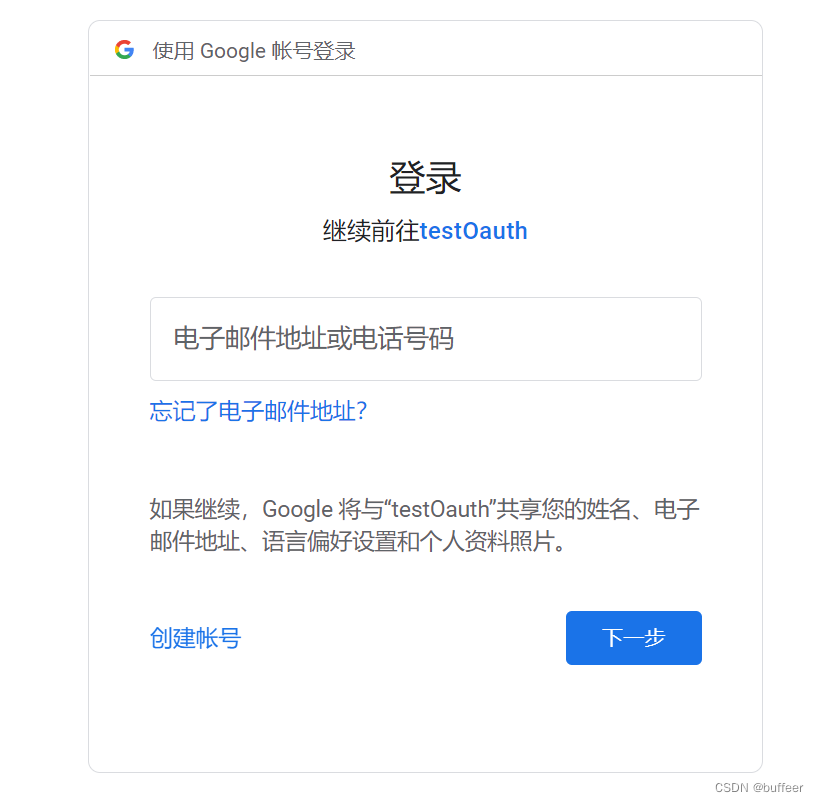
首先,去访问 /user/info/1 接口,如果没有登录过会被重定向到登录页面。点击 Google 登录按钮,开始 Google OAuth2 Login 授权流程。成功后,会重定向到 /user/info/1 接口。注意:在测试时,首先要确保你可以访问 Google,如果你是在本地运行代码还要确保你的代码也能访问Google。本地调试可以安装 Proxifier


到此,功能已经基本实现,但是有点小缺陷。你可能会发现,当它运行在一台机器上是好好的,但是运行在两个机器上,就会报错了。为什么呢?原因是:默认是用 WebSession 存储 授权信息。解决办法有几种:
- Nginx 可以设置 会话粘性
- 自定义使用 Cookie 存储 授权信息
- 使用分布式Session
更多信息
- 第16章 OAuth2AuthorizationRequestRedirectWebFilter源码解析
- 第17章 OAuth2LoginAuthenticationWebFilter 源码解析
- 第18章 OAuth2LoginAuthenticationWebFilter 之请求匹配器ServerWebExchangeMatcher
- 第19章 OAuth2LoginAuthenticationWebFilter 之ServerAuthenticationConverter
- 第20章 OAuth2LoginAuthenticationWebFilter 之ReactiveAuthenticationManager认证授权管理器
- 第21章 OAuth2LoginAuthenticationWebFilter 之AuthenticationSuccessHandler
- 第22章 OAuth2LoginAuthenticationWebFilter之AuthenticationFailureHandler