文章目录
本文是Swagger3 相关笔记总结,方便自己以后复习,同时也希望对大家有所帮助。
一、导入依赖
 		<!--swagger3-->
        <dependency>
            <groupId>io.springfox</groupId>
            <artifactId>springfox-boot-starter</artifactId>
            <version>3.0.0</version>
        </dependency>
二、编写相关类
1.application.yml
server:
  port: 8089

spring:
  application:
    name: bbx-swagger
  # ===== 避免spring boot版本和swagger版本不一致报错 ===== #
  mvc:
    pathmatch:
      matching-strategy: ant_path_matcher

# ===== 自定义swagger配置 ===== #
swagger:
  enable: true
  application-name: ${spring.application.name}
  application-version: v1.0
  application-description: springfox swagger 3.0 Demo
  try-host: http://localhost:${server.port}
2.SwaggerProperties 类
@Component
@ConfigurationProperties("swagger")
@Data
public class SwaggerProperties {

    /**
     * 是否开启swagger,生产环境一般关闭,所以这里定义一个变量
     */
    private Boolean enable;

    /**
     * 项目应用名
     */
    private String applicationName;

    /**
     * 项目版本信息
     */
    private String applicationVersion;

    /**
     * 项目描述信息
     */
    private String applicationDescription;

    /**
     * 接口调试地址
     */
    private String tryHost;
}
3.Swagger配置类
@Configuration
@EnableOpenApi //swagger3启动注释
public class SwaggerConfig {
    @Autowired
    private SwaggerProperties swaggerProperties;

    @Bean
    public Docket userDocket(){
        return new Docket(DocumentationType.OAS_30)
                //定义是否开启swagger
                .enable(swaggerProperties.getEnable())
                .groupName("bbx")
                //api展示信息
                .apiInfo(apiInfo())
                //接口调试地址
                .host(swaggerProperties.getTryHost())
                //过滤条件
                .select()
                .apis(RequestHandlerSelectors.basePackage("com.bbx.swagger.controller"))
                .build();
    }

    @Bean
    public Docket docket(){
        return new Docket(DocumentationType.OAS_30)
                //定义是否开启swagger
                .enable(swaggerProperties.getEnable())
                .groupName("fft");
    }

    private ApiInfo apiInfo(){
        //作者信息
        Contact contact = new Contact("bbx","https://blog.csdn.net/BBQ__ZXB?type=blog","1101249732@qq.com");
        return new ApiInfo(
                swaggerProperties.getApplicationName() + "APi Doc",
                swaggerProperties.getApplicationDescription(),
                swaggerProperties.getApplicationVersion(),
                "urn:tos",
                contact,
                "Apache 2.0",
                "http://www.apache.org/licenses/LICENSE-2.0",
                new ArrayList());
    }
}
4. Controller
@RestController
@RequestMapping("/user")
@Api(tags = "用户接口类")
//@Tag(name = "用户管理", description = "用户数据增删改查") 不生效
public class UserController {

    @Autowired
    private UserService userService;


    @ApiOperation("测试接口1") //swagger2
    //@Operation(summary = "测试接口1") //swagger3
    @PostMapping("/show1")
    public String show1(@ApiParam(value = "姓名", required = true, example = "笨笨熊")@RequestBody String name) {
        return "hello," + name;
    }

    @ApiOperation("测试接口2")
    @PostMapping("/show2")
    public String show2(@ApiParam(value = "用户对象", required = true) @RequestBody User user) {
        return "hi," + user.getName();
    }
}
5. 实体类User
@Data
@AllArgsConstructor
@NoArgsConstructor
@ApiModel("用户实体类")
//@Schema(name = "用户实体类") 不生效
public class User {

	//swagger3
    @Schema(description = "姓名",required = true,example = "笨笨熊")
    private String name;

	//swagger2
    @ApiModelProperty(value = "年龄",required = true,example = "21")
    private Integer age;
}
6. 常用注解
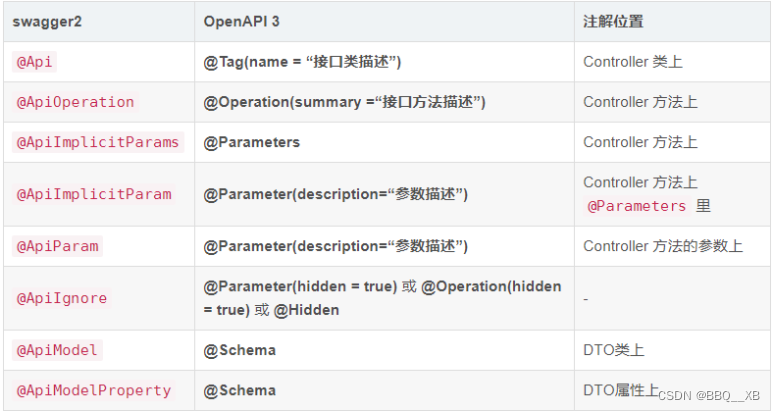
swagger3的注解与swagger2相差很多,但兼容了swagger2的注解,区别如下:

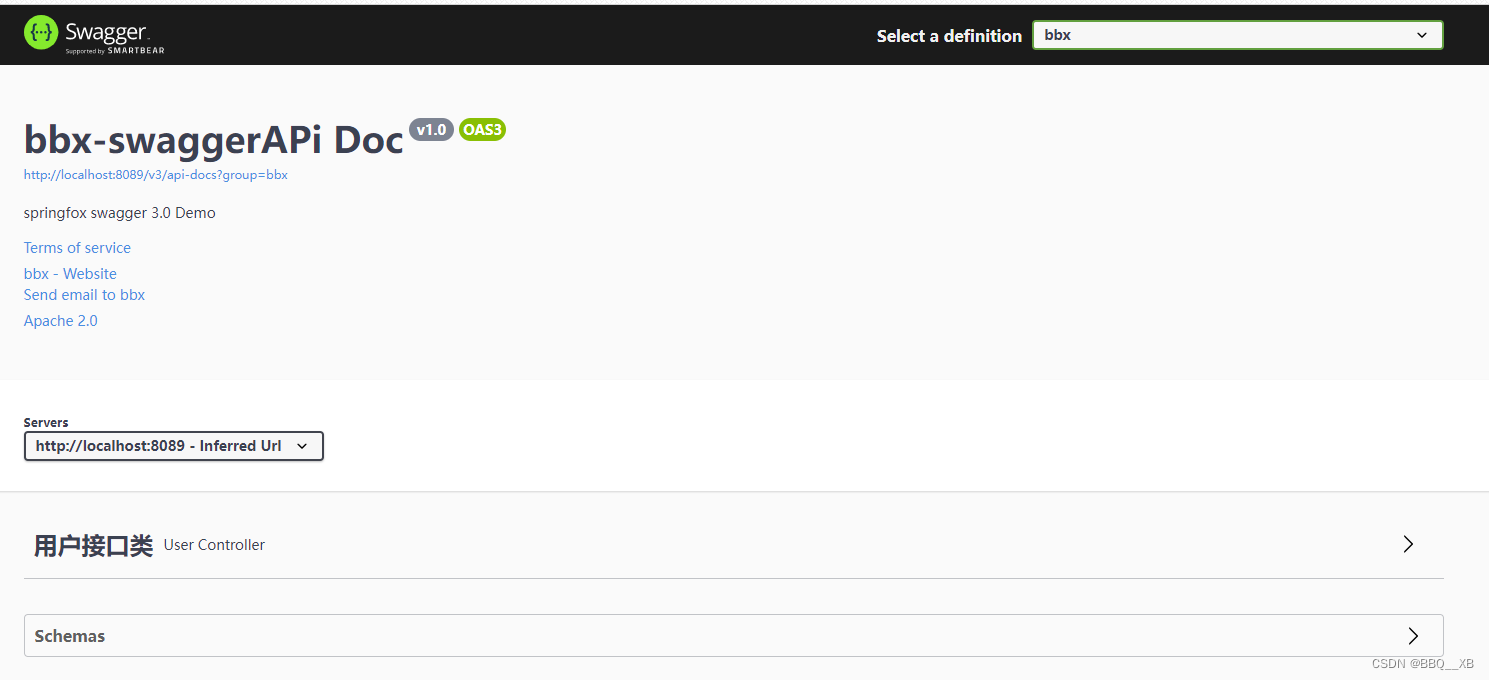
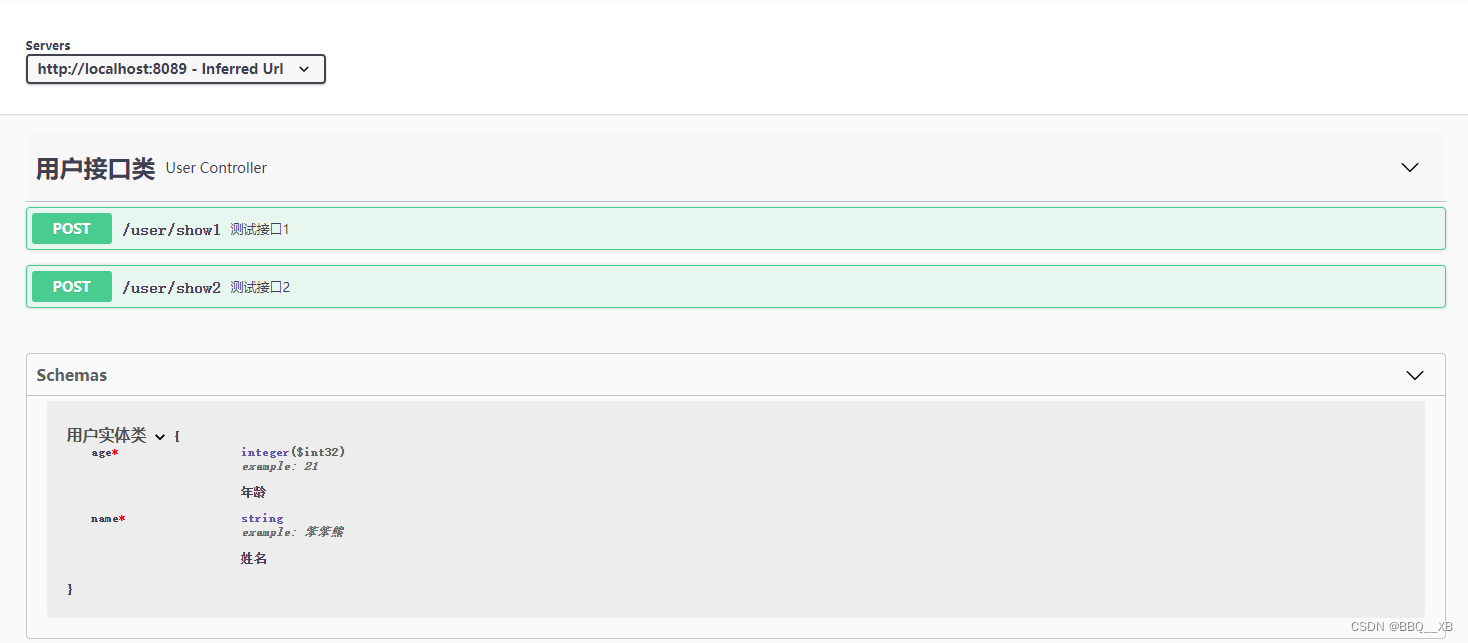
三、Swagger管理页面
http://localhost:8089/swagger-ui/index.html


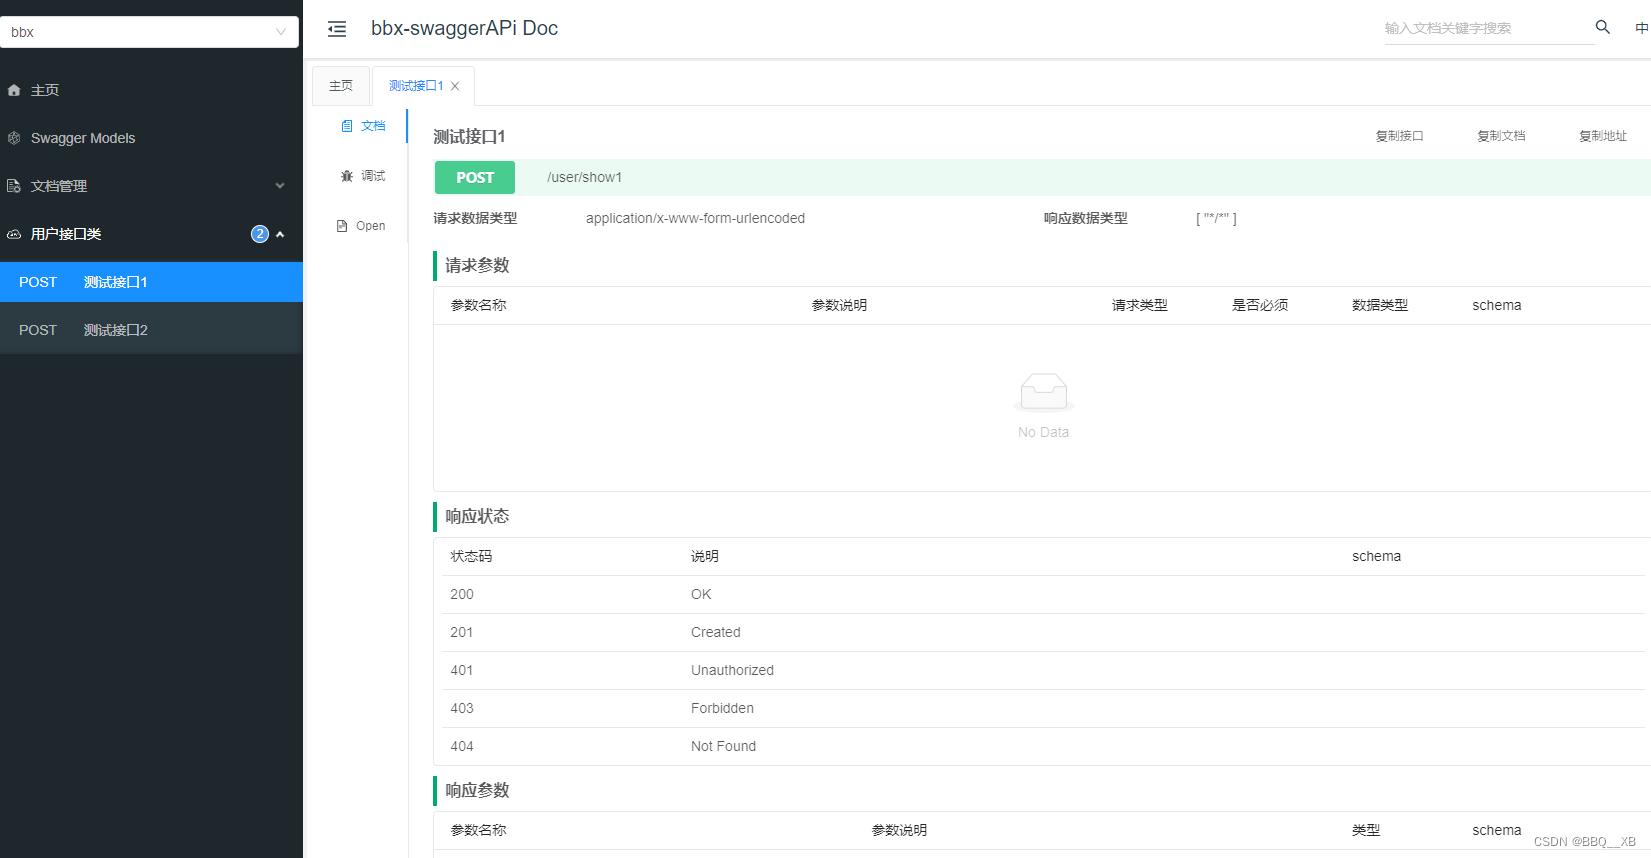
四、使用knife4j优化体验
1. 导入依赖
<!--knife4j-->
        <dependency>
            <groupId>com.github.xiaoymin</groupId>
            <artifactId>knife4j-spring-boot-starter</artifactId>
            <version>3.0.2</version>
        </dependency>
2. 访问网址
http://localhost:8089/doc.html
