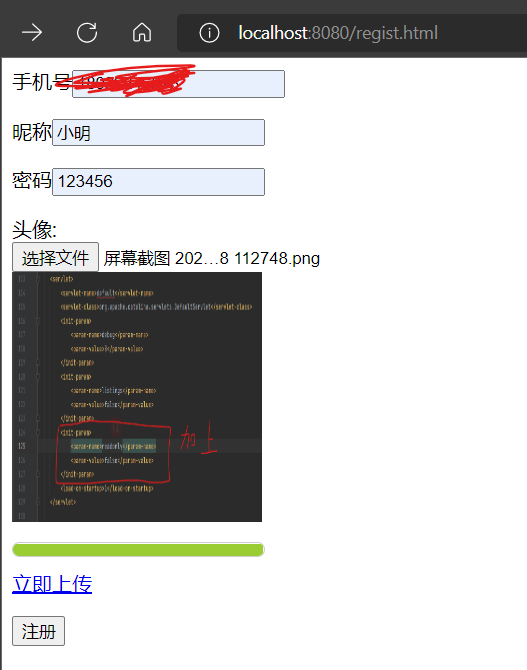
案例介绍:新用户注册,上传和下载头像
第一步:新建SpringBoot项目
新建项目,这里打包方式选Jar还是War都无所谓
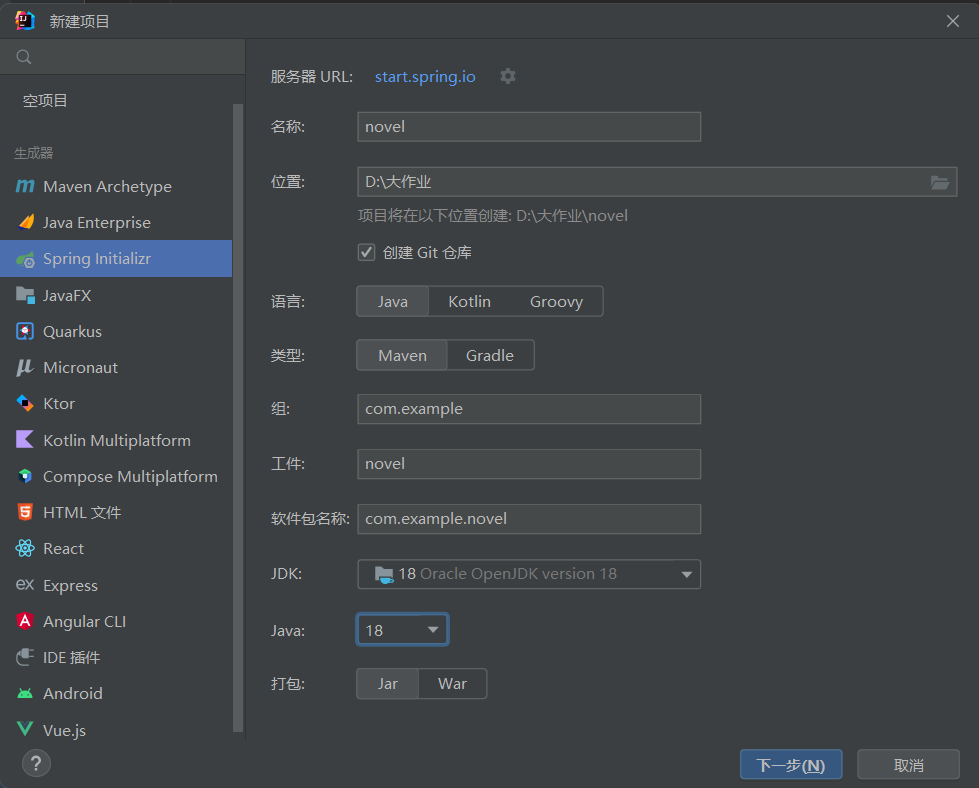
这里加入以下依赖:
- Spring Web:我们是个Web项目当然要加入这个
- Lombok:加入Lombok是为了写实体类(和数据库一一对应的pojo类)时,可以不用自己写set和get方法
- Thymeleaf:是为了之后更方便进行前端页面的制作
- MyBatis:用Mybaits连接数据库
- MySql:使用Mysql数据库的驱动类
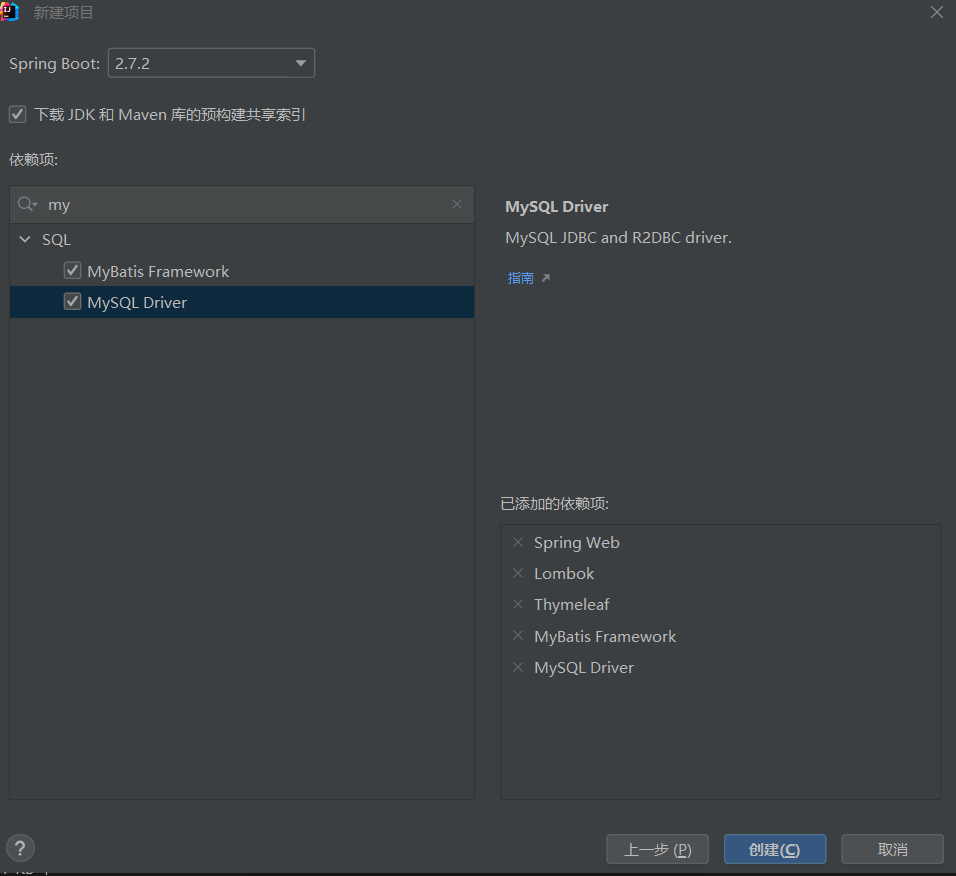
因为使用了Lombok,所以要在设置里开启注解处理器
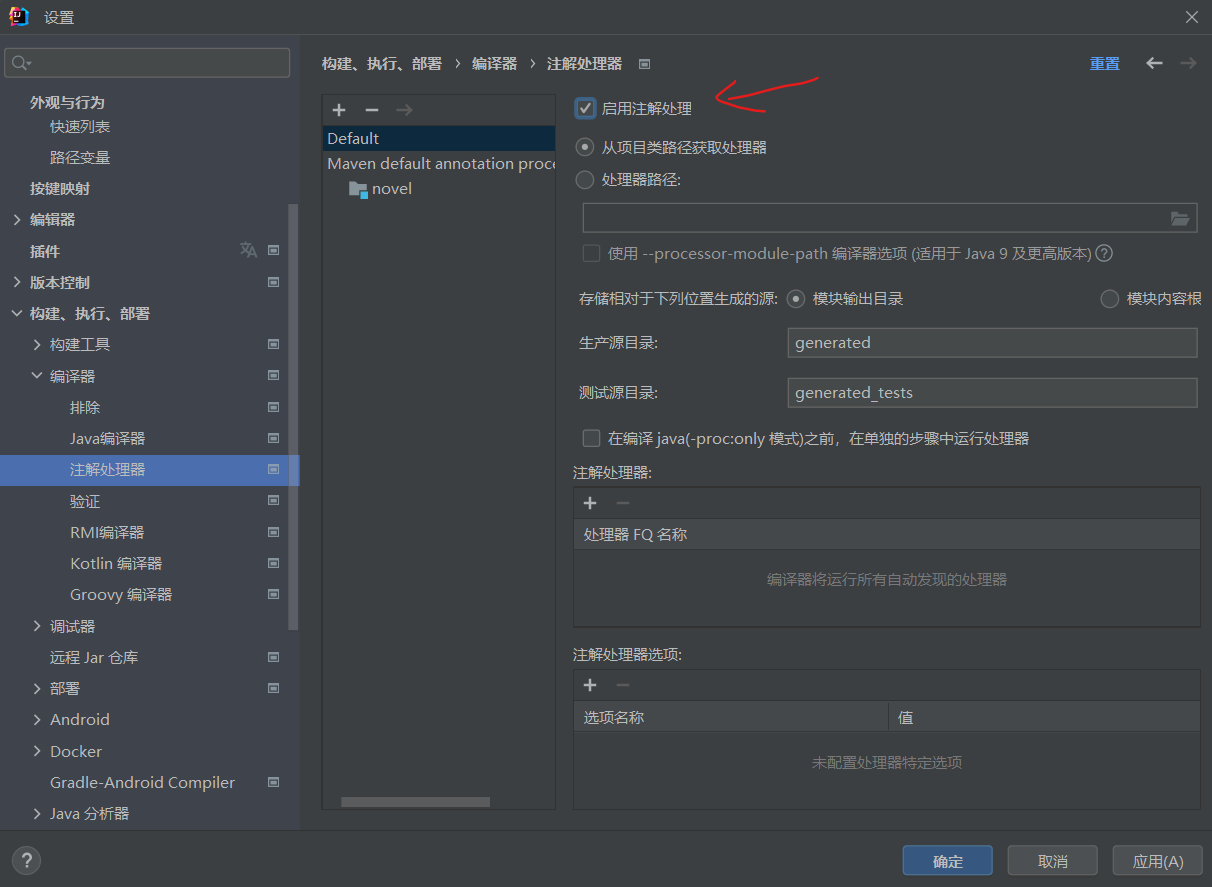
导入跨服务器依赖
往项目里的pom.xml的dependencys标签里加入下面代码(加完之后记得加载Maven变更,idea快捷键ctrl+shift+o)
<dependency>
  <groupId>com.sun.jersey</groupId>
  <artifactId>jersey-client</artifactId>
  <version>1.19.4</version>
</dependency>
第二步:新建数据库表
连接数据库的账号密码都是root,数据库名字叫novel,表名叫user

第三步:单独解压一个tomcat作为文件存储服务器
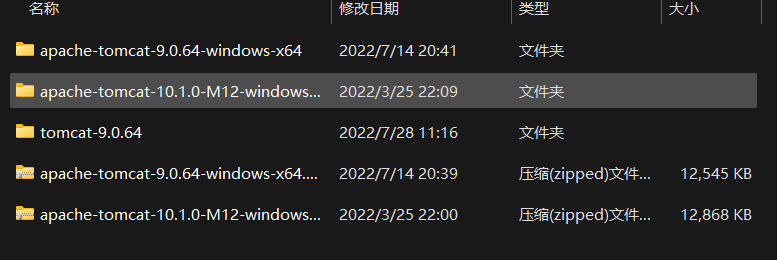
我新解压了一个tomcat,文件夹名字叫tomcat-9.0.64
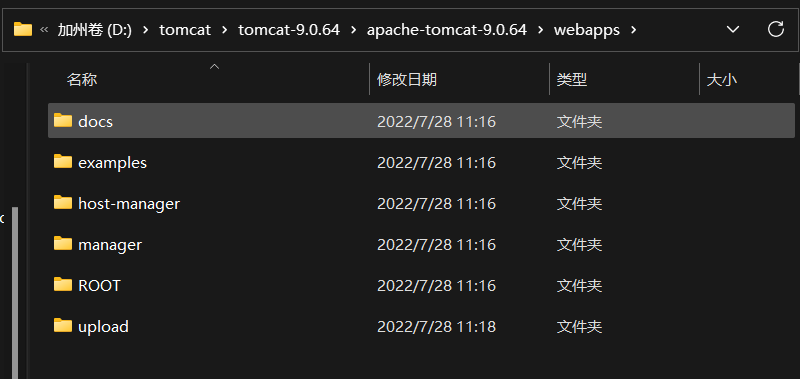
打开到webapps文件夹,新建upload目录,等会文件往这里面存储。
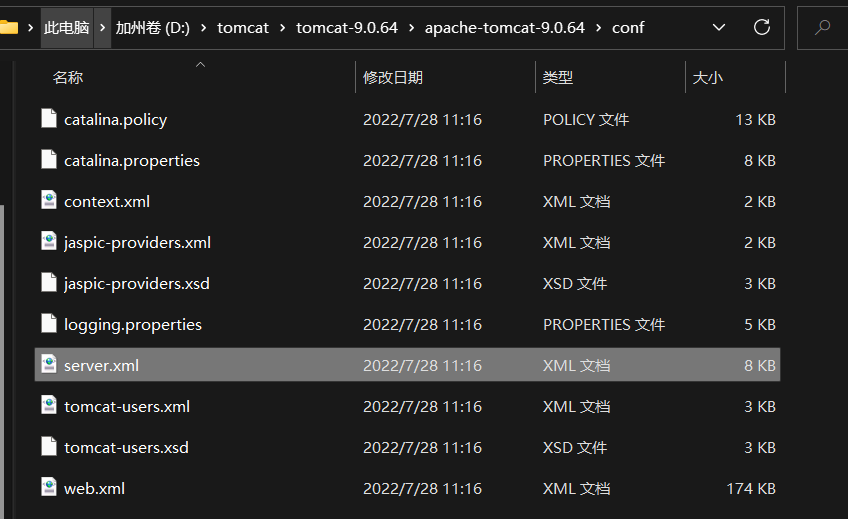
然后找到conf目录下的server.xml文件
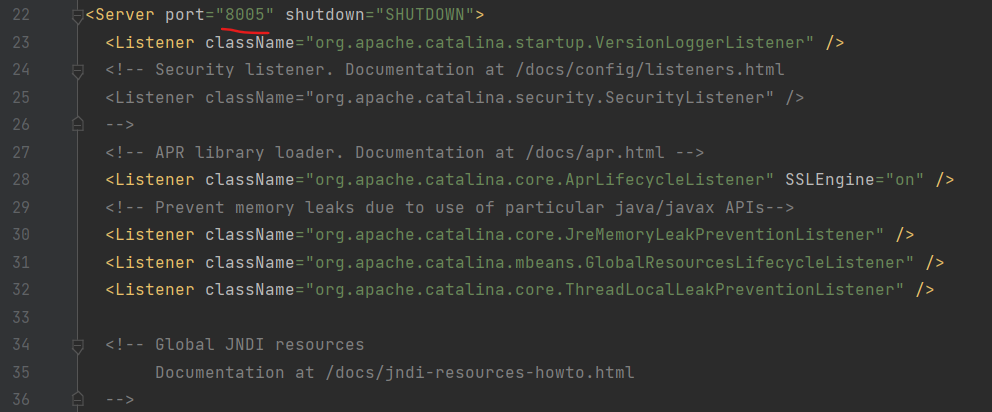
打开找到8005改为8006
连接器端口号从8080改为8090

接下来打开同级目录下的web.xml
加上配置信息,这样才可以写入
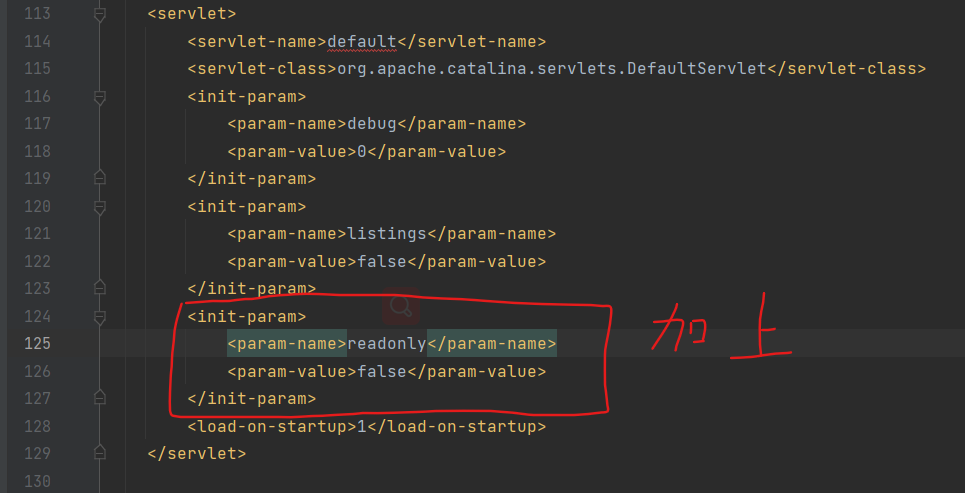
之后找到bin目录下的startup.bat,启动tomcat,查看能否启动,然后先不管。
可能启动tomcat它会一闪而过,这个问题是因为没有配置环境变量path。如果没这个问题可以跳到第三步。
在环境变量里一定要配置JAVA_HOME C:\Program Files\Java\jdk1.8.0_161(自己安装java的路径,每个人不一样)
部分电脑需要配置CATALINA_HOME D:///apache-tomcat-9.0.41(tomcat路径)
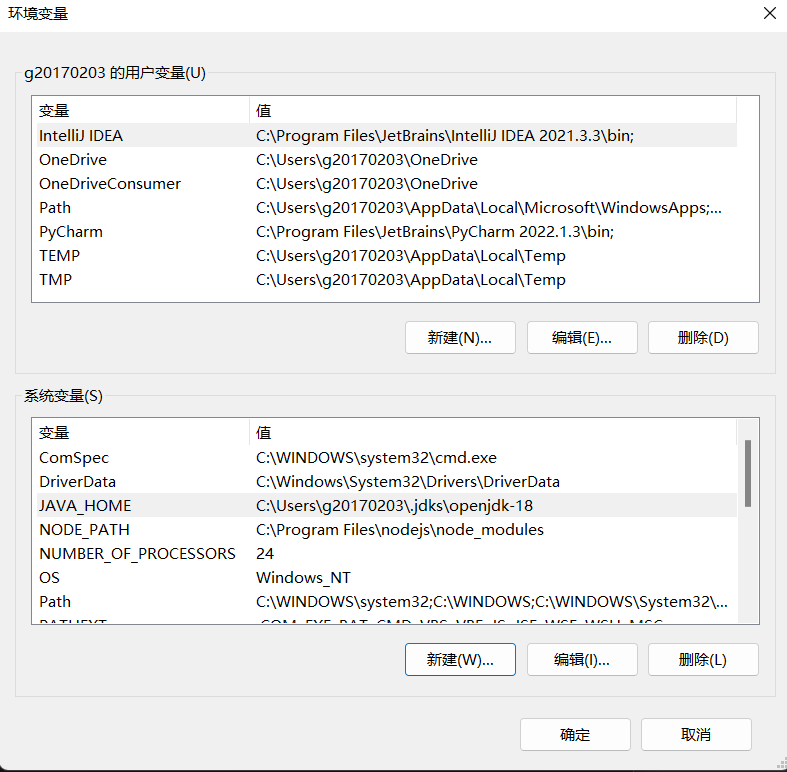
至于开始运行后控制台乱码控制台产生乱码的问题,是因为在Tomcat在输出日志中使用的是UTF-8编码,而我们中文的Windows操作系统使用的是GBK编码。由于编码格式不统一,所以出现了乱码。
解决方式:
修改conf目录中的logging.properties文件重新指定的编码方式。如果还是不行,那么 就删除该行即可
java.util.logging.ConsoleHandler.encoding = GBK
第四步:写具体逻辑
新建一个静态页面作为上传信息页面
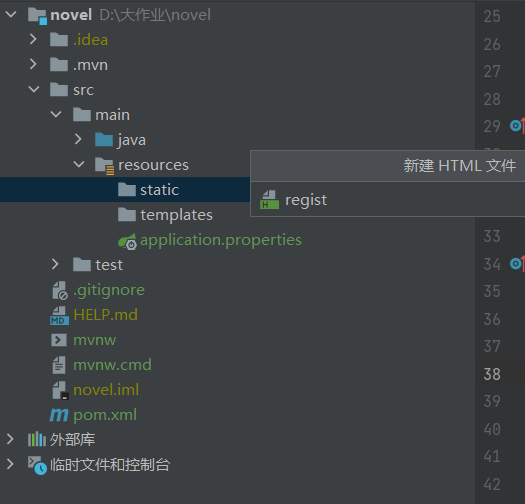
前端注册页面详细代码,用来获取信息和上传头像
<html>
<head>
  <meta charset="UTF-8">
  <title>注册页面</title>
  <style>
    .progress {
      width: 200px;
      height: 10px;
      border: 1px solid #ccc;
      border-radius: 10px;
      margin: 10px 0px;
      overflow: hidden;
    }
    /* 初始状态设置进度条宽度为0px */
    .progress > div {
      width: 0px;
      height: 100%;
      background-color: yellowgreen;
      transition: all .3s ease;
    }
  </style>
  <script type="text/javascript" src="js/jquery-3.1.1.min.js"></script>
  <script type="text/javascript">
    $(function(){
      $("#uploadFile").click(function(){
        // 获取要上传的文件
        var photoFile =$("#photo")[0].files[0]
        if(photoFile==undefined){
          alert("您还未选中文件")
          return;
        }
        // 将文件装入FormData对象
        var formData =new FormData();
        formData.append("headPhoto",photoFile)
        // ajax向后台发送文件
        $.ajax({
          //提交方式
          type:"post",
          //提交内容
          data:formData,
          //提交地址
          url:"user/upload",
          //将processData属性的值设置为false,告诉浏览器发送对象请求数据
          processData:false,
          //将contentType属性的值设置为false,设置请求数据的类型为二进制类型。
          contentType:false,
          success:function(result){
            // 接收后台响应的信息
            alert(result.message)
            // 图片回显
            $("#headImg").attr("src",result.newFileName);
            //将文件类型和文件名放入form表单
            $("#photoInput").val(result.newFileName);
            $("#filetypeInput").val(result.filetype);
          },
          xhr: function() {
            var xhr = new XMLHttpRequest();
            //使用XMLHttpRequest.upload监听上传过程,注册progress事件,打印回调函数中的event事件
            xhr.upload.addEventListener('progress', function (e) {
              //loaded代表上传了多少
              //total代表总数为多少
              var progressRate = (e.loaded / e.total) * 100 + '%';
              //通过设置进度条的宽度达到效果
              $('.progress > div').css('width', progressRate);
            })
            return xhr;
          }
        })
      })
    })
  </script>
</head>
<body>
<form action="user/addUser" method="get">
  <p>手机号<input type="text" name="phone"></p>
  <p>昵称<input type="text" name="uname"></p>
  <p>密码<input type="text" name="password"></p>
  <p>头像:
    <br/>
    <input id="photo" type="file">
    <br/>
    <img id="headImg" style="width: 200px;height: 200px" alt="你还未上传图片" >
    <br/>
  <div class="progress">
    <div></div>
  </div>
  <a id="uploadFile" href="javascript:void(0)">立即上传</a>
  <!--使用隐藏输入框存储文件名称和文件类型-->
  <input type="hidden" id="photoInput" name="photo">
  <input type="hidden" id="filetypeInput" name="filetype">
  <p><input type="submit" value="注册"></p>
</form>
</body>
</html>
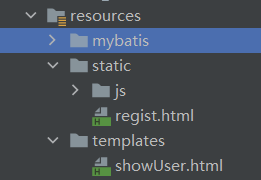
因为这里使用了ajax向后台发送文件,需要引用js文件,在静态包static里新增js文件。放入jquery-3.1.1.min.js。可前往jquery官网获取。或者点击这里用百度网盘下载。
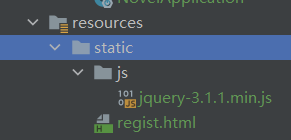
然后在resources文件里新增application.yml配置文件
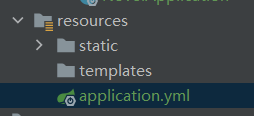
里面内容:
spring:
  #连接数据库的信息
  datasource:
    url: jdbc:mysql://127.0.0.1:3306/novel?useSSL=false&useUnicode=true&characterEncoding=UTF-8&serverTimezone=Asia/Shanghai&allowPublicKeyRetrieval=true
    driver-class-name: com.mysql.cj.jdbc.Driver
    username: root
    password: root
  servlet:
    multipart:
      #spring boot默认上传一个文件大小1MB,这里改为20MB
      max-file-size: 20MB
      #多个文件一次上传允许大小100M
      max-request-size: 100MB


#mapper-locations: classpath:mybatis/*.xml  mapper映射文件包扫描
#type-aliases-package 实体类别名包扫描
mybatis:
  mapper-locations: classpath:mybatis/*.xml
  type-aliases-package: com.msb.pojo
新建包和类
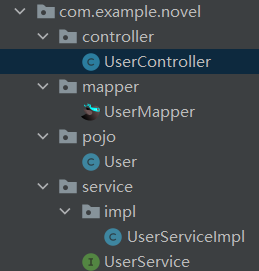
UserController写具体逻辑
package com.example.novel.controller;

import com.example.novel.pojo.User;
import com.example.novel.service.UserService;
import com.sun.jersey.api.client.Client;
import com.sun.jersey.api.client.WebResource;
import org.apache.tomcat.util.http.fileupload.IOUtils;
import org.springframework.stereotype.Controller;
import org.springframework.web.bind.annotation.RequestMapping;
import org.springframework.web.bind.annotation.ResponseBody;
import org.springframework.web.multipart.MultipartFile;
import org.springframework.web.servlet.ModelAndView;

import javax.servlet.ServletOutputStream;
import javax.servlet.http.HttpServletRequest;
import javax.servlet.http.HttpServletResponse;
import java.io.IOException;
import java.io.InputStream;
import java.lang.reflect.InvocationTargetException;
import java.net.URL;
import java.util.HashMap;
import java.util.Map;
import java.util.UUID;

@Controller
@RequestMapping("/user")
public class UserController {

    private final UserService userService;

    public UserController(UserService userService) {
        this.userService = userService;
    }


    //存放用户头像的数据库位置
    private final static String FILESERVER ="http://127.0.0.1:8090/upload/";
    @RequestMapping("/upload")
    @ResponseBody
    public Map<String,String> upload(MultipartFile headPhoto, HttpServletRequest req) throws IOException {
        Map<String,String> map=new HashMap<>();
        // 获取文件名
        String originalFilename = headPhoto.getOriginalFilename();
        // 避免文件名冲突,使用UUID替换文件名
        String uuid = UUID.randomUUID().toString();
        // 获取拓展名
        String extendsName = originalFilename.substring(originalFilename.lastIndexOf("."));
        // 新的文件名
        String newFileName=uuid.concat(extendsName);
        // 创建 sun公司提供的jersey包中的client对象
        Client client=Client.create();
        WebResource resource = client.resource(FILESERVER + newFileName);
        //  文件保存到另一个服务器上去了
        resource.put(String.class, headPhoto.getBytes());
        // 上传成功之后,把文件的名字和文件的类型返回给浏览器
        map.put("message", "上传成功");
        map.put("newFileName",FILESERVER+newFileName);
        map.put("filetype", headPhoto.getContentType());
        return map;
    }

    @RequestMapping("addUser")
    public ModelAndView addUser(User user) throws InvocationTargetException, IllegalAccessException, NoSuchMethodException {
        //新用户默认权限为1级
        user.setJurisdiction(1);
        //调用服务层方法,将数据保存进数据库
        userService.addUser(user);
        /**
         * ModelAndView有Model和View的功能
         * Model主要用于向请求域共享数据
         * View主要用于设置视图,实现页面跳转
         */
        ModelAndView mav = new ModelAndView();
        //向请求域共享数据
        mav.addObject("uid", user.getUid());
        mav.addObject("phone", user.getPhone());
        mav.addObject("uname", user.getUname());
        mav.addObject("password", user.getPassword());
        mav.addObject("filetype", user.getFiletype());
        mav.addObject("photo", user.getPhoto());
        mav.addObject("jurisdiction", user.getJurisdiction());
        //设置视图,实现页面跳转
        mav.setViewName("showUser");
        return mav;
    }


    @RequestMapping("downloadPhoto")
    public void fileDownLoad(String photo, String filetype, HttpServletResponse response) throws IOException {
        // 设置响应头
        // 告诉浏览器要将数据保存到磁盘上,不在浏览器上直接解析
        response.setHeader("Content-Disposition", "attachment;filename="+photo);
        // 告诉浏览下载的文件类型
        response.setContentType(filetype);
        // 获取一个文件的输入流,导入java.net的包
        //InputStream inputStream = new URL(FILESERVER + photo).openStream();
        InputStream inputStream = new URL(photo).openStream();
        // 获取一个指向浏览器的输出流
        ServletOutputStream outputStream = response.getOutputStream();
        // 向浏览器响应文件即可
        IOUtils.copy(inputStream, outputStream);
    }
}
UserMapper代码:
package com.example.novel.mapper;

import com.example.novel.pojo.User;
import org.apache.ibatis.annotations.Mapper;

@Mapper
public interface UserMapper {
    public int addUser(User user);
}
User代码:
package com.example.novel.pojo;

import lombok.AllArgsConstructor;
import lombok.Data;
import lombok.NoArgsConstructor;

import java.io.Serializable;
@AllArgsConstructor
@NoArgsConstructor
@Data
public class User implements Serializable {
    private Integer uid;
    private String phone;
    private String uname;
    private String password;
    private String photo;
    private String filetype;
    private Integer jurisdiction;
}
UserServiceImpl代码:
package com.example.novel.service.impl;

import com.example.novel.mapper.UserMapper;
import com.example.novel.pojo.User;
import com.example.novel.service.UserService;
import org.springframework.beans.factory.annotation.Autowired;
import org.springframework.stereotype.Service;

@Service
public class UserServiceImpl implements UserService {
    @Autowired
    private UserMapper userMapper;
    @Override
    public int addUser(User user) {
        return userMapper.addUser(user);
    }
}
UserService代码:
package com.example.novel.service;

import com.example.novel.pojo.User;

public interface UserService {
    int addUser(User user);
}
新建一个mybatis文件夹,放入UserMapper.xml配置文件

UserMapper.xml里面内容:
<?xml version="1.0" encoding="UTF-8" ?>
<!DOCTYPE mapper
        PUBLIC "-//mybatis.org//DTD Mapper 3.0//EN"
        "http://mybatis.org/dtd/mybatis-3-mapper.dtd">
<mapper namespace="com.example.novel.mapper.UserMapper">
    <!--增加一条user并可以返回主键
        order:取值AFTER|BEFORE,表示在新增之后|之前执行<selectKey>中的SQL命令
        keyProperty:执行select @@identity后结果填充到哪个属性中
        resultType:结果类型。-->
    <insert id="addUser">
        <selectKey order="AFTER" keyProperty="uid"  resultType="Integer">
            select @@identity
        </selectKey>
        insert into user values (DEFAULT,#{phone},#{uname},#{password},#{photo},#{filetype},#{jurisdiction})
    </insert>
</mapper>
然后再写一个前端页面用来进行下载操作,在templates文件夹里新建showUser.html
<!DOCTYPE html>
<html lang="zh" xmlns:th="http://www.thymeleaf.org">
<head>
    <meta charset="UTF-8">
    <title>展示用户界面</title>
    <style>
        #userTable{
            cellspacing:"0px";
            cellpadding:"0px";
            width: 50%;
            border: 3px solid cadetblue;
            margin: 0px auto;
            text-align: center;
        }
        #userTable th,td{
            border: 1px solid gray;
        }
        #userTable img{
            width: 100px;
            height: 100px;
        }
    </style>
</head>
<body>
  <table id="userTable" >
    <tr>
      <th>编号</th>
      <th>手机</th>
      <th>昵称</th>
      <th>密码</th>
      <th>头像</th>
      <th>操作</th>
    </tr>
    <tr>
        <!--/*@thymesVar id="id" type="java.lang.Integer"*/-->
        <td th:text="${uid}"></td>
        <td th:text="${phone}"></td>
        <td th:text="${uname}"></td>
        <td th:text="${password}"></td>
        <td>
            <img th:src="${photo}" alt="暂时没有" >
        </td>
        <td>
            <!--<a href="fileDownload.do?photo='+e.photo+'&filetype='+e.filetype+'"-->
            <a th:href="@{downloadPhoto(photo=${photo},filetype=${filetype})}">下载</a>
        </td>
    </tr>
</table>
</body>
</html>
项目展示
