一、文件架构:

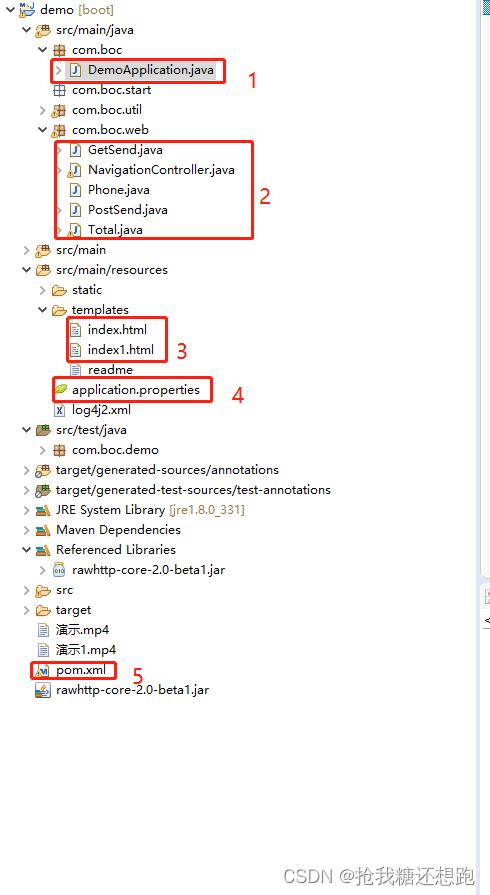
接下来按图片中的红框,分段介绍
1、DemoApplication
启动服务文件,内容无需修改。
package com.boc;

import org.springframework.boot.SpringApplication;
import org.springframework.boot.autoconfigure.SpringBootApplication;

@SpringBootApplication
public class DemoApplication {

	public static void main(String[] args) {
		SpringApplication.run(DemoApplication.class, args);
	}

}
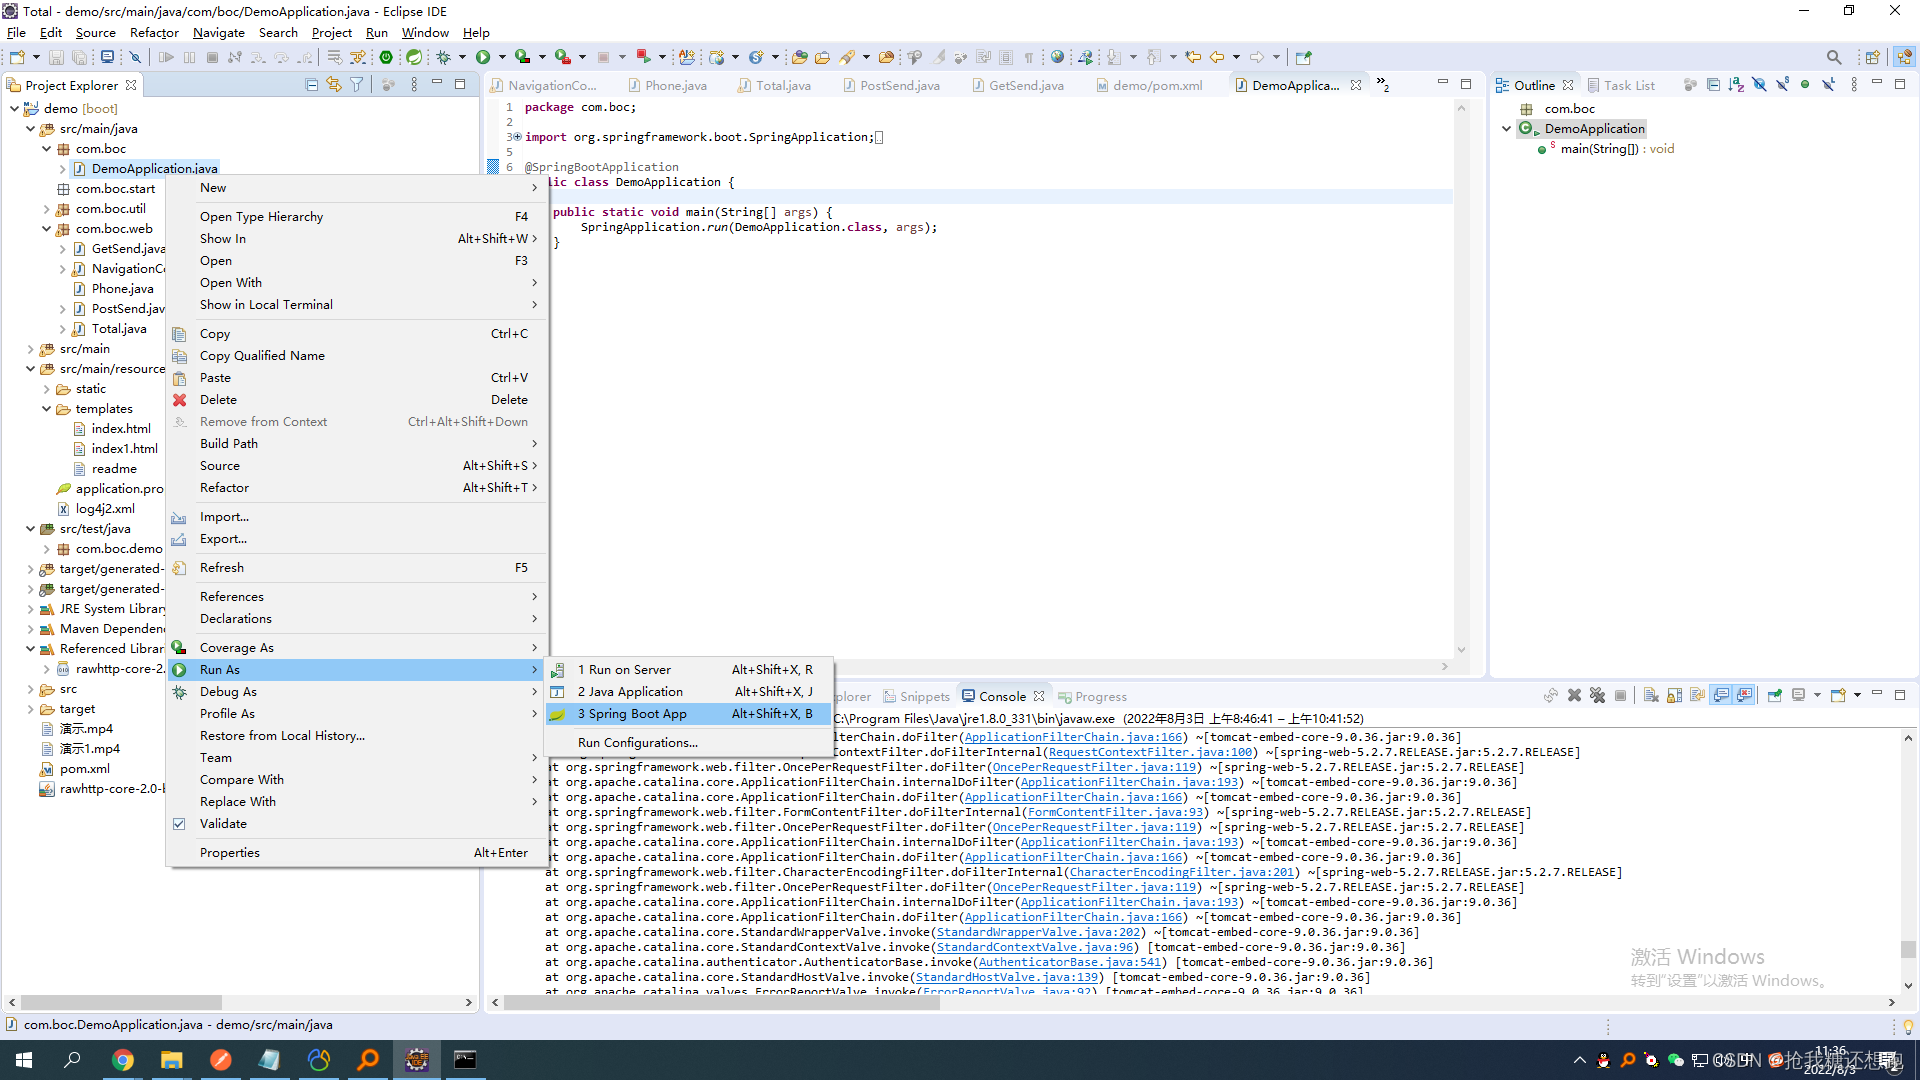
启动步骤:右键-run as -springboot app,如下图:

2、编写自己的JAVA程序。
注:springboot是java编程的web服务器,如何跳转和实现功能性需求(提交表单、身份验证等),重点都在JAVA程序这部分。
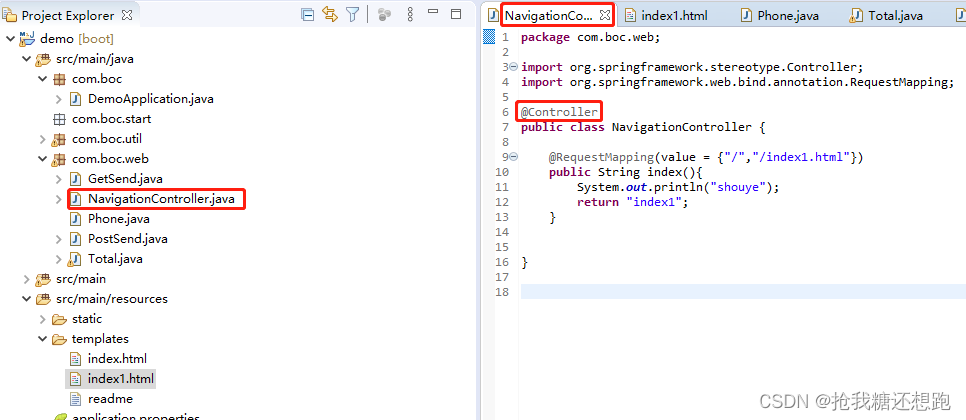
(1)、跳转的实现:需要满足下面三个条件
- class类前,添加 @Controller

-
方法前面
添加
??????@ResponseBody
??????@GetMapping(“/create”)
或者
??????@ResponseBody
??????@RequestMapping(“/add”) -
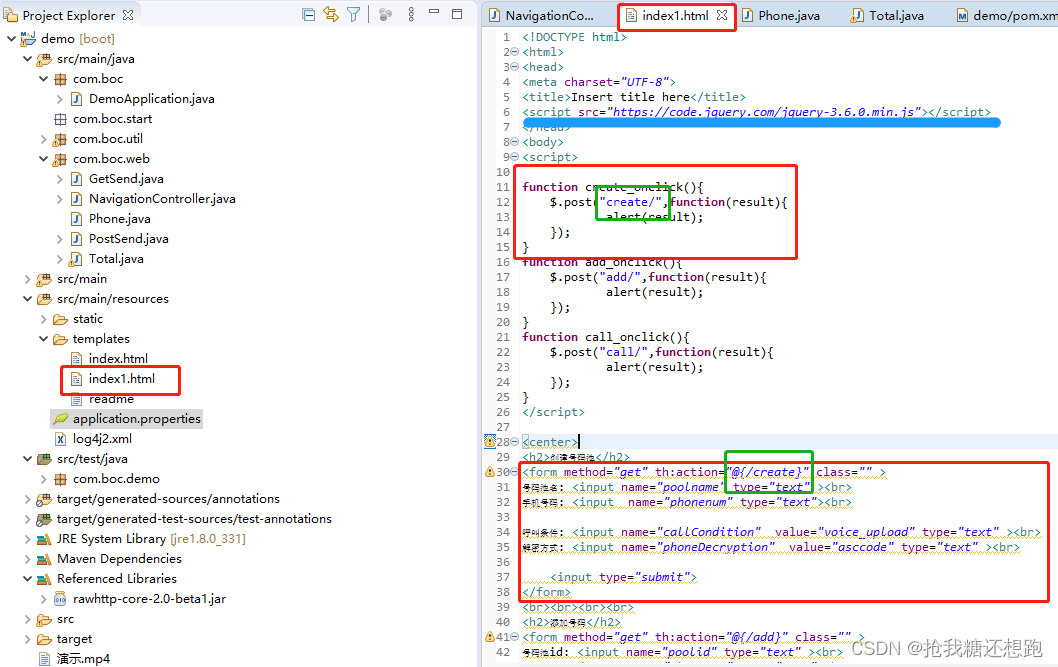
html界面
?????? 或者通过js实现跳转:需要引入jquery.js文件
function create_onclick(){
	$.post("create/",function(result){
			alert(result);
	});
}
??????或者通过form表单:
<form method="get" th:action="@{/create}" class="" >

号码池名: <input name="poolname" type="text" ><br>
手机号码: <input  name="phonenum" type="text"><br>
    	  <input type="submit">

</form>

3、编写HTML页面
4、application.properties
Spring Boot 启动,默认会从该文件查找相关属性并加载。
包含如端口号、数据库连接等
spring.thymeleaf.mode=LEGACYHTML5
spring.thymeleaf.servlet.content-type=text/html
spring.thymeleaf.cache=false
spring.thymeleaf.prefix=classpath:/templates/

server.port=8080
server.max-http-header-size = 4048576


spring.datasource.driverClassName=com.mysql.cj.jdbc.Driver
spring.datasource.url=jdbc:mysql://localhost:3306/mysql?useSSL=false&useUnicode=true&characterEncoding=utf-8
spring.datasource.username=root
spring.datasource.password=root
5、pox.xml
这篇写的比较好,可以参考。http://t.csdn.cn/dUQfT
最常用的部分是dependencies:配置项目所需要的依赖包