Springboot Admin提供了开箱即用的服务监控组件,通过简单的集成我们就可以在实际的开发中监控我们的微服务运行状态、各种指标,提供实时报警等等,非常实用!
配套讲解视频:https://www.bilibili.com/video/BV1R14y1e7zz
前言
官网地址:https://codecentric.github.io/spring-boot-admin/
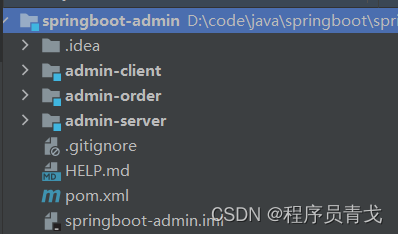
- springboot-admin (父级模块)
- admin-server (监控服务)
- admin-client (微服务实例)
- admin-order (微服务实例)
项目结构:
创建 springboot-admin
pom.xml:
<?xml version="1.0" encoding="UTF-8"?>
<project xmlns="http://maven.apache.org/POM/4.0.0" xmlns:xsi="http://www.w3.org/2001/XMLSchema-instance"
         xsi:schemaLocation="http://maven.apache.org/POM/4.0.0 https://maven.apache.org/xsd/maven-4.0.0.xsd">
    <modelVersion>4.0.0</modelVersion>
    <modules>
        <module>admin-order</module>
    </modules>
    <parent>
        <groupId>org.springframework.boot</groupId>
        <artifactId>spring-boot-starter-parent</artifactId>
        <version>2.7.3</version>
        <relativePath/> <!-- lookup parent from repository -->
    </parent>
    <groupId>com.example</groupId>
    <artifactId>springboot-admin</artifactId>
    <version>0.0.1-SNAPSHOT</version>
    <name>springboot-admin</name>
    <description>Admin for Spring Boot</description>
    <packaging>pom</packaging>
    <properties>
        <java.version>1.8</java.version>
        <spring-boot-admin.version>2.7.4</spring-boot-admin.version>
    </properties>

    <dependencyManagement>
        <dependencies>
            <dependency>
                <groupId>de.codecentric</groupId>
                <artifactId>spring-boot-admin-dependencies</artifactId>
                <version>${spring-boot-admin.version}</version>
                <type>pom</type>
                <scope>import</scope>
            </dependency>
        </dependencies>
    </dependencyManagement>


</project>
创建maven子模块:admin-server作为监控服务
pom.xml:
<?xml version="1.0" encoding="UTF-8"?>
<project xmlns="http://maven.apache.org/POM/4.0.0" xmlns:xsi="http://www.w3.org/2001/XMLSchema-instance"
         xsi:schemaLocation="http://maven.apache.org/POM/4.0.0 https://maven.apache.org/xsd/maven-4.0.0.xsd">
    <modelVersion>4.0.0</modelVersion>
    <parent>
        <groupId>com.example</groupId>
        <artifactId>springboot-admin</artifactId>
        <version>0.0.1-SNAPSHOT</version>
    </parent>
    <artifactId>admin-server</artifactId>
    <properties>
        <java.version>1.8</java.version>

    </properties>
    <dependencies>
        <dependency>
            <groupId>de.codecentric</groupId>
            <artifactId>spring-boot-admin-starter-server</artifactId>
        </dependency>
    </dependencies>

</project>
启动类(千万别忘记加 @EnableAdminServer ):
import de.codecentric.boot.admin.server.config.EnableAdminServer;
import org.springframework.boot.SpringApplication;
import org.springframework.boot.autoconfigure.SpringBootApplication;

@EnableAdminServer   // 千万别忘记
@SpringBootApplication
public class AdminServerApplication {

    public static void main(String[] args) {
        SpringApplication.run(AdminServerApplication.class, args);
    }

}
配置文件 application.yml:
server:
  port: 8000

spring:
  application:
    name: admin-server
management:
  endpoint:
    health:
      show-details: always
做完这些之后就可以启动你的 admin-server 服务了

启动之后打开 http://localhost:8000 就可以看到监控的页面了:
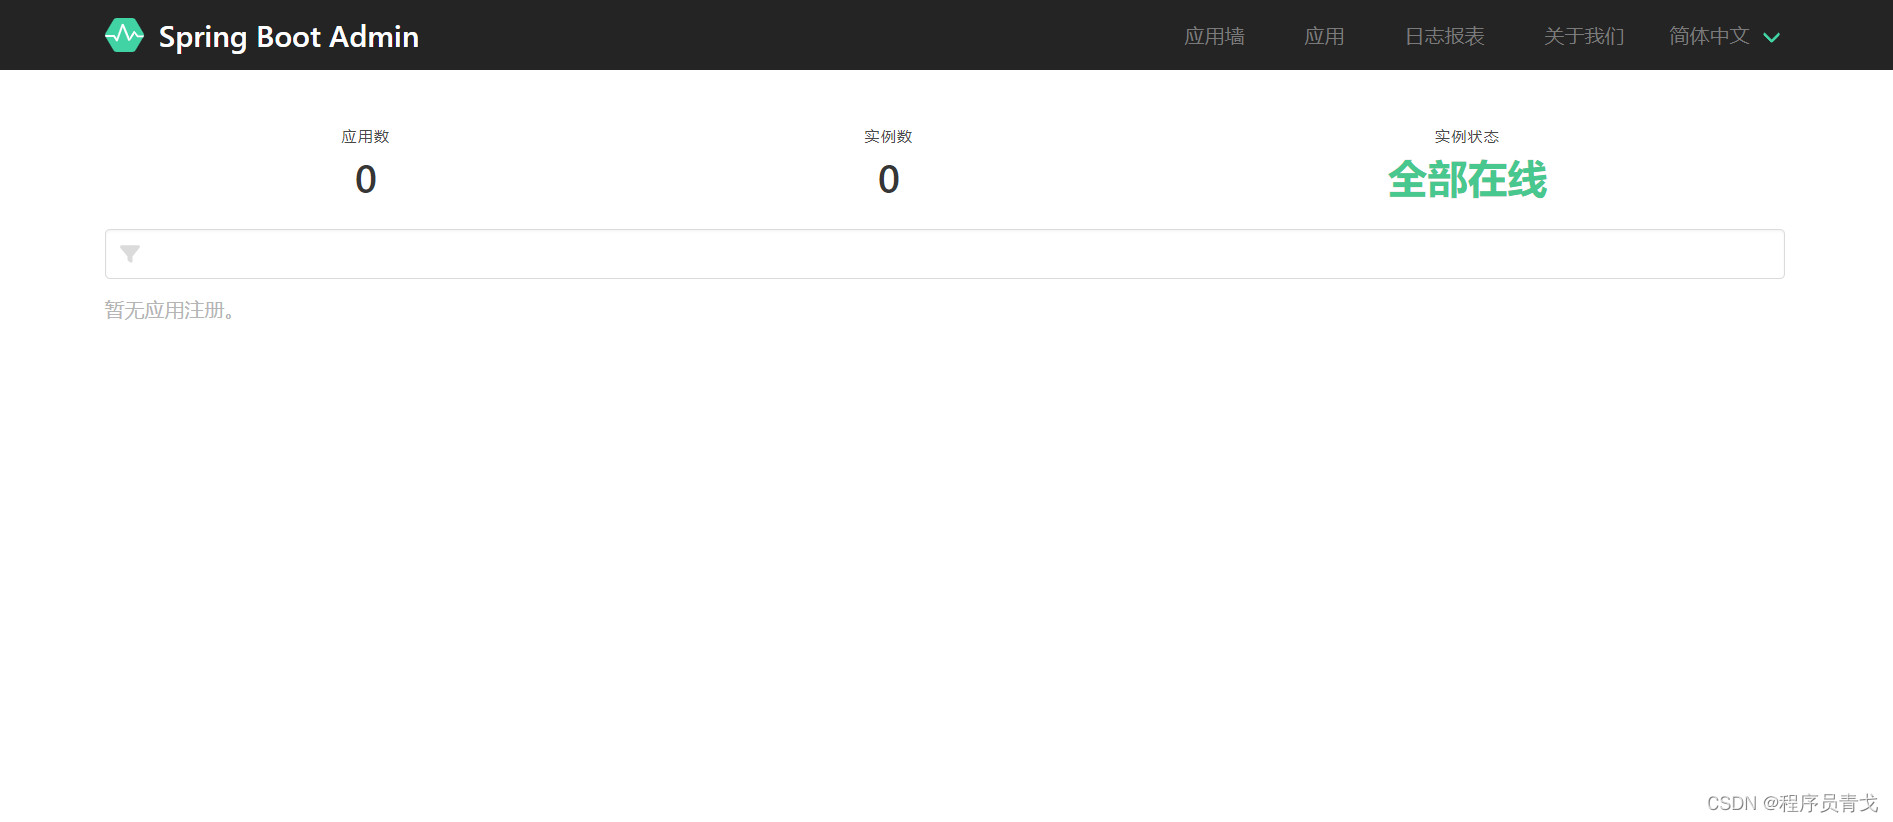
到此,你的server监控服务就ok了。
创建maven子模块 admin-client 作为微服务实例
pom.xml:
<?xml version="1.0" encoding="UTF-8"?>
<project xmlns="http://maven.apache.org/POM/4.0.0" xmlns:xsi="http://www.w3.org/2001/XMLSchema-instance"
         xsi:schemaLocation="http://maven.apache.org/POM/4.0.0 https://maven.apache.org/xsd/maven-4.0.0.xsd">
    <modelVersion>4.0.0</modelVersion>
    <parent>
        <groupId>com.example</groupId>
        <artifactId>springboot-admin</artifactId>
        <version>0.0.1-SNAPSHOT</version>
        <relativePath/> <!-- lookup parent from repository -->
    </parent>
    <artifactId>admin-client</artifactId>
    <version>0.0.1-SNAPSHOT</version>
    <name>admin-client</name>
    <properties>
        <java.version>1.8</java.version>

    </properties>
    <dependencies>
        <dependency>
            <groupId>de.codecentric</groupId>
            <artifactId>spring-boot-admin-starter-client</artifactId>
        </dependency>

        <dependency>
            <groupId>org.springframework.boot</groupId>
            <artifactId>spring-boot-starter-web</artifactId>
        </dependency>
    </dependencies>
</project>
启动类:
import org.springframework.beans.factory.annotation.Value;
import org.springframework.boot.SpringApplication;
import org.springframework.boot.autoconfigure.SpringBootApplication;
import org.springframework.web.bind.annotation.GetMapping;
import org.springframework.web.bind.annotation.RequestMapping;
import org.springframework.web.bind.annotation.RestController;

@RestController
@RequestMapping
@SpringBootApplication
public class AdminClientApplication {

    @Value("${server.port}")
    private String port;

    public static void main(String[] args) {
        SpringApplication.run(AdminClientApplication.class, args);
    }

    @GetMapping
    public String port() {
        return "我现在正在运行实例端口:" + port;
    }

}
配置文件 appl.yml
server:
  port: 9000

spring:
  application:
    name: admin-client
  boot:
    admin:
      client:
        url: http://localhost:8000

management:
  endpoint:
    health:
      show-details: always
  endpoints:
    web:
      exposure:
        include: '*'
    enabled-by-default: true
配置完成之后启动 admin-client 服务,观察 admin-server 的监控页面:

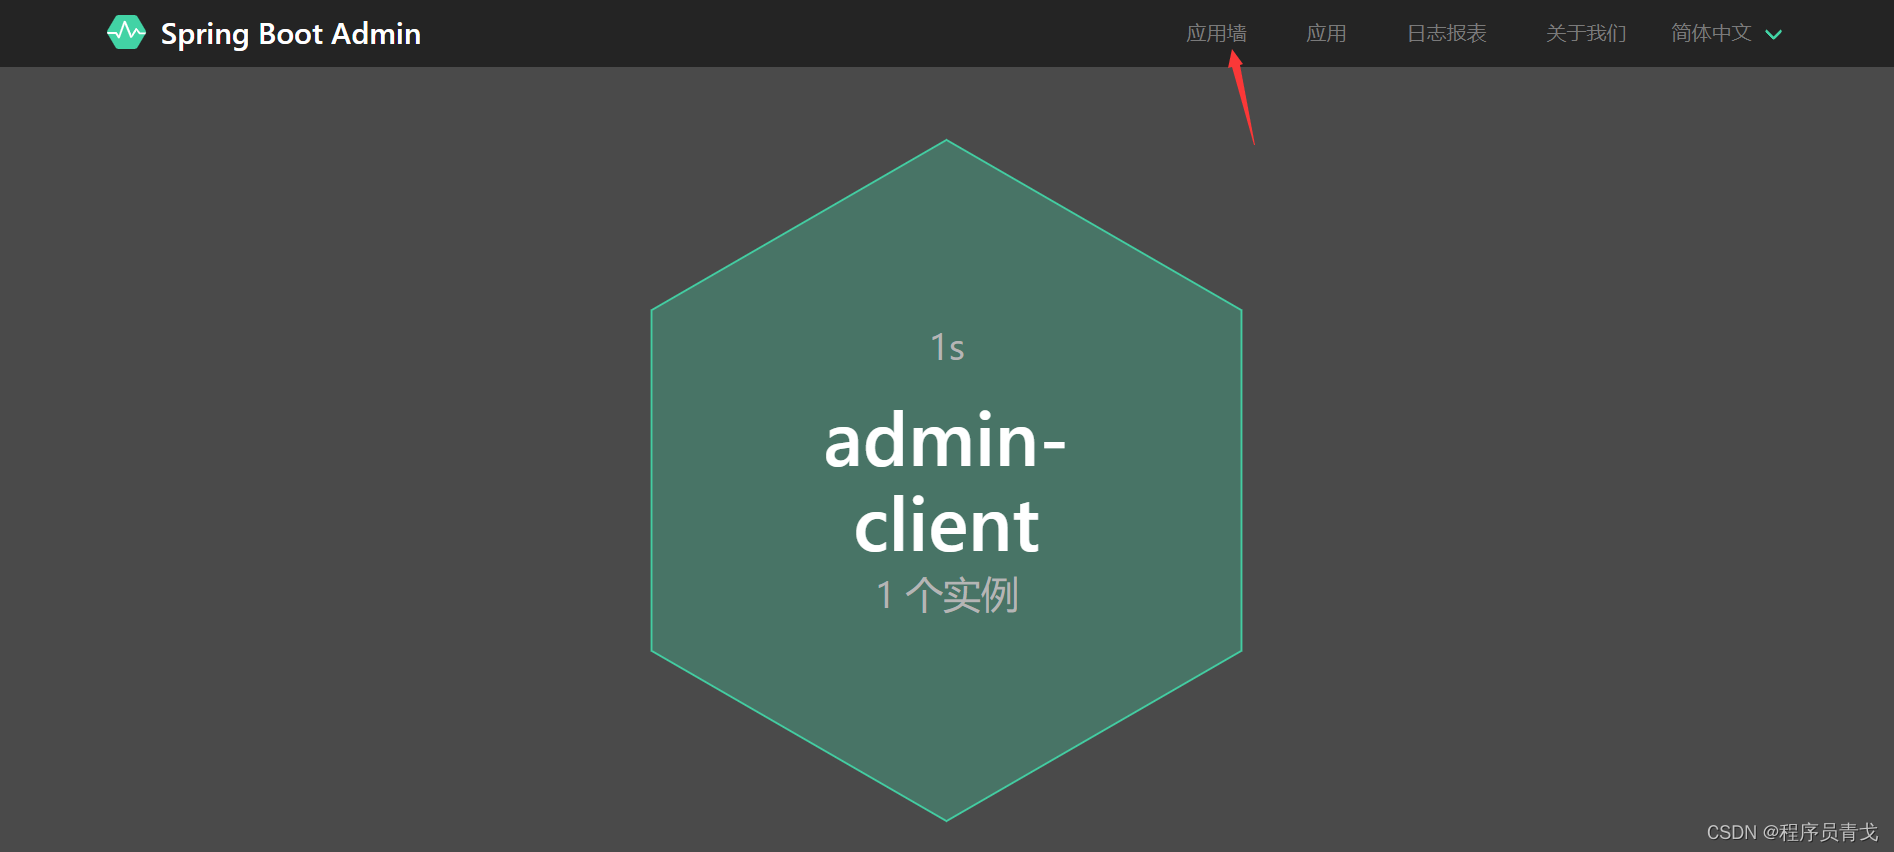
我们可以看到,在监控页面出现了一个件 admin-client的微服务实例,正是我们刚才启动的微服务。
点进去看到具体信息:
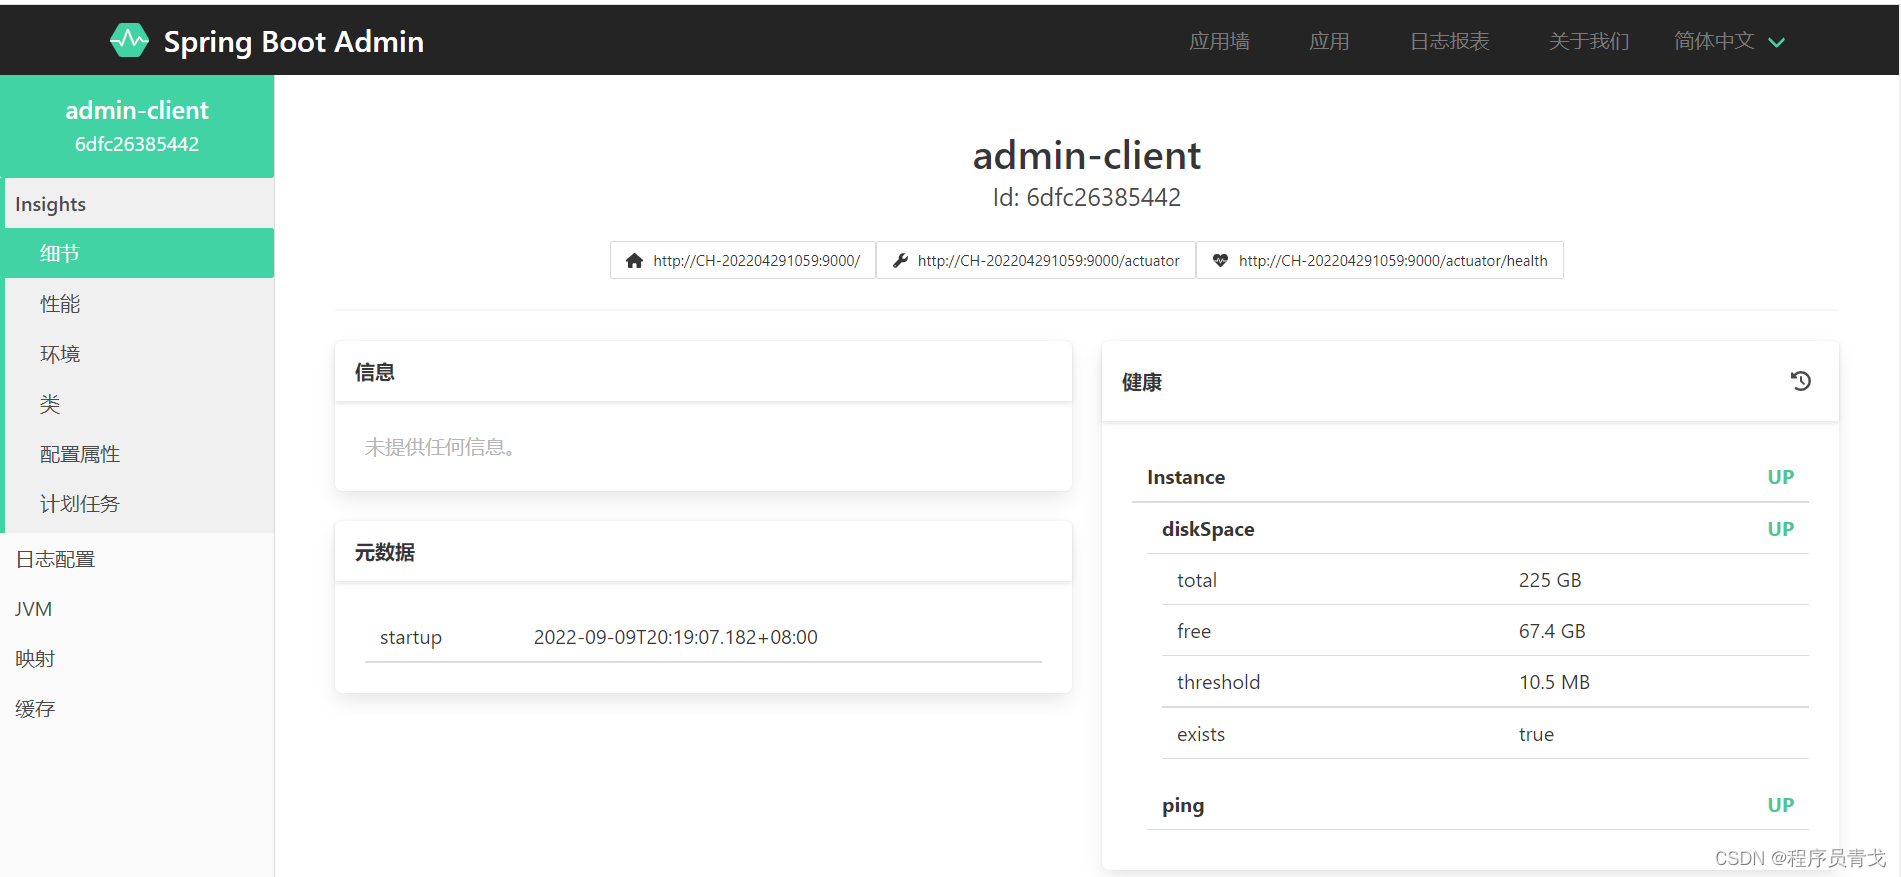
左侧菜单列举了此服务的详细信息以及各种指标。
单个应用多实例
我们刚才启动了一个 admin-client,那我们是否可以模拟多个服务的情况呢?

点击配置服务,选择 9000的这个服务,复制一份,配置端口 -Dserver.port=9001,再把运行的名称改成 9001,即可启动但应用的多个实例,目前client有2个启动项,分别是 9000和9001
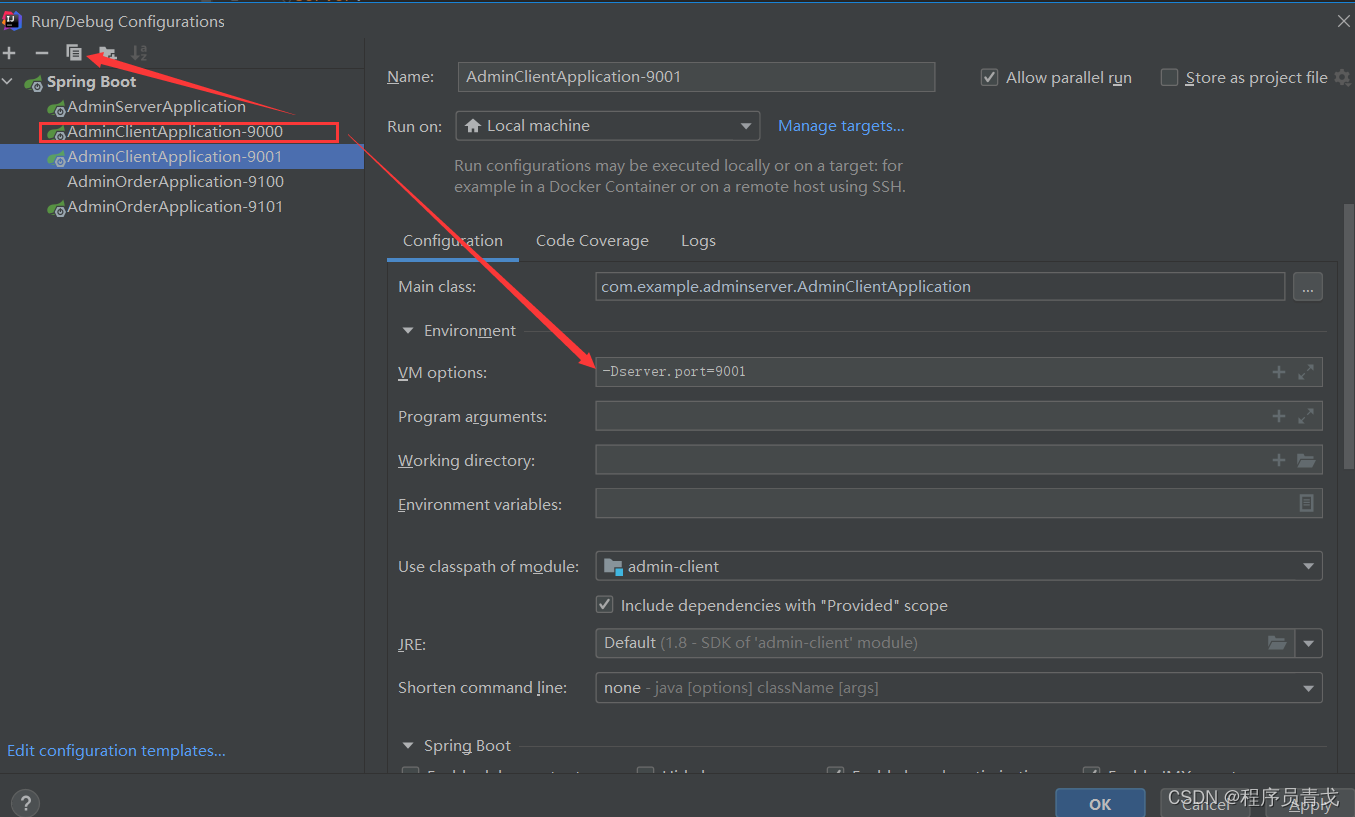
我们再确定后,回到启动的页面,把9001也启动起来:

然后我们再观察 admin-server的监控页面:
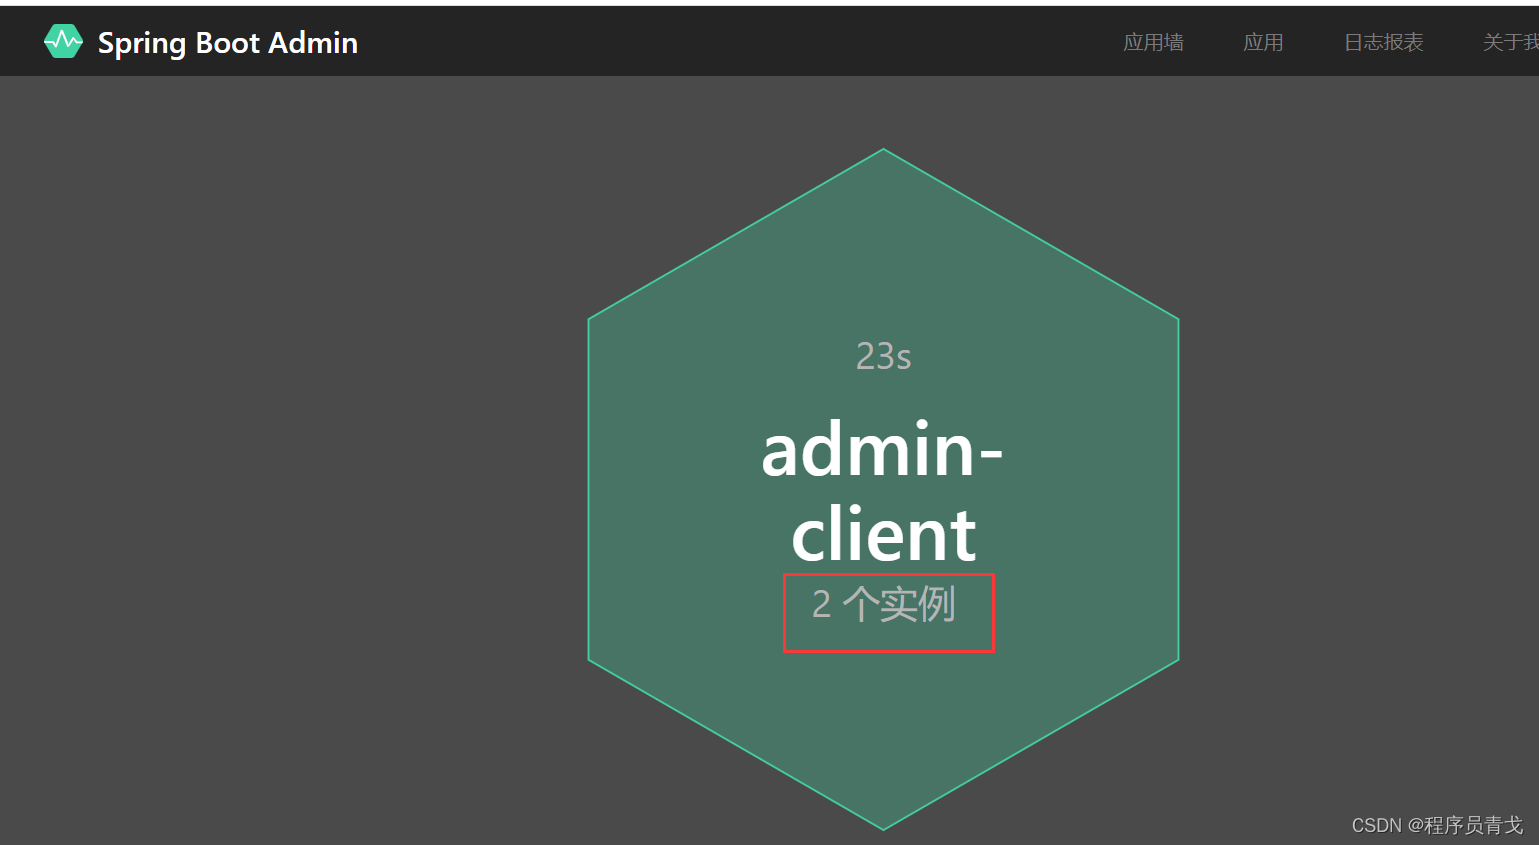
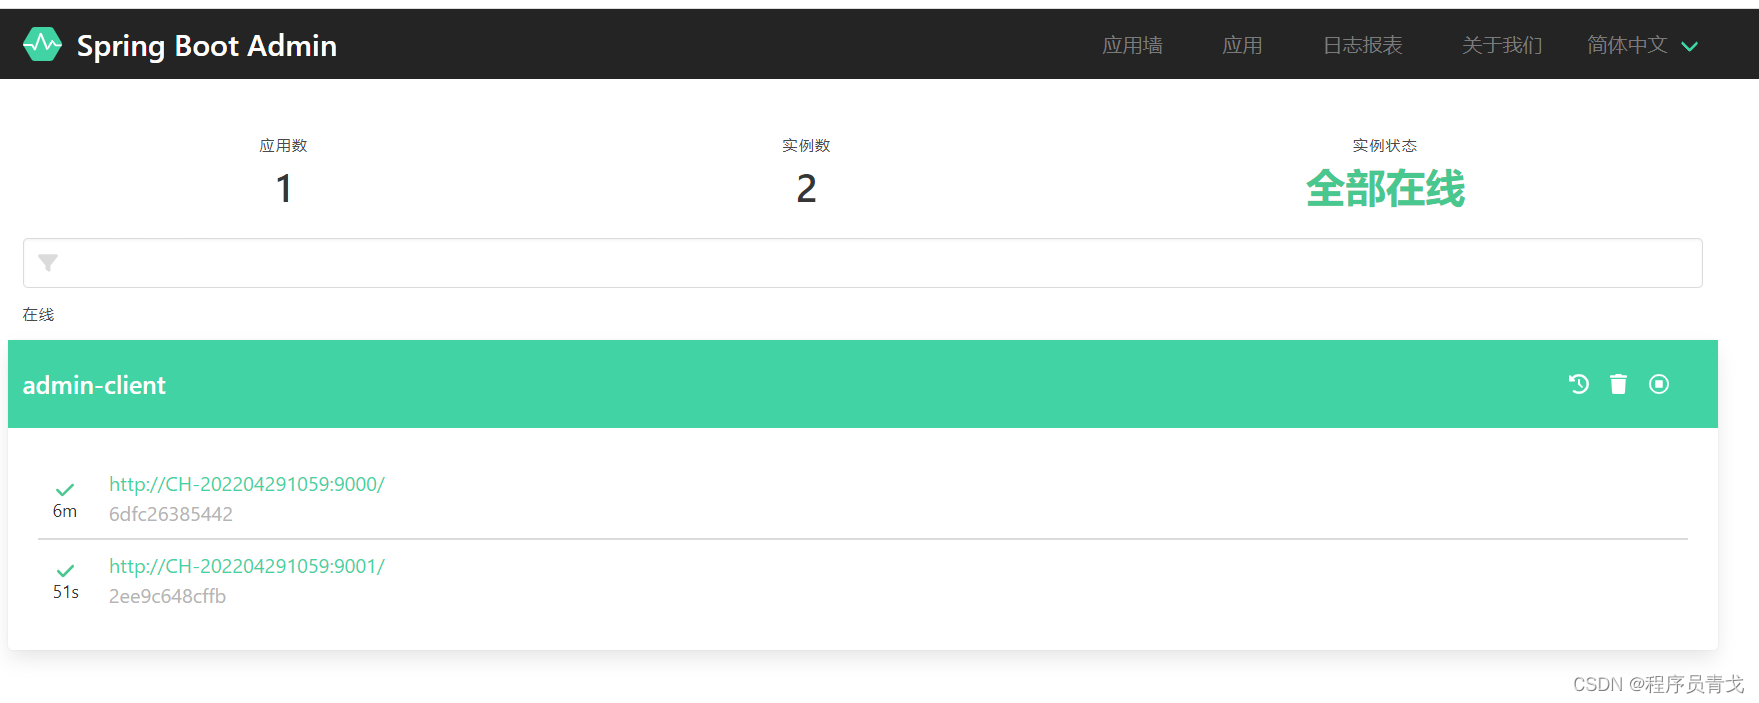
可以看到2个实例都在。从这里我们可以一目了然对服务进行监控以及实时预警,对我们运维是一个非常好用的插件。
后话
你也可以跟我一样尝试多起几个服务注册上去,看看他们监控的状态如何变化。
好了,至此,分享结束,我是程序员青戈,感谢您的收看,期待您的一件三连哦~