文章目录
了解 SpringBoot 的自动装配得先了解下 SpringBoot 的启动流程
9千字长文带你了解SpringBoot启动过程–史上最详细 SpringBoot启动流程-图文并茂
@SpringBootApplication
从 @SpringBootApplication 注解开始分析,查看 @SpringBootApplication
@Target(ElementType.TYPE)
@Retention(RetentionPolicy.RUNTIME)
@Documented
@Inherited
// 标注在某个类上,表示这是一个springboot的配置类
@SpringBootConfiguration
// 开启自动配置功能,
@EnableAutoConfiguration
// 自动扫描并加载符合条件的组件或者bean,将这个bean定义加载到IOC容器中
@ComponentScan(excludeFilters = { @Filter(type = FilterType.CUSTOM, classes = TypeExcludeFilter.class),
		@Filter(type = FilterType.CUSTOM, classes = AutoConfigurationExcludeFilter.class) })
public @interface SpringBootApplication {}
注解包含关系

@EnableAutoConfiguration
@EnableAutoConfiguration 的作用:
开启自动配置,利用 AutoConfigurationImportSelector 给容器导入一些组件
查看 AutoConfigurationImportSelector 的关键方法 getCandidateConfigurations()

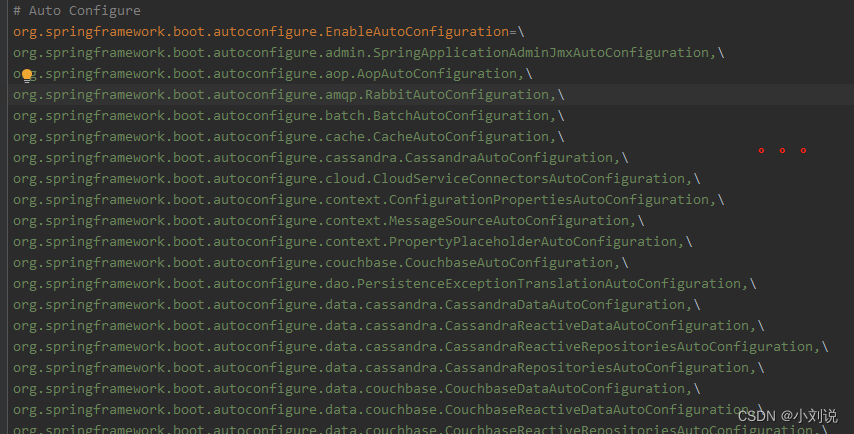
会从 springboot-autoconfigure.jar 中的 /META-INF/spring.factories 获取 EnableAutoConfiguration 配置的全路径类,此时有124个,然后在 getAutoConfigurationEntry() 中去重与条件判断得到最后的24个需要自动装配的类

spring.factories

@Conditional:自动配置类在一定条件下才能生效
| @Conditional扩展注解            | 作用                                     |
| ------------------------------- | ---------------------------------------- |
| @ConditionalOnJava              | 系统的java版本是否符合要求               |
| @ConditionalOnBean              | 容器中存在指定Bean                       |
| @ConditionalOnMissingBean       | 容器中不存在指定Bean                     |
| @ConditionalOnExpression        | 满足SpEL表达式                           |
| @ConditionalOnClass             | 系统中有指定的类                         |
| @ConditionalOnMissingClass      | 系统中没有指定的类                       |
| @ConditionalOnSingleCandidate   | 容器中只有一个指定的Bean,或者是首选Bean |
| @ConditionalOnProperty          | 系统中指定的属性是否有指定的值           |
| @ConditionalOnResource          | 类路径下是否存在指定资源文件             |
| @ConditionOnWebApplication      | 当前是web环境                            |
| @ConditionalOnNotWebApplication | 当前不是web环境                          |
| @ConditionalOnJndi              | JNDI存在指定项                           |
那么是什么时候进行获取调用这个应该自动装配的类的呢?
上述中 AutoConfigurationImportSelector 为关键的获取类,而该类由 @Import 注解导入
@Import(AutoConfigurationImportSelector.class)
综合前面所学习的 spring 知识,所以应该看下对 @Import 注解的解析,下面从 springboot 启动流程开始分析
SpringApplication::run()
public ConfigurableApplicationContext run(String... args) {
    //1、创建并启动计时监控类
	StopWatch stopWatch = new StopWatch();
	stopWatch.start();
    //2、初始化应用上下文和异常报告集合
	ConfigurableApplicationContext context = null;
	Collection<SpringBootExceptionReporter> exceptionReporters = new ArrayList<>();
    //3、设置系统属性“java.awt.headless”的值,默认为true,用于运行headless服务器,进行简单的图像处理,多用于在缺少显示屏、键盘或者鼠标时的系统配置,很多监控工具如jconsole 需要将该值设置为true
	configureHeadlessProperty();
    //4、创建所有spring运行监听器并发布应用启动事件,简单说的话就是获取SpringApplicationRunListener类型的实例(EventPublishingRunListener对象),并封装进SpringApplicationRunListeners对象,然后返回这个SpringApplicationRunListeners对象。说的再简单点,getRunListeners就是准备好了运行时监听器EventPublishingRunListener。
	SpringApplicationRunListeners listeners = getRunListeners(args);
	listeners.starting();
	try {
        //5、初始化默认应用参数类
		ApplicationArguments applicationArguments = new DefaultApplicationArguments(args);
        //6、根据运行监听器和应用参数来准备spring环境
		ConfigurableEnvironment environment = prepareEnvironment(listeners, applicationArguments);
        //将要忽略的bean的参数打开
		configureIgnoreBeanInfo(environment);
        //7、创建banner打印类
		Banner printedBanner = printBanner(environment);
        //8、创建应用上下文,可以理解为创建一个容器
		context = createApplicationContext();
        //9、准备异常报告器,用来支持报告关于启动的错误
		exceptionReporters = getSpringFactoriesInstances(SpringBootExceptionReporter.class,
					new Class[] { ConfigurableApplicationContext.class }, context);
        //10、准备应用上下文,该步骤包含一个非常关键的操作,将启动类注入容器,为后续开启自动化提供基础
		prepareContext(context, environment, listeners, applicationArguments, printedBanner);
        //11、刷新应用上下文
		refreshContext(context);
        //12、应用上下文刷新后置处理,做一些扩展功能
		afterRefresh(context, applicationArguments);
        //13、停止计时监控类
		stopWatch.stop();
        //14、输出日志记录执行主类名、时间信息
		if (this.logStartupInfo) {
				new StartupInfoLogger(this.mainApplicationClass).logStarted(getApplicationLog(), stopWatch);
		}
        //15、发布应用上下文启动监听事件
		listeners.started(context);
        //16、执行所有的Runner运行器
		callRunners(context, applicationArguments);
	}catch (Throwable ex) {
		handleRunFailure(context, ex, exceptionReporters, listeners);
		throw new IllegalStateException(ex);
	}
	try {
        //17、发布应用上下文就绪事件
		listeners.running(context);
	}catch (Throwable ex) {
		handleRunFailure(context, ex, exceptionReporters, null);
		throw new IllegalStateException(ex);
	}
    //18、返回应用上下文
	return context;
}
在上述代码中,我们了解springboot自动装配需要重点关注两个方法
prepareContext()
private void prepareContext(ConfigurableApplicationContext context, ConfigurableEnvironment environment,
			SpringApplicationRunListeners listeners, ApplicationArguments applicationArguments, Banner printedBanner) {
		context.setEnvironment(environment);
		postProcessApplicationContext(context);
		// 1.执行 ApplicationContextInitializer 的 initialize 方法
		applyInitializers(context);
		listeners.contextPrepared(context);
		if (this.logStartupInfo) {
			logStartupInfo(context.getParent() == null);
			logStartupProfileInfo(context);
		}
		// Add boot specific singleton beans
		ConfigurableListableBeanFactory beanFactory = context.getBeanFactory();
		beanFactory.registerSingleton("springApplicationArguments", applicationArguments);
		if (printedBanner != null) {
			beanFactory.registerSingleton("springBootBanner", printedBanner);
		}
		if (beanFactory instanceof DefaultListableBeanFactory) {
			((DefaultListableBeanFactory) beanFactory)
					.setAllowBeanDefinitionOverriding(this.allowBeanDefinitionOverriding);
		}
		if (this.lazyInitialization) {
			context.addBeanFactoryPostProcessor(new LazyInitializationBeanFactoryPostProcessor());
		}
		// Load the sources
		Set<Object> sources = getAllSources();
		Assert.notEmpty(sources, "Sources must not be empty");
		// 2.将启动类加载到上下文中
		load(context, sources.toArray(new Object[0]));
		listeners.contextLoaded(context);
	}
重点查看上面的两个方法
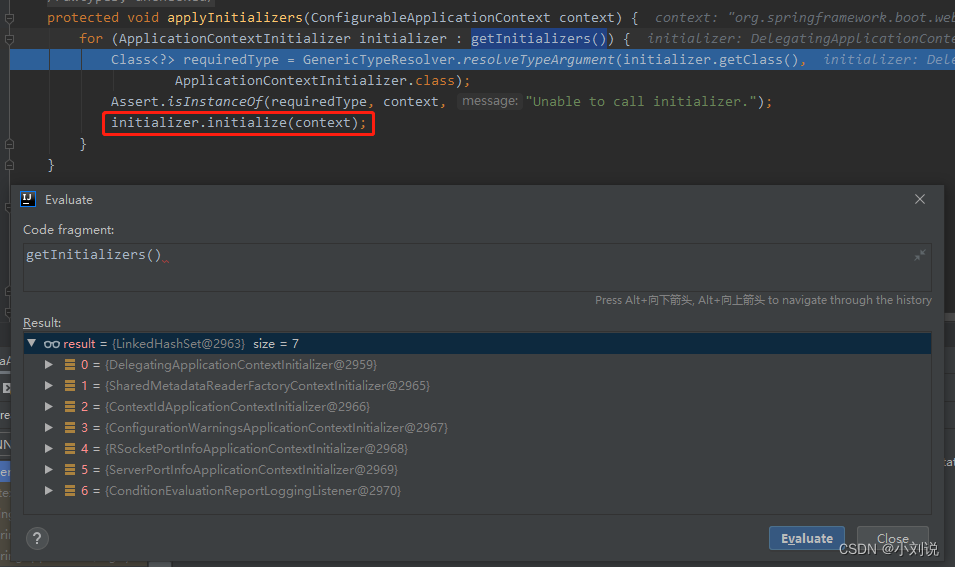
- applyInitializers(context)

执行 ApplicationContextInitializer 的 initialize() 方法,而这些实现 ApplicationContextInitializer 接口的方法会在 SpringApplication 的构造方法中从 spring.factories 文件进行加载

- load(context, sources.toArray(new Object[0]));
跟踪源码,判断启动类是否由@Component标注,因为 @SpringBootApplication–>@SpringBootConfiguration–>@Configuration–>@Component,所以将启动类加入到 AnnotatedBeanDefinitionReader 中,后续会进行实例化与初始化

refreshContext()
在 invokeBeanFactoryPostProcessors() 中存在注解解析的调用
02 Spring 源码总结 - invokeBeanFactoryPostProcessors()
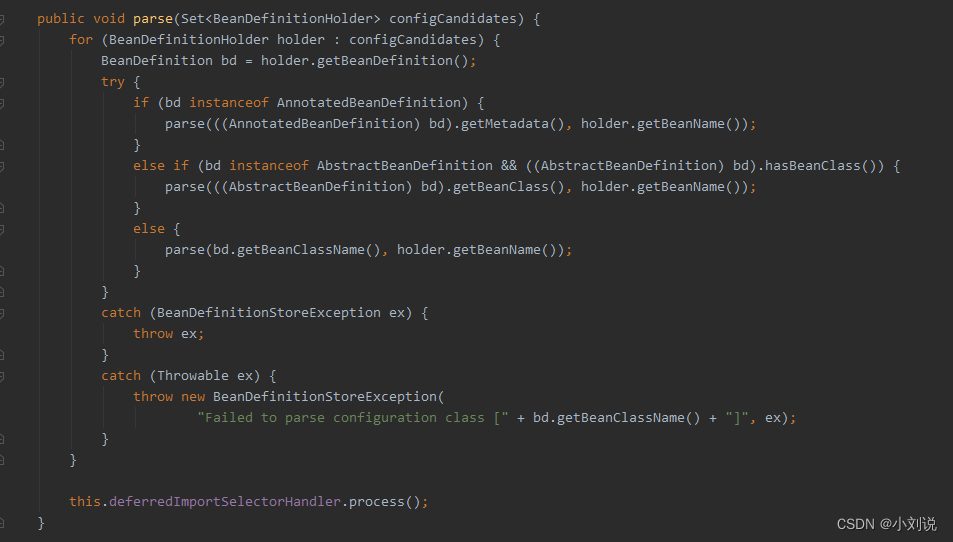
通过debug一步一步进行查找,会发现最终会在ConfigurationClassParser类中,此类是所有配置类的解析类,所有的解析逻辑在 parser() 中

继续跟进 doProcessConfigurationClass() 方法,此方式是支持注解配置的核心逻辑,会看到对@Import注解的解析
protected final SourceClass doProcessConfigurationClass(
			ConfigurationClass configClass, SourceClass sourceClass, Predicate<String> filter)
			throws IOException {
		// @Configuration继承了@Component
		if (configClass.getMetadata().isAnnotated(Component.class.getName())) {
			// Recursively process any member (nested) classes first
			// 递归处理内部类,因为内部类也是一个配置类,配置类上有@configuration注解,该注解继承@Component,if判断为true,调用processMemberClasses方法,递归解析配置类中的内部类
			processMemberClasses(configClass, sourceClass, filter);
		}

		// Process any @PropertySource annotations
		// 如果配置类上加了@PropertySource注解,那么就解析加载properties文件,并将属性添加到spring上下文中
		for (AnnotationAttributes propertySource : AnnotationConfigUtils.attributesForRepeatable(
				sourceClass.getMetadata(), PropertySources.class,
				org.springframework.context.annotation.PropertySource.class)) {
			if (this.environment instanceof ConfigurableEnvironment) {
				processPropertySource(propertySource);
			}
			else {
				logger.info("Ignoring @PropertySource annotation on [" + sourceClass.getMetadata().getClassName() +
						"]. Reason: Environment must implement ConfigurableEnvironment");
			}
		}

		// Process any @ComponentScan annotations
		// 处理@ComponentScan或者@ComponentScans注解,并将扫描包下的所有bean转换成填充后的ConfigurationClass
		// 此处就是将自定义的bean加载到IOC容器,因为扫描到的类可能也添加了@ComponentScan和@ComponentScans注解,因此需要进行递归解析
		Set<AnnotationAttributes> componentScans = AnnotationConfigUtils.attributesForRepeatable(
				sourceClass.getMetadata(), ComponentScans.class, ComponentScan.class);
		if (!componentScans.isEmpty() &&
				!this.conditionEvaluator.shouldSkip(sourceClass.getMetadata(), ConfigurationPhase.REGISTER_BEAN)) {
			for (AnnotationAttributes componentScan : componentScans) {
				// The config class is annotated with @ComponentScan -> perform the scan immediately
				// 解析@ComponentScan和@ComponentScans配置的扫描的包所包含的类
				// 比如 basePackages = com.mashibing, 那么在这一步会扫描出这个包及子包下的class,然后将其解析成BeanDefinition
				// (BeanDefinition可以理解为等价于BeanDefinitionHolder)
				Set<BeanDefinitionHolder> scannedBeanDefinitions =
						this.componentScanParser.parse(componentScan, sourceClass.getMetadata().getClassName());
				// Check the set of scanned definitions for any further config classes and parse recursively if needed
				// 通过上一步扫描包com.mashibing,有可能扫描出来的bean中可能也添加了ComponentScan或者ComponentScans注解.
				//所以这里需要循环遍历一次,进行递归(parse),继续解析,直到解析出的类上没有ComponentScan和ComponentScans
				for (BeanDefinitionHolder holder : scannedBeanDefinitions) {
					BeanDefinition bdCand = holder.getBeanDefinition().getOriginatingBeanDefinition();
					if (bdCand == null) {
						bdCand = holder.getBeanDefinition();
					}
					// 判断是否是一个配置类,并设置full或lite属性
					if (ConfigurationClassUtils.checkConfigurationClassCandidate(bdCand, this.metadataReaderFactory)) {
						// 通过递归方法进行解析
						parse(bdCand.getBeanClassName(), holder.getBeanName());
					}
				}
			}
		}

		// Process any @Import annotations
		// 处理@Import注解
		processImports(configClass, sourceClass, getImports(sourceClass), filter, true);

		// Process any @ImportResource annotations
		// 处理@ImportResource注解,导入spring的配置文件
		AnnotationAttributes importResource =
				AnnotationConfigUtils.attributesFor(sourceClass.getMetadata(), ImportResource.class);
		if (importResource != null) {
			String[] resources = importResource.getStringArray("locations");
			Class<? extends BeanDefinitionReader> readerClass = importResource.getClass("reader");
			for (String resource : resources) {
				String resolvedResource = this.environment.resolveRequiredPlaceholders(resource);
				configClass.addImportedResource(resolvedResource, readerClass);
			}
		}

		// Process individual @Bean methods
		// 处理加了@Bean注解的方法,将@Bean方法转化为BeanMethod对象,保存再集合中
		Set<MethodMetadata> beanMethods = retrieveBeanMethodMetadata(sourceClass);
		for (MethodMetadata methodMetadata : beanMethods) {
			configClass.addBeanMethod(new BeanMethod(methodMetadata, configClass));
		}

		// Process default methods on interfaces
		// 处理接口的默认方法实现,从jdk8开始,接口中的方法可以有自己的默认实现,因此如果这个接口的方法加了@Bean注解,也需要被解析
		processInterfaces(configClass, sourceClass);

		// Process superclass, if any
		// 解析父类,如果被解析的配置类继承了某个类,那么配置类的父类也会被进行解析
		if (sourceClass.getMetadata().hasSuperClass()) {
			String superclass = sourceClass.getMetadata().getSuperClassName();
			if (superclass != null && !superclass.startsWith("java") &&
					!this.knownSuperclasses.containsKey(superclass)) {
				this.knownSuperclasses.put(superclass, configClass);
				// Superclass found, return its annotation metadata and recurse
				return sourceClass.getSuperClass();
			}
		}

		// No superclass -> processing is complete
		return null;
	}