?下期开始更Mybatis啦~~~
目录
1.获取参数
本节内容接上期所讲的Spring MVC(上)
1.1获取cookie/header
我们前面讲过SpringMVC是基于Servlet的,所以,在MVC中,方法中的HttpServletRequest 与HttpServletResponse参数默认是隐藏的,如果想要使用,直接写上即可。所以,在这里我们的cookie和header都会有两种获取方式,一种是基于Servlet的,另一种是基于Spring本身的,下面我们来一一演示:
①cookie:
(1)servlet获取cookie的方法:
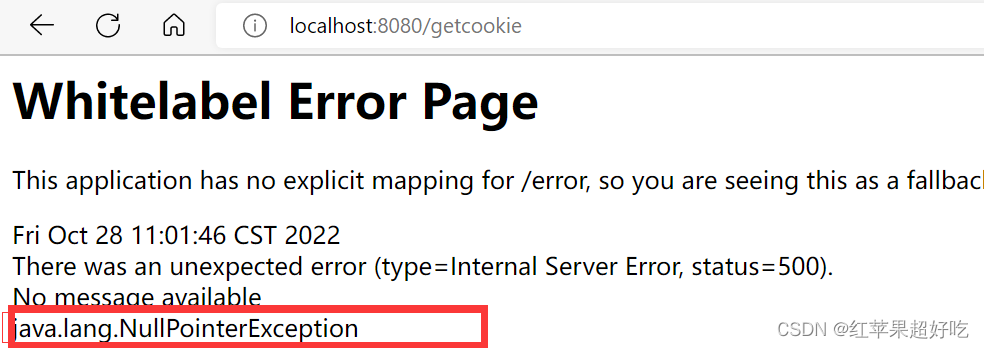
为了防止以下这种空指针异常的情况,我们手动地添加一项cookie
添加如下:
?代码:
import org.springframework.web.bind.annotation.RequestMapping;
import org.springframework.web.bind.annotation.ResponseBody;

import javax.servlet.http.Cookie;
import javax.servlet.http.HttpServletRequest;
@Slf4j
@Controller
@ResponseBody
public class UserController6 {
    @RequestMapping("/getcookie")
        public void getCookie(HttpServletRequest req){
        //得到全部的cookie
            Cookie[]cookies= req.getCookies();
            for (Cookie a:cookies){
                log.info("CookieKey:" + a.getName() + "   CookieValue:" + a.getValue());
            }
        }
?输出结果:
同时我们可以通过抓包看到此时的cookie:
?(2)使用@CookieValue注解获取cookie的方法:
代码:
    @RequestMapping("/cookie2")
    public String getCookie2(@CookieValue("111") String cookie) {
        return "CookieValue:" + cookie;
    }
输出结果:
注意:对于第一种方法来说会把所有的cookies都给读出来,而第二种的话更有针对性的拿出某个cookie,具体用哪种根据我们自己的需求
②header:(我们这里以获取header中的UA为例)
(1)通过servlet来获取
代码如下:
  @RequestMapping("/getheader")
    public String getHeader(HttpServletRequest request){
        return "header"+request.getHeader("User-Agent");
    }
结果如下:
(2)通过@RequestHeader注解来获取
代码如下:
    @RequestMapping("/getheader2")
    public String getHeader2(@RequestHeader("User-Agent")String UA){
        return "header"+UA;
    }
结果如下:
1.2存储并获取session
我们知道,在获取session之前需要先存入session,而在Spring MVC中存取session和在servlet阶段的存入是一致的。
①存储session:
    @RequestMapping("/setsession")
    public boolean setSession(HttpServletRequest req){
        boolean result=false;
        //1.得到HTTPsession
        HttpSession session= req.getSession(true);//此处的true,如果有session就直接用,没有就进行创建
        //2.使用setAtribute设置值
        session.setAttribute("Student对象", "这是一个Student对象");
        result=true;
        return result;
    }
②获取session:
(注意!此处一定要先setSession,即访问设置会话,否则是不会返回的)
(1)存储session的代码:
 @RequestMapping("/setsession")
    public boolean setSession(HttpServletRequest req){
        boolean result=false;
        //1.得到HTTPsession
        HttpSession session= req.getSession(true);//此处的true,如果有session就直接用,没有就进行创建
        //2.使用setAtribute设置值
        session.setAttribute("name", "大家好,我是session存储的张三同学");
        result=true;
        return result;
    }
(2)用servlet来获取session:
  @RequestMapping("/getsession1")
    public String getSession(HttpServletRequest req){
        String result=null;
        //1.得到HTTPSession对象
        HttpSession session= req.getSession(false);//如果会话不为空就可以拿到,不新建一个会话
        //2.利用getAtrribute得到会话信息
        if ((session!=null)&&session.getAttribute("name")!=null){
             result= (String)session.getAttribute("name");
        }
        return result;
    }
(3)用@RequestSession注解来获取session:
  @RequestMapping("/getsession2")
    public String getSession2(@SessionAttribute(value = "name",required = false)String name){
        return "这是一个会话:"+name;
    }
结果如下:
设置会话:
?获取会话:
2.将结果返回给用户
前面的三部曲,我们已经进行了两步,下面将是最后的环节,即从服务器返回给客户端(用户)
2.1返回一个静态html文件
首先,我们先了解@ResponseBody这个注解的意思是返回一个非静止页面,也就是说,当我们不加这个注解的时候,服务器会去找我们返回的值是否存在一个页面,若不存在,就会出现以下情况报错:
代码:
package com.example.demo.test;
import org.springframework.stereotype.Controller;
import org.springframework.web.bind.annotation.RequestMapping;
@Controller
public class UserController {
    @RequestMapping("/gettext")
    public String gettext(){
        return "hello";
    }
}
结果:
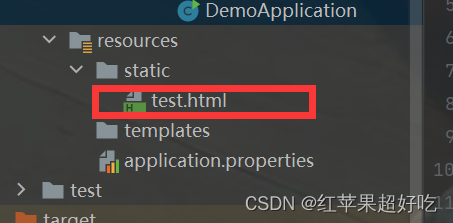
①创建一个html文件,来看是否能够读取到:
package com.example.demo.test;
import org.springframework.stereotype.Controller;
import org.springframework.web.bind.annotation.RequestMapping;
@Controller
public class UserController {
    @RequestMapping("/gettext")
    public String gettext(){
        return "test.html";
    }
}
输出结果:
②此时如果想要返回一个数据,则需要使用注解@ResponseBody修饰对应的方法或者修饰类才能实现:
代码如下:
package com.example.demo.test;
import org.springframework.stereotype.Controller;
import org.springframework.web.bind.annotation.RequestMapping;
import org.springframework.web.bind.annotation.ResponseBody;
@Controller
@ResponseBody
public class UserController {
    @RequestMapping("/gettext")
    public String gettext(){
        return "test.html";
    }
}
输出结果:?
③关于ResponseBody的一些说明:
(1)ResponseBody可以修饰类,表示当前类中的所有方法都会返回一个非静态页面的数据;当然其也可以修饰方法,修饰方法时表示当前方法返回的是一个非静态页面的数据。说白了,就是作用域的问题。
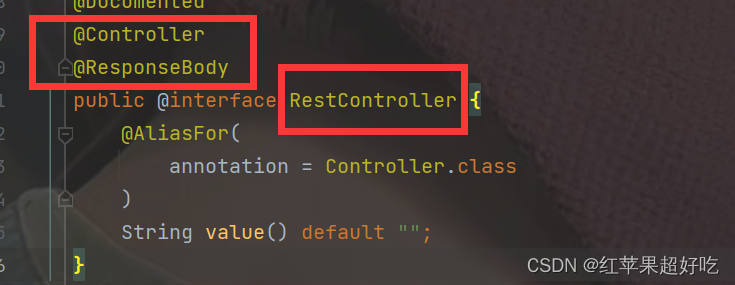
(2)@RestController是@ResponseBody和@Controller的集合,所以写这一个就表示了它们两个
2.2返回json对象
此处我们通过一个ajax来构造一个登陆页面的案例,来返回json对象。在开始之前,我们先说几点需要注意的地方
(1)不要忘了设置ajax对象参数中的contentType:"application/json;charset=utf8"
(2)将对象转换成json格式的字符串需要用到JSON.Stringify
①前端通过ajax来构造:
<!doctype html>
<html lang="en">
<head>
    <meta charset="UTF-8">
    <meta name="viewport"
          content="width=device-width, user-scalable=no, initial-scale=1.0, maximum-scale=1.0, minimum-scale=1.0">
    <meta http-equiv="X-UA-Compatible" content="ie=edge">
    <script src="https://apps.bdimg.com/libs/jquery/2.1.4/jquery.min.js"></script>
    <title>Document</title>
    <script>
        // ajax 提交
        function mysub(){
            // 1.判空
            var username = jQuery("#username").val();
            var password = jQuery("#password").val();
            if(jQuery.trim(username)==""){
                alert("请先输入用户名!");
                username.focus(); // 光标重制到此元素
                return;
            }
            if(jQuery.trim(password)==""){
                alert("请先输入密码!");
                password.focus(); // 光标重制到此元素
                return;
            }
            jQuery.ajax({
                url:"/test",
                type:"POST",
                contentType:"application/json",
                data:JSON.stringify({"username":name,
            "password":password}),
                success:function(result){
                    alert(JSON.stringify(result));
                }
            });
        }
    </script>
</head>
<body>
<div style="text-align: center;">
    <h1>登录</h1>
    用户:<input id="username">
    <br>
    密码:<input id="password" type="password">
    <br>
    <input type="button" value=" 提交 " onclick="mysub()" style="margin-top: 20px;margin-left: 50px;">
</div>
</body>
</html>
②后端java代码:
package com.example.demo.test;
import org.apache.catalina.User;
import org.springframework.stereotype.Controller;
import org.springframework.util.StringUtils;
import org.springframework.web.bind.annotation.*;
import java.util.HashMap;
@ResponseBody
@Controller
public class UserController1 {
    @RequestMapping("/test")
    public HashMap<String, Object> login(@RequestParam(value = "username", required = false) String name, String password) {
        HashMap<String, Object> res = new HashMap<>();
        //假设用户只有admin,密码也是admin
        //状态码
        int state = 200;
        //是否登录成功
        boolean ok = false;
        //原因
        String msg = "登录成功!";
        //对密码进行验证
        if (StringUtils.hasLength(name) && StringUtils.hasLength(password)) {
            //账号与密码均不为空
            if (name.equals("admin") && password.equals("admin")) {
                //验证通过
                ok = true;
                msg = "登录成功!";
            } else {
                //账号或密码错误
                msg = "账号或密码错误!";
            }
        }
        res.put("state", state);
        res.put("ok", ok);
        res.put("msg", msg);
        //spring中返回map会自动转换成json格式
        return res;
    }

}
输出结果:
?
2.3实现请求转发和重定向
在介绍请求转发和请求重定向之前,我们先举一个实例来区别一下这两个:
张三向李四借钱,李四说他没有钱了,让他找王五借钱,这种当前丢了,负责人就是张三的行为就是类似于请求重定向。而当张三向李四借钱,李四说自己没钱,然后李四去找王五借钱,最后把钱给张三,而要是这个时候,钱丢了,责任人就是李四,这种行为就是类似于请求转发。
①请求转发:
(1) 第一种方式:此时的forward:/是可以省略的:
    @RequestMapping("/fw")
    public String fw(){
        return "forward:/hello.html";
    }
输出结果:
(2)第二种方式:使用request对象来进行跳转
 @RequestMapping("/fw2")
    public void myForward2(HttpServletRequest req, HttpServletResponse resp) throws ServletException, IOException, ServletException, IOException {
        req.getRequestDispatcher("hello.html").forward(req, resp);
    }
输出结果:
②请求重定向:
(1) 将请求转发中的forward改为redirect:
代码如下:
    @RequestMapping("/rd")
    public String rd(){
        return "redirect:/hello.html";
    }
输出结果:(注意是跳转到了这个页面)
?(2)通过使用response对象来进行跳转:
代码如下:
 @RequestMapping("/rd2")
    public void rd2(HttpServletResponse res) throws IOException {
        res.sendRedirect("hello.html");
    }
输出结果:
关于请求转发和重定向的五大不同可以参考下面这篇博客:


