最近笔者在做一些vue的开发工作,想要部署一下环境,在网上找了很多,无奈有很多错误的,所以我整合了一下全部的流程,以及自己的一些心得体会,完全从零开始并且包括前后台的教程,欢迎各位指正
1.安装环境
1.1 安装Node.js
在官网进行下载安装即可
http://nodejs.cn/download/

1.2 安装vue-cli
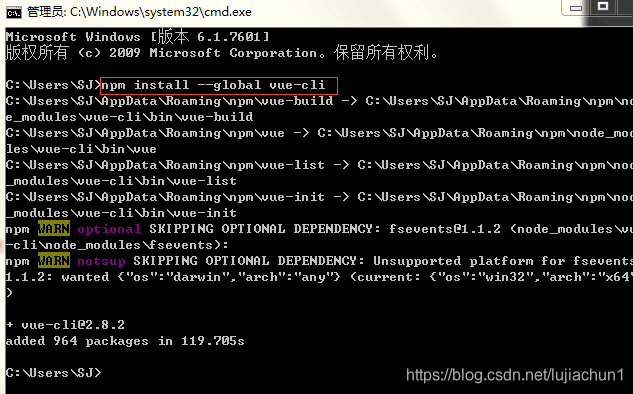
win+R ,输入cmd,打开DOS命令板,输入命令
npm install --global vue-cli
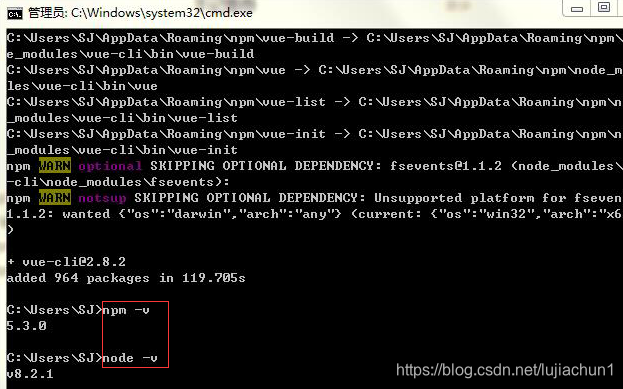
我们可以用命令行npm -v或node -v查看安装的版本号,以此来检测是否安装成功:
1.3 cnpm的安装(可选)
安装完node之后,npm包含的很多依赖包是部署在国外的,在天朝,大家都知道下载速度是超级慢啊。所以我们要安装cnpm,cnpm是淘宝对npm的镜像服务器,这样依赖的包安装起来就快多了。
安装命令为:
npm install -g cnpm --registry=https://registry.npm.taobao.org
1.4 vue-cli的安装(cnpm下再全局安装vue-cli)(可选)
cnpm install -g vue-cli
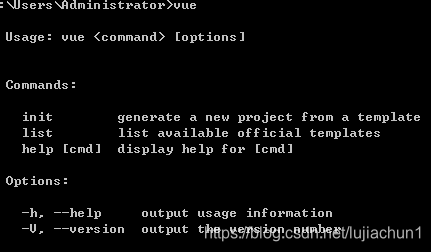
安装完后,检查是否安装成功,输入vue,出现以下提示表示安装成功。
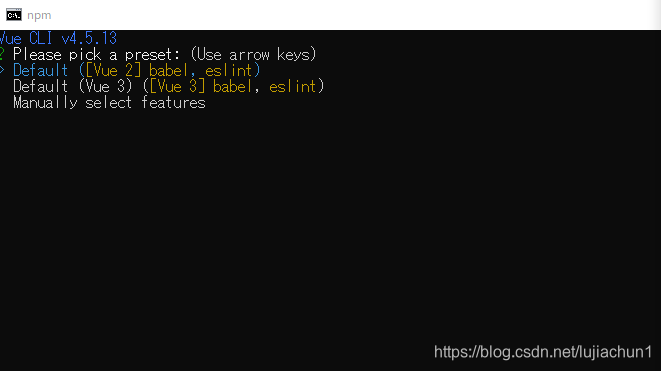
2.新建vue项目
2.1 创建项目
选择一个目录,cmd中输入(my-project可以改为自定义的名字)
vue create my-project
然后选择第一个,我这边环境Vue 3报错,所以选择了Vue 2,之后等待下载即可
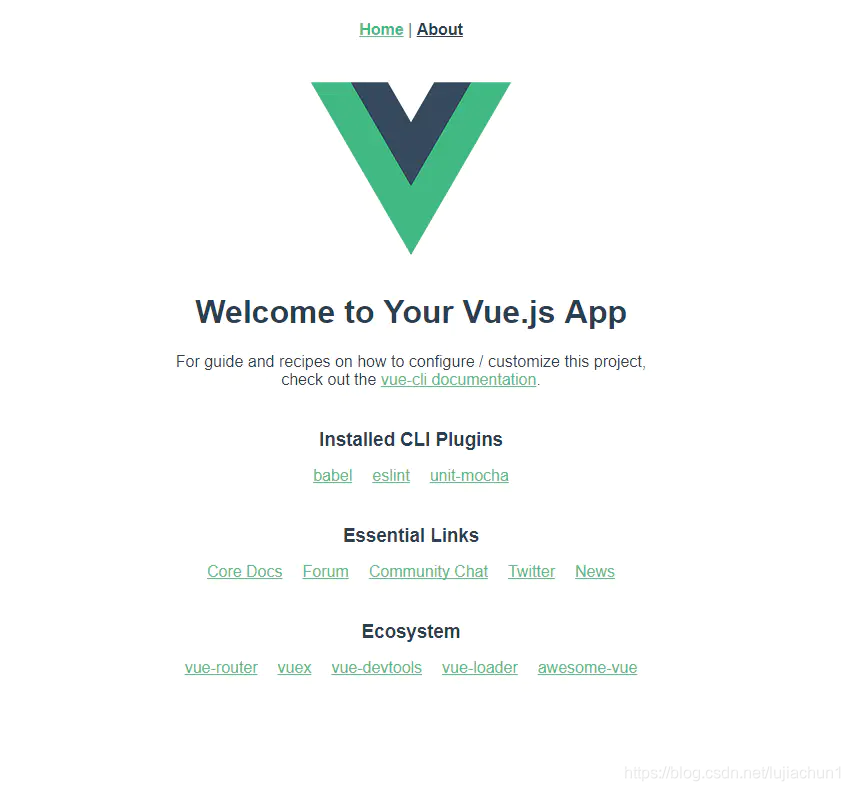
下载完成后输入如下命令启动服务
cd my-project
npm run serve

运行后浏览器输入http://localhost:8080 出现如下页面及运行成功!
3.新建一个登录页面
3.1安装插件
elementui
cmd中输入如下命令
npm i element-ui -S
vue-router
npm install vue-router
axios
npm install axios
qs
npm install qs
等待下载完成
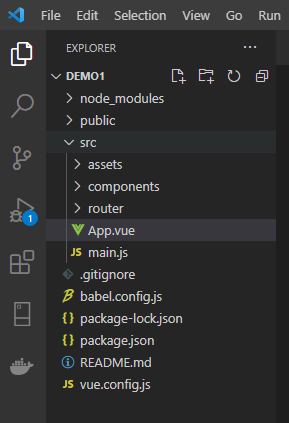
现在我们的vue项目结构大致如下所示:
3.2 编写登录页面
首先在src/components中找到HelloWorld.vue,修改名称为Login.vue,并且需要修改App.vue,main.js等几个文件,如下我已经列出
Login.vue
<template>
  <div class="login_container">
    <div class="login_box">
      <!-- 头像 -->
      <div class="avator_box">
        <img src="../assets/logo.png" alt />
      </div>
      <!-- 输入表单 -->
      <el-form label-width="0" class="login_form">
        <!-- name -->
        <el-form-item>
          <el-input v-model="account" placeholder="Account"></el-input>
        </el-form-item>
        <!-- password -->
        <el-form-item>
          <el-input v-model="password" placeholder="Password" show-password></el-input>
        </el-form-item>
        <!--button -->
        <el-form-item class="btns">
          <el-button type="primary" @click="login">Login</el-button>
        </el-form-item>
      </el-form>
    </div>
  </div>
</template>

<script>
export default {
  name: 'Login',
  data() {
    return {
      account: '',
      password: ''
    }
  },
  methods: {
    login: function() {
      const that = this
      var url = 'login'
      var userData = this.$qs.stringify({'account': this.account, 'password': this.password})
      console.log(userData)
      this.$axios.post(url, userData).then(function (response) {
          if (response.status == 200) {
            console.log("login success")
            that.$router.push({ path: '/home'})
          }
      }).catch(function (error) {
          console.log(error);
      })
    }
  }
}
</script>

<style>
.login_container {
  background-color: #2b4b6b;
  height: 100%;
}
.login_box {
  width: 450px;
  height: 300px;
  background-color: #fff;
  border-radius: 3px;
  position: absolute;
  left: 50%;
  top: 50%;
  transform: translate(-50%, -50%);
}
.avator_box {
  height: 130px;
  width: 130px;
  border: 1px solid #eee;
  border-radius: 50%;
  padding: 10px;
  box-shadow: 0 0 10px #ddd;
  position: absolute;
  left: 50%;
  transform: translate(-50%, -50%);
}
.avator_box img {
    height: 100%;
    width: 100%;
    border-radius: 50%;
    background-color: #eee;
}
.login_form{
    position: absolute;
    bottom: 0;
    width: 100%;
    padding: 0 20px;
    box-sizing: border-box;
}
.btns{
    display: flex;
    justify-content: center;
}
</style>
App.vue
<template>
  <div id="app">
    <router-view></router-view>
  </div>
</template>

<style>
#app {
  font-family: Avenir, Helvetica, Arial, sans-serif;
  -webkit-font-smoothing: antialiased;
  -moz-osx-font-smoothing: grayscale;
  text-align: center;
  color: #2c3e50;
  margin-top: 60px;
}
</style>
main.js
import Vue from 'vue'
import App from './App.vue'
import ElementUI from 'element-ui'
import 'element-ui/lib/theme-chalk/index.css'
import axios from "axios"
import qs from 'qs'
import router from './router'

Vue.use(ElementUI)
Vue.config.productionTip = false
Vue.prototype.$axios = axios
Vue.prototype.$qs = qs
axios.defaults.baseURL = '/api'
axios.defaults.headers.post['Content-Type'] = 'application/x-www-form-urlencoded'

new Vue({
  router,
  render: h => h(App),
}).$mount('#app')
随后需要在src目录下新建一个router文件夹,其中新建一个index.js文件,作为路由使用
router/index.js
import Vue from 'vue'
import VueRouter from 'vue-router'

const Home = () => import("../components/Home")
const Login = () => import("../components/Login")

Vue.use(VueRouter)

const routes = [
    {
        // 重定向
        path: '/',
        redirect: '/login'
    },
    {
        path: '/login',
        component: Login
    },
    {
        path: '/home',
        component: Home
    }
]

const router = new VueRouter({
    mode:'history',
    routes
})

export default router
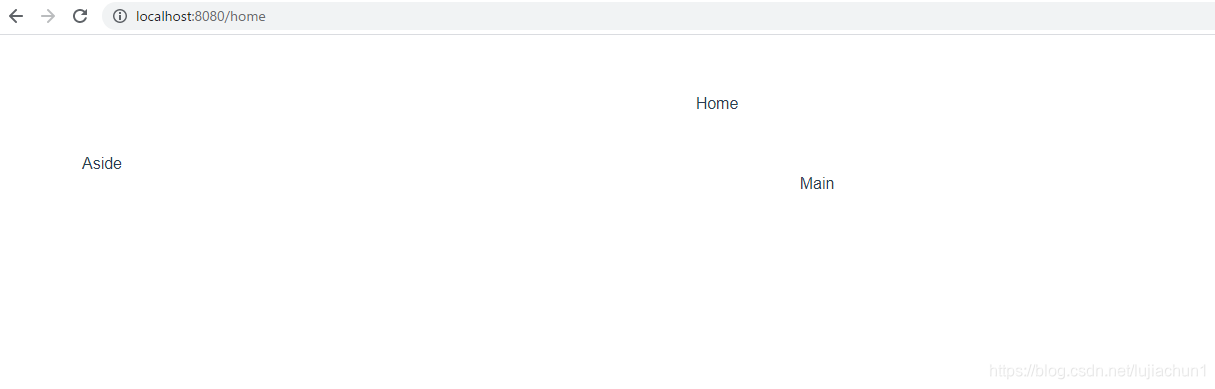
在src/components中新建一个Home.js 作为登录后跳转的主页
<template>
    <el-container>
      <el-header>Home</el-header>
      <el-container>
        <el-aside width="200px">Aside</el-aside>
        <el-main>Main</el-main>
      </el-container>
    </el-container>
</template>
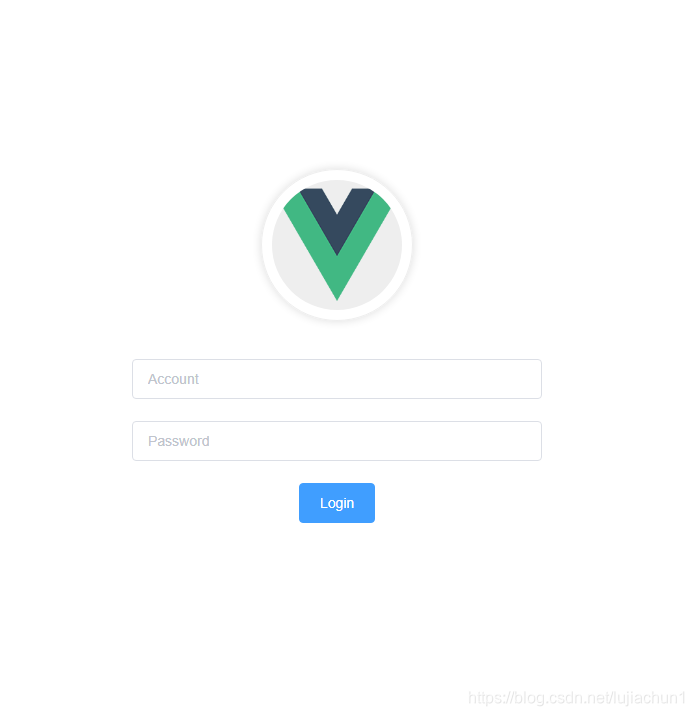
随后运行项目,最简单的一个登录页面就完成了
4.创建后台接口
笔者这边使用的是Springboot框架,那么简单的写一下创建流程吧。
4.1 创建 Maven 项目
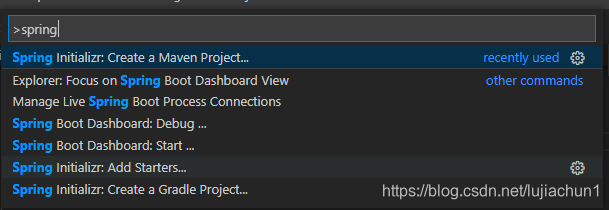
笔者使用的是vscode创建的,使用快捷键(Ctrl+Shift+P)命令窗口,输入 Spring 选择创建 Maven 项目。
之后选择合适的选项进行创建,具体可以参考一下这篇文章
https://blog.csdn.net/zyd573803837/article/details/109263219
创建好的项目如下
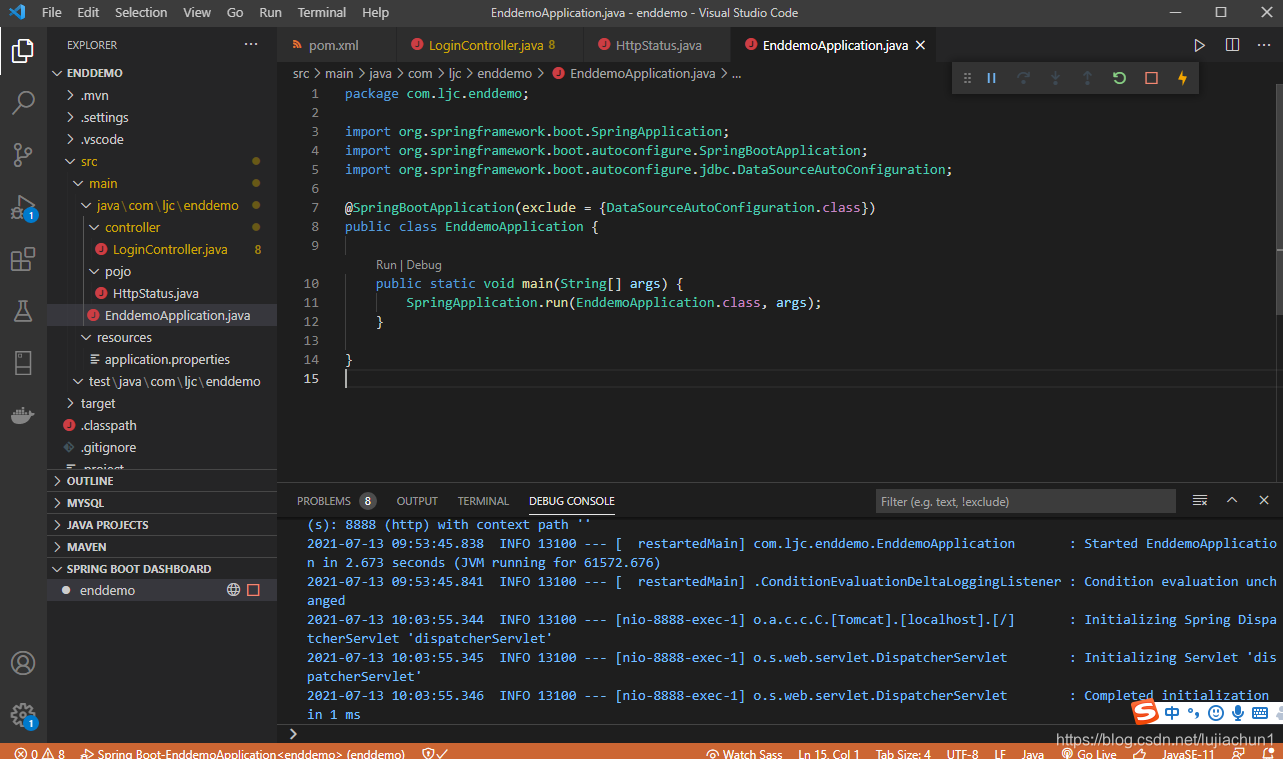
随后我们创建一个接口,在src中创建一个LoginController.java
package com.ljc.enddemo.controller;

import org.springframework.stereotype.Controller;
import org.springframework.ui.Model;
import org.springframework.web.bind.annotation.PostMapping;
import org.springframework.web.bind.annotation.RequestParam;
import org.springframework.web.bind.annotation.ResponseBody;


@Controller
public class LoginController {

    @PostMapping("/login")
    @ResponseBody
    public String index(Model m, @RequestParam("account") String account, @RequestParam("password") String password) throws Exception {
        return "{\"status\":200}";
    }
}
随后需要在vue项目中增加跨域处理
4.2 跨域配置
在vue项目的根目录中创建一个vue.config.js文件
vue.config.js
module.exports = {
    devServer: {
        open: true,
        host: 'localhost',
        port: 8080,
        https: false,
        proxy: {
            // 配置跨域
            '/api': {
                target: 'http://localhost:8888/',//后端接口地址
                ws: true,
                changOrigin: true,
                pathRewrite: {
                    '^/api': ''
                }
            }
        }
    }
}
到此我们的配置就完成了,可以打开服务试着访问了。
点击登录的login按钮,会自动跳转到home页面