Nuxt.js �ۺϰ���
����
- GitHub�ֿ�:https://github.com/gothinkster/realworld
- ����ʾ��:https://demo.realworld.io/#/
- �ӿ��ĵ�:https://github.com/gothinkster/realworld/tree/master/api
- ҳ��ģ��:https://github.com/gothinkster/realworld-starter-kit/blob/master/FRONTEND_INSTRUCTIONS.md
������Ŀ
# ������ĿĿ¼
mkdir realworld-nuxtjs
# ������ĿĿ¼
cd realworld-nuxtjs
# ���� package.json �ļ�
npm init -y
# ��װ nuxt ����
npm install nuxt
�� package.json �����������ű�:
"scripts": {
	"dev": "nuxt"
}
���� pages/index.vue :
<template>
  <div>
    <h1>Home Page</h1>
  </div>
</template>
<script>
export default {
  name: 'HomePage'
}
</script>
<style>
</style>
������ʽ��Դ
��ǰĿ¼�ṹ:
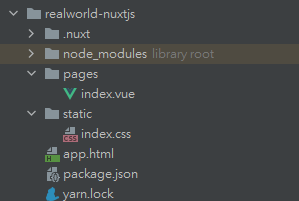
app.html:
<!DOCTYPE html>
<html {{ HTML_ATTRS }}>
<head {{ HEAD_ATTRS }}>
  {{ HEAD }}
  <!-- Import Ionicon icons & Google Fonts our Bootstrap theme relies on -->
  <link href="https://cdn.jsdelivr.net/npm/ionicons@2.0.1/css/ionicons.min.css" rel="stylesheet" type="text/css">
  <link
    href="//fonts.googleapis.com/css?family=Titillium+Web:700|Source+Serif+Pro:400,700|Merriweather+Sans:400,700|Source+Sans+Pro:400,300,600,700,300italic,400italic,600italic,700italic"
    rel="stylesheet" type="text/css">
  <!-- Import the custom Bootstrap 4 theme from our hosted CDN -->
  <link rel="stylesheet" href="/index.css">
</head>
<body {{ BODY_ATTRS }}>
{{ APP }}
</body>
</html>
�������
pages/layout/index.vue
<template>
<div>
<!-- header -->
<nav class="navbar navbar-light">
<div class="container">
<a class="navbar-brand" href="index.html">conduit</a>
<ul class="nav navbar-nav pull-xs-right">
<li class="nav-item">
<!-- Add "active" class when you're on that page" -->
<a class="nav-link active" href="">Home</a>
</li>
<li class="nav-item">
<a class="nav-link" href="">
<i class="ion-compose"></i> New Post
</a>
</li>
<li class="nav-item">
<a class="nav-link" href="">
<i class="ion-gear-a"></i> Settings
</a>
</li>
<li class="nav-item">
<a class="nav-link" href="">Sign up</a>
</li>
</ul>
</div>
</nav>
<!-- header -->
<!-- ��·�� -->
<nuxt-child/>
<!-- footer -->
<footer>
<div class="container">
<a href="/" class="logo-font">conduit</a>
<span class="attribution">
An interactive learning project from <a href="https://thinkster.io">Thinkster</a>. Code & design licensed under MIT.
</span>
</div>
</footer>
<!-- footer -->
</div>
</template>
<script>
export default {
name: "LayoutIndex"
}
</script>
<style scoped>
</style>
����nuxt.config.js�����ļ�,�����Զ���·�ɱ�
/*
* Nuxt.js�����ļ�
* */
module.exports = {
router: {
// �Զ���·�ɱ�����
extendRoutes(routes, resolve) {
// �����������,���nuxtĬ�����ɵ�·�ɱ�
routes.splice(0)
routes.push(...[
{
path: '/',
component: resolve(__dirname, 'pages/layout'),
children: [
{
path: '', // Ĭ����·��
name: 'home',
component: resolve(__dirname, 'pages/home')
}
]
},
])
}
}
}
����pages/home/index.vue,������Ĭ����·��
<template>
  <div class="home-page">

    <div class="banner">
      <div class="container">
        <h1 class="logo-font">conduit</h1>
        <p>A place to share your knowledge.</p>
      </div>
    </div>

    <div class="container page">
      <div class="row">

        <div class="col-md-9">
          <div class="feed-toggle">
            <ul class="nav nav-pills outline-active">
              <li class="nav-item">
                <a class="nav-link disabled" href="">Your Feed</a>
              </li>
              <li class="nav-item">
                <a class="nav-link active" href="">Global Feed</a>
              </li>
            </ul>
          </div>

          <div class="article-preview">
            <div class="article-meta">
              <a href="profile.html"><img src="http://i.imgur.com/Qr71crq.jpg"/></a>
              <div class="info">
                <a href="" class="author">Eric Simons</a>
                <span class="date">January 20th</span>
              </div>
              <button class="btn btn-outline-primary btn-sm pull-xs-right">
                <i class="ion-heart"></i> 29
              </button>
            </div>
            <a href="" class="preview-link">
              <h1>How to build webapps that scale</h1>
              <p>This is the description for the post.</p>
              <span>Read more...</span>
            </a>
          </div>

          <div class="article-preview">
            <div class="article-meta">
              <a href="profile.html"><img src="http://i.imgur.com/N4VcUeJ.jpg"/></a>
              <div class="info">
                <a href="" class="author">Albert Pai</a>
                <span class="date">January 20th</span>
              </div>
              <button class="btn btn-outline-primary btn-sm pull-xs-right">
                <i class="ion-heart"></i> 32
              </button>
            </div>
            <a href="" class="preview-link">
              <h1>The song you won't ever stop singing. No matter how hard you try.</h1>
              <p>This is the description for the post.</p>
              <span>Read more...</span>
            </a>
          </div>

        </div>

        <div class="col-md-3">
          <div class="sidebar">
            <p>Popular Tags</p>

            <div class="tag-list">
              <a href="" class="tag-pill tag-default">programming</a>
              <a href="" class="tag-pill tag-default">javascript</a>
              <a href="" class="tag-pill tag-default">emberjs</a>
              <a href="" class="tag-pill tag-default">angularjs</a>
              <a href="" class="tag-pill tag-default">react</a>
              <a href="" class="tag-pill tag-default">mean</a>
              <a href="" class="tag-pill tag-default">node</a>
              <a href="" class="tag-pill tag-default">rails</a>
            </div>
          </div>
        </div>

      </div>
    </div>

  </div>

</template>

<script>
export default {
  name: "HomeIndex"
}
</script>

<style scoped>

</style>
��ǰЧ��:

����localhost:3000ʱ,���ȼ���pages/index.vue���,��nuxt-child�м�����·��,��·��pathΪ���ַ�������,��˷���localhost:3000ʱ��ͬʱ����pages/index.vue��pages/layout/index.vue��pages/home/index.vue�������
��¼ע��
��ģ����ַ���ҵ���¼ģ��,���ڵ�ǰ��Ŀ��¼/ע��ҵ����,����ʹ��ͬһ�����ģ��,����this.$route.name���䴦��Ϊ��̬�����������Ҫ����������ʾ����ť��ʾ��·��ָ��,��������:
pages/login/index.vue
- ����:
<template>
  <div class="auth-page">
    <div class="container page">
      <div class="row">

        <div class="col-md-6 offset-md-3 col-xs-12">
          <h1 class="text-xs-center">{{ isLogin ? 'Sign in' : 'Sign up' }}</h1>
          <p class="text-xs-center">
            <nuxt-link v-if="isLogin" to="/register">Need an account?</nuxt-link>
            <nuxt-link v-else to="/login">Have an account?</nuxt-link>
          </p>

          <ul class="error-messages">
            <li>That email is already taken</li>
          </ul>

          <form>
            <fieldset v-if="!isLogin" class="form-group">
              <input class="form-control form-control-lg" type="text" placeholder="Your Name">
            </fieldset>
            <fieldset class="form-group">
              <input class="form-control form-control-lg" type="text" placeholder="Email">
            </fieldset>
            <fieldset class="form-group">
              <input class="form-control form-control-lg" type="password" placeholder="Password">
            </fieldset>
            <button class="btn btn-lg btn-primary pull-xs-right">
              {{ isLogin ? 'Sign in' : 'Sign up' }}
            </button>
          </form>
        </div>
      </div>
    </div>
  </div>
</template>

<script>
export default {
  name: "LoginIndex",
  computed: {
    isLogin() {
      return this.$route.name === 'login'
    }
  }
}
</script>

<style scoped>

</style>
-
��̬����:
��̬����
computed: { isLogin() { return this.$route.name === 'login' } }-
������ʾ
<h1 class="text-xs-center">{{ isLogin ? 'Sign in' : 'Sign up' }}</h1> <p class="text-xs-center"> <nuxt-link v-if="isLogin" to="/register">Need an account?</nuxt-link> <nuxt-link v-else to="/login">Have an account?</nuxt-link> </p> -
�����
<fieldset v-if="!isLogin" class="form-group"> <input class="form-control form-control-lg" type="text" placeholder="Your Name"> </fieldset> -
��ť
<button class="btn btn-lg btn-primary pull-xs-right">
  {{ isLogin ? 'Sign in' : 'Sign up' }}
</button>
-
����ʣ��ҳ��
| ·�� | ҳ�� |
|---|---|
/ | ��ҳ |
/login | ��¼ |
/register | ע�� |
/settings | �û����� |
/editor | �������� |
/editor/:slug | �༭���� |
/profile/:username | �������� |
/profile/:username/favorites | �û�ҳ��/ϲ�������� |
�û�ҳ��
pages/profile/index.vue
<template>
<div class="profile-page">
<div class="user-info">
<div class="container">
<div class="row">
<div class="col-xs-12 col-md-10 offset-md-1">
<img src="http://i.imgur.com/Qr71crq.jpg" class="user-img"/>
<h4>Eric Simons</h4>
<p>
Cofounder @GoThinkster, lived in Aol's HQ for a few months, kinda looks like Peeta from the Hunger Games
</p>
<button class="btn btn-sm btn-outline-secondary action-btn">
<i class="ion-plus-round"></i>
Follow Eric Simons
</button>
</div>
</div>
</div>
</div>
<div class="container">
<div class="row">
<div class="col-xs-12 col-md-10 offset-md-1">
<div class="articles-toggle">
<ul class="nav nav-pills outline-active">
<li class="nav-item">
<a class="nav-link active" href="">My Articles</a>
</li>
<li class="nav-item">
<a class="nav-link" href="">Favorited Articles</a>
</li>
</ul>
</div>
<div class="article-preview">
<div class="article-meta">
<a href=""><img src="http://i.imgur.com/Qr71crq.jpg"/></a>
<div class="info">
<a href="" class="author">Eric Simons</a>
<span class="date">January 20th</span>
</div>
<button class="btn btn-outline-primary btn-sm pull-xs-right">
<i class="ion-heart"></i> 29
</button>
</div>
<a href="" class="preview-link">
<h1>How to build webapps that scale</h1>
<p>This is the description for the post.</p>
<span>Read more...</span>
</a>
</div>
<div class="article-preview">
<div class="article-meta">
<a href=""><img src="http://i.imgur.com/N4VcUeJ.jpg"/></a>
<div class="info">
<a href="" class="author">Albert Pai</a>
<span class="date">January 20th</span>
</div>
<button class="btn btn-outline-primary btn-sm pull-xs-right">
<i class="ion-heart"></i> 32
</button>
</div>
<a href="" class="preview-link">
<h1>The song you won't ever stop singing. No matter how hard you try.</h1>
<p>This is the description for the post.</p>
<span>Read more...</span>
<ul class="tag-list">
<li class="tag-default tag-pill tag-outline">Music</li>
<li class="tag-default tag-pill tag-outline">Song</li>
</ul>
</a>
</div>
</div>
</div>
</div>
</div>
</template>
<script>
export default {
name: "UserProfile"
}
</script>
<style scoped>
</style>
�û�����
pages/settings
<template>
  <div class="settings-page">
    <div class="container page">
      <div class="row">

        <div class="col-md-6 offset-md-3 col-xs-12">
          <h1 class="text-xs-center">Your Settings</h1>

          <form>
            <fieldset>
              <fieldset class="form-group">
                <input class="form-control" type="text" placeholder="URL of profile picture">
              </fieldset>
              <fieldset class="form-group">
                <input class="form-control form-control-lg" type="text" placeholder="Your Name">
              </fieldset>
              <fieldset class="form-group">
                <textarea class="form-control form-control-lg" rows="8" placeholder="Short bio about you"></textarea>
              </fieldset>
              <fieldset class="form-group">
                <input class="form-control form-control-lg" type="text" placeholder="Email">
              </fieldset>
              <fieldset class="form-group">
                <input class="form-control form-control-lg" type="password" placeholder="Password">
              </fieldset>
              <button class="btn btn-lg btn-primary pull-xs-right">
                Update Settings
              </button>
            </fieldset>
          </form>
        </div>
      </div>
    </div>
  </div>
</template>

<script>
export default {
  name: "SettingsIndex"
}
</script>

<style scoped>

</style>
��������
editor/inde.vue
<template>
  <div class="editor-page">
    <div class="container page">
      <div class="row">

        <div class="col-md-10 offset-md-1 col-xs-12">
          <form>
            <fieldset>
              <fieldset class="form-group">
                <input type="text" class="form-control form-control-lg" placeholder="Article Title">
              </fieldset>
              <fieldset class="form-group">
                <input type="text" class="form-control" placeholder="What's this article about?">
              </fieldset>
              <fieldset class="form-group">
                <textarea class="form-control" rows="8" placeholder="Write your article (in markdown)"></textarea>
              </fieldset>
              <fieldset class="form-group">
                <input type="text" class="form-control" placeholder="Enter tags"><div class="tag-list"></div>
              </fieldset>
              <button class="btn btn-lg pull-xs-right btn-primary" type="button">
                Publish Article
              </button>
            </fieldset>
          </form>
        </div>
      </div>
    </div>
  </div>
</template>

<script>
export default {
  name: "EditorIndex"
}
</script>

<style scoped>

</style>
��������
pages/editor
<template>
  <div class="editor-page">
    <div class="container page">
      <div class="row">

        <div class="col-md-10 offset-md-1 col-xs-12">
          <form>
            <fieldset>
              <fieldset class="form-group">
                <input type="text" class="form-control form-control-lg" placeholder="Article Title">
              </fieldset>
              <fieldset class="form-group">
                <input type="text" class="form-control" placeholder="What's this article about?">
              </fieldset>
              <fieldset class="form-group">
                <textarea class="form-control" rows="8" placeholder="Write your article (in markdown)"></textarea>
              </fieldset>
              <fieldset class="form-group">
                <input type="text" class="form-control" placeholder="Enter tags"><div class="tag-list"></div>
              </fieldset>
              <button class="btn btn-lg pull-xs-right btn-primary" type="button">
                Publish Article
              </button>
            </fieldset>
          </form>
        </div>
      </div>
    </div>
  </div>
</template>

<script>
export default {
  name: "EditorIndex"
}
</script>

<style scoped>

</style>
����������������
��ģ���е�a����ȫ���滻Ϊnuxt-link
pages/layout/index.vue
<template>
<div>
<!-- header -->
<nav class="navbar navbar-light">
<div class="container">
<nuxt-link class="navbar-brand" to="/">Home</nuxt-link>
<ul class="nav navbar-nav pull-xs-right">
<li class="nav-item">
  <!-- Add "active" class when you're on that page" -->
  <nuxt-link class="nav-link" to="/" exact>
    Home
  </nuxt-link>
</li>
<li class="nav-item">
<nuxt-link class="nav-link" to="/editor">
<i class="ion-compose"></i> New Post
</nuxt-link>
</li>
<li class="nav-item">
<nuxt-link class="nav-link" to="/settings">
<i class="ion-gear-a"></i> Settings
</nuxt-link>
</li>
<li class="nav-item">
<nuxt-link class="nav-link" to="/register">Sign up</nuxt-link>
</li>
<li class="nav-item">
<nuxt-link class="nav-link" to="/login">Sign in</nuxt-link>
</li>
<li class="nav-item">
<nuxt-link class="nav-link" to="/profile/123">
<img class="user-pic"
src="https://pic1.zhimg.com/80/v2-3358e380b520aaa16d4c16bbacb7dab9_720w.jpg?source=1940ef5c">
5coder
</nuxt-link>
</li>
</ul>
</div>
</nav>
<!-- header -->
<!-- ��·�� -->
<nuxt-child/>
<!-- footer -->
<footer>
<div class="container">
<a href="/" class="logo-font">conduit</a>
<span class="attribution">
An interactive learning project from <a href="https://thinkster.io">Thinkster</a>. Code & design licensed under MIT.
</span>
</div>
</footer>
<!-- footer -->
</div>
</template>
<script>
export default {
name: "LayoutIndex"
}
</script>
<style scoped>
</style>

�����������Ӹ���
-
��nuxt.js�ṩ��·�е�������,Ĭ��ֵΪ
nuxt-link-active,��Ϊģ���ж����active(�ٷ��ĵ�)vue.config.jsmodule.exports = { router: { // �Զ���·�ɱ����� extendRoutes(routes, resolve) { // �����������,���nuxtĬ�����ɵ�·�ɱ� routes.splice(0) routes.push(...[ { path: '/', component: resolve(__dirname, 'pages/layout'), children: [ { path: '', // Ĭ����·�� name: 'home', component: resolve(__dirname, 'pages/home/') }, { path: '/login', name: 'login', component: resolve(__dirname, 'pages/login/') }, { path: '/register', name: 'register', component: resolve(__dirname, 'pages/login/') }, { path: '/profile/:username', name: 'profile', component: resolve(__dirname, 'pages/profile/') }, { path: '/settings/', name: 'settings', component: resolve(__dirname, 'pages/settings/') }, { path: '/editor/', name: 'editor', component: resolve(__dirname, 'pages/editor/') }, { path: '/article/:slug', name: 'article', component: resolve(__dirname, 'pages/article/') }, ] } ]) }, linkActiveClass: 'active' // default nav-link-active } } -
�ľ�ȷƥ��,��
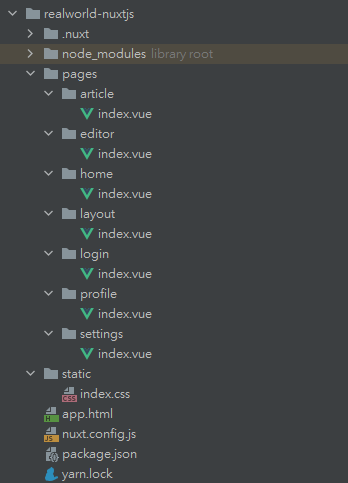
Home�е�·��Ϊ/ʱ,Ĭ�ϻ�����active,��Ҫ������Ϊ��ȷƥ��,���������������ʱ,Home����������(�ٷ��ĵ�)pages/layout/index.vue<li class="nav-item"> <!-- Add "active" class when you're on that page" --> <nuxt-link class="nav-link" to="/" exact> Home </nuxt-link> </li>��ǰĿ¼�ṹ:
��װ����ģ��
-
ʹ��
axios��װ����ģ�� -
��װaxios:
yarn add axios -
����Ŀ¼���ļ�
utils/request.jsimport axios from 'axios' const request = axios.create({ baseURL: 'https://conduit.productionready.io' }) export default request
��¼ע��
ʵ�ֻ�����¼����
-
��¼�ӿ�

pages/login/index.vue
<template>
<div class="auth-page">
<div class="container page">
<div class="row">
<div class="col-md-6 offset-md-3 col-xs-12">
<h1 class="text-xs-center">{{ isLogin ? 'Sign in' : 'Sign up' }}</h1>
<p class="text-xs-center">
<nuxt-link v-if="isLogin" to="/register">Need an account?</nuxt-link>
<nuxt-link v-else to="/login">Have an account?</nuxt-link>
</p>
<ul class="error-messages">
<li>That email is already taken</li>
</ul>
<!--����submit�ύ�¼�,��ʹ��preventȡ��Ĭ���ύ�¼�-->
<form @submit.prevent="onSubmit">
<fieldset v-if="!isLogin" class="form-group">
<input class="form-control form-control-lg" type="text" placeholder="Your Name">
</fieldset>
<!--ʹ��v-model������-->
<fieldset class="form-group">
<input class="form-control form-control-lg" type="text" placeholder="Email" v-model="user.email">
</fieldset>
<fieldset class="form-group">
<input class="form-control form-control-lg" type="password" placeholder="Password"
v-model="user.password">
</fieldset>
<button class="btn btn-lg btn-primary pull-xs-right">
{{ isLogin ? 'Sign in' : 'Sign up' }}
</button>
</form>
</div>
</div>
</div>
</div>
</template>
<script>
import request from '@/utils/request'
export default {
name: "LoginIndex",
data() {
return {
user: {
email: '',
password: ''
}
}
},
computed: {
isLogin() {
return this.$route.name === 'login'
}
},
methods: {
async onSubmit() {
// �ύ���������¼
const {data} = await request({
method: 'POST',
url: '/api/users/login',
data: {
user: this.user
}
})
console.log(data)
// TODO �����û���¼״̬
// ��ת����ҳ
this.$router.push('/')
}
}
}
</script>
<style scoped>
</style>
��װ����
Ϊ��ά������,�������ٷ�װ
����Ŀ¼���ļ�api/user.js
import request from "@/utils/request";
// �û���¼
export const login = data => {
return request({
method: 'POST',
url: '/api/users/login',
data
})
}
// �û�ע��
export const register = data => {
return request({
method: 'POST',
url: '/api/users',
data
})
}
��login.vue��ʹ�õĵ�¼����
export default {
name: "LoginIndex",
data() {
return {
user: {
email: '',
password: ''
}
}
},
computed: {
isLogin() {
return this.$route.name === 'login'
}
},
methods: {
async onSubmit() {
// �ύ���������¼,ʹ�øղŷ�װ�õ�user.js
const {data} = await login({
user: this.user
})
console.log(data)
// TODO �����û���¼״̬
// ��ת����ҳ
this.$router.push('/')
}
}
}
������֤
ʹ��HTMLԭʼ����֤,�ֱ���input������required����type="emial"
<!--ʹ��v-model������-->
<fieldset class="form-group">
<input class="form-control form-control-lg" type="email" required placeholder="Email" v-model="user.email">
</fieldset>
<fieldset class="form-group">
<input class="form-control form-control-lg" type="password" required placeholder="Password"
v-model="user.password">
</fieldset>
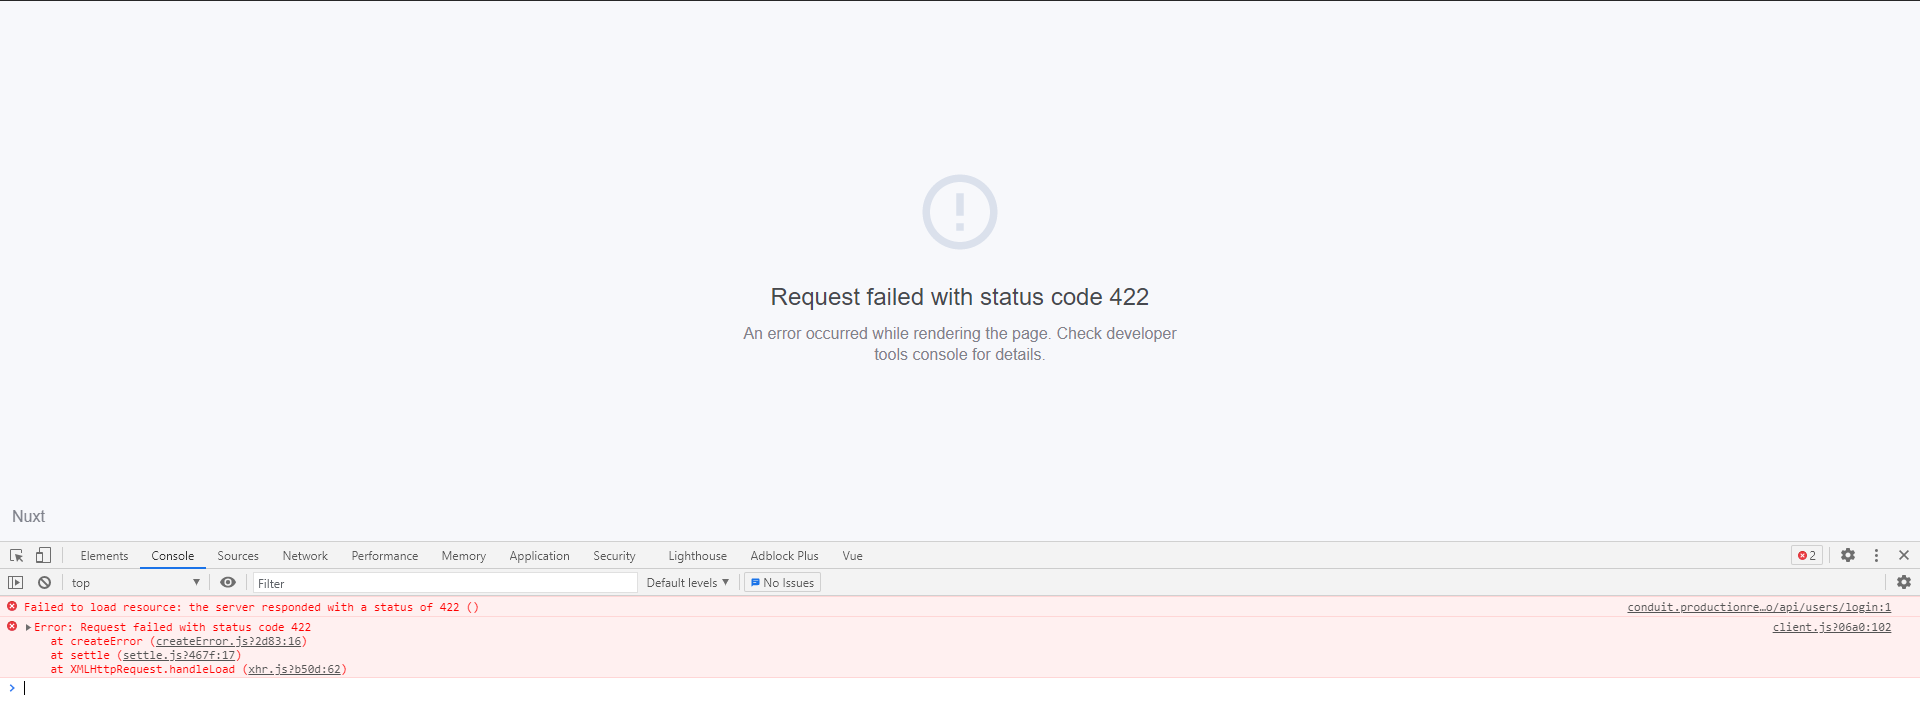
������
-
�˴������û���¼����ʱ����ʾ����
-
δ����ʱ,��¼���������������ҳ��:
-
������Ϣ����:
-
ʹ��
try {} catch {err}�����쳣try { // �ύ���������¼ const {data} = await login({ user: this.user }) console.log(data) // TODO �����û���¼״̬ // ��ת����ҳ this.$router.push('/') } catch (err) { // ����ʧ�� console.dir(err) this.errors = err.response.data.errors } -
��data���errors����:
errors:{}��ʼ��Ϊ�ն��� -
��htmlģ���б������ô�����Ϣ
<ul class="error-messages"> <template v-for="(messages, field) of errors"> <li v-for="(message,index) in messages" :key="index">{{ field }} {{ message }}</li> </template> </ul> -
����������ҳ������:


�û�ע��
����ע����Ҫ�ṩ�û���,������data�е�user������username,��ʹ��v-model��input���С�
data() {
return {
user: {
username: '',
email: '',
password: ''
},
errors: {} // ������Ϣ
}
}
ע��͵�¼��������,���ֻ��Ҫ�ڵ���login��registerʱ���жϼ���,ͬʱ����ע��ʱ,�û��ṩ�������ں��������֤,������ڵ���8Ϊ,�����ǰ��Ҳ������֤����password�ֶ�������minlength='8':
<input class="form-control form-control-lg" type="password" minlength="8" required placeholder="Password" v-model="user.password">
async onSubmit() {
try {
// �ύ���������¼
const {data} = this.isLogin ? await login({
user: this.user
}) : await register({
user: this.user
})
console.log(data)
// TODO �����û���¼״̬
// ��ת����ҳ
this.$router.push('/')
} catch (err) {
// ����ʧ��
console.dir(err)
this.errors = err.response.data.errors
}
}
�洢�û���¼״̬
(1)��ʼ����������
// �ڷ������Ⱦ�ڼ�,���еĶ���ͬһ��ʵ��,Ϊ�˷�ֹ���ݳ�ͻ,��ؽ�state����Ϊһ������,�������ݶ���
// ȷ��ÿ�δ���ʵ��ʱ,state��Ҫͨ��һ��������̬�Ĵ���һ������,�������ݾͲ����ͻ����Ⱦ
export const state = () => {
return {
// ��ǰ��¼�û��ĵ�¼״̬����
user: null
}
}
export const mutations = {
setUser(state, data) {
state.user = data
}
}
export const actions = {}
(2)��½�ɹ�,���û���Ϣ��������
this.$store.commit('setUser', data.user)
(3)����½״̬�־û���Cookie��
��װjs-cookie
yarn add js-cookie
ʹ��js-cookie��data.user���ݴ洢��cookie��(31��):Cookie.set('user', data.user)
export default {
name: "LoginIndex",
data() {
return {
user: {
username: '',
email: '',
password: ''
},
errors: {} // ������Ϣ
}
},
computed: {
isLogin() {
return this.$route.name === 'login'
}
},
methods: {
async onSubmit() {
try {
// �ύ���������¼
const {data} = this.isLogin ? await login({
user: this.user
}) : await register({
user: this.user
})
// �����û���¼״̬������
this.$store.commit('setUser', data.user)
// Ϊ�˷�ֹˢ��ҳ�����ݶ�ʧ,��Ҫ�����ݳ־û�,�浽cookie��
Cookie.set('user', data.user)
// ��ת����ҳ
this.$router.push('/')
} catch (err) {
// ����ʧ��
console.dir(err)
this.errors = err.response.data.errors
}
}
}
}
(4)��Cookie�л�ȡ����ʼ���û���¼״̬
��װcookieparser
yarn add cookieparser
ʹ��nuxtServerInit�ڷ������Ⱦ�ڼ�,��cookie�л�ȡuser����,���浽state�е�user������
import cookieparser from 'cookieparser'
// �ڷ������Ⱦ�ڼ�,���еĶ���ͬһ��ʵ��,Ϊ�˷�ֹ���ݳ�ͻ,��ؽ�state����Ϊһ������,�������ݶ���
// ȷ��ÿ�δ���ʵ��ʱ,state��Ҫͨ��һ��������̬�Ĵ���һ������,�������ݾͲ����ͻ����Ⱦ
export const state = () => {
return {
// ��ǰ��¼�û��ĵ�¼״̬����
user: null
}
}
export const mutations = {
setUser(state, data) {
state.user = data
}
}
export const actions = {
// nuxtServerInit��һ�������action����,���ڷ������Ⱦ�ڼ����
// ��ʼ����������,��cookie��ȡ�����ŵ�state��
nuxtServerInit({commit}, {req}) {
let user = null
// �������ͷ����Cookie
if (req.headers.cookie) {
// ʹ��cookieparser�ṹ�ɶ���
const parsed = cookieparser.parse(req.headers.cookie)
try{
user = JSON.parse(parsed.user)
} catch (e) {
// No Valid cookie found
}
}
// �ύmutation��state״̬
commit('setUser', user)
}
}
- ������Ϊ:ʹ��
mapState��store�е�state.userӳ�䵽layout.vue��,��ģ�����ж��Ƿ����user,������ʱ,չʾHome��New Post��Settings���û�ͷ����Ϣ,��������ʱ,ֻչʾHome��Sign In��Sign Up
<template v-if="user">
<li class="nav-item">
<nuxt-link class="nav-link" to="/editor">
<i class="ion-compose"></i> New Post
</nuxt-link>
</li>
<li class="nav-item">
<nuxt-link class="nav-link" to="/settings">
<i class="ion-gear-a"></i> Settings
</nuxt-link>
</li>
<li class="nav-item">
<nuxt-link class="nav-link" to="/profile/123">
<img class="user-pic"
:src="user.image">
{{ user.username }}
</nuxt-link>
</li>
</template>
<template v-else>
<li class="nav-item">
<nuxt-link class="nav-link" to="/login">Sign in</nuxt-link>
</li>
<li class="nav-item">
<nuxt-link class="nav-link" to="/register">Sign up</nuxt-link>
</li>
</template>
import {mapState} from 'vuex'

export default {
  name: "LayoutIndex",
  computed: {
    ...mapState(['user'])
  }
}
����ҳ�����Ȩ��
��ǰ������ֻ�ǽ���½���������Ƿ���Ⱦ��Editor��·��,Ȼ�����û�ֱ����url����localhost:3000/editor��·��ʱ,��Ȼ���Է���ҳ��,��ʱ����Ҫʹ���������������ⲿ������
·���м��
�м�������㶨��һ���Զ��庯��������һ��ҳ���һ��ҳ����Ⱦ֮ǰ��
������ͨ���� middleware/ Ŀ¼�д���һ���ļ������������м��,�ļ��������м�����ơ�

middleware/authenticated.js
export default function ({store, redirect}) {
// ����û�û�е�¼
if (!store.state.user) {
return redirect('/login')
}
}
- ����Ҫ�жϵ�¼Ȩ��ҳ��������ʹ���м����
editor.vue
export default {
// ��·��ƥ�����֮ǰ����ִ���м������
middleware: 'authenticated',
name: "EditorIndex"
}
ͬ��,��settings��profile��ҳ��Ҳ����ͬ�����м����
- �ڵ�¼��,�������û��ظ���¼ע��,ͬ�������м��
not-authenticated.js,��ֹ�û��ڵ�¼���ٴη��ʵ�¼��ע��ҳ�档
middleware/not-authenticated.js
export default function ({store, redirect}) {
// ����û�û�е�¼
if (store.state.user) {
return redirect('/')
}
}
- �ڵ�½ע��ҳ�����
not-authenticated����
��ҳģ��
չʾ���������б�
��װ����:
import request from "@/utils/request";
// ��ȡ�����������б�
export const getArticles = params => {
return request({
method: 'GET',
url: '/api/articles',
params
})
}
home/index.vue��ȡ����,������Ҫ����SEO�Ż�,����ʹ��asyncData������ȡ����:
import {getArticles} from "@/api/article";
export default {
name: "HomeIndex",
// ������SEO
async asyncData() {
const {data} = await getArticles()
return {
articles: data.articles,
articlesCount: data.articlesCount
}
}
}
ģ���:
<div
    class="article-preview"
    v-for="article in articles"
    :key="article.slug"
>
  <div class="article-meta">
    <nuxt-link :to="{
      name: 'profile',
      params: {
        username: article.author.username
      }
    }">
      <img :src="article.author.image"/>
    </nuxt-link>
    <div class="info">
      <nuxt-link class="author" :to="{
      name: 'profile',
      params: {
        username: article.author.username
      }
    }">{{ article.author.username }}
      </nuxt-link>
      <span class="date">{{ article.createAt }}</span>
    </div>
    <button class="btn btn-outline-primary btn-sm pull-xs-right"
            :class="{
      active: article.favorited
    }">
      <i class="ion-heart"></i>
      {{ article.favoritesCount }}
    </button>
  </div>
  <nuxt-link
      class="preview-link"
      :to="{
        name: 'article',
        params: {
          slug: article.slug
        }
      }"
  >
    <h1>{{ article.title }}</h1>
    <p>{{ article.description }}</p>
    <span>Read more...</span>
  </nuxt-link>
</div>
��ҳ����
������ҳ����
���ȶ���page��limit,Ȼ�����Ҫ��������������Լ�����һ�����¿�ʼȡ
export default {
name: "HomeIndex",
// ������SEO
async asyncData() {
let page = 1
const limit = 20
const {data} = await getArticles({
limit,
offset: (page - 1) * limit
})
return {
articles: data.articles,
articlesCount: data.articlesCount
}
}
}
ҳ�봦��
��ҳģ��:
<nav>
<ul class="pagination">
<!--ʹ�ü������Լ����totalPage,����ѭ����ҳ��,���Ұ�̬��ʽactive-->
<li class="page-item" v-for="item in totalPage" :key="item"
:class="{
active: item === page
}"
>
<!--��to����,��̬����page����-->
<nuxt-link class="page-link" :to="{
name: 'home',
query: {
page: item
}
}">{{ item }}
</nuxt-link>
</li>
</ul>
</nav>
-
ʹ�ü������Լ�����ҳ��
computed: { totalPage() { return Math.ceil(this.articlesCount / this.limit) } } -
��������ҳ���б������õ�������
<nav> <ul class="pagination"> <!--ʹ�ü������Լ����totalPage,����ѭ����ҳ��,���Ұ�̬��ʽactive--> <li class="page-item" v-for="item in totalPage" :key="item" :class="{ active: item === page }" > <!--��to����,��̬����page����--> <nuxt-link class="page-link" :to="{ name: 'home', query: { page: item } }">{{ item }} </nuxt-link> </li> </ul> </nav> -
��Ӧquery�����仯
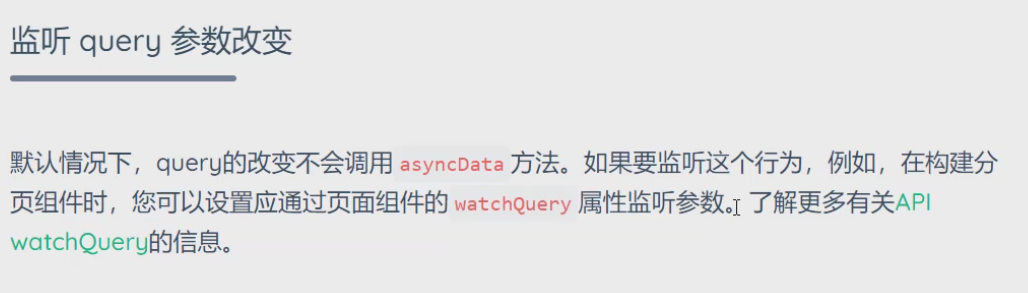

watchQuery: ['page'],
��ȡ��ǩ�б�(Popular Tags)
- ��װ����
api/tag.js
import request from "@/utils/request";
// ��ȡ���±�ǩ�б�
export const getTags = () => {
return request({
method: 'GET',
url: '/api/tags',
})
}
- ��
home/index.vue�л�ȡ����
export default {
name: "HomeIndex",
// ������SEO
watchQuery: ['page'],
async asyncData({query}) {
// ��url�л�ȡҳ��:localhost:3000?page=3
const page = Number.parseInt(query.page || 1)
const limit = 20
const {data} = await getArticles({
limit,
offset: (page - 1) * limit
})
const {data: tagData} = await getTags() // ��ȡtags����
return {
articles: data.articles,
articlesCount: data.articlesCount,
limit,
page,
tags: tagData.tags // ����tags���ݸ�ҳ��ģ��
}
},
computed: {
totalPage() {
return Math.ceil(this.articlesCount / this.limit)
}
}
}
- ������ȡ����tags,��Ⱦ��ҳ��
<div class="tag-list">
  <a href="" class="tag-pill tag-default" v-for="item in tags" :key="item" v-if="item">{{ item }}</a>
</div>
�Ż���������
ǰ������������б����ݺͱ�ǩ�б�������ҵ���ϲ�û�л��������Ĺ�ϵ,��˿��Խ��������ִ�����������Ż�Ϊ����ִ����������,ͨ�����п������������ص��ٶȡ�
async asyncData({query}) {
// ��url�л�ȡҳ��:localhost:3000?page=3
const page = Number.parseInt(query.page || 1)
const limit = 20
// ��ȡ���ؽ����� Promise.all ��������ֵδ����
const [articlesResponse, tagResponse] = await Promise.all([
getArticles({
limit,
offset: (page - 1) * limit
}),
getTags()
])
// ����ֵ
const {articles, articlesCount} = articlesResponse.data
const {tags} = tagResponse.data
return {
articles,
articlesCount,
limit,
page,
tags
}
},
��ǩ�б����Ӻ�����
-
������ǩ�б�����,�����ڷ�ҳҳ��Ĵ���;�ڱ�ǩ�ϰ�ѯ����
?tag='something'<nuxt-link :to="{ name: 'home', query: { tag: item } }" class="tag-pill tag-default" v-for="item in tags" :key="item" v-if="item">{{ item }}</nuxt-link> -
����
?page=3?tag=��something��<nuxt-link class="page-link" :to="{ name: 'home', query: { page: item, tag: $route.query.tag } }">{{ item }} </nuxt-link>
��ǩ����������(Tab)
-
ҵ����:���û���¼��,��ʾYour Feed, ������ʾYour Feed,ֻ��ʾGlobal Feed��
-
��ȡuser,�ж�user,�Ƿ�չʾYour Feed
<li v-if="user" class="nav-item">
  <nuxt-link class="nav-link" ...>Your Feed</nuxt-link>
</li>
-
-
ҵ����:����Ҳ�Popular Tagʱ,��̬��ʾ
#{{ tag }}��tab������-
�жϵ�ǰurl���Ƿ���tag,�������̬����Ⱦtab������
<li v-if="tag"> ... </li>-
��asyncData����Ҫ����tag����
async asyncData({query}) { // ��url�л�ȡҳ��:localhost:3000?page=3 const page = Number.parseInt(query.page || 1) const limit = 20 const {tag} = query const [articlesResponse, tagResponse] = await Promise.all([ getArticles({ limit, offset: (page - 1) * limit, tag // ��ѯtag }), getTags() ]) const {articles, articlesCount} = articlesResponse.data const {tags} = tagResponse.data return { articles, articlesCount, limit, page, tags, tag, // ����tag tab: query.tab || 'global_feed' } },
-
-
Popular Tag
query��ѯ����������tag����<div class="tag-list"> <nuxt-link :to="{ name: 'home', query: { tag: item, // ����tag��ѯ���� tab: 'tag' } }" class="tag-pill tag-default" v-for="item in tags" :key="item" v-if="item">{{ item }} </nuxt-link> </div>
-
-
��̬��Your Feed��Global Feed��#tag��active��ʽ
-
��tab�����Ӳ�ѯ����
tab: 'your_feed'��tab: 'global_feed'��tab: tag -
��ȷƥ��
exact,watchQueryt������tab<li v-if="user" class="nav-item"> <nuxt-link class="nav-link" :class="{ active: tab === 'your_feed' }" exact :to="{ name: 'home', query: { tab: 'your_feed' } }" href="">Your Feed </nuxt-link> </li> <li class="nav-item"> <nuxt-link class="nav-link" :class="{ active: tab === 'global_feed' }" exact :to="{ name: 'home', query: { tab: 'global_feed' } }">Global Feed </nuxt-link> </li> <li v-if="tag" class="nav-item"> <nuxt-link class="nav-link" :class="{ active: tab === 'tag' }" exact :to="{ name: 'home', query: { tab: 'tag', tag: tag } }">#{{ tag }} </nuxt-link> </li>watchQuery: ['page', 'tag', 'tab'],- �����ű�ǩPopular Tags��,ѡ��ҳ��,����Tab��û�б�����,������Ҫ��ҳ���м�Ҳ���ѯ����query,
tab:tab
- �����ű�ǩPopular Tags��,ѡ��ҳ��,����Tab��û�б�����,������Ҫ��ҳ���м�Ҳ���ѯ����query,
-
չʾ��ע�����б�
��Your Feed�е�������Ⱦ����Tab��
- ������
asyncData�н��store����,��store�����л�ȡuser,���ڴ��ݵ��ӿڷ�����,�ڽӿ������ֶ�д���û�token
// ��ȡ��ע�ĵ������б�
export const getFeedArticles = params => {
return request({
method: 'GET',
url: '/api/articles/feed',
// ע�����ݸ�ʽ
headers: {
Authorization: `Token eyJ0eXAiOiJKV1QiLCJhbGciOiJIUzI1NiJ9.eyJpZCI6MTkwMzIyLCJ1c2VybmFtZSI6IjVjb2RlciIsImV4cCI6MTYzMjUzNTA0NH0.i0tpsAKIB-462Vg_dOyCABZNcFwNMqRtvQ-jzoDTY6k`
},
params
})
}
- �����û���¼״̬��tab�Ƿ�Ϊyour_feed����������������ȫ�����»��߹�ע������
import {getArticles, getFeedArticles} from "@/api/article";
...
async asyncData({query, store}) {
// ��url�л�ȡҳ��:localhost:3000?page=3
const page = Number.parseInt(query.page || 1)
const limit = 20
const {tag} = query
const tab = query.tab || 'global_feed'
// �жϼ���ȫ�����»��߹�ע����
const loadArticles = store.state.user && tab === 'your_feed'
? getFeedArticles
: getArticles
const [articlesResponse, tagResponse] = await Promise.all([
loadArticles({
limit,
offset: (page - 1) * limit,
tag,
}),
getTags()
])
const {articles, articlesCount} = articlesResponse.data
const {tags} = tagResponse.data
return {
articles,
articlesCount,
limit,
page,
tags,
tag,
tab: query.tab || 'global_feed'
}
},
ͳһ��������token
����һ����,�����ֶ����õ��û���tokenֵ,������ʵ�ʵ�ҵ������Ҫ��̬������tokenֵ��Ҳ����˵��Ҫ��store�л�ȡ��state.user.token��������request.js����������ȡ��store�����Ķ���Nuxt.jsΪ�����ṩ��һ���������,������ƿ�������������������֮ǰ���ص�����,���������п��Ի�ȡ�����Ķ���(query��params��req��res��app��store��)
�������ʹ������:
����Ŀ��Ŀ¼����Ŀ¼plugins�Լ��ļ�request.js,����Ĭ�ϳ�Ա,��������:
plugins/request.js
/*
* ���� axios ��װ������ģ��
* */
import axios from 'axios'
// �����������
export const request = axios.create({
baseURL: 'https://conduit.productionready.io'
})
// �����������������Ϊdefault��Ա,��default��Աֻ��һ��
// ͨ��������ƻ�ȡ�������Ķ���(query��params��req��res��app��store...)
export default ({store}) => {
console.log(123)
// ����������
// �κ�����Ҫ��������������
// ���ǿ�������������������һЩ������ҵ����,��������token
request.interceptors.request.use(function (config) {
// ����ͻᾭ������
// �õ��û���token
const {user} = store.state
if (user && user.token) {
  config.headers.Authorization = `Token ${user.token}`
}
// ����config�������ö���
return config
}, function (error) {
// �������ʧ��(��ʱ����û�з���ȥ)�ͻ��������
return Promise.reject(error)
})
}
����,����Ҫʹ�ò��ʱ,����Ҫ��nuxt.config.js�н���ע����,��������:
module.exports = {
router: {
...
},
// ע����
plugins: [
'~/plugins/request.js'
]
}
export default����Ĭ�ϳ�Աʱ,����ʹ�ö���,ֻ���������Ҫ��store����,Ȼ�����ж�user�Լ�user.token,������������,��config������headers,����API�ĵ��ͽ������á�
const {user} = store.state
if (user && user.token) {
config.headers.Authorization = `Token ${user.token}`
}
��ʱ,���ǾͲ���Ҫ��ʹ��utils/request.js�еķ�����,��Ҫ��api�е������ļ�(articles.js��tag.js��user.js)���滻����
import { request } from "@/plugins/request";
��ʱ,������home/index.vue�е���������ʹ��plugins/request.js,��������Ҳ�ᾭ��������,����ͳһ�����û�token��
���ڸ�ʽ����
����demo��,���ڵ�չ����ʽ��:��д�·� ����, ���,����������Ҫ����ȡ����articles�е�createAt�ֶθı�Ϊ�˸�ʽ�������Ƽ�һ��������moment.js�IJ��dayjs.js(Github)���ٷ��ĵ�
Day.js��һ�������Ĵ���ʱ������ڵ� JavaScript ��,�� Moment.js �� API ��Ʊ�����ȫһ��. ����������ù� Moment.js, ��ô���Ѿ�֪�����ʹ��Day.js
ʹ��Vue�е�ȫ�ֹ�����,�����ڸ�ʽ��,�������Ը����ȵ����ô��롣ͬ����Ҫ��pluginsĿ¼���½�dayjs.js�ļ�(�ļ�������),��������:
plugins/dayjs.js
import Vue from 'vue'
import dayjs from 'dayjs'
// {{ ����ʽ | ������ }}
// filter��һ������Ϊ����������
// filter�ڶ�������Ϊ����,�����е�valueΪ����ʽ���ص�ֵ
Vue.filter('date', (value, format = 'YYYY-MM-DD HH:mm:ss') => {
return dayjs(value).format(format)
})
��pages/home/index.vue��ʹ�ùܵ�������,���������:
<span class="date">{{ article.createAt | date('MMM DD, YYYY') }}</span>
���µ���
�������������µ�����,ҵ����:
- δ����״̬��,���Ϊ����,������1
- ����״̬��,���Ϊȡ������,������1
��������:
- �����������ݽӿ�
api/articles.js
// ���ӵ���
export const addFavorite = slug => {
return request({
method: 'POST',
url: `api/articles/${slug}/favorite`
})
}
// ȡ������
export const deleteFavorite = slug => {
return request({
method: 'DELETE',
url: `api/articles/${slug}/favorite`
})
}
- ��
pages/home/index.vue�еĵ��ް�ť�а��¼�
<button class="btn btn-outline-primary btn-sm pull-xs-right"
        :class="{
                active: article.favorited
                }" @click="onFavorite(article)"

        >...</button>
- ��
vmʵ��������methods
methods: {
async onFavorite(article) {
// ����Ѿ�������,��ȡ������,���������ӵ���
if (article.favorited) {
await deleteFavorite(article.slug)
// ������ͼ
article.favorited = false
// ������1
article.favoritesCount += -1
} else {
await addFavorite(article.slug)
article.favorited = true
// ������1
article.favoritesCount += 1
}
}
}
-
�����ڵ���ȡ���������е�
pedding״̬,��ֹ�û����ٵ����ť,ʵ��˼·Ϊ��̬����button��disabled����-
��̬���ڽ��շ��ص�
articles����������favoriteDisabled����articles.forEach(articles => articles.favoriteDisabled = false)
-
pages/home/index.vue
<button class="btn btn-outline-primary btn-sm pull-xs-right"
        :class="{
          active: article.favorited
        }" @click="onFavorite(article)"
        :disabled="article.favoriteDisabled"
>
  <i class="ion-heart"></i>
  {{ article.favoritesCount }}
</button>
- �������ж�̬�İ�
disabled����
methods: {
async onFavorite(article) {
// disabledΪtrue
article.favoriteDisabled = true
// ����Ѿ�������,��ȡ������,���������ӵ���
if (article.favorited) {
await deleteFavorite(article.slug)
// ������ͼ
article.favorited = false
article.favoritesCount += -1
} else {
await addFavorite(article.slug)
article.favorited = true
article.favoritesCount += 1
}
// disabledΪfalse
article.favoriteDisabled = false
}
}
��������
ҵ�����:
- չʾ������������
- ���±���
- ������Ϣ
- ����
- ����
- �������۹���
- ��������
-
�����������ݽӿڷ�װ
api/articles.js// ��ȡ�������� export const getArticle = slug => { return request({ method: 'GET', url: `/api/articles/${slug}`, }) } -
��ȡ����
pages/article/index.vueimport {getArticle} from "@/api/article"; export default { name: "ArticleIndex", // ͨ������ṹ,�ó�params,�����õ�params.slug,������id async asyncData({params}) { const {data} = await getArticle(params.slug) return { article: data.article } } } -
��̬��Ⱦ��������
������ֻ��Ⱦ����
title������body,��������body������markdownת��<h1>{{ article.title }}</h1> ... <div class="row article-content"> <div class="col-md-12"> {{ article.body }} </div> </div>
��MarkdownתΪHTMl

ʹ�õ��������markdown-it,�ò�����Խ�markdown�ת��ΪHTML���ڻ�ȡ��article.body��,ʹ�øò����������תΪHTML��
import {getArticle} from "@/api/article";
import MarkdownIt from 'markdown-it'

export default {
  name: "ArticleIndex",
  async asyncData({params}) {
    const {data} = await getArticle(params.slug)
    const {article} = data
    const md = new MarkdownIt()
    article.body = md.render(article.body)
    return {
      article
    }
  }
}
��ģ����,ʹ��v-htmlָ�����article.body
<div class="col-md-12" v-html="article.body"></div>
չʾ�������������Ϣ


��������ҳ�����������ֹ�������:
����������Ϣ����ע��ť�����ް�ť
- ���ȷ�װ���
pages/article/components/article-meta.vue
<template>
<div class="article-meta">
<nuxt-link :to="{
name: 'profile',
params: {
username: article.author.username
}
}">
}
<img :src="article.author.image"/>
</nuxt-link>
<div class="info">
<nuxt-link :to="{
name: 'profile',
params: {
username: article.author.username
}
}" class="author">{{ article.author.username }}
</nuxt-link>
<span class="date">{{ article.createdAt | date('MMM DD, YYYY') }}</span>
</div>
<button
class="btn btn-sm btn-outline-secondary"
:class="{
active: article.author.following
}"
>
<i class="ion-plus-round"></i>
Follow Eric Simons <span class="counter">({{ article.followCount }})</span>
</button>
<button
    class="btn btn-sm btn-outline-primary"
    :class="{
      active: article.favorited
    }"
    @click="onFavorite(article)"
>
  <i class="ion-heart"></i>
  Favorite Post <span class="counter">({{ article.favoritesCount }})</span>
</button>
</div>
</template>
<script>
import {addFavorite, deleteFavorite} from "@/api/article";
export default {
name: "ArticleMeta",
props: {
article: {
type: Object,
required: true
}
},
methods: {
async onFavorite(article) {
article.favoriteDisabled = true
// ����Ѿ�������,��ȡ������,���������ӵ���
if (article.favorited) {
await deleteFavorite(article.slug)
// ������ͼ
article.favorited = false
article.favoritesCount += -1
} else {
await addFavorite(article.slug)
article.favorited = true
article.favoritesCount += 1
}
article.favoriteDisabled = false
}
}
}
</script>
<style scoped>
</style>
- ��
article/index.vue�е������ط�ʹ�����,���Ҵ���article��article-meta.vue��,article-meta.vueʹ��props����article����,���Ϸ�����
<article-meta :article="article"/>
- ��̬������Ⱦ
article�Լ����������Ϣ,���װ����еĴ��� - ��̬���ް�ť�¼�,��֮ǰ��
home/index.vue�е��÷���ͬ
<button
class="btn btn-sm btn-outline-primary"
:class="{
active: article.favorited
}"
@click="onFavorite(article)"
>
<i class="ion-heart"></i>
Favorite Post <span class="counter">({{ article.favoritesCount }})</span>
</button>
methods: {
async onFavorite(article) {
article.favoriteDisabled = true
// ����Ѿ�������,��ȡ������,���������ӵ���
if (article.favorited) {
await deleteFavorite(article.slug)
// ������ͼ
article.favorited = false
article.favoritesCount += -1
} else {
await addFavorite(article.slug)
article.favorited = true
article.favoritesCount += 1
}
article.favoriteDisabled = false
}
}
TODO ��ע��ť�¼�,��ԭ������ް�ť��ͬ,��װAPI����,�����ť,�жϵ�ǰ״̬,��������
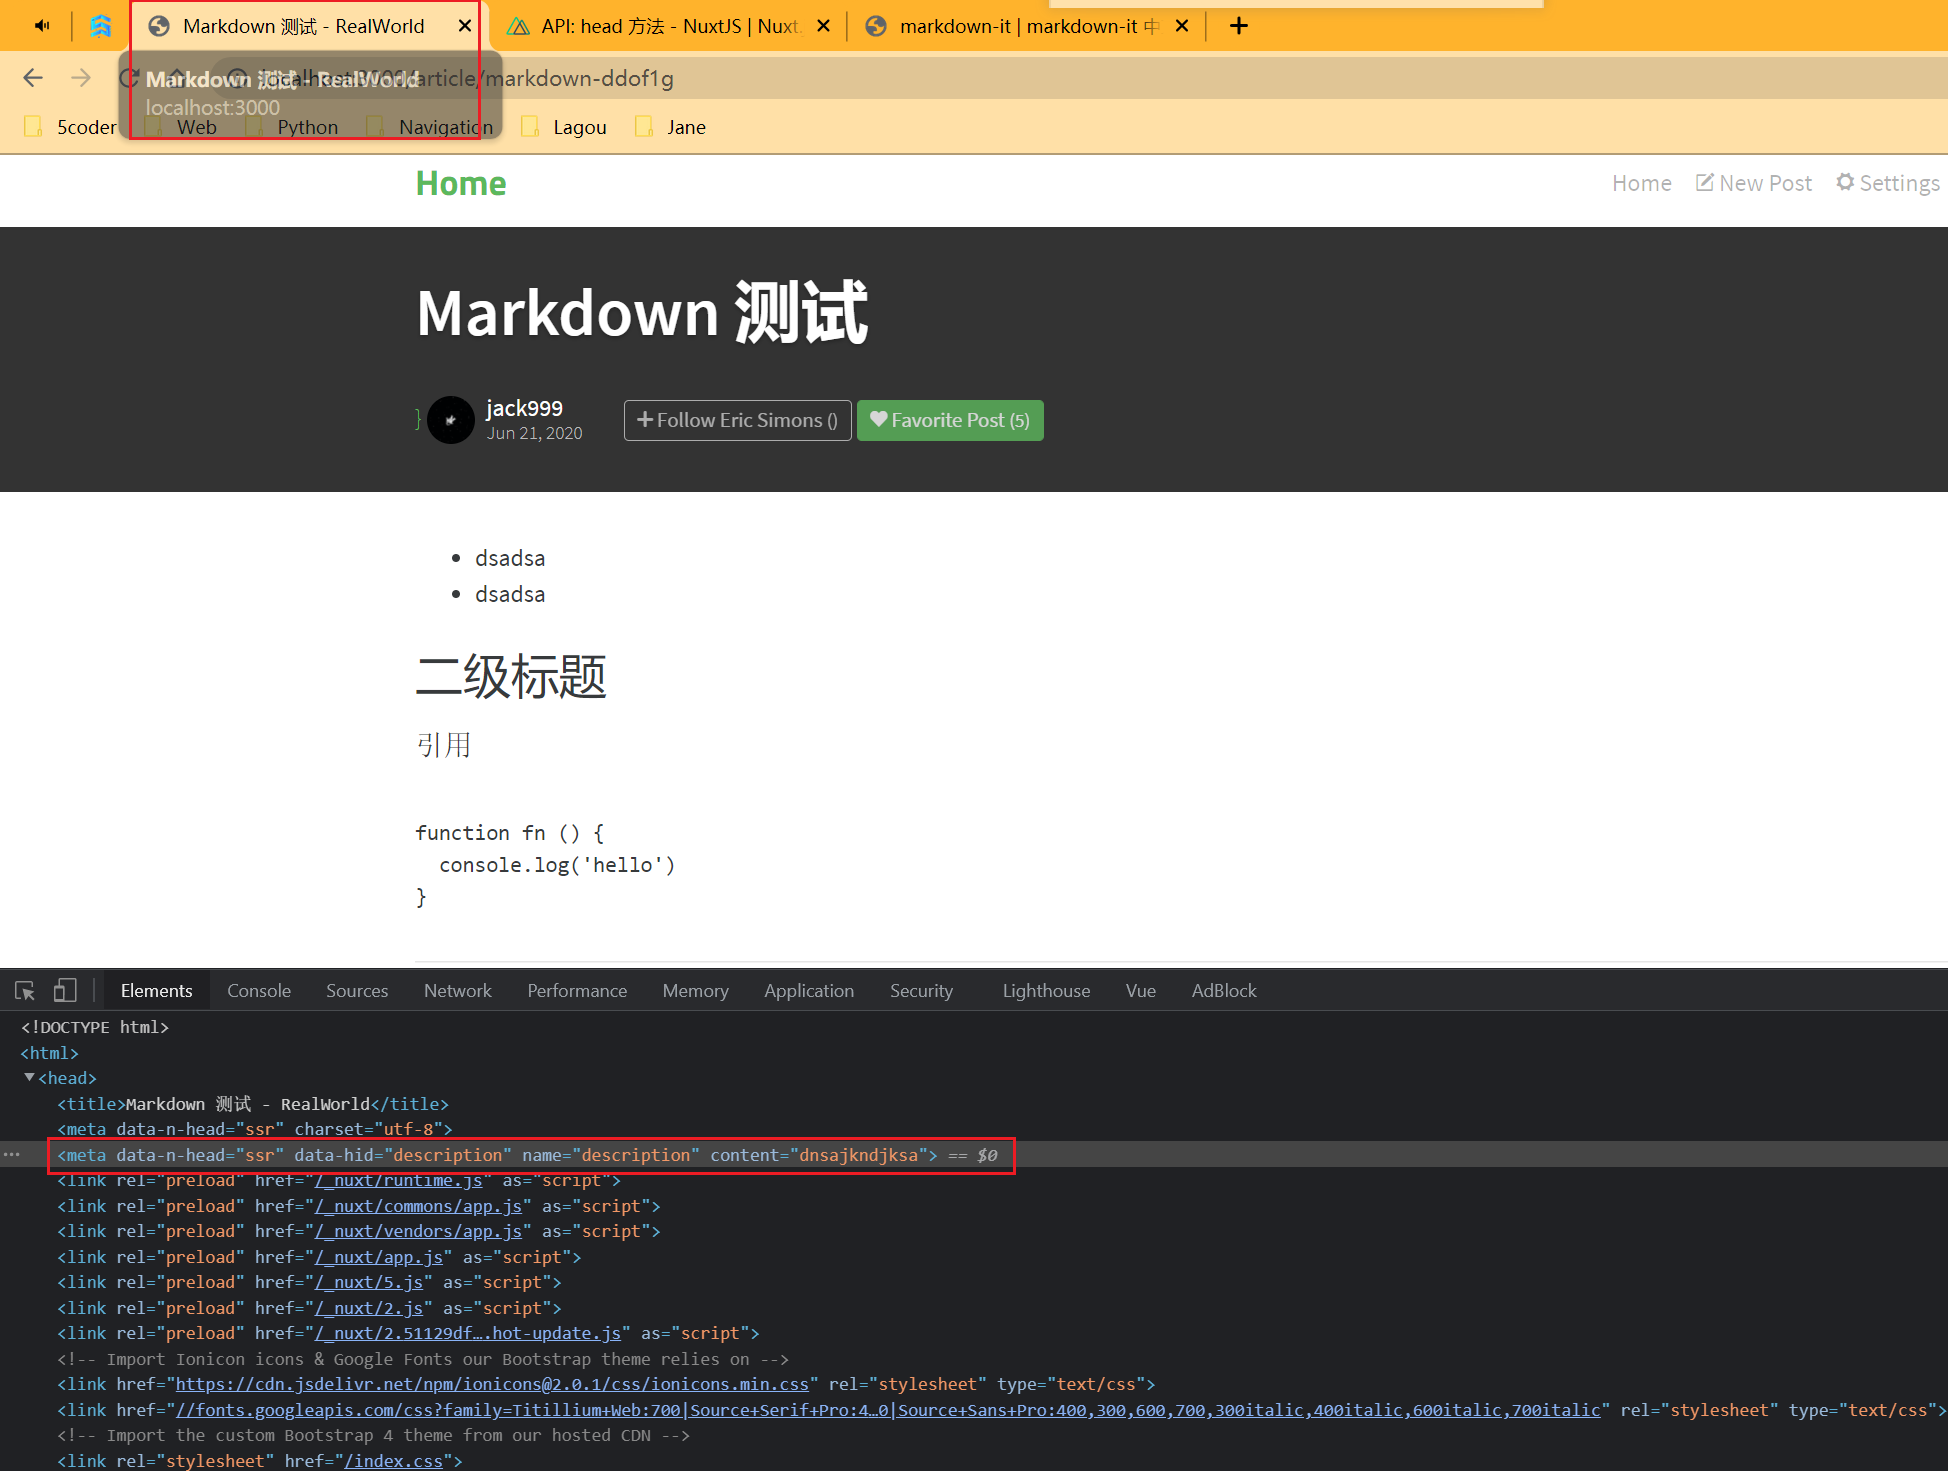
����ҳ��meta�Ż�SEO
-
��ҳ�����,ϣ����ҳ������г������µı���


Nuxt.js ʹ����
vue-meta����Ӧ�õ�ͷ����ǩ(Head)��html ������
- ����:
Object��Functionʹ��
head�������õ�ǰҳ���ͷ����ǩ����
head�������ͨ��this�ؼ�������ȡ���������,���������ҳ����������������ø��Ի���meta��ǩ��
<template>
  <h1>{{ title }}</h1>
</template>

<script>
  export default {
    data() {
      return {
        title: 'Hello World!'
      }
    },
    head() {
      return {
        title: this.title,
        meta: [
          {
            hid: 'description',
            name: 'description',
            content: 'My custom description'
          }
        ]
      }
    }
  }
</script>
ע��:Ϊ�˱���������е� meta ��ǩ������ȷ���Ǹ��������ͬ�ı�ǩ�������ظ�������,��������
hid��Ϊmeta��ǩ��һ��Ψһ�ı�ʶ��š�
article/index.vue
import {addFavorite, deleteFavorite} from "@/api/article";
export default {
name: "ArticleMeta",
props: {
article: {
type: Object,
required: true
}
},
methods: {
async onFavorite(article) {
article.favoriteDisabled = true
// ����Ѿ�������,��ȡ������,���������ӵ���
if (article.favorited) {
await deleteFavorite(article.slug)
// ������ͼ
article.favorited = false
article.favoritesCount += -1
} else {
await addFavorite(article.slug)
article.favorited = true
article.favoritesCount += 1
}
article.favoriteDisabled = false
}
},
head() {
return {
title: `${this.article.title} - RealWorld`,
meta: [
{
hid: 'description',
name: 'description',
content: this.article.description
}
]
}
}
}
��ʾЧ��
��������
- ���ȷ�װ���
article-comments.vue,�����۲��ֳ������������ȡ���ݡ� - ʹ��Vue�������ں���mounted(�˲��ֲ���ҪSEO�Ż�,��˲��ÿͻ�����Ⱦ)��������
- ʹ�÷�װ�õ����,������ص����¶���
article - ��Ⱦ��������
article-comments.vue
<template>
<div>
<form class="card comment-form">
<div class="card-block">
<textarea class="form-control" placeholder="Write a comment..." rows="3"></textarea>
</div>
<div class="card-footer">
<img src="http://i.imgur.com/Qr71crq.jpg" class="comment-author-img"/>
<button class="btn btn-sm btn-primary">
Post Comment
</button>
</div>
</form>
<div class="card"
v-for="comment in comments"
:key="comment.id"
>
<div class="card-block">
<p class="card-text">{{ comment.body }}</p>
</div>
<div class="card-footer">
<nuxt-link
:to="{
name: 'profile',
params: {
username: comment.author.username
}
}"
class="comment-author">
<img :src="comment.author.image" class="comment-author-img"/>
</nuxt-link>
<nuxt-link
:to="{
name: 'profile',
params: {
username: comment.author.username
}
}"
class="comment-author">{{ comment.author.username }}
</nuxt-link>
<span class="date-posted">{{ comment.createdAt | date('MMM DD, YYYY') }}</span>
</div>
</div>
</div>
</template>
<script>
import {getComments} from "@/api/article";
export default {
name: "ArticleComments",
props: {
article: {
type: Object,
required: true
}
},
data() {
return {
comments: [] // ���������
}
},
async mounted() {
const {data} = await getComments(this.article.slug)
console.log(data)
this.comments = data.comments
}
}
</script>
<style scoped>
</style>
��������
Nuxt.js �ṩ�����ַ�������Ӧ�õķ�ʽ:�������ȾӦ�ò��� �� ��̬Ӧ�ò���
���� Nuxt.js �������Ⱦ��Ӧ�ò���ֱ��ʹ�� nuxt ����,��Ӧ���Ƚ��б��빹��,Ȼ�������� Nuxt
����,��ͨ�������������������:
nuxt build
nuxt start
���
Nuxt.js �ṩ��һϵ�г��õ�����, ���ڿ���������
| ���� | ���� |
|---|---|
nuxt | ����һ���ȼ��ص�Web������(����ģʽ)localhost:3000 |
nuxt build | ����Webpack����Ӧ��,ѹ��js��css��Դ(������) |
nuxt start | ������ģʽ����һ��Web������(��Ҫ��ִ��nuxt build) |
nuxt gnerate | ����Ӧ��,������·���������ɶ�Ӧ��HTML�ļ�(���ھ�̬վ��IJ���) |
���ʹ���� Koa/Express �� Node.js Web �������,��ʹ���� Nuxt ��Ϊ�м��,�����Զ��� Web ���������������:
| ���� | ���� |
|---|---|
NODE_ENV=development nodemon server/index.js | ����һ���ȼ��ص��Զ���Web������(����ģʽ) |
NODE_ENV=production node server/index.js | ������ģʽ����һ���Զ���Web������(��Ҫ��ִ��nuxt build) |
����
������ʹ�� --help ��������ȡ��ϸ�÷���������������:
--config-file��-c: ָ��nuxt.config.js���ļ�·����--spa��-s: ���÷���������Ⱦ,ʹ��SPAģʽ--unix-socket��-n: ָ��UNIX Socket��·����
����Խ���Щ���������� package.json :
"scripts": {
  "dev": "nuxt",
  "build": "nuxt build",
  "start": "nuxt start",
  "generate": "nuxt generate"
}
���������ͨ�� npm run <command> ��ִ����Ӧ�������: npm run dev ��
��ʾ: Ҫ���������ݸ�npm����,����Ҫһ�������-- �ű�����(����: npm run dev --���� --spa )
��IJ���ʽ
- ����Host + Port
nuxt.config.js
/*
* Nuxt.js�����ļ�
* */
module.exports = {
router: {
// �Զ���·�ɱ�����
extendRoutes(routes, resolve) {
// �����������,���nuxtĬ�����ɵ�·�ɱ�
routes.splice(0)
routes.push(...[
{
path: '/',
component: resolve(__dirname, 'pages/layout'),
children: [
{
path: '', // Ĭ����·��
name: 'home',
component: resolve(__dirname, 'pages/home/')
},
{
path: '/login',
name: 'login',
component: resolve(__dirname, 'pages/login/')
},
{
path: '/register',
name: 'register',
component: resolve(__dirname, 'pages/login/')
},
{
path: '/profile/:username',
name: 'profile',
component: resolve(__dirname, 'pages/profile/')
},
{
path: '/settings/',
name: 'settings',
component: resolve(__dirname, 'pages/settings/')
},
{
path: '/editor/',
name: 'editor',
component: resolve(__dirname, 'pages/editor/')
},
{
path: '/article/:slug',
name: 'article',
component: resolve(__dirname, 'pages/article/')
},
]
}
])
},
linkActiveClass: 'active', // default nav-link-active,
},
// ע����
plugins: [
'~/plugins/request.js',
'~/plugins/dayjs.js'
],
head: {
meta: [
{charset: 'utf-8'}
]
},
server: {
host: '0.0.0.0',
port: 3000
}
}
-
ѹ��������
-
�ѷ���������������
��Ҫ�������������ļ���Ŀ¼
- .nuxt
- static
- nuxt.config.js
- package.json
- package-lock.json
windows��ѹ�������ļ�,�õ�
realworld-nuxtjs.zip�ļ�ʹ��
src -r realworld-nuxtjs.zip �û���@������ip:������Ŀ¼��ѹ�������������� -
��ѹ
- ʹ��
unzip realworld-nuxtjs.zip��ѹ�ļ�
- ʹ��
-
��װ����
-
��װ����ǰһ��Ҫ�Ȱ�װ
node.js
- ��װ��ʽ:
- ����linux��װ��https://nodejs.org/dist/v14.17.3/node-v14.17.3-linux-x64.tar.xz
- ͬ���沽��,scp�����ļ���������
usr/localĿ¼ - ʹ��
tar xf node-v14.17.3-linux-x64.tar.xz��ѹ cd node-v14.17.3-linux-x64./bin/node -v�鿴node�汾- ����������
ln -s /usr/local/node-v14.17.3-linux-x64/bin/npm /usr/local/binln -s /usr/local/node-v14.17.3-linux-x64/bin/node /usr/local/bin
- ��װyarn
npm install yarn -g
- ����yarn������
ln -s /usr/local/node-v14.17.3-linux-x64/bin/yarn /usr/local/bin
- ʹ��
yarn����,��װ����
- ��װ��ʽ:
-
-
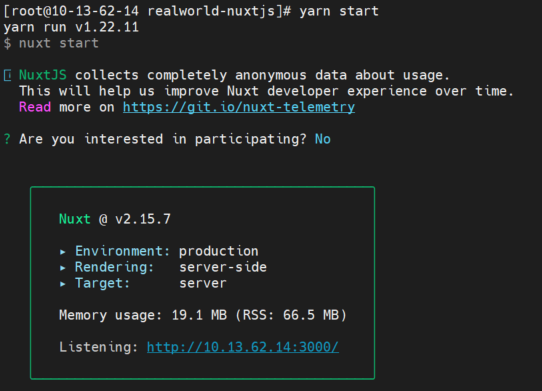
��������
- ʹ������:
yarn start��������
- ʹ������:
-
���������:������IP:3000
- ǰ����Ҫ��3000�˿ڵķ���ǽ���ô�
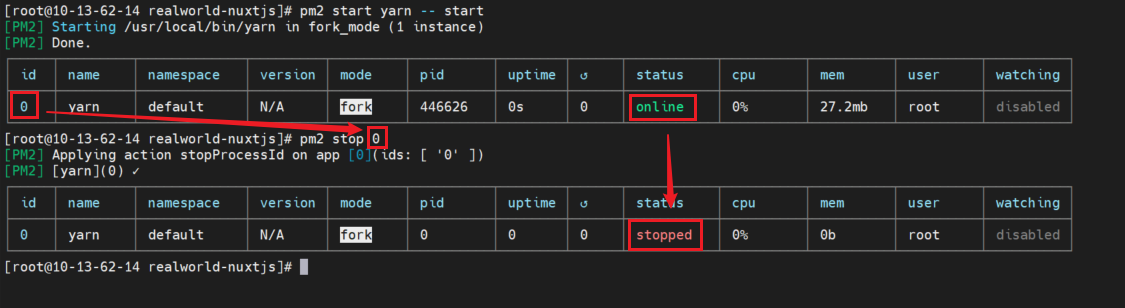
ʹ��PM2����Node����
ʹ��������ʽ��������,�����б�ռ��,�������б��رպ�,����ͱ��ر���,����ʹ��PM2,PM2ר����������node���̵�Ӧ�á�
-
GitHub�ֿ��ַ:https://github.com/Unitech/pm2
-
�ٷ��ĵ�:https://pm2.keymetrics.io/docs/usage/quick-start/
-
��װ:yarn global add pm2

-
����:pm2 start �ű�·��
- ����ʹ��pm2 start yarn �C start��ʽ����,-- startΪ���εķ�ʽ

-
�ر�pm2
- pm2 stop 0
PM2��������

�Զ����������
��ͳ�IJ���ʽ

�ִ�������ʽ(CI/CD:�������ɡ���������)

���Զ���������
- ʹ��GitHub Actionsʵ���Զ�����

-
������
- Linux������
- �Ѵ����ύ��GitHubԶ�ֿ̲�
-
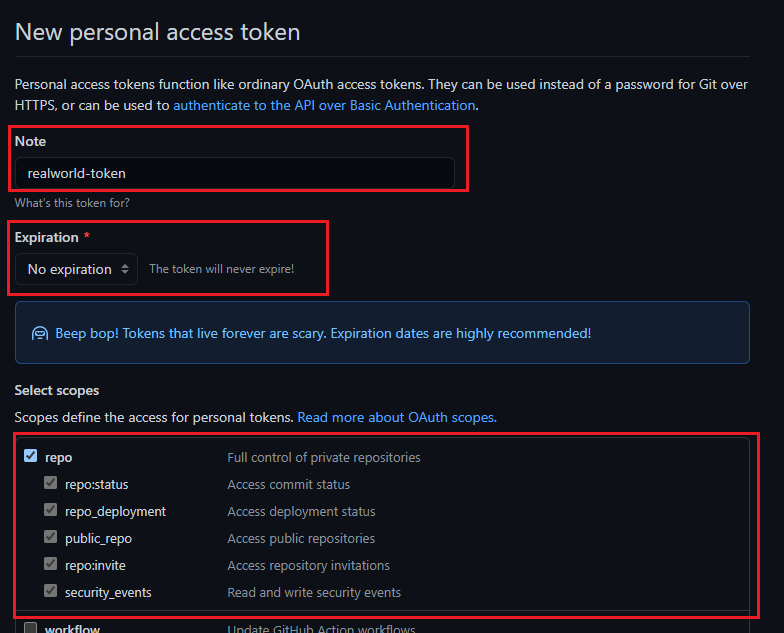
����GitHub Access Token
-
����:https://github.com/settings/tokens


-
���õ���Ŀ��Secrets��:https://github.com/5coder-leo/realworld/settings/secrets/actions


����GitHub Actionsִ�нű�
-
����Ŀ��Ŀ¼����
.github/workflowsĿ¼ -
����
main.yml��workflowsĿ¼��main.yml
name: Publish And Deploy Demo on: push: tags: # ��ǩ��v��ͷ,�ͻᴥ�����½ű� - 'v*' jobs: build-and-deploy: runs-on: ubuntu-latest # ���л��� steps: # ����Դ�� - name: Checkout uses: actions/checkout@master # ������� - name: Build uses: actions/setup-node@master - run: npm install - run: npm run build - run: tar -zcvf release.tgz .nuxt static nuxt.config.js package.json package-lock.json pm2.config.json # ���� Release - name: Create Release id: create_release uses: actions/create-release@master env: GITHUB_TOKEN: ${{ secrets.TOKEN }} with: tag_name: ${{ github.ref }} release_name: Release ${{ github.ref }} draft: false prerelease: false # �ϴ���������� Release - name: Upload Release Asset id: upload-release-asset uses: actions/upload-release-asset@master env: GITHUB_TOKEN: ${{ secrets.TOKEN }} with: upload_url: ${{ steps.create_release.outputs.upload_url }} asset_path: ./release.tgz asset_name: release.tgz asset_content_type: application/x-tgz # �������� - name: Deploy uses: appleboy/ssh-action@master with: host: ${{ secrets.HOST }} username: ${{ secrets.USERNAME }} password: ${{ secrets.PASSWORD }} port: ${{ secrets.PORT }} script: | cd /home/leo/realworld-nuxtjs wget https://github.com/5coder-leo/realworld/releases/latest/download/release.tgz -O release.tgz tar zxvf release.tgz npm install --production pm2 reload pm2.config.json -
������


-
����PM2�����ļ�
pm2.config.json{ "apps": [ { "name": "RealWorld", "script": "npm", "args": "start" } ] } -
�ύ����
git add . git commit -m "���²���" git push -u origin master # ��ʼ����tag��ǩ git tag v0.1.0 git push origin v0.1.0 -
�鿴�Զ�����״̬

-
������ַ:http://106.75.130.241:3000/
