在上一篇文章里【JavaScript事件绑定进阶认识:即如何给一个事件添加多个相同的事件】,我们讲到obj.addEventListener(type,fn,false)里的三个参数,其中第三个参数是布尔值,决定了事件冒泡过程还是事件捕获过程(false表示冒泡过程,true表示捕获过程)。
1、那什么是事件冒泡过程和捕获过程?
从一张图来认识DOM事件流是怎么样的:
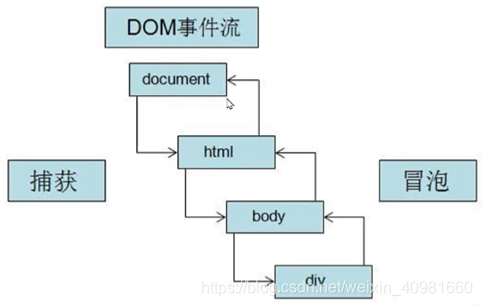
捕获过程,也就是从父元素到子元素的过程:document→html→body→div
冒泡过程,也就是从子元素到父元素的过程:div→body→html→document
举个栗子形象理解冒泡过程:
<!DOCTYPE html>
<html lang="en">

<head>
    <meta charset="UTF-8">
    <meta name="viewport" content="width=device-width, initial-scale=1.0">
    <meta http-equiv="X-UA-Compatible" content="ie=edge">
    <title>Document</title>
    <style>
        #box1 {
            width: 300px;
            height: 300px;
            background-color: yellowgreen;
        }
        #box2 {
            width: 200px;
            height: 200px;
            background-color: pink;
        }
        #box3 {
            width: 100px;
            height: 100px;
            background-color: skyblue;
        }
    </style>
</head>
<body>
    <div id="box1">
        <div id="box2">
            <div id="box3"></div>
        </div>
    </div>
    <script>
        // 获取元素
        var box1 = document.getElementById("box1");
        var box2 = document.getElementById("box2");
        var box3 = document.getElementById("box3");

        // 添加点击事件
        box1.addEventListener("click",function () {
            console.log(1);
        },false);
        box2.addEventListener("click",function () {
            console.log(2);
        },false);
        box3.addEventListener("click",function () {
            console.log(3);
        },false);
    </script>
</body>
</html>
我们通过点击不同的div元素,代码显示的效果是这样的:
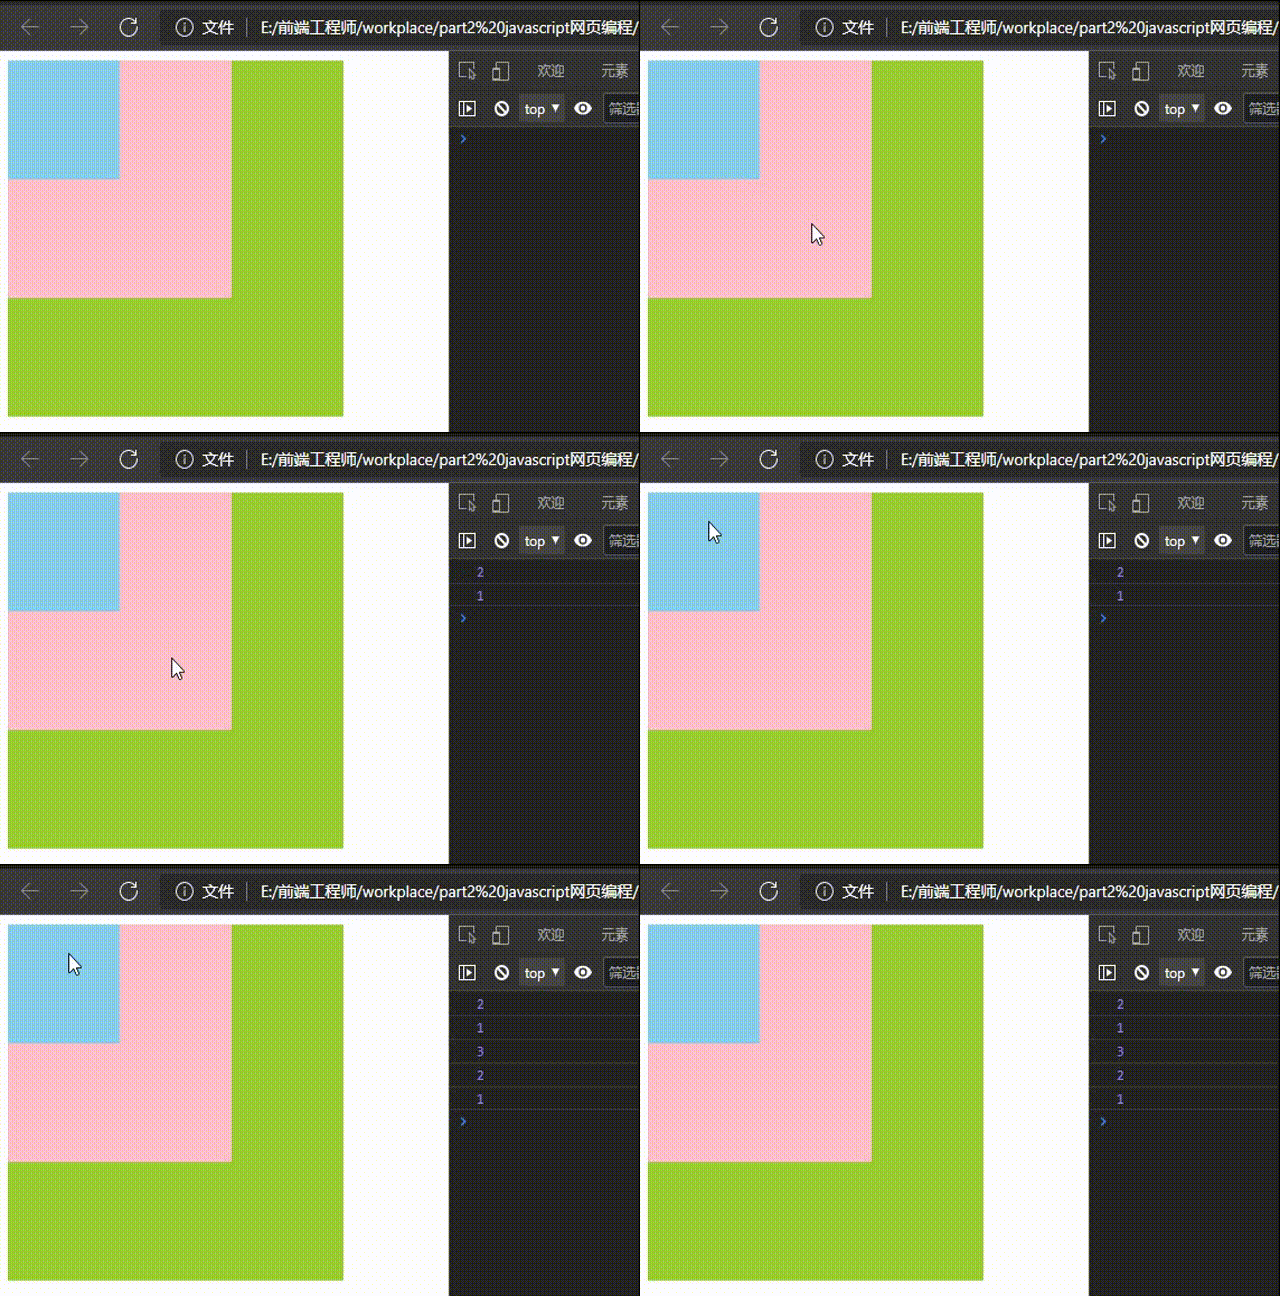
分析:obj.addEventListener()方法的第三个参数,用来决定【事件流方向】,事件流方向有冒泡过程和捕获过程两种。其中,false决定了事件是冒泡过程,即box3→box2→box1。
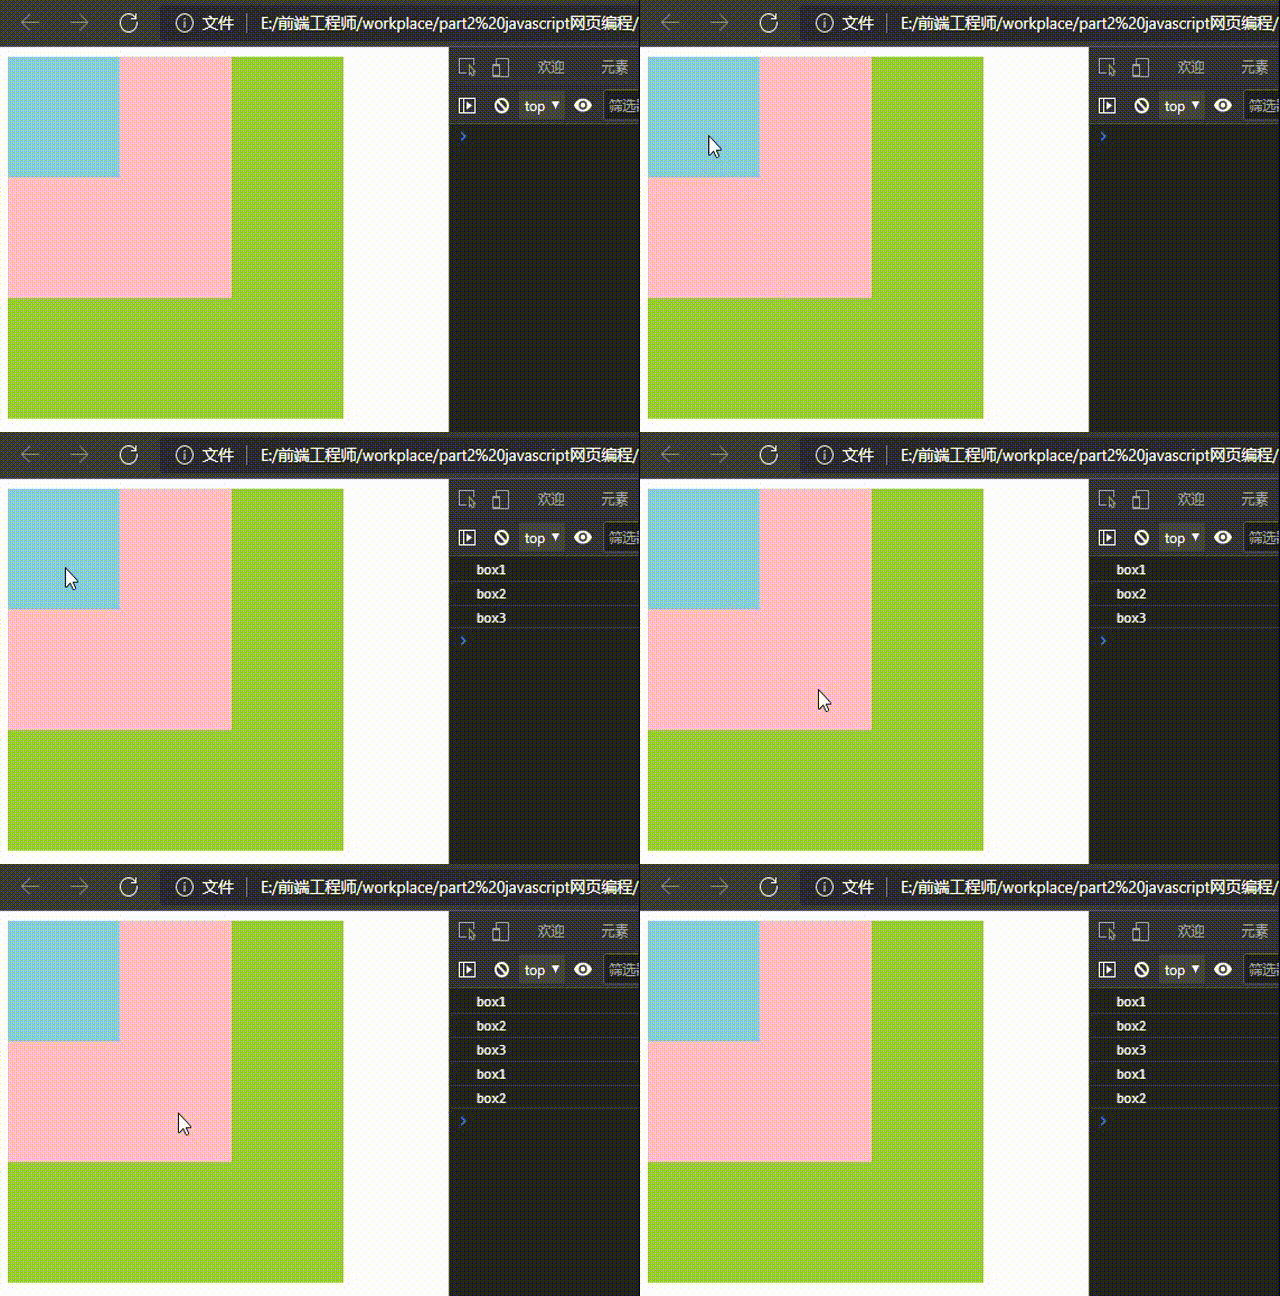
同样的,事件的捕获过程只需要修改第三个参数为true即可
举栗:事件的捕获过程
<!DOCTYPE html>
<html lang="en">
<head>
    <meta charset="UTF-8">
    <meta name="viewport" content="width=device-width, initial-scale=1.0">
    <meta http-equiv="X-UA-Compatible" content="ie=edge">
    <title>Document</title>
    <style>
        #box1 {
            width: 300px;
            height: 300px;
            background-color: yellowgreen;
        }
        #box2 {
            width: 200px;
            height: 200px;
            background-color: pink;
        }
        #box3 {
            width: 100px;
            height: 100px;
            background-color: skyblue;
        }
    </style>
</head>

<body>
    <div id="box1">
        <div id="box2">
            <div id="box3"></div>
        </div>
    </div>
    <script>
        // 获取元素
        var box1 = document.getElementById("box1");
        var box2 = document.getElementById("box2");
        var box3 = document.getElementById("box3");

        box1.addEventListener("click",function () {
            console.log(this.id);
        },true);
        box2.addEventListener("click",function () {
            console.log(this.id);
        },true);
        box3.addEventListener("click",function () {
            console.log(this.id);
        },true);
    </script>
</body>
</html>
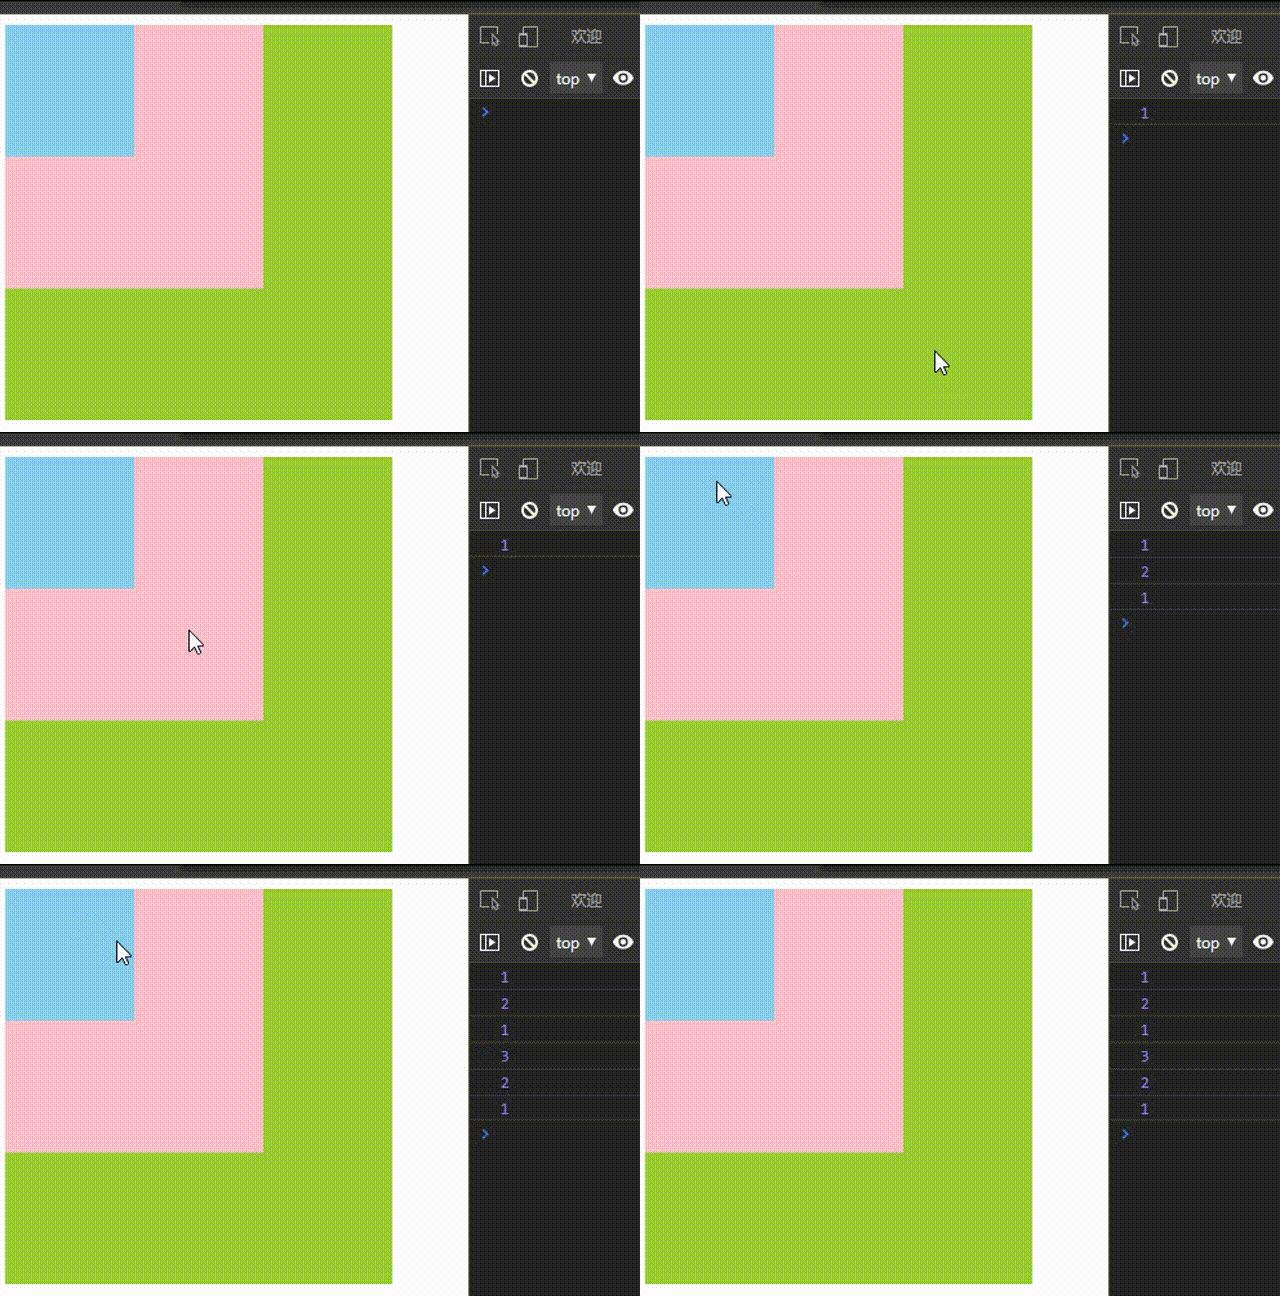
2、需要注意的是,onclick方法点击事件只有冒泡过程,没有捕获过程
举栗:
<!DOCTYPE html>
<html lang="en">
<head>
    <meta charset="UTF-8">
    <meta name="viewport" content="width=device-width, initial-scale=1.0">
    <meta http-equiv="X-UA-Compatible" content="ie=edge">
    <title>Document</title>
    <style>
        #box1 {
            width: 300px;
            height: 300px;
            background-color: yellowgreen;
        }

        #box2 {
            width: 200px;
            height: 200px;
            background-color: pink;
        }

        #box3 {
            width: 100px;
            height: 100px;
            background-color: skyblue;
        }
    </style>
</head>
<body>
    <div id="box1">
        <div id="box2">
            <div id="box3"></div>
        </div>
    </div>
    <script>
        // 获取元素
        var box1 = document.getElementById("box1");
        var box2 = document.getElementById("box2");
        var box3 = document.getElementById("box3");

        // onclick 属性添加事件方法只有冒泡过程,没有捕获过程
        box1.onclick = function () {
            console.log(1);
        };
        box2.onclick = function () {
            console.log(2);
        };
        box3.onclick = function () {
            console.log(3);
        };
    </script>
</body>
</html>
3、冒泡的实践用法–隔行换色
没有学习冒泡过程时候实现隔行换色的方法:
<!DOCTYPE html>
<html lang="en">

<head>
    <title>Document</title>
    <style>
        * {
            margin: 0;
            padding: 0;
        }
        ul {
            width: 300px;
            border: 1px dashed #f0f;
            margin: 50px auto;
            font-size: 24px;
            line-height: 48px;
            list-style: none;
        }
        li {
            padding-left: 20px;
            cursor: pointer;
        }

    </style>
</head>

<body>
    <ul id="list">
        <li>刘亦菲</li>
        <li>杨幂</li>
        <li>唐嫣</li>
        <li>赵丽颖</li>
        <li>刘诗诗</li>
    </ul>
    <script>
        //需要:让每个li被点击后,自己添加特殊背景色,而其他兄弟不添加
        //实现的逻辑思路:给每一个li元素添加点击事件,每个事件函数内部都排除其他高亮颜色,保留自己
        var liss = document.getElementsByTagName('li');
        for(var i=0;i<liss.length;i++){
            liss[i].onclick = function(){
                //1.排除所有
                for(var j=0;j<liss.length;j++){
                    liss[j].style.backgroundColor='';
                }
                //2.保留自己
                this.style.backgroundColor='pink';
            }
        }
    </script>
</body>
</html>
实现效果如下:
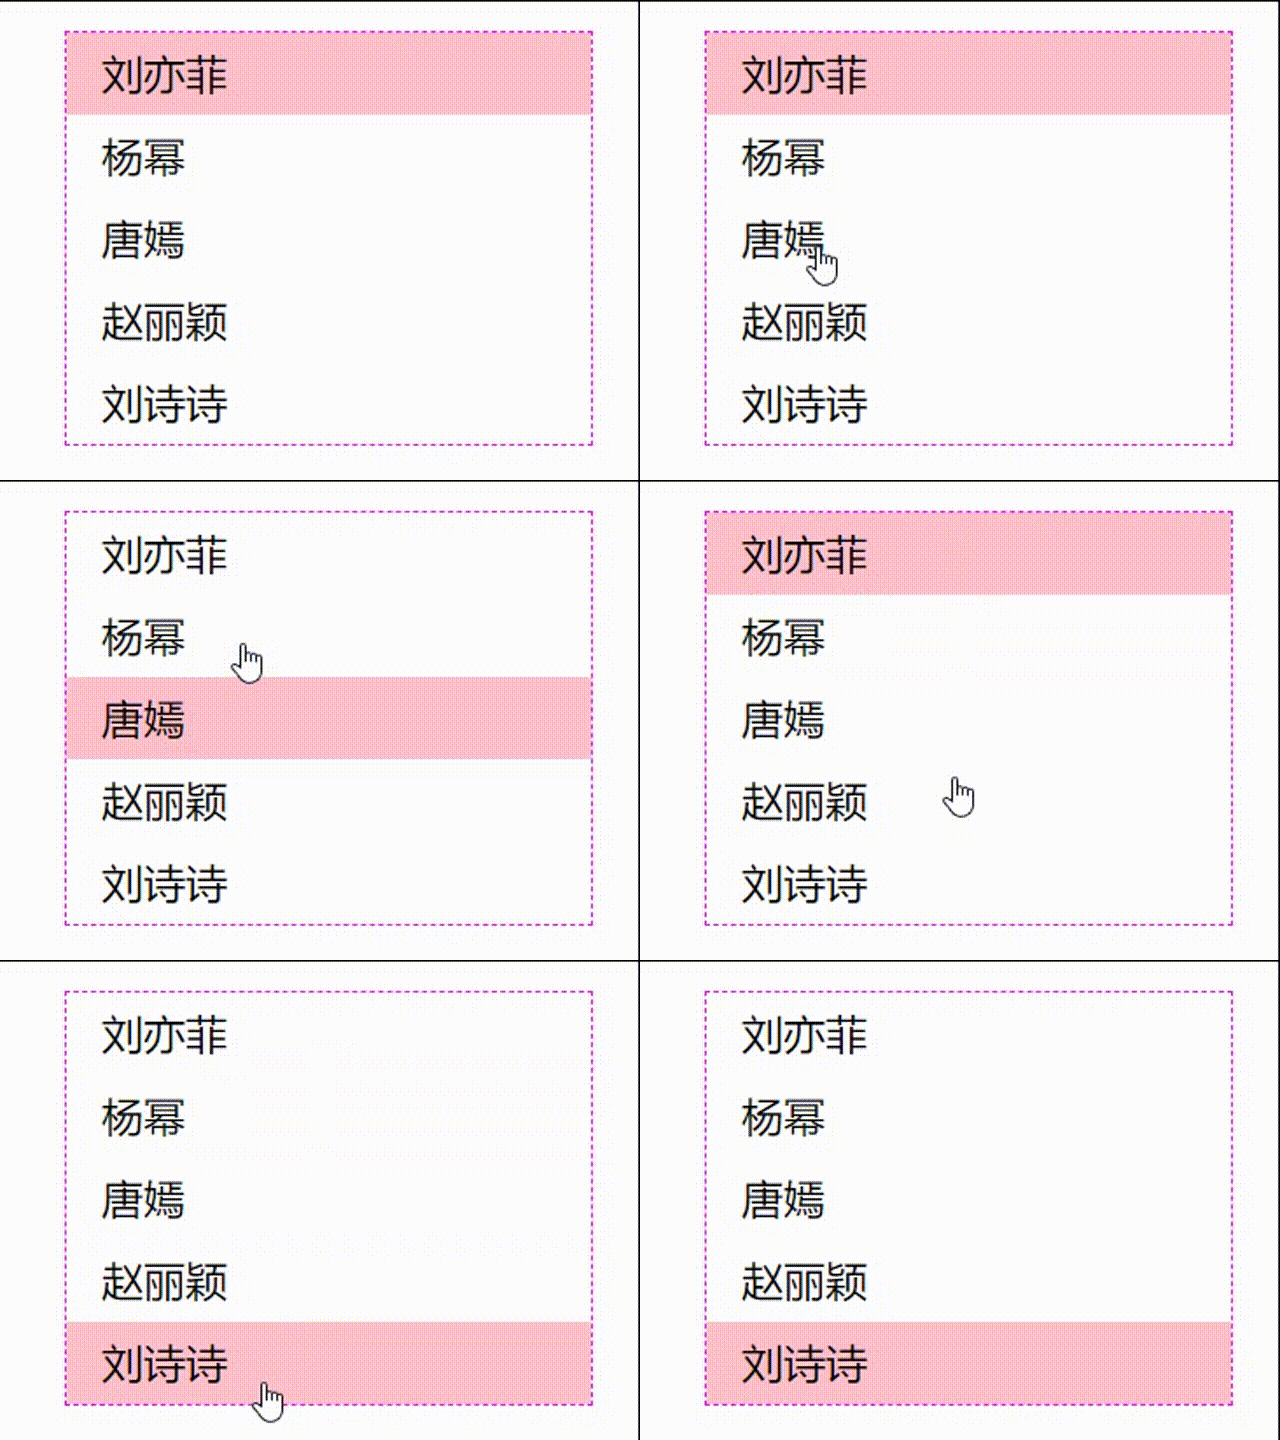
分析:
需求:让每个li被点击后,自己添加特殊背景色,而其他兄弟不添加
实现的逻辑思路:给每一个li元素添加点击事件,每个事件函数内部都排除其他高亮颜色,保留自己
使用冒泡方法同样实现隔行换色:
先来认识事件委托的概念:
事件委托:指的是将一些子级的公共类型的事件委托给他们的父级元素,在父级元素想办法找到真正触发事件的最底层的子元素源(父级办法就是这个事件e),从而对子元素源进行某种设置。(实际上就是点击子级元素,但是由于冒泡的缘故,子级元素就把事件委托给父级元素进行加载,父元素通过e找到最底层真正触发事件的子元素)
此处谈到的事件函数的一个e参数,现在我只需要知道:只要触发事件,函数内部都可以得到一个事件对象e,这个对象中存储了关于事件的一系列数据,这个e对象有各种方法,其中有一个方法e.target可以获取触发事件发生的真正元素。
代码实现:
<!DOCTYPE html>
<html lang="en">
<head>
    <title>Document</title>
    <style>
        * {
            margin: 0;
            padding: 0;
        }
        ul {
            width: 300px;
            border: 1px dashed #f0f;
            margin: 50px auto;
            font-size: 24px;
            line-height: 48px;
            list-style: none;
        }
        li {
            padding-left: 20px;
            cursor: pointer;
        }

    </style>
</head>
<body>
    <ul id="list">
        <li>刘亦菲</li>
        <li>杨幂</li>
        <li>唐嫣</li>
        <li>赵丽颖</li>
        <li>刘诗诗</li>
    </ul>
    <script>
        //1.获取元素
        var list = document.getElementById('list');
        var lis = list.children;
        //2.给元素添加事件
        list.onclick = function(e){
            // 点击ul内部任一子元素li,由于冒泡的影响,子元素都会触发父级元素,此时会在父元素list生成一个参数e,这个参数e储存了关于事件函数内部各种数据,其中包括 e.target 属性,这个属性记录了真正触发父级元素事件发生的子元素
            //2.1 排他思想
            for(var i=0;i<lis.length;i++){
                lis[i].style.backgroundColor = '';
            }
            //2.2 保留自己
            e.target.style.backgroundColor = 'pink';
        }
    </script>
</body>
</html>
分析:利用事件冒泡原理,我们可以通过点击父级元素list轻松找到真正触发事件发生子元素源,从而对子元素的样式进行设置。
下一篇,我们将详细介绍事件函数参数e的具体用法,这个藏着有关父级元素事件被触发后的各种信息,就像飞机黑匣子般藏着各种还原事实真相的信息。
参考素材:拉钩大前端训练营,JavaScript高级程序设计。希望整理的知识笔记对大家JavaScript进阶有所帮助,也诚恳希望大家批评指正。