目录
3. 实现地图点位宽度自动撑满?width:?fit-content;
4. 实现 弹框 / 点位 首次加载的 放大 / 跳动 动画效果
5. zoom 和 scale() 比较,前者会让 echarts 有问题
7. 饼图中 通过 async/await 异步获取模拟数据、引入 echarts 顺序
- 该项目基本是基于 Vue3组件库 导出的 dist?进行编写
1. 大标题 渐变 + 阴影 效果
- ?文字渐变背景色 不可以和 文字阴影 一起设置,会导致:
- 文字渐变本质是设置 div 背景,将文字部分镂空,阴影一定会在背景之上
解决方案:使用两个标题组件,定位在左上角,一个组件只设置文字渐变色,一个组件只设置文字阴影,更改二者 z-index<div> <t-title-base :title="title" :c-style="cStyle"></t-title-base> <t-title-base :title="title" :c-style="cStyleShadow"></t-title-base> </div> // 文本渐变样式 cStyle: { wrapper: { ...commonWrapepr, zIndex: '1', // 更改层级,防止覆盖 }, title: { ...commonTitle, backgroundImage: 'linear-gradient(0deg, #B0CAFF 0%, #FFF1BA 100%)', backgroundClip: 'text', }, }, // 文字阴影样式 cStyleShadow: { wrapper: { ...commonWrapepr, zIndex: '0', // 更改层级,防止覆盖 }, title: { ...commonTitle, textShadow: '0px 21px 13px rgba(0, 8, 25, 0.75)', }, },
- 其他问题:
- 无法设置标题文字间距,是因为标题组件设置的默认最大宽度限制了,改变最大宽度即可
- 加粗后和设计稿的字重视觉上不一致,本次是因为 没换字体 的原因?@font-face?{
??????font-family:?FZZongYi-M05S;
??????src:?url(http://xxx.ttf);
????}- tab 切换 最好放在一个文件里,省的重做,平行四边形 tab 切换的注意事项请参考?CSS3 clip-path 属性的使用示例(平行四边形的 tab按钮 / 不规则八边形弹框边角效果 / ...)不支持 IE 哦_Lyrelion的博客-CSDN博客
2. 图片内边阴影效果
- 原理不难:设置一个 div,填充背景图片
- 正常情况下加内阴影:box-shadow:?0?0?40px?10px?#000?inset;
- 鼠标滑过的时候扩大内阴影:box-shadow:?0?0?60px?30px?#000?inset;
3. 实现地图点位宽度自动撑满?width:?fit-content;
- 之前实现这种需求,一直用 padding、min-width、max-width
- 如果 min-width < 点位宽度 <?max-width,刚好这样,就会导致点位宽度按照?max-width 来,很丑
- 如何实现点位宽度真正的自适应呢?搭配?width:?fit-content; 使用即可
4. 实现 弹框 / 点位 首次加载的 放大 / 跳动 动画效果
- 有两种方法:自己写个执行一次的动画 / 调用 animate.min.css
- 写一个动画效果,仅执行一次,以 弹框首次加载 放大再复位 为例
- 如果是自己写的话,得考虑下动画过程中 DOM 元素有没有足够的空间展示全,我是通过设置 padding 留下足够的空间让其做动画
      .dialog-outer {
        animation: appear 0.8s linear;
      }

      @keyframes appear {
        0% {
          opacity: 0;
          transform: scale(1);
        }
        50% {
          opacity: 0.5;
          transform: scale(1.03);
        }
        100% {
          opacity: 0.9;
          transform: rotate(1);
        }
      }
使用?animate.min.css?实现跳动效果- 参考网站:animate.css 中文文档在线预览
- 使用方法很简单,引入 animate.css ,在需要动画效果的 DOM 元素上添加类名
- 注意:所有动画类名必须搭配 animated 类名进行使用!
<link href="./animate.min.css" rel="stylesheet" />
    <div class="map-point animated bounce">
      <img class="ponit" src="./assets/point.png" alt="地图点位" />
    </div>
5. zoom 和 scale() 比较,前者会让 echarts 有问题
- 做项目的时候,突然要求把弹框缩放为原来设计稿的 1/4
- 如果使用 zoom: 0.25 ,会导致 echarts 图表出现问题,鼠标滑过缩放后的 echarts 图表会导致 tooltip 无法正常显示
- 使用 transform: scale(0.25);,一定要搭配 transform-origin: 0 0?一起使用:
      /* 此处用 zoom 会导致echarts图表选中有问题 */
      /* zoom: 0.25; */
      transform: scale(0.25);
      /* 修改缩放后的位置,将页面居左居上 */
      transform-origin: 0 0;
6. 实现图片渐变边框效果、vue 动态内联样式写法复习
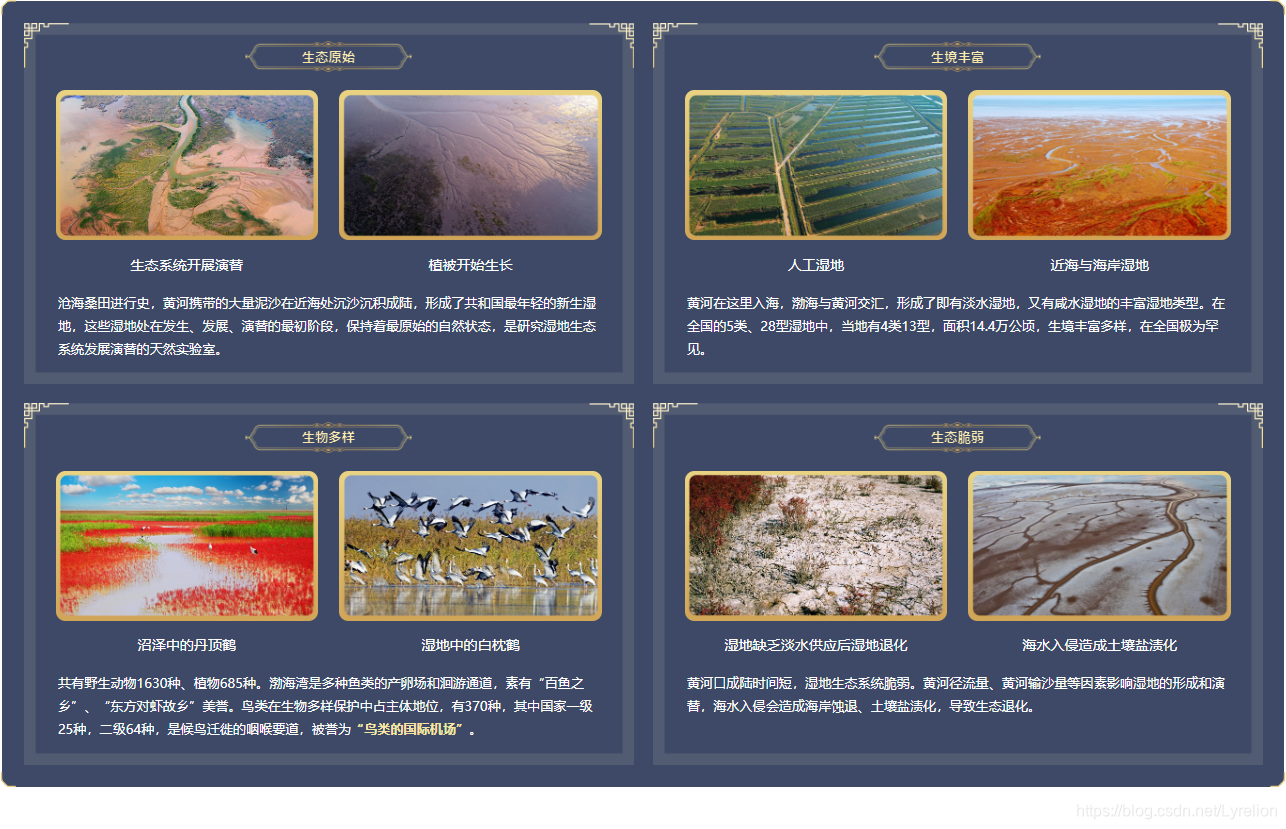
- 上面的图片边框是渐变的,直接设置 边框渐变 + 圆角 是不能实现这个效果的
- 边框渐变其实是通过div 模拟的,用一个 渐变背景的 div 包裹住 带背景图片的 div,分别给两个 div 设置圆角
- 为了让图片可以进行更多的设置,所以把图片写成了背景图片,这样可以设置位置大小等等很多样式
  <div class="image-border">
    <!-- 动态绑定背景图片 -->
    <div class="image" :style="{
             background: `url(${cardInfo.imageOneSrc}) no-repeat center center`,
             backgroundSize: '100% 100%'
         }"></div>
  </div>

    /* 图片渐变边框(本质是个div) */
    .image-box .image-border {
      width: 100%;
      height: 619px;
      border-radius: 40px;
      padding: 10px;
      background: linear-gradient(0deg, #D1A558 0%, #E9D383 100%);
      overflow: hidden;
    }

    /* 图片本身 - 通过设置背景来设置图片 */
    .image-box .image-border .image {
      width: 100%;
      height: 100%;
      border-radius: 40px;
      /* 设置默认背景图片 */
      background: url(./assets/11.png) no-repeat center center;
      background-size: 100% 100%;
    }
- Vue3 动态绑定样式要注意的点:
- :style="{? }" 冒号、双引号、大括号
- 内部的样式,属性必须是驼峰命名,属性值必须用(模板)字符串的形式
7. 饼图中 通过 async/await 异步获取模拟数据、引入 echarts 顺序
- 用到的饼图组件内部使用了 echarts 实现,因此在引入 饼图组件的 dist 之前,应该引入 echarts 依赖,防止奇怪的报错
- echarts 依赖一般是去官方 github 上下载 dist,但是我经常打不开
- 可以通过 yarn add echarts 的方式,在 node_modules 中找到 dist,里面有 echarts.js
          // 获取饼图数据
          const getPieData = async () => {
            const serveData = () =>
              new Promise((resolve, err) => {
                setTimeout(() => {
                  // 服务器端返回的饼图数据
                  sdata = [
                    { value: 291, name: "淡水浮游植物" },
                    { value: 116, name: "海洋浮游植物" },
                    { value: 195, name: "自然分布维管束植物" },
                    { value: 83, name: "栽培植物" },
                  ];
                  resolve(sdata);
                }, 1000);
              });
            console.log("serve", await serveData());
            state.chartData = await serveData();
          };
8. 日期对象格式化为字符串的方法
- 该方法使用时,极其容易写错格式化格式,比如 分钟mm,月MM
- startTime:?dateFormat(startTime,?'yyyy-MM-dd').substr(0,?10),
endTime:?dateFormat(endTime,?'yyyy-MM-dd').substr(0,?10),/** * 日期对象转为日期字符串. * * @param date - 需要格式化的日期对象. * @param sFormat - 输出格式,默认为yyyy-MM-dd 年:y,月:M,日:d,时:h,分:m,秒:s. * @example dateFormat(new Date()) "2017-02-28" * @example dateFormat(new Date(),'yyyy-MM-dd') "2017-02-28" * @example dateFormat(new Date(),'yyyy-MM-dd hh:mm:ss') "2017-02-28 09:24:00" * @example dateFormat(new Date(),'hh:mm') "09:24" * @example dateFormat(new Date(),'yyyy-MM-ddThh:mm:ss+08:00') "2017-02-28T09:24:00+08:00" * @returns {string} */ function dateFormat(date, sFormat) { const time = { Year: 0, TYear: '0', Month: 0, TMonth: '0', Day: 0, TDay: '0', Hour: 0, THour: '0', hour: 0, Thour: '0', Minute: 0, TMinute: '0', Second: 0, TSecond: '0', Millisecond: 0, }; time.Year = date.getFullYear(); time.TYear = String(time.Year).substr(2); time.Month = date.getMonth() + 1; time.TMonth = time.Month < 10 ? `0${time.Month}` : String(time.Month); time.Day = date.getDate(); time.TDay = time.Day < 10 ? `0${time.Day}` : String(time.Day); time.Hour = date.getHours(); time.THour = time.Hour < 10 ? `0${time.Hour}` : String(time.Hour); time.hour = time.Hour < 13 ? time.Hour : time.Hour - 12; time.Thour = time.hour < 10 ? `0${time.hour}` : String(time.hour); time.Minute = date.getMinutes(); time.TMinute = time.Minute < 10 ? `0${time.Minute}` : String(time.Minute); time.Second = date.getSeconds(); time.TSecond = time.Second < 10 ? `0${time.Second}` : String(time.Second); time.Millisecond = date.getMilliseconds(); return sFormat .replace(/yyyy/gi, String(time.Year)) .replace(/yyy/gi, String(time.Year)) .replace(/yy/gi, time.TYear) .replace(/y/gi, time.TYear) .replace(/MM/g, time.TMonth) .replace(/M/g, String(time.Month)) .replace(/dd/gi, time.TDay) .replace(/d/gi, String(time.Day)) .replace(/HH/g, time.THour) .replace(/H/g, String(time.Hour)) .replace(/hh/g, time.Thour) .replace(/h/g, String(time.hour)) .replace(/mm/g, time.TMinute) .replace(/m/g, String(time.Minute)) .replace(/ss/gi, time.TSecond) .replace(/s/gi, String(time.Second)) .replace(/fff/gi, String(time.Millisecond)); }9. 折线图表遇到的问题
- ?折线图每次重新发送请求时,都需要清空数组,而折线图接受的数据格式必须是二维数组,每个内部数组表示一个系列
- 也就是说,如果当前只有一条折线,应该清空为 [[]],如果当前有多条折线,应该写为 [[], [], []...]
设置折线点的样式,涉及到了修改 series,这个组件不支持直接在 options里写 series,最后是这么改的,你懂我意思吧?
查看 echarts tooltip 接受的数据 params,直接在 formatter 中打印即可formatter: (params) => { const xname = params[0].name || ''; let content = `<div> <div style="margin-left:20px">${xname}</div>`; params.forEach((item) => { console.log(item); content += `<div style="display:flex;align-items:center;"> <i style="display:block;margin: 0 4px;width:40px;height:40px; border-radius:50%;background-color:${item.color}"></i> <div style="margin-left: 20px; font-size:50px;"> ${item.seriesName}:${item.value}</div> </div>`; }); return `${content}</div>`; },
- 我还没解决的问题:chartNames 换成动态获取之后,图例/提示框 都会只显示系列名的头一个字,忧郁?
10. 列表组件使用的注意事项
- vue3 列表组件本质上是基于 ElementPlus 进行改造的,再 .html 中使用时,必须要引入 ElementPlus 的 CDN 文件,且列表组件需要挂载在 ElementPlus 组件的后面【顺序问题】,否则会报缺少 $index 的报错,就是 elementplus 的报错,该表格组件使用了这个组件库
    <!-- 引入 vue3 这里最终应该下载一个稳定版本 -->
    <script src="./vue3.min.js"></script>
    <!-- 引入组件库 -->
    <link rel="stylesheet" href="https://unpkg.com/element-plus/lib/theme-chalk/index.css">
    <script src="https://unpkg.com/element-plus/lib/index.full.js"></script>
    <!-- 引入列表组件 -->
    <script src="./dist/umd/src/index.js"></script>
    <link rel="stylesheet" href="./dist/umd/src/index.css" />

      // 挂载 Vue 的 app 实例
      Vue.createApp(tableExample)
          .use(ElementPlus) // 此处不可以省略 elementplus 的使用,否则会报错缺少 $index
          .use(ListBase)
          .mount('#app');
修改表格行高:这个在组件里暴露 : row-height 属性,但是没在组件文档里写,表格的整体高度是通过 :row-height 属性接受的数值 * 数据条数进行动态计算的
设置完 :row-height 之后,再对单行和间隔行进行高度设置,就可还原设计稿- wrapperContent: { height: '157px', background: 'transparent', paddingLeft: '80px', },
rowContent: { height: '157px', background: 'rgba(16, 30, 86, 0.5)', paddingLeft: '80px', },
关于修改表头高度,这个是通过样式实现的,如下:.t-list-base .wrapper .el-table__header .cell { height: 100%; line-height: 157px; font-size: 70px; /* 表头文字对齐位置 - 左对齐left 右对齐right 居中center */ text-align: center; }
存在左侧列头的解决方案:把左边那列的上方表头标题写成空,将左侧标题通过数据返回的形式写入,如下图:
一些小点:
- 隐藏滚动条:????
- ::-webkit-scrollbar?{
??????/*?隐藏滚动条的时候直接打开?display:?none;?*/
??????display:?none;
??????width:?22px;
????}
渐变色:?????????- background:?linear-gradient(0deg,?#F3DA85?0%,?#FFF5D2?100%);
????????-webkit-background-clip:?text;
????????-webkit-text-fill-color:?transparent;
将 background 和 background-size 结合:通过 / 分隔,左边是左右上下的位置,右边是长度宽度的尺寸- background:?url(./assets/images/title.png)?no-repeat?left?94px?/?1962px?110px;
- 背景图片永远充满:background:?center?center?/?cover;
?


