视频地址:https://www.bilibili.com/video/BV15741177Eh?p=1
一、用户详情页
点击某一个具体商品,跳转到详情页,一个商品就是一个GoodsListItem,所以我们要监听GoodsListItem
详情页也是一个组件,所以我们直接在views中新建一个detail目录,该目录下新建Detail.vue
/router/index.js:路由跳转
{
  // 商品的id,以便查到更详细的信息:使用动态路由
  path: '/detail/:iid',
  component: Detail
}
GoodsListItem.vue:监听跳转
methods: {
  imageLoad() {
    this.$bus.$emit('itemImageLoad')
  },
  itemClick() {
    // 需要从详情页返回Home,所以使用push最好,并且需要传递商品的id,以便查到更详细的信息:使用动态路由
    this.$router.push('/detail/' + this.goodsItem.iid)
  }
}
Detail.vue:获取信息
<template>
  <div>详情页{{iid}}</div>
</template>

<script>
export default {
  name: "Detail",
  data() {
    return {
      iid: null
    }
  },
  // 组件创建后获取并保存iid
  created() {
    this.iid = this.$route.params.iid
  }
}
</script>

<style scoped>

</style>
详细:
/router/index.js
import Vue from 'vue'
import VueRouter from 'vue-router'
const Home = () => import('views/home/Home')
const Cart = () => import('views/cart/Cart')
const Category = () => import('views/category/Category')
const Profile = () => import('views/profile/Profile')
const Detail = () => import('views/detail/Detail')

// 安装路由插件
Vue.use(VueRouter)

// 创建路由对象
const routes = [
  {
    path: '',
    redirect: '/home'
  },
  {
    path: '/home',
    component: Home
  },
  {
    path: '/cart',
    component: Cart
  },
  {
    path: '/category',
    component: Category
  },
  {
    path: '/profile',
    component: Profile
  },
  {
    // 商品的id,以便查到更详细的信息:使用动态路由
    path: '/detail/:iid',
    component: Detail
  }
]

const router = new VueRouter({
  routes,
  mode: 'history'
})

// 导出
export default router
GoodsListItem.vue
<template>
  <div class="goods-item" @click="itemClick">
    <img :src="goodsItem.show.img" alt="" @load="imageLoad">
    <div class="goods-info">
      <p>{{goodsItem.title}}</p>
      <span class="price">{{goodsItem.price}}</span>
      <span class="collect">{{goodsItem.cfav}}</span>
    </div>
  </div>
</template>

<script>
export default {
  name: "GoodsListItem",
  props: {
    goodsItem: {
      type: Object,
      default() {
        return {}
      }
    }
  },
  methods: {
    imageLoad() {
      this.$bus.$emit('itemImageLoad')
    },
    itemClick() {
      // 需要从详情页返回Home,所以使用push最好,并且需要传递商品的id,以便查到更详细的信息:使用动态路由
      this.$router.push('/detail/' + this.goodsItem.iid)
    }
  }
}
</script>

<style scoped>
.goods-item {
  padding-bottom: 40px;
  position: relative;
  width: 48%;
}
.goods-item img {
  width: 100%;
  border-radius: 5px;
}

.goods-info {
  font-size: 12px;
  position: absolute;
  bottom: 5px;
  left: 0;
  right: 0;
  overflow: hidden;
  text-align: center;
}

.goods-info p {
  overflow: hidden;
  text-overflow: ellipsis;
  white-space: nowrap;
  margin-bottom: 3px;
}

.goods-info .price {
  color: var(--color-high-text);
  margin-right: 20px;
}

.goods-info .collect {
  position: relative;
}

.goods-info .collect::before {
  content: "";
  position: absolute;
  left: -15px;
  top: 0;
  width: 14px;
  height: 14px;
  background: url("~assets/img/common/collect.svg") 0 0/14px 14px;
}
</style>
效果:
1.1、详情页界面
在detail目录下新建childComps目录,该目录新建DetailNavBar组件
<template>
  <nav-bar>
    <div slot="left" class="back" @click="backClick">
      <img src="~assets/img/common/back.svg" alt="">
    </div>
    <div slot="center" class="title">
      <div v-for="(item, index) in titles"
           class="title-item"
           :class="{active: index===currentIndex}"
           @click="titleClick(index)">
        {{item}}
    </div>
  </div></nav-bar>
</template>

<script>
import NavBar from "components/common/navbar/NavBar";

export default {
  name: "DetailNavBar",
  data() {
    return {
      titles: ['商品', '参数', '评论', '推荐'],
      currentIndex: 0
    }
  },
  components: {
    NavBar
  },
  methods: {
    titleClick(index) {
      this.currentIndex = index
    },
    backClick() {
      // go(-1)回退一格,相当于back()
      this.$router.go(-1)
    }
  }
}
</script>

<style scoped>
.title {
  display: flex;
  font-size: 13px;
}
.title-item {
  flex: 1;
}
.active {
  color: var(--color-high-text);
}
.back img {
  margin-top: 12px;
}
</style>
Detail.vue:使用DetailNavBar.vue
<template>
  <div id="detail">
    <!--导航-->
    <detail-nav-bar></detail-nav-bar>
  </div>
</template>

<script>
import DetailNavBar from "./childComps/DetailNavBar";

export default {
  name: "Detail",
  data() {
    return {
      iid: null
    }
  },
  components: {
    DetailNavBar
  },
  // 组件创建后获取并保存iid
  created() {
    this.iid = this.$route.params.iid
  }
}
</script>

<style scoped>

</style>
效果:
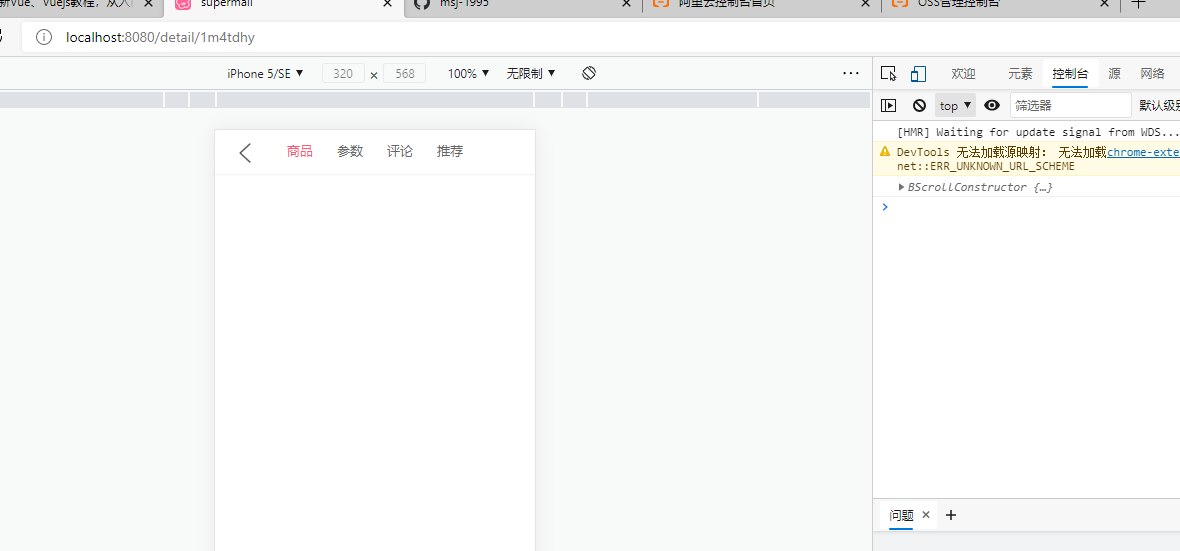
1.2、数据请求以及轮播图展示
请求数据的轮播图位置:
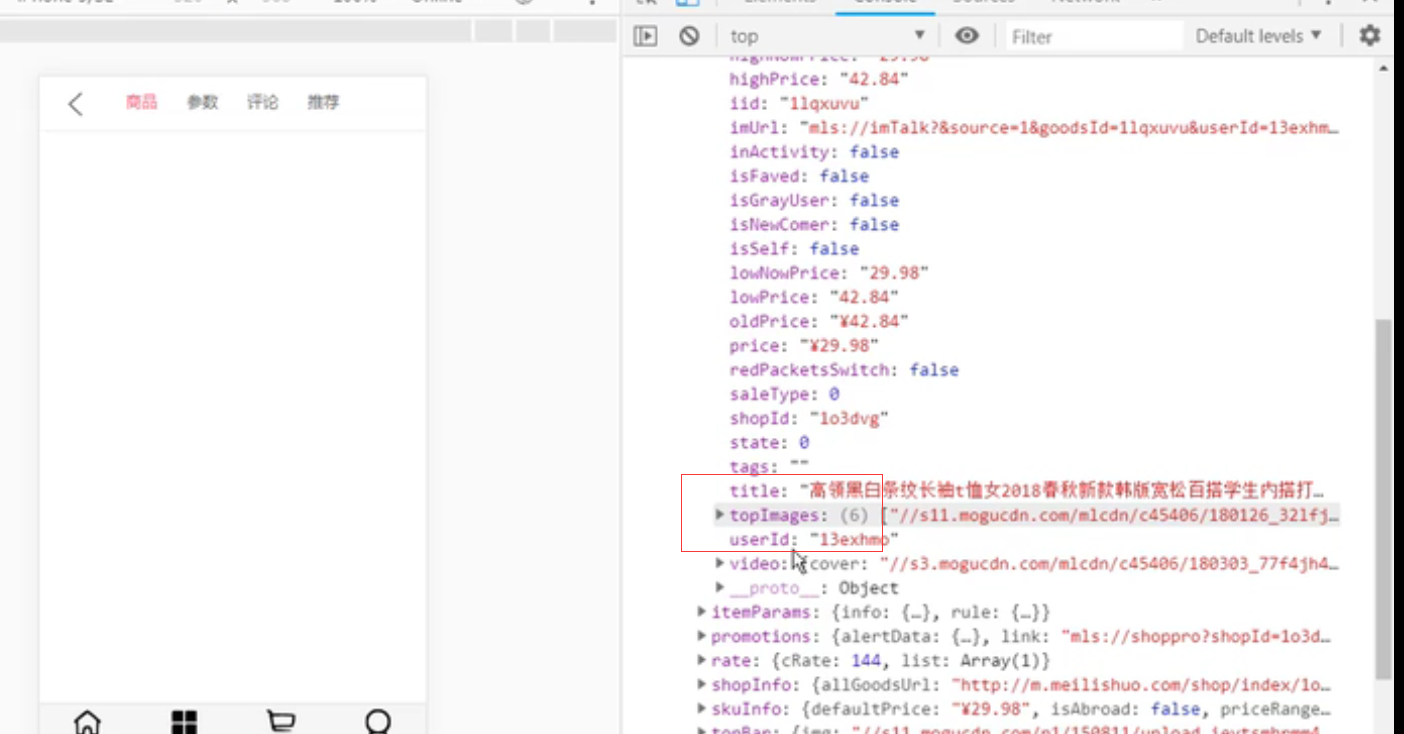
在network下新建detail.js
import {request} from "./request";

export function getDetail(iid) {
  return request({
    url: '/detail',
    params: {
      iid
    }
  })
}
在childComps下新建DetailSwiper组件
<template>
  <div class="detail-swiper">
    <swiper class="swiper">
      <swiper-item v-for="item in topImages">
        <img :src="item" alt="">
      </swiper-item>
    </swiper>
  </div>
</template>

<script>
import {Swiper, SwiperItem} from 'components/common/swiper'

export default {
  name: "DetailSwiper",
  props: {
    topImages: {
      type: Array,
      default() {
        return []
      }
    }
  },
  components: {
    Swiper,
    SwiperItem
  }
}
</script>

<style scoped>
.swiper {
  height: 300px;
  overflow: hidden;
}
</style>
Detail.vue
<template>
  <div id="detail">
    <!--导航-->
    <detail-nav-bar></detail-nav-bar>
    <detail-swiper :top-images="topImages"></detail-swiper>
  </div>
</template>

<script>
import DetailNavBar from "./childComps/DetailNavBar";
import DetailSwiper from "./childComps/DetailSwiper";

import {getDetail} from "@/network/detail";

export default {
  name: "Detail",
  data() {
    return {
      iid: null,
      topImages: []
    }
  },
  components: {
    DetailNavBar,
    DetailSwiper
  },
  // 组件创建后获取并保存iid
  created() {
    // 1.保存传入的iid
    this.iid = this.$route.params.iid

    // 2.根据iid请求详情数据
    getDetail(this.iid).then(res => {
      // 1. 获取顶部图片的轮播数据
      this.topImages = res.result.itemInfo.topImages
    })
  }
}
</script>

<style scoped>

</style>
这时我们发现一个问题:就是进入详情也后出来点击别的商品再进还是原来的图片,即数据没有变,原因是keep-alive在起作用
解决办法:把Detail组件排除在外,不保持
App.vue
<template>
  <div id="app">
    <keep-alive exclude="Detail">
      <router-view></router-view>
    </keep-alive>
    <main-tab-bar></main-tab-bar>
  </div>
</template>

<script>
import MainTabBar from "components/content/MainTabBar";

export default {
  name: 'app',
  components: {
    MainTabBar
  }
}
</script>

<style>
  @import "assets/css/base.css";

</style>
修改后的DetailSwiper.vue:修改之前,我们多使用了一个div,但是swiper半身就可以作为一个div,所以没必要在包一个,其次在Swiper中,使用了querySelectoer(’.swiper’),而刚才我们有定义了一个class=‘swiper’,所以倒是冲突,轮播出现问题
<template>
  <swiper class="detail-swiper">
    <swiper-item v-for="item in topImages">
      <img :src="item" alt="">
    </swiper-item>
  </swiper>
</template>

<script>
import {Swiper, SwiperItem} from 'components/common/swiper'

export default {
  name: "DetailSwiper",
  props: {
    topImages: {
      type: Array,
      default() {
        return []
      }
    }
  },
  components: {
    Swiper,
    SwiperItem
  }
}
</script>

<style scoped>
.detail-swiper {
  height: 300px;
  overflow: hidden;
}
</style>
效果:
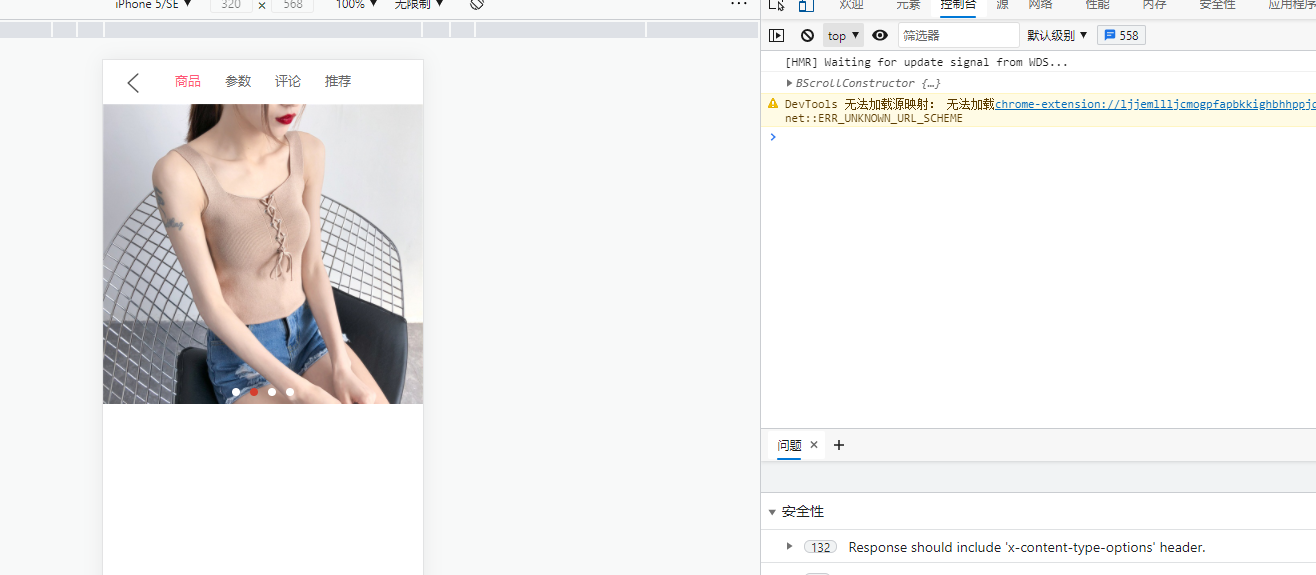
1.3、商品基本信息展示
商品信息
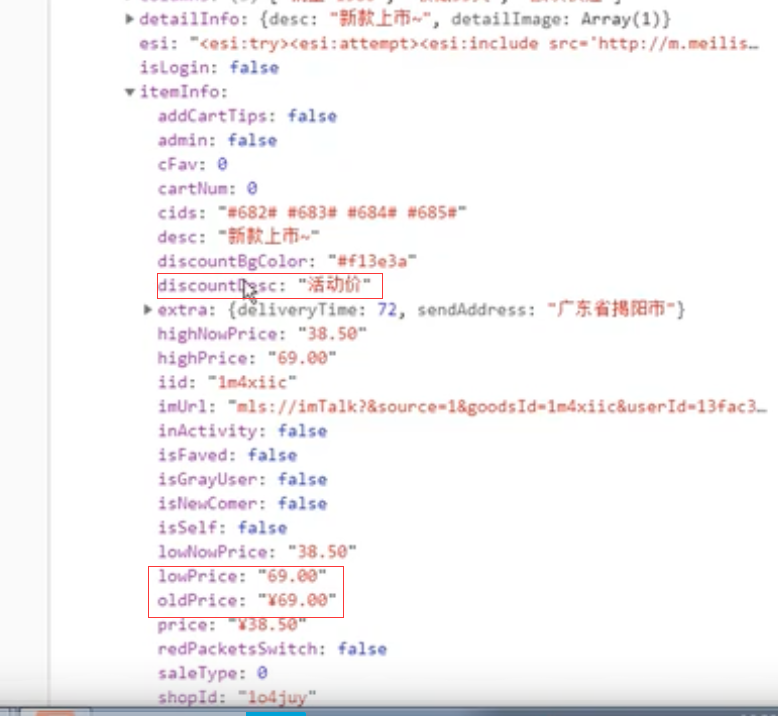
销量与收藏
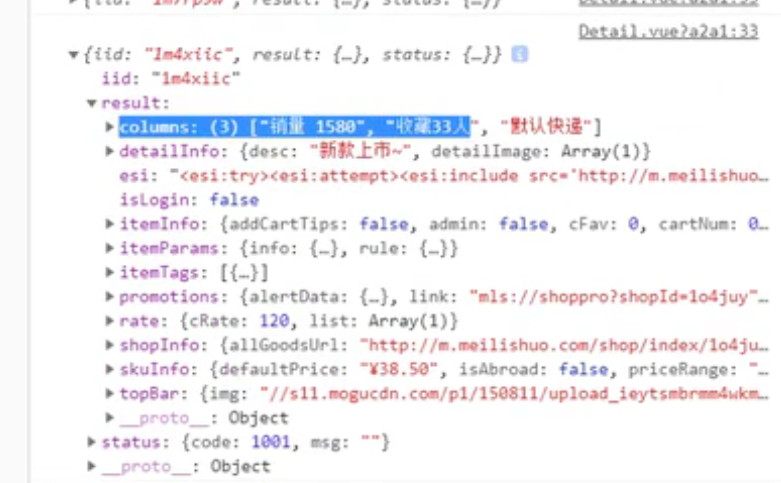
抽离数据,让数据拿给组件去展示
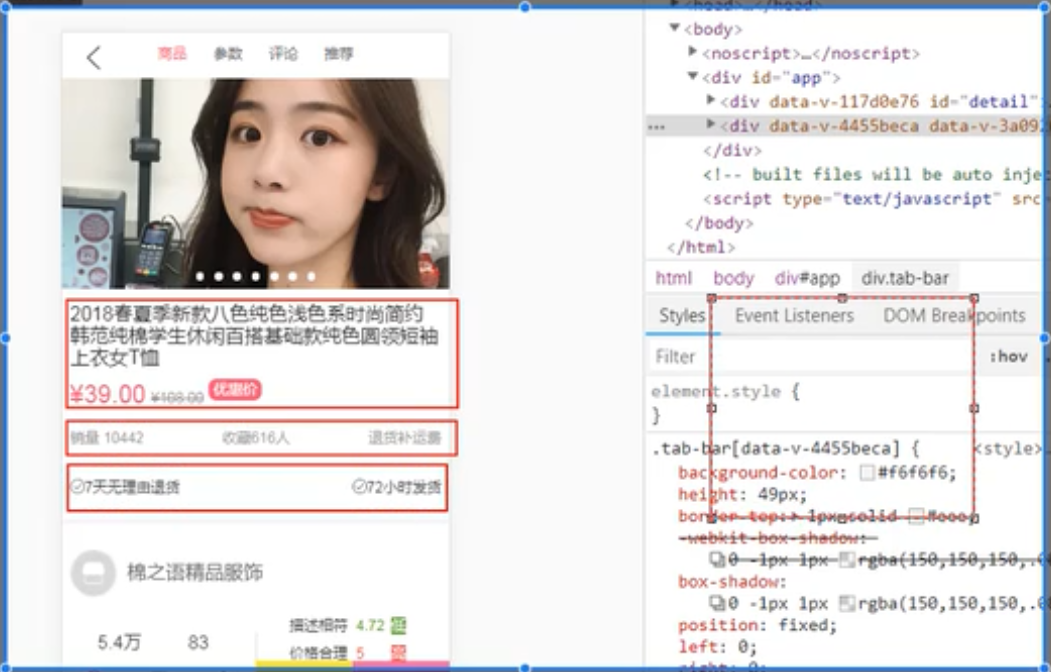
上面的数据在三个地方,但我们拿到数据的时候,应该把组件要展示的数据整合为一个对象,把该对象传给组件即可
detail.js中封装数据对象
import {request} from "./request";

export function getDetail(iid) {
  return request({
    url: '/detail',
    params: {
      iid
    }
  })
}


/*Es5定义类:function Person() {}
* ES6定义类:class GoodsInfo {}
* */
export class Goods {
  // 构造函数
  constructor(itemInfo, columns, services) {
    this.title = itemInfo.title
    this.desc = itemInfo.desc
    this.newPrice = itemInfo.price
    this.oldPrice = itemInfo.oldPrice
    this.discount = itemInfo.discountDesc
    this.columns = columns
    this.services = services
    this.realPrice = itemInfo.lowNowPrice
  }
}
在childComps下新建DetailBaseInfo.vue组件,用于展示商品信息
<template>
  <div v-if="Object.keys(GoodsInfo).length !== 0" class="base-info">
    <div class="goods-title">{{GoodsInfo.title}}</div>
    <div class="goods-price">
      <span class="n-price">{{GoodsInfo.newPrice}}</span>
      <span class="o-price">{{GoodsInfo.oldPrice}}</span>
      <span class="discount">{{GoodsInfo.discount}}</span>
    </div>
    <div class="info-other">
      <span>{{GoodsInfo.columns[0]}}</span>
      <span>{{GoodsInfo.columns[1]}}</span>
      <span>{{GoodsInfo.services[GoodsInfo.services.length-1].name}}</span>
    </div>
    <div class="info-service">
      <span class="info-service-item" v-for="index in GoodsInfo.services.length-1" :key="index">
        <img :src="GoodsInfo.services[index-1].icon" alt />
        <span>{{GoodsInfo.services[index-1].name}}</span>
      </span>
    </div>
  </div>
</template>

<script>
export default {
  name: "DetailBaseInfo",
  props: {
    GoodsInfo: {
      type: Object,
      default() {
        return {};
      }
    }
  }
};
</script>

<style>
.base-info {
  margin-top: 15px;
  padding: 0 8px;
  color: #888;
  border-bottom: 5px solid #f2f5f8;
}
.goods-title {
  color: #222;
}
.goods-price {
  margin-top: 10px;
}
.goods-price .n-price {
  font-size: 24px;
  color: var(--color-high-text);
}
.goods-price .o-price {
  font-size: 13px;
  margin-left: 5px;
  text-decoration: line-through;
}
.goods-price .discount {
  font-size: 12px;
  padding: 2px 5px;
  color: #fff;
  background-color: var(--color-high-text);
  border-radius: 8px;
  margin-left: 10px;
}
.info-other {
  margin-top: 15px;
  line-height: 30px;
  display: flex;
  font-size: 13px;
  border-bottom: 1px solid rgba(100, 100, 100, 0.1);
  justify-content: space-between;
}
.info-service {
  display: flex;
  justify-content: space-between;
  line-height: 60px;
}
.info-service-item img {
  width: 14px;
  height: 14px;
  position: relative;
  top: 2px;
}
.info-service-item span {
  font-size: 13px;
  color: #333;
}
</style>
Detail组件获取与传输数据
<template>
  <div id="detail">
    <!--导航-->
    <detail-nav-bar></detail-nav-bar>
    <detail-swiper :top-images="topImages"></detail-swiper>
    <detail-base-info :GoodsInfo="goods"></detail-base-info>
  </div>
</template>

<script>
import DetailNavBar from "./childComps/DetailNavBar";
import DetailSwiper from "./childComps/DetailSwiper";
import DetailBaseInfo from "./childComps/DetailBaseInfo";

import {getDetail, Goods} from "@/network/detail";

export default {
  name: "Detail",
  data() {
    return {
      iid: null,
      topImages: [],
      goods: {}
    }
  },
  components: {
    DetailNavBar,
    DetailSwiper,
    DetailBaseInfo
  },
  // 组件创建后获取并保存iid
  created() {
    // 1.保存传入的iid
    this.iid = this.$route.params.iid

    // 2.根据iid请求详情数据
    getDetail(this.iid).then(res => {
      // 1. 获取顶部图片的轮播数据
      this.topImages = res.result.itemInfo.topImages
      // 2.获取商品基本信息
      this.goods = new Goods(res.result.itemInfo, res.result.columns, res.result.shopInfo.services)
    })
  }
}
</script>

<style scoped>

</style>
效果:
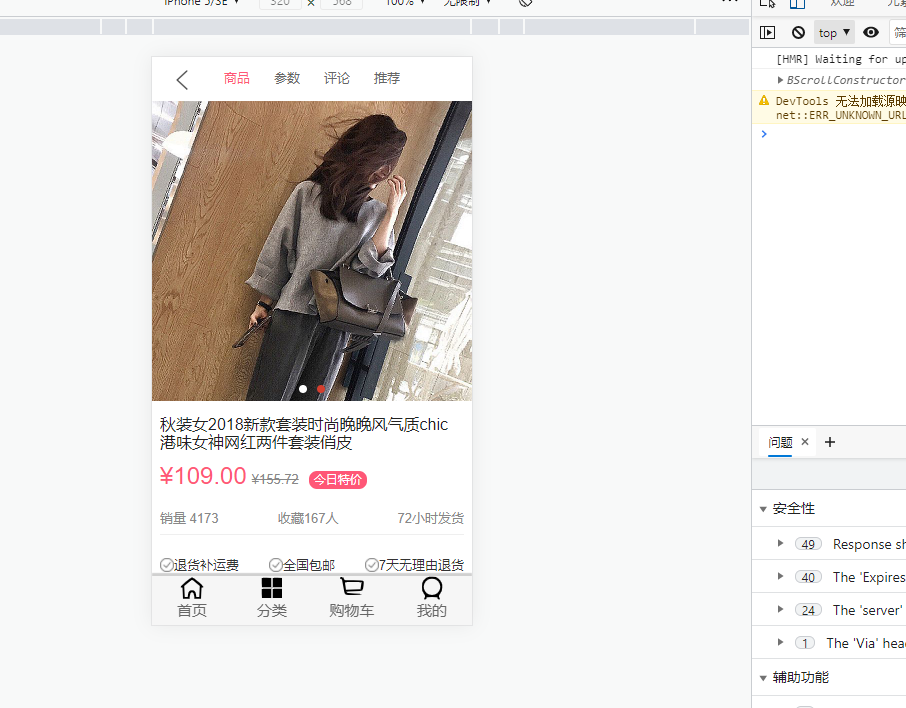
封装后的数据

v-for的遍历:
v-for="i in 10": 则会从1遍历到10,包含10
判断一个对象是否为空:
const obj = {}
Object.keys(obj).length === 0:即获取一个对象的所有key,然后有没有key即可
1.4、店铺信息的解析和展示
商家信息图片:
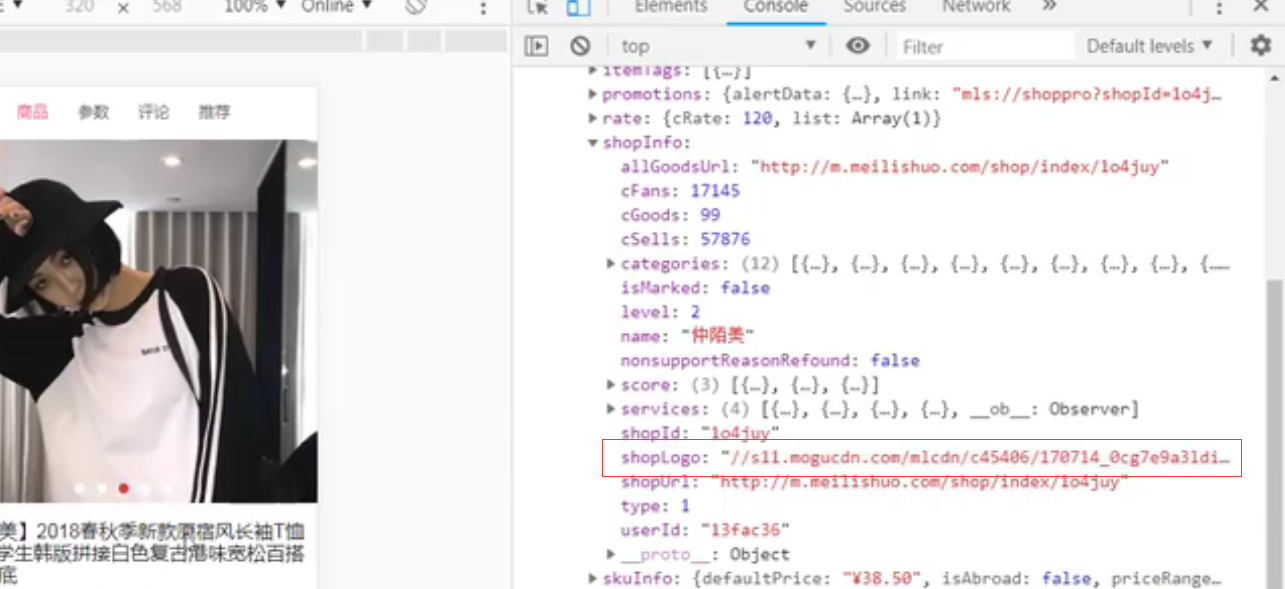
销量与评分:
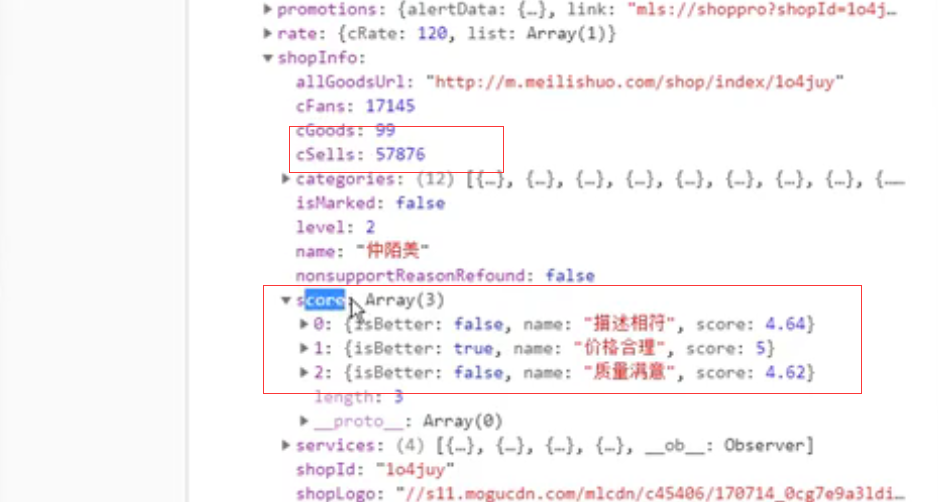
数据请求与封装:detail.js
import {request} from "./request";

export function getDetail(iid) {
  return request({
    url: '/detail',
    params: {
      iid
    }
  })
}


/*Es5定义类:function Person() {}
* ES6定义类:class GoodsInfo {}
* */
export class Goods {
  // 构造函数
  constructor(itemInfo, columns, services) {
    this.title = itemInfo.title
    this.desc = itemInfo.desc
    this.newPrice = itemInfo.price
    this.oldPrice = itemInfo.oldPrice
    this.discount = itemInfo.discountDesc
    this.columns = columns
    this.services = services
    this.realPrice = itemInfo.lowNowPrice
  }
}

export class Shop {
  constructor(shopInfo) {
    this.logo = shopInfo.shopLogo;
    this.name = shopInfo.name
    this.fans = shopInfo.cFans
    this.sells = shopInfo.cSells
    this.score = shopInfo.score
    this.goodsCount = shopInfo.cGoods
  }
}
DetailShopInfo.vue(childComps目录下)
<template>
  <div class="shop-info">
    <div class="shop-top">
      <img :src="ShopInfo.logo" />
      <span class="title">{{ShopInfo.name}}</span>
    </div>
    <div class="shop-middle">
      <div class="shop-middle-item shop-middle-left">
        <div class="info-sells">
          <div class="sells-num">{{ShopInfo.sells}}</div>
          <div class="sells-text">总销量</div>
        </div>
        <div class="info-goods">
          <div class="goods-count">{{ShopInfo.goodsCount}}</div>
          <div class="goods-text">全部宝贝</div>
        </div>
      </div>
      <div class="shop-middle-item shop-middle-right">
        <table>
          <tr v-for="(item, index) in ShopInfo.score" :key="index">
            <td>{{item.name}}</td>
            <td class="score" :class="{'score-better': item.isBetter}">{{item.score}}</td>
            <td class="better" :class="{'better-more': item.isBetter}">
              <span>{{item.isBetter ? '高':'低'}}</span>
            </td>
          </tr>
        </table>
      </div>
    </div>
    <div class="shop-bottom">
      <div class="enter-shop">进店逛逛</div>
    </div>
  </div>
</template>

<script>
export default {
  name: "DetailShopInfo",
  props: {
    ShopInfo: {
      type: Object,
      defaulr() {
        return {};
      }
    }
  }
};
</script>

<style>
.shop-info {
  padding: 25px 8px;
  border-bottom: 5px solid #f2f5f8;
}
.shop-top {
  line-height: 45px;
  /* 让元素垂直中心对齐 */
  display: flex;
  align-items: center;
}
.shop-top img {
  width: 45px;
  height: 45px;
  border-radius: 50%;
  border: 1px solid rgba(0, 0, 0, 0.1);
}
.shop-top .title {
  margin-left: 10px;
  vertical-align: center;
}
.shop-middle {
  margin-top: 15px;
  display: flex;
  align-items: center;
}
.shop-middle-item {
  flex: 1;
}
.shop-middle-left {
  display: flex;
  justify-content: space-evenly;
  color: #333;
  text-align: center;
  border-right: 1px solid rgba(0, 0, 0, 0.1);
}
.sells-count,
.goods-count {
  font-size: 18px;
}

.sells-text,
.goods-text {
  margin-top: 10px;
  font-size: 12px;
}

.shop-middle-right {
  font-size: 13px;
  color: #333;
}

.shop-middle-right table {
  width: 120px;
  margin-left: 30px;
}

.shop-middle-right table td {
  padding: 5px 0;
}

.shop-middle-right .score {
  color: #5ea732;
}

.shop-middle-right .score-better {
  color: #f13e3a;
}

.shop-middle-right .better span {
  background-color: #5ea732;
  color: #fff;
  text-align: center;
}

.shop-middle-right .better-more span {
  background-color: #f13e3a;
}

.shop-bottom {
  text-align: center;
  margin-top: 10px;
}

/* .enter-shop {
  display: inline-block;
  font-size: 14px;
  background-color: #f2f5f8;
  width: 150px;
  height: 30px;
  text-align: center;
  line-height: 30px;
  border-radius: 10px;
} */
</style>
Detail.vue使用DetailShopInfo
# 导入
import DetailShopInfo from "./childComps/DetailShopInfo";

import {getDetail, Goods, Shop} from "@/network/detail";

# 注册
components: {
    DetailNavBar,
    DetailSwiper,
    DetailBaseInfo,
    DetailShopInfo
  }

# 数据请求与保存
data() {
    return {
      iid: null,
      topImages: [],
      goods: {},
      shop: {}
    }

created() {
    // 1.保存传入的iid
    this.iid = this.$route.params.iid

    // 2.根据iid请求详情数据
    getDetail(this.iid).then(res => {
      // 1. 获取顶部图片的轮播数据
      this.topImages = res.result.itemInfo.topImages
      // 2.获取商品基本信息
      this.goods = new Goods(res.result.itemInfo, res.result.columns, res.result.shopInfo.services)
      // 创建店铺信息对象
      this.shop = new Shop(res.result.shopInfo)
    })
  }
Detail.vue
<template>
  <div id="detail">
    <!--导航-->
    <detail-nav-bar></detail-nav-bar>
    <detail-swiper :top-images="topImages"></detail-swiper>
    <detail-base-info :GoodsInfo="goods"></detail-base-info>
    <detail-shop-info :shop-info="shop"></detail-shop-info>
  </div>
</template>

<script>
import DetailNavBar from "./childComps/DetailNavBar";
import DetailSwiper from "./childComps/DetailSwiper";
import DetailBaseInfo from "./childComps/DetailBaseInfo";
import DetailShopInfo from "./childComps/DetailShopInfo";

import {getDetail, Goods, Shop} from "@/network/detail";

export default {
  name: "Detail",
  data() {
    return {
      iid: null,
      topImages: [],
      goods: {},
      shop: {}
    }
  },
  components: {
    DetailNavBar,
    DetailSwiper,
    DetailBaseInfo,
    DetailShopInfo
  },
  // 组件创建后获取并保存iid
  created() {
    // 1.保存传入的iid
    this.iid = this.$route.params.iid

    // 2.根据iid请求详情数据
    getDetail(this.iid).then(res => {
      // 1. 获取顶部图片的轮播数据
      this.topImages = res.result.itemInfo.topImages
      // 2.获取商品基本信息
      this.goods = new Goods(res.result.itemInfo, res.result.columns, res.result.shopInfo.services)
      // 创建店铺信息对象
      this.shop = new Shop(res.result.shopInfo)
    })
  }
}
</script>

<style scoped>

</style>
效果:
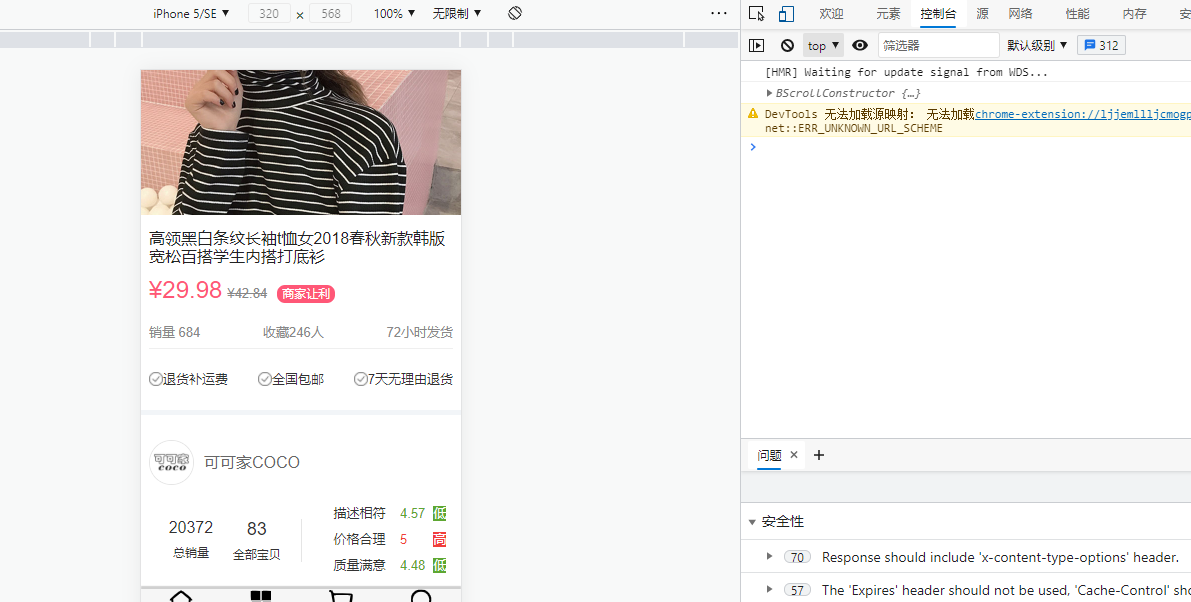
1.5、商品详情中使用轮播
发现一个问题,就是刚才的商品详情页中顶部导航栏不会停留,这里加上轮播图
首先,使用样式,把底部的首页、分类等盖住:
#detail {
  position: relative;
  z-index: 9;
  background-color: #ffffff;
}
使用better-scroll滚动
Detail.vue
<template>
  <div id="detail">
    <!--导航-->
    <detail-nav-bar class="detail-nav"></detail-nav-bar>
    <scroll class="content">
      <detail-swiper :top-images="topImages"></detail-swiper>
      <detail-base-info :GoodsInfo="goods"></detail-base-info>
      <detail-shop-info :shop-info="shop"></detail-shop-info>
    </scroll>
  </div>
</template>

<script>
import DetailNavBar from "./childComps/DetailNavBar";
import DetailSwiper from "./childComps/DetailSwiper";
import DetailBaseInfo from "./childComps/DetailBaseInfo";
import DetailShopInfo from "./childComps/DetailShopInfo";
import Scroll from "components/common/scroll/Scroll";

import {getDetail, Goods, Shop} from "@/network/detail";

export default {
  name: "Detail",
  data() {
    return {
      iid: null,
      topImages: [],
      goods: {},
      shop: {}
    }
  },
  components: {
    DetailNavBar,
    DetailSwiper,
    DetailBaseInfo,
    DetailShopInfo,
    Scroll
  },
  // 组件创建后获取并保存iid
  created() {
    // 1.保存传入的iid
    this.iid = this.$route.params.iid

    // 2.根据iid请求详情数据
    getDetail(this.iid).then(res => {
      // 1. 获取顶部图片的轮播数据
      this.topImages = res.result.itemInfo.topImages
      // 2.获取商品基本信息
      this.goods = new Goods(res.result.itemInfo, res.result.columns, res.result.shopInfo.services)
      // 创建店铺信息对象
      this.shop = new Shop(res.result.shopInfo)
    })
  }
}
</script>

<style scoped>
#detail {
  position: relative;
  z-index: 9;
  background-color: #ffffff;
  height: 100vh;
}

.detail-nav {
  position: relative;
  z-index: 9;
  background-color: #ffffff;
}

.content {
  height: calc(100% - 44px);
}
</style>
效果:
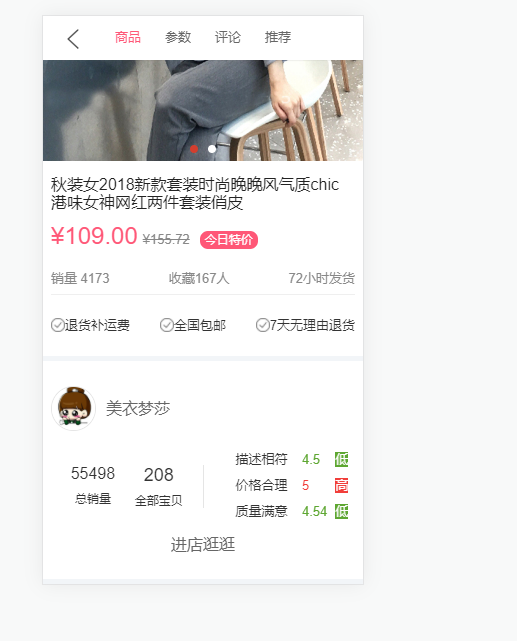
这时也会遇到不能滚动的原因,也是因为图片延迟加载。
1.6、商品详情数据展示
商品详情数据页的图片展示
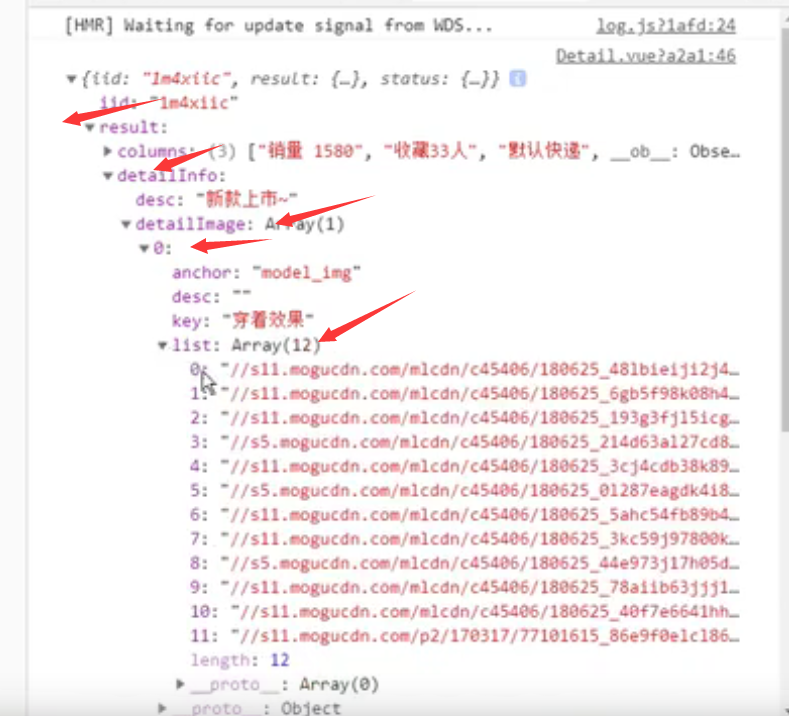
这里就list中的一个数据,所以不用使用对象封装数据了,我们直接从detailInfo中取数据
DetailGoodsInfo.vue(childComps下)
<template>
  <div v-if="Object.keys(detailInfo).length !== 0" class="goods-info">
    <div class="info-desc clear-fix">
      <div class="start"></div>
      <div class="desc">{{detailInfo.desc}}</div>
      <div class="end"></div>
    </div>
    <div class="info-key">{{detailInfo.detailImage[0].key}}</div>
    <div class="info-list">
      <img
        v-for="(item, index) in detailInfo.detailImage[0].list"
        :src="item"
        :key="index"
        @load="imgLoad"
      />
    </div>
  </div>
</template>

<script>
export default {
  name: "DetailGoodsInfo",
  props: {
    detailInfo: {
      type: Object,
      defualt() {
        return {};
      }
    }
  },
  data() {
    return {
      counter: 0,
      imagesLength: 0
    };
  },
  methods: {
    imgLoad() {
      // 目的是让这个函数只回调一次
      if (++this.counter === this.imagesLength) {
        this.$emit("imageLoad");
      }
    }
  },
  watch: {
    detailInfo() {
      this.imagesLength = this.detailInfo.detailImage[0].list.length;
    }
  }
};
</script>

<style>
.goods-info {
  padding: 20px 0;
  border-bottom: 5px solid #f2f5f8;
}

.info-desc {
  padding: 0 15px;
}

.info-desc .start,
.info-desc .end {
  width: 90px;
  height: 1px;
  background-color: #a3a3a5;
  position: relative;
}

.info-desc .start {
  float: left;
}

.info-desc .end {
  float: right;
}

.info-desc .start::before,
.info-desc .end::after {
  content: "";
  position: absolute;
  width: 5px;
  height: 5px;
  background-color: #333;
  bottom: 0;
}

.info-desc .end::after {
  right: 0;
}

.info-desc .desc {
  padding: 15px 0;
  font-size: 14px;
}

.info-key {
  margin: 10px 0 10px 15px;
  color: #333;
  font-size: 15px;
}

.info-list img {
  width: 100%;
}
</style>
Detail.vue
<template>
  <div id="detail">
    <!--导航-->
    <detail-nav-bar class="detail-nav"></detail-nav-bar>
    <scroll class="content" ref="scroll">
      <detail-swiper :top-images="topImages"></detail-swiper>
      <detail-base-info :GoodsInfo="goods"></detail-base-info>
      <detail-shop-info :shop-info="shop"></detail-shop-info>
      <detail-goods-info :detail-info="detailInfo" @imageLoad="imageLoad"></detail-goods-info>
    </scroll>
  </div>
</template>

<script>
import DetailNavBar from "./childComps/DetailNavBar";
import DetailSwiper from "./childComps/DetailSwiper";
import DetailBaseInfo from "./childComps/DetailBaseInfo";
import DetailShopInfo from "./childComps/DetailShopInfo";
import Scroll from "components/common/scroll/Scroll";
import DetailGoodsInfo from "./childComps/DetailGoodsInfo";

import {getDetail, Goods, Shop} from "@/network/detail";

export default {
  name: "Detail",
  data() {
    return {
      iid: null,
      topImages: [],
      goods: {},
      shop: {},
      detailInfo: {}
    }
  },
  components: {
    DetailNavBar,
    DetailSwiper,
    DetailBaseInfo,
    DetailShopInfo,
    Scroll,
    DetailGoodsInfo
  },
  methods: {
    imageLoad() {
      this.$refs.scroll.refresh()
    }
  },
  // 组件创建后获取并保存iid
  created() {
    // 1.保存传入的iid
    this.iid = this.$route.params.iid

    // 2.根据iid请求详情数据
    getDetail(this.iid).then(res => {
      // 1. 获取顶部图片的轮播数据
      this.topImages = res.result.itemInfo.topImages
      // 2.获取商品基本信息
      this.goods = new Goods(res.result.itemInfo, res.result.columns, res.result.shopInfo.services)
      // 3.创建店铺信息对象
      this.shop = new Shop(res.result.shopInfo)
      // 4.保存商品的详情数据
      this.detailInfo = res.result.detailInfo
    })
  }
}
</script>

<style scoped>
#detail {
  position: relative;
  z-index: 10;
  background-color: #ffffff;
  height: 100vh;
}

.detail-nav {
  position: relative;
  z-index: 9;
  background-color: #ffffff;
}

.content {
  height: calc(100% - 44px);
}
</style>
效果:
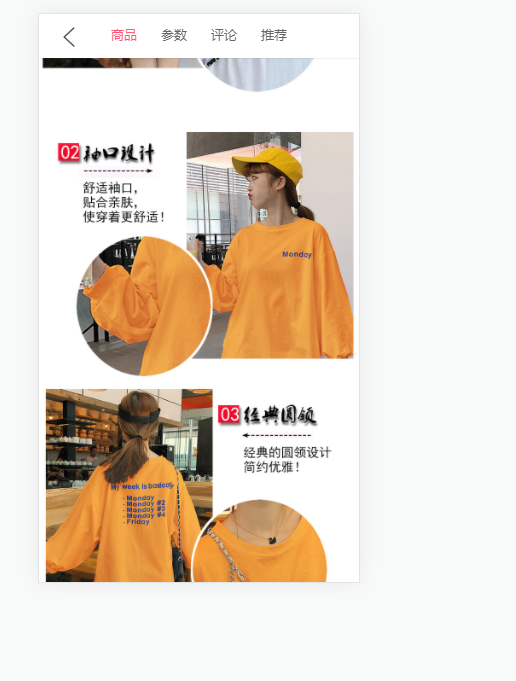
1.7、商品参数信息的展示
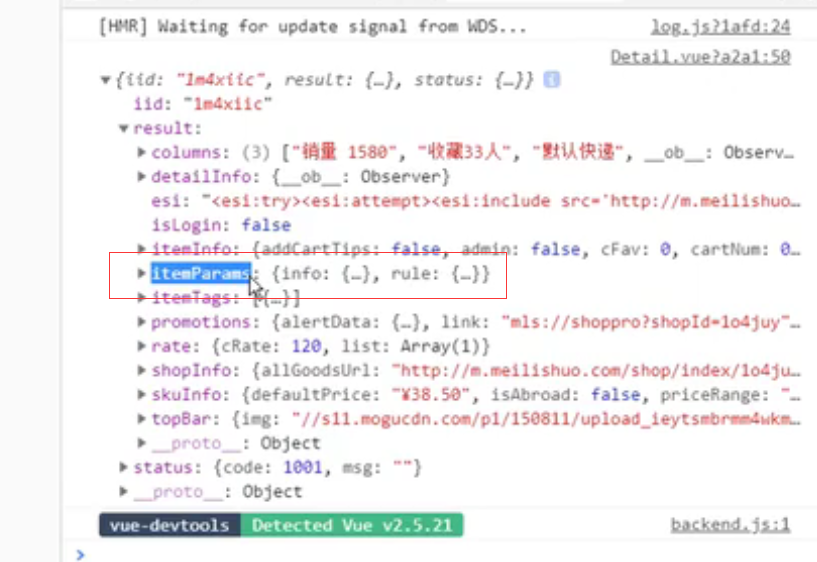
详细数据
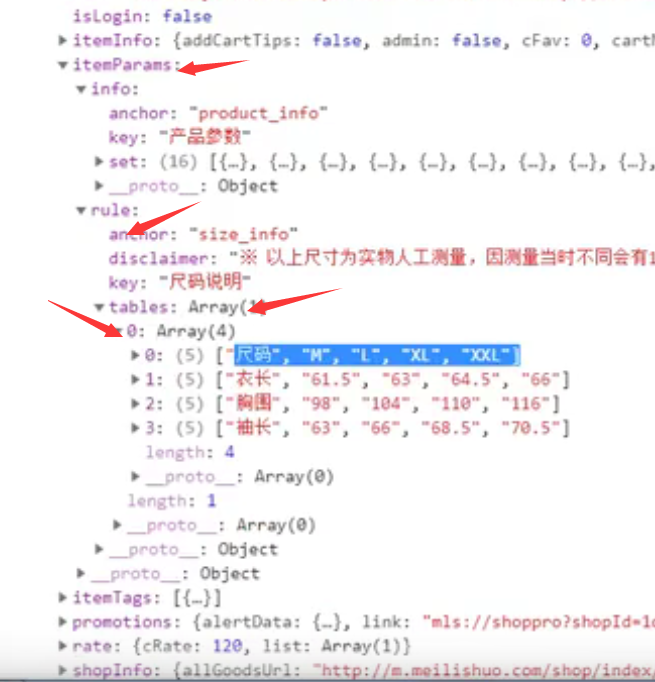
数据封装:detail.js
import {request} from "./request";

export function getDetail(iid) {
  return request({
    url: '/detail',
    params: {
      iid
    }
  })
}


/*Es5定义类:function Person() {}
* ES6定义类:class GoodsInfo {}
* */
export class Goods {
  // 构造函数
  constructor(itemInfo, columns, services) {
    this.title = itemInfo.title
    this.desc = itemInfo.desc
    this.newPrice = itemInfo.price
    this.oldPrice = itemInfo.oldPrice
    this.discount = itemInfo.discountDesc
    this.columns = columns
    this.services = services
    this.realPrice = itemInfo.lowNowPrice
  }
}

export class Shop {
  constructor(shopInfo) {
    this.logo = shopInfo.shopLogo;
    this.name = shopInfo.name
    this.fans = shopInfo.cFans
    this.sells = shopInfo.cSells
    this.score = shopInfo.score
    this.goodsCount = shopInfo.cGoods
  }
}

export class GoodsParams {
  constructor(info, rule) {
    // 注:images可能没有值(某些商品有值,某些没有)
    this.image = info.images ? info.images[0] : '';
    this.infos = info.set;
    this.size = rule.tables;
  }
}
DetailParamsInfo.vue(childComps下)
<template>
  <div class="param-info" v-if="Object.keys(GoodsParam).length !== 0">
    <table v-for="(table, index) in GoodsParam.sizes" class="info-size" :key="index">
      <tr v-for="(tr, indey) in table" :key="indey">
        <td v-for="(td, indez) in tr" :key="indez">{{td}}</td>
      </tr>
    </table>
    <table class="info-param">
      <tr v-for="(info, index) in GoodsParam.infos" :key="index">
        <td class="info-param-key">{{info.key}}</td>
        <td class="param-value">{{info.value}}</td>
      </tr>
    </table>
    <div class="info-img" v-if="GoodsParam.image.length !== 0">
      <img :src="GoodsParam.image" alt />
    </div>
  </div>
</template>

<script>

export default {
  name: "DetailParamInfo",
  props: {
    GoodsParam: {
      type: Object,
      default() {
        return {};
      }
    }
  }
};
</script>

<style>
.param-info {
  padding: 20px 15px;
  font-size: 14px;
  border-bottom: 5px solid #f2f5f8;
}

.param-info table {
  width: 100%;
  border-collapse: collapse;
}

.param-info table tr {
  height: 42px;
}

.param-info table tr td {
  border-bottom: 1px solid rgba(100, 100, 100, 0.1);
}

.info-param-key {
  /*当value的数据量比较大的时候, 会挤到key,所以给一个固定的宽度*/
  width: 95px;
}

.info-param {
  border-top: 1px solid rgba(0, 0, 0, 0.1);
}

.param-value {
  color: #eb4868;
}

.info-img img {
  width: 100%;
}
</style>
Detail.vue
<template>
  <div id="detail">
    <!--导航-->
    <detail-nav-bar class="detail-nav"></detail-nav-bar>
    <scroll class="content" ref="scroll">
      <detail-swiper :top-images="topImages"></detail-swiper>
      <detail-base-info :GoodsInfo="goods"></detail-base-info>
      <detail-shop-info :shop-info="shop"></detail-shop-info>
      <detail-goods-info :detail-info="detailInfo" @imageLoad="imageLoad"></detail-goods-info>
      <detail-param-info :goods-param="paramInfo"></detail-param-info>
    </scroll>
  </div>
</template>

<script>
import DetailNavBar from "./childComps/DetailNavBar";
import DetailSwiper from "./childComps/DetailSwiper";
import DetailBaseInfo from "./childComps/DetailBaseInfo";
import DetailShopInfo from "./childComps/DetailShopInfo";
import Scroll from "components/common/scroll/Scroll";
import DetailGoodsInfo from "./childComps/DetailGoodsInfo";
import DetailParamInfo from "./childComps/DetailParamInfo";

import {getDetail, Goods, Shop, GoodsParams} from "@/network/detail";

export default {
  name: "Detail",
  data() {
    return {
      iid: null,
      topImages: [],
      goods: {},
      shop: {},
      detailInfo: {},
      paramInfo: {}
    }
  },
  components: {
    DetailNavBar,
    DetailSwiper,
    DetailBaseInfo,
    DetailShopInfo,
    Scroll,
    DetailGoodsInfo,
    DetailParamInfo
  },
  methods: {
    imageLoad() {
      this.$refs.scroll.refresh()
    }
  },
  // 组件创建后获取并保存iid
  created() {
    // 1.保存传入的iid
    this.iid = this.$route.params.iid

    // 2.根据iid请求详情数据
    getDetail(this.iid).then(res => {
      // 1. 获取顶部图片的轮播数据
      this.topImages = res.result.itemInfo.topImages
      // 2.获取商品基本信息
      this.goods = new Goods(res.result.itemInfo, res.result.columns, res.result.shopInfo.services)
      // 3.创建店铺信息对象
      this.shop = new Shop(res.result.shopInfo)
      // 4.保存商品的详情数据
      this.detailInfo = res.result.detailInfo
      // 5.获取参数信息
      this.paramInfo = new GoodsParams(res.result.itemParams.info, res.result.itemParams.rule)
    })
  }
}
</script>

<style scoped>
#detail {
  position: relative;
  z-index: 10;
  background-color: #ffffff;
  height: 100vh;
}

.detail-nav {
  position: relative;
  z-index: 9;
  background-color: #ffffff;
}

.content {
  height: calc(100% - 44px);
}
</style>
1.8、知识回顾
详情页,自己回顾
详情页的思路:
1、点击商品,进入商品详情页(GoodsListItem中监听)
2、根据点击显示更加详细的信息
3、点击商品的时候需要传入商品的id(这里是iid),这样才能请求到商品的数据
商品基本信息使用服务器返回的颜色:
DetailBaseInfo中使用服务器返回的颜色
修改Goods的封装类,添加discountBgColor属性:
export class Goods {
  // 构造函数
  constructor(itemInfo, columns, services) {
    this.title = itemInfo.title
    this.desc = itemInfo.desc
    this.newPrice = itemInfo.price
    this.oldPrice = itemInfo.oldPrice
    this.discount = itemInfo.discountDesc
    this.columns = columns
    this.services = services
    this.realPrice = itemInfo.lowNowPrice
    this.discountBgColor = itemInfo.discountBgColor
  }
}
在DetailBaseInfo使用:
<span class="discount"
            :style="{backgroundColor: GoodsInfo.discountBgColor}">
        {{GoodsInfo.discount}}
      </span>


# 样式
.goods-price .discount {
  font-size: 12px;
  padding: 2px 5px;
  color: #fff;
  /*background-color: var(--color-high-text);*/
  border-radius: 8px;
  margin-left: 10px;
}
DetailBaseInfo.vue
<template>
  <div v-if="Object.keys(GoodsInfo).length !== 0" class="base-info">
    <div class="goods-title">{{GoodsInfo.title}}</div>
    <div class="goods-price">
      <span class="n-price">{{GoodsInfo.newPrice}}</span>
      <span class="o-price">{{GoodsInfo.oldPrice}}</span>
      <span class="discount"
            :style="{backgroundColor: GoodsInfo.discountBgColor}">
        {{GoodsInfo.discount}}
      </span>
    </div>
    <div class="info-other">
      <span>{{GoodsInfo.columns[0]}}</span>
      <span>{{GoodsInfo.columns[1]}}</span>
      <span>{{GoodsInfo.services[GoodsInfo.services.length-1].name}}</span>
    </div>
    <div class="info-service">
      <span class="info-service-item" v-for="index in GoodsInfo.services.length-1" :key="index">
        <img :src="GoodsInfo.services[index-1].icon" alt />
        <span>{{GoodsInfo.services[index-1].name}}</span>
      </span>
    </div>
  </div>
</template>

<script>
export default {
  name: "DetailBaseInfo",
  props: {
    GoodsInfo: {
      type: Object,
      default() {
        return {};
      }
    }
  }
};
</script>

<style>
.base-info {
  margin-top: 15px;
  padding: 0 8px;
  color: #888;
  border-bottom: 5px solid #f2f5f8;
}
.goods-title {
  color: #222;
}
.goods-price {
  margin-top: 10px;
}
.goods-price .n-price {
  font-size: 24px;
  color: var(--color-high-text);
}
.goods-price .o-price {
  font-size: 13px;
  margin-left: 5px;
  text-decoration: line-through;
}
.goods-price .discount {
  font-size: 12px;
  padding: 2px 5px;
  color: #fff;
  /*background-color: var(--color-high-text);*/
  border-radius: 8px;
  margin-left: 10px;
}
.info-other {
  margin-top: 15px;
  line-height: 30px;
  display: flex;
  font-size: 13px;
  border-bottom: 1px solid rgba(100, 100, 100, 0.1);
  justify-content: space-between;
}
.info-service {
  display: flex;
  justify-content: space-between;
  line-height: 60px;
}
.info-service-item img {
  width: 14px;
  height: 14px;
  position: relative;
  top: 2px;
}
.info-service-item span {
  font-size: 13px;
  color: #333;
}
</style>
DetailShopInfo的优化:使用过滤器
<div class="info-sells">
    <div class="sells-num">{{ShopInfo.sells | sellCountFilter}}</div>
    <div class="sells-text">总销量</div>
</div>
过滤器:
filters: {
  sellCountFilter(value) {
    let result = value
    if(value > 10000) {
      // 如果销量大于1万,则使销量除以10000并保留1位小数
      result = (result / 10000).toFixed(1) + '万'
    }
    return result
  }
}
DetailShopInfo.vue
<template>
  <div class="shop-info" v-if="Object.keys(ShopInfo).length !== 0">
    <div class="shop-top">
      <img :src="ShopInfo.logo" />
      <span class="title">{{ShopInfo.name}}</span>
    </div>
    <div class="shop-middle">
      <div class="shop-middle-item shop-middle-left">
        <div class="info-sells">
          <div class="sells-num">{{ShopInfo.sells | sellCountFilter}}</div>
          <div class="sells-text">总销量</div>
        </div>
        <div class="info-goods">
          <div class="goods-count">{{ShopInfo.goodsCount}}</div>
          <div class="goods-text">全部宝贝</div>
        </div>
      </div>
      <div class="shop-middle-item shop-middle-right">
        <table>
          <tr v-for="(item, index) in ShopInfo.score" :key="index">
            <td>{{item.name}}</td>
            <td class="score" :class="{'score-better': item.isBetter}">{{item.score}}</td>
            <td class="better" :class="{'better-more': item.isBetter}">
              <span>{{item.isBetter ? '高':'低'}}</span>
            </td>
          </tr>
        </table>
      </div>
    </div>
    <div class="shop-bottom">
      <div class="enter-shop">进店逛逛</div>
    </div>
  </div>
</template>

<script>
export default {
  name: "DetailShopInfo",
  props: {
    ShopInfo: {
      type: Object,
      defaulr() {
        return {};
      }
    }
  },
  filters: {
    sellCountFilter(value) {
      let result = value
      if(value > 10000) {
        // 如果销量大于1万,则使销量除以10000并保留1位小数
        result = (result / 10000).toFixed(1) + '万'
      }
      return result
    }
  }
};
</script>

<style>
.shop-info {
  padding: 25px 8px;
  border-bottom: 5px solid #f2f5f8;
}
.shop-top {
  line-height: 45px;
  /* 让元素垂直中心对齐 */
  display: flex;
  align-items: center;
}
.shop-top img {
  width: 45px;
  height: 45px;
  border-radius: 50%;
  border: 1px solid rgba(0, 0, 0, 0.1);
}
.shop-top .title {
  margin-left: 10px;
  vertical-align: center;
}
.shop-middle {
  margin-top: 15px;
  display: flex;
  align-items: center;
}
.shop-middle-item {
  flex: 1;
}
.shop-middle-left {
  display: flex;
  justify-content: space-evenly;
  color: #333;
  text-align: center;
  border-right: 1px solid rgba(0, 0, 0, 0.1);
}
.sells-count,
.goods-count {
  font-size: 18px;
}

.sells-text,
.goods-text {
  margin-top: 10px;
  font-size: 12px;
}

.shop-middle-right {
  font-size: 13px;
  color: #333;
}

.shop-middle-right table {
  width: 120px;
  margin-left: 30px;
}

.shop-middle-right table td {
  padding: 5px 0;
}

.shop-middle-right .score {
  color: #5ea732;
}

.shop-middle-right .score-better {
  color: #f13e3a;
}

.shop-middle-right .better span {
  background-color: #5ea732;
  color: #fff;
  text-align: center;
}

.shop-middle-right .better-more span {
  background-color: #f13e3a;
}

.shop-bottom {
  text-align: center;
  margin-top: 10px;
}

/* .enter-shop {
  display: inline-block;
  font-size: 14px;
  background-color: #f2f5f8;
  width: 150px;
  height: 30px;
  text-align: center;
  line-height: 30px;
  border-radius: 10px;
} */
</style>
效果:
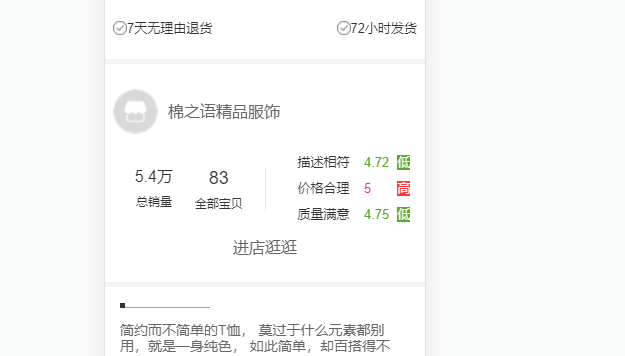
修改后的DetailParamInfo.vue
<template>
  <div class="param-info" v-if="Object.keys(GoodsParam).length !== 0">
    <table v-for="(table, index) in GoodsParam.sizes" class="info-size" :key="index">
      <tr v-for="(tr, indey) in table" :key="indey">
        <td v-for="(td, indez) in tr" :key="indez">{{td}}</td>
      </tr>
    </table>
    <table class="info-param">
      <tr v-for="(info, index) in GoodsParam.infos" :key="index">
        <td class="info-param-key">{{info.key}}</td>
        <td class="param-value">{{info.value}}</td>
      </tr>
    </table>
    <div class="info-img" v-if="GoodsParam.image.length !== 0">
      <img :src="GoodsParam.image" alt />
    </div>
  </div>
</template>
主要是修改了detail.js中的GoodsParam类中的size属性修改为了sizes
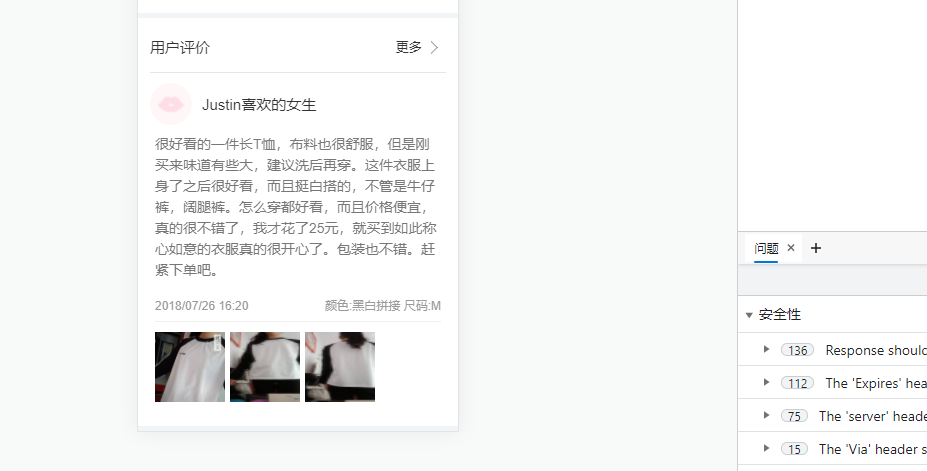
1.9、商品评论信息展示
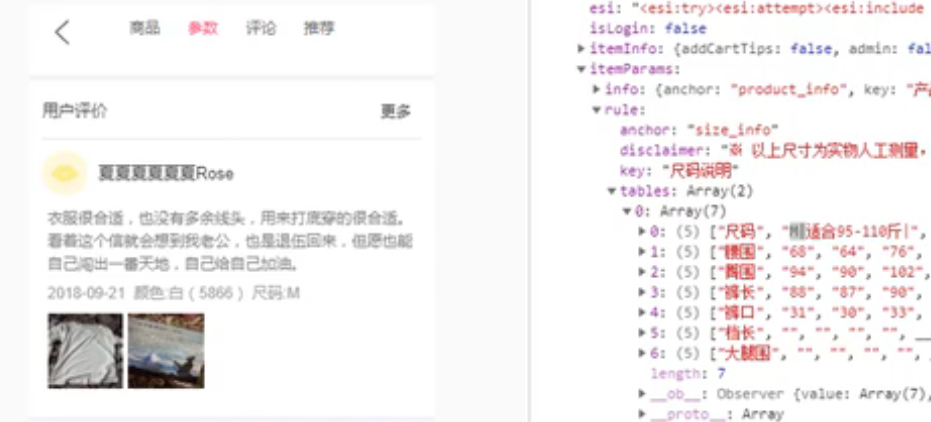
位置:
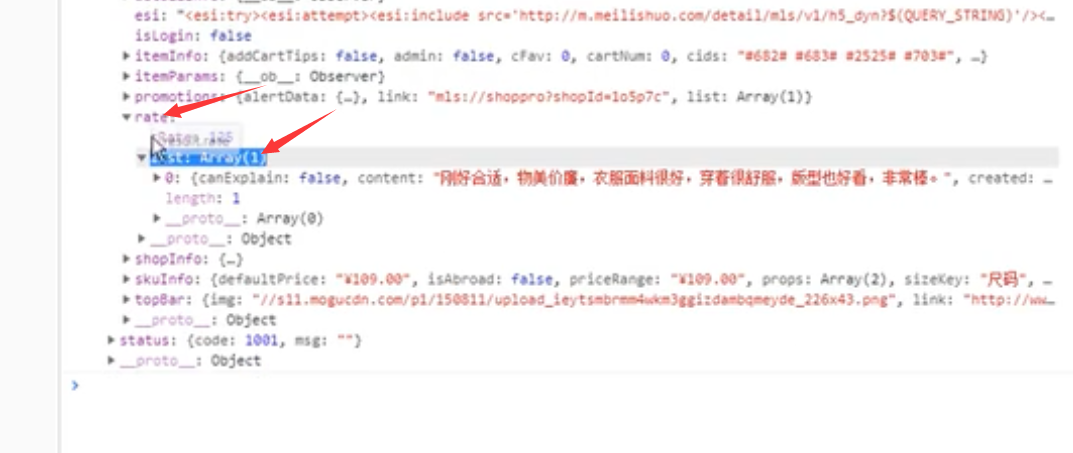
这里只展示一条:
服务器返回事件格式:
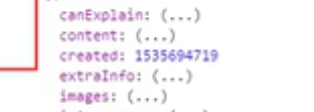
这里使用过滤器修改时间格式
时间戳转换为格式化时间:
1、将时间戳转换为Date对象
2、const date = new Data(时间戳*1000),因为时间戳一般为秒,Date()函数要求我们传入的是毫秒
3、将date进行格式化,转换为对应的字符串
4、获取年:date.getYear()
获取月:date.getMonth + 1(因为getMonth是从0开始)等待
一般开发中不用使用上述的方法去做,可以直接使用已经封装好的函数:
date->FormatString(date,‘格式化方式’)
格式化方式:yyyy-MM-dd
yyyy表示获取年份的后四位,yy表示获取年份的后两位,如2018为18
y:表示要获取几位的年份就写几个y
分隔符:可以是-,也可以是/(一般可以随便写)
MM:需要大写,这里写M是为了和hh:mm中的分钟做区别
想显示时分秒:yyy-MM-dd hh:mm:ss
h:hours,有的语言区分H和h,h(12小时制)/H(24小时制)
m:minutes分钟
s:秒,seconds
时间转换函数,js中没有原生的时间格式化函数,但是有人写好了,我们直接拿过来使用,放到common/utils.js中
utils.js
export function debounce(func, delay) {
  let timer = null
  // 参数是args,可变长,即可以不传
  return function(...args) {
    // 如果timer有值,则清除timer的值
    if(timer) clearTimeout(timer)
    timer = setTimeout(() => {
      // 执行传入的函数:func
      func.apply(this, args)
    }, delay)
  }
}

//时间转换函数
export function formatDate(date, fmt) {
  if (/(y+)/.test(fmt)) {
    fmt = fmt.replace(RegExp.$1, (date.getFullYear() + '').substr(4 - RegExp.$1.length));
  }
  let o = {
    'M+': date.getMonth() + 1,
    'd+': date.getDate(),
    'h+': date.getHours(),
    'm+': date.getMinutes(),
    's+': date.getSeconds()
  };
  for (let k in o) {
    if (new RegExp(`(${k})`).test(fmt)) {
      let str = o[k] + '';
      fmt = fmt.replace(RegExp.$1, (RegExp.$1.length === 1) ? str : padLeftZero(str));
    }
  }
  return fmt;
}
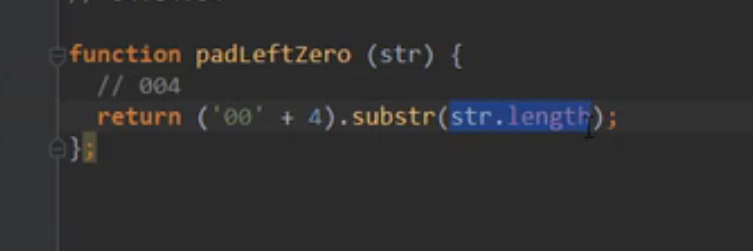
function padLeftZero(str) {
  // 保证时分秒显示两位,如果不足两位,用0补足
  return ('00' + str).substr(str.length);  //用0补齐位数
}
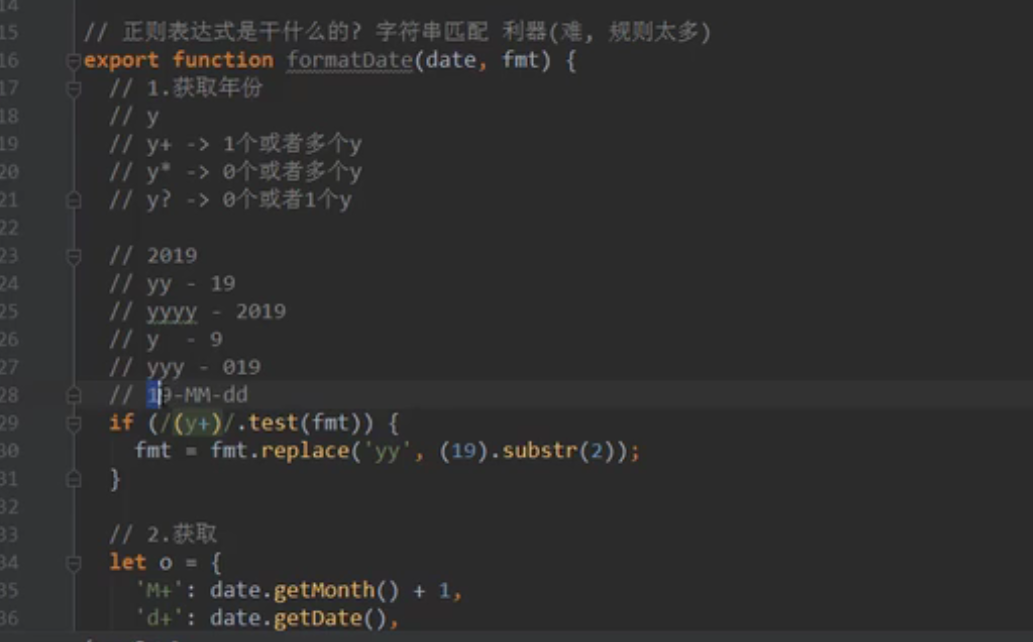
保证时分秒显示2位:
DetatilCommitInfo.vue
<template>
  <div v-if="Object.keys(CommentInfo).length !== 0" class="comment-info">
    <div class="info-header">
      <div class="header-title">用户评价</div>
      <div class="header-more">
        更多
        <i class="arrow-right"></i>
      </div>
    </div>
    <div class="info-user">
      <img :src="CommentInfo.user.avatar" alt />
      <span>{{CommentInfo.user.uname}}</span>
    </div>
    <div class="info-detail">
      <p>{{CommentInfo.content}}</p>
      <div class="info-other">
        <span class="date">{{CommentInfo.created | showDate}}</span>
        <span>{{CommentInfo.style}}</span>
      </div>
      <div class="info-imgs">
        <img :src="item" v-for="(item, index) in CommentInfo.images" :key="index" />
      </div>
    </div>
  </div>
</template>

<script>
import { formatDate } from "@/common/utils.js";
export default {
  name: "DetailCommentInfo",
  props: {
    CommentInfo: {
      type: Object,
      default() {
        return {};
      }
    }
  },
  filters: {
    showDate: function(value) {
      //服务器返回的时间不会是一个实际的日期,发过来的是一个毫秒数,我们要自己格式化
      //是以时间元年为起点,返回对应的时间戳
      let date = new Date(value * 1000);
      //这里的这个formatDate在很多语言中都内置了,但是js没有,这里是我直接网上复制过来的,看他的源码需要一定的正则知识
      return formatDate(date, "yyyy/MM/dd hh:mm");
    }
  }
};
</script>

<style>
.comment-info {
  padding: 5px 12px;
  color: #333;
  border-bottom: 5px solid #f2f5f8;
}

.info-header {
  height: 50px;
  line-height: 50px;
  border-bottom: 1px solid rgba(0, 0, 0, 0.1);
}

.header-title {
  float: left;
  font-size: 15px;
}

.header-more {
  float: right;
  margin-right: 10px;
  font-size: 13px;
}

.info-user {
  padding: 10px 0 5px;
}

.info-user img {
  width: 42px;
  height: 42px;
  border-radius: 50%;
}

.info-user span {
  position: relative;
  font-size: 15px;
  top: -15px;
  margin-left: 10px;
}

.info-detail {
  padding: 0 5px 15px;
}

.info-detail p {
  font-size: 14px;
  color: #777;
  line-height: 1.5;
}

.info-detail .info-other {
  font-size: 12px;
  color: #999;
  margin-top: 10px;
}

.info-other .date {
  margin-right: 8px;
}

.info-imgs {
  margin-top: 10px;
}

.info-imgs img {
  width: 70px;
  height: 70px;
  margin-right: 5px;
}
</style>
Detail.vue
<template>
  <div id="detail">
    <!--导航-->
    <detail-nav-bar class="detail-nav"></detail-nav-bar>
    <scroll class="content" ref="scroll">
      <detail-swiper :top-images="topImages"></detail-swiper>
      <detail-base-info :GoodsInfo="goods"></detail-base-info>
      <detail-shop-info :shop-info="shop"></detail-shop-info>
      <detail-goods-info :detail-info="detailInfo" @imageLoad="imageLoad"></detail-goods-info>
      <detail-param-info :goods-param="paramInfo"></detail-param-info>
      <detail-comment-info :comment-info="commentInfo"/>
    </scroll>
  </div>
</template>

<script>
import DetailNavBar from "./childComps/DetailNavBar";
import DetailSwiper from "./childComps/DetailSwiper";
import DetailBaseInfo from "./childComps/DetailBaseInfo";
import DetailShopInfo from "./childComps/DetailShopInfo";
import Scroll from "components/common/scroll/Scroll";
import DetailGoodsInfo from "./childComps/DetailGoodsInfo";
import DetailParamInfo from "./childComps/DetailParamInfo";
import DetailCommentInfo from "./childComps/DetailCommentInfo";

import {getDetail, Goods, Shop, GoodsParams} from "@/network/detail";

export default {
  name: "Detail",
  data() {
    return {
      iid: null,
      topImages: [],
      goods: {},
      shop: {},
      detailInfo: {},
      paramInfo: {},
      commentInfo: {}
    }
  },
  components: {
    DetailNavBar,
    DetailSwiper,
    DetailBaseInfo,
    DetailShopInfo,
    Scroll,
    DetailGoodsInfo,
    DetailParamInfo,
    DetailCommentInfo
  },
  methods: {
    imageLoad() {
      this.$refs.scroll.refresh()
    }
  },
  // 组件创建后获取并保存iid
  created() {
    // 1.保存传入的iid
    this.iid = this.$route.params.iid

    // 2.根据iid请求详情数据
    getDetail(this.iid).then(res => {
      // 1. 获取顶部图片的轮播数据
      this.topImages = res.result.itemInfo.topImages
      // 2.获取商品基本信息
      this.goods = new Goods(res.result.itemInfo, res.result.columns, res.result.shopInfo.services)
      // 3.创建店铺信息对象
      this.shop = new Shop(res.result.shopInfo)
      // 4.保存商品的详情数据
      this.detailInfo = res.result.detailInfo
      // 5.获取参数信息
      this.paramInfo = new GoodsParams(res.result.itemParams.info, res.result.itemParams.rule)
      // 6.取出评论信息:由于不是所有的商品都有评论,所以需要先判断一下
      if(res.result.rate.cRate !== 0) {
        this.commentInfo = res.result.rate.list[0]
      }
    })
  }
}
</script>

<style scoped>
#detail {
  position: relative;
  z-index: 10;
  background-color: #ffffff;
  height: 100vh;
}

.detail-nav {
  position: relative;
  z-index: 9;
  background-color: #ffffff;
}

.content {
  height: calc(100% - 44px);
}
</style>
效果:
1.10、商品推荐数据展示
商品推荐数据在recommend接口中,在detail.js中重新写一个数据请求接口
/*商品推荐数据接口*/
export function getRecommend() {
  return request({
    url: '/recommend'
  })
}
在Detail.vue中导入并使用getRecommend:导入
import {getDetail, Goods, Shop, GoodsParams, getRecommend} from "@/network/detail";
使用:
created() {
  // 1.保存传入的iid
  this.iid = this.$route.params.iid

  // 2.根据iid请求详情数据
  getDetail(this.iid).then(res => {
    // 1. 获取顶部图片的轮播数据
    this.topImages = res.result.itemInfo.topImages
    // 2.获取商品基本信息
    this.goods = new Goods(res.result.itemInfo, res.result.columns, res.result.shopInfo.services)
    // 3.创建店铺信息对象
    this.shop = new Shop(res.result.shopInfo)
    // 4.保存商品的详情数据
    this.detailInfo = res.result.detailInfo
    // 5.获取参数信息
    this.paramInfo = new GoodsParams(res.result.itemParams.info, res.result.itemParams.rule)
    // 6.取出评论信息:由于不是所有的商品都有评论,所以需要先判断一下
    if(res.result.rate.cRate !== 0) {
      this.commentInfo = res.result.rate.list[0]
    }
  })

  // 请求推荐数据
  getRecommend().then(res => {
    console.log(res);
  })
}
数据结构:
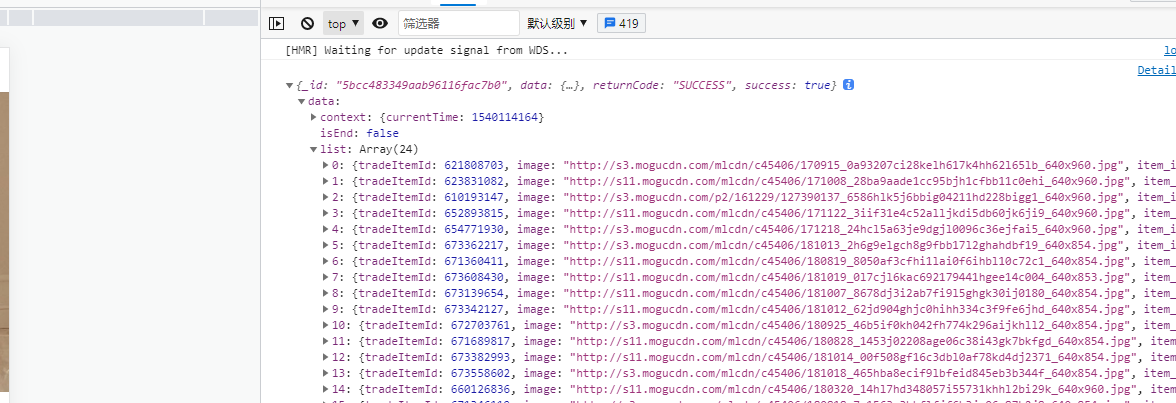
保存数据:在data中定义一个变量recommends用于保存请求到的数据
// 请求推荐数据
getRecommend().then(res => {
  // 保存数据
  this.recommends = res.data.list
})
数据的展示:我们这里不需要创建新的组件,因为之前我们的GoodsList组件就是用于展示商品列表的,并且GoodsList要求传入的也是一个数组,所以我们直接导入使用GoodsList.vue即可
GoodsList.vue代码不变,GoodListItem.vue中使用计算属性显示图片,因为首页和详情页中的图片的路径不同:
computed: {
  // 用于返回图片,因为不用的组件显示图片的方式不同
  showImage() {
    return this.goodsItem.image || this.goodsItem.show.img
  }
}
还有一个问题:
就是在GoodsListItem中,我们监听图片加载事件是把事件通过$bus发送到Home组件中,即事件监听是在Home组件中处理,而不是Detail组件中处理
方式一:修改imageLoad方法如下:
imageLoad() {
  // 如果路由中包含/home路径,则把事件发送到Home组件
  if(this.$route.path.indexOf('/home')) {
    this.$bus.$emit('homeItemImageLoad')
  } else if(this.$route.path.indexOf('/detail')) {
    this.$bus.$emit('detailItemImageLoad')
  }
},
方式二:发出的还是itemImageLoad事件:
只是在首页中修改代码,一旦离开了首页就不监听itemImageLoad事件
添加保存监听事件函数的变量:itemImgLisenter:
data() {
  return {
    // result: null
    banners: [],
    recommends: [],
    goods: {
      'pop': {page: 0, list: []},
      'new': {page: 0, list: []},
      'sell': {page: 0, list: []}
    },
    currentType: 'pop',
    isShowBackTop: false,
    tabOffsetTop: 0,
    isTabFixed: false,
    // 用于保存离开组件时y的位置
    saveY: 0,
    itemImgListener: null
  }
},
保存监听事件的函数:
mounted() {
  const refresh = debounce(this.$refs.scroll.refresh, 1)
  // 对监听的事件进行保存
  this.itemImgListener = () => {
    refresh()
  }
  this.$bus.$on('itemImageLoad', this.itemImgListener)
},
取消全局事件的监听:
deactivated() {
  // 1.保存y值
  this.saveY = this.$refs.scroll.getScrollY()

  // 2.取消全局事件监听:参数一,要取消的事件名,参数二,该事件名对应的函数
  // 这里不能只传一个事件名,这样的话所有的该事件的监听都会被取消,如果传入函数的话,只会取消该事件对应的函数的监听
  this.$bus.$off('itemImageLoad', this.itemImgListener)
},
我们的项目中选择了方式二:
Home.vue
<template>
  <div id="home">
    <nav-bar class="home-nav">
      <div slot="center">购物街</div>
    </nav-bar>
    <tab-control :titles="['流行', '精选', '新款']"
                 ref="tabControl01"
                 @tabClick="tabClick"
                 class="tab-control"
                 v-show="isTabFixed"/>
    <!-- :probe-type加冒号和不加冒号的区别:不加冒号,"3"会被当成字符串传过去,而我们Scroll中设置的类型为Number
       加了冒号后:如果符合标识符命名规范就会被当成变量,会去vue的data中取值传过去,如果是数组就会被当成数字类型(Number)传过去-->
    <scroll class="content" ref="scroll"
            :probe-type="3"
            @scroll="contentScroll"
            :pull-up-load="true"
            @pullingUp="loadMore">
      <home-swiper :banners="banners" @swiperImageLoad="swiperImageLoad"/>
      <recommend-view :recommends="recommends"/>
      <feature-view/>
      <tab-control :titles="['流行', '精选', '新款']"
                   ref="tabControl02"
                   @tabClick="tabClick"/>
      <goods-list :goods="showGoods"/>
    </scroll>
    <!-- v-show:为true时显示,为false时隐藏-->
    <back-top @click.native="backClick" v-show="isShowBackTop"/>
  </div>
</template>

<script>
// 导入NavBar组件:分类导入,并且在注册组件时,保持和导入的顺序一致,方便以后管理。
import HomeSwiper from "./childComps/HomeSwiper";
import RecommendView from "./childComps/RecommendView";
import FeatureView from "./childComps/FeatureView";

import NavBar from "components/common/navbar/NavBar";
import TabControl from "components/content/tabControl/TabControl";
import GoodsList from "components/content/goods/GoodsList";
import Scroll from "components/common/scroll/Scroll";
import BackTop from "components/content/backTop/BackTop";

import {getHomeMultiData, getHomeGoods} from "network/home";
import {debounce} from "common/utils";

export default {
  name: "Home",
  components: {
    HomeSwiper,
    RecommendView,
    FeatureView,
    NavBar,
    TabControl,
    GoodsList,
    Scroll,
    BackTop
  },
  data() {
    return {
      // result: null
      banners: [],
      recommends: [],
      goods: {
        'pop': {page: 0, list: []},
        'new': {page: 0, list: []},
        'sell': {page: 0, list: []}
      },
      currentType: 'pop',
      isShowBackTop: false,
      tabOffsetTop: 0,
      isTabFixed: false,
      // 用于保存离开组件时y的位置
      saveY: 0,
      itemImgListener: null
    }
  },
  created() {
    // 1、请求多个数据
    this.getHomeMultiData()

    // 2.商品数据请求:this.函数名,调用的是vue methods中的函数,不使用this时表示的是使用import导入的函数
    this.getHomeGoods('pop')

    this.getHomeGoods('new')

    this.getHomeGoods('sell')
  },
  mounted() {
    const refresh = debounce(this.$refs.scroll.refresh, 1)
    // 对监听的事件进行保存
    this.itemImgListener = () => {
      refresh()
    }
    this.$bus.$on('itemImageLoad', this.itemImgListener)
  },
  computed: {
    showGoods() {
      return this.goods[this.currentType].list
    }
  },
  destroyed() {
    console.log('home组件销毁');
  },
  activated() {
    this.$refs.scroll.scrollTo(0, this.saveY, 0)
    this.$refs.scroll.refresh()
  },
  deactivated() {
    // 1.保存y值
    this.saveY = this.$refs.scroll.getScrollY()

    // 2.取消全局事件监听:参数一,要取消的事件名,参数二,该事件名对应的函数
    // 这里不能只传一个事件名,这样的话所有的该事件的监听都会被取消,如果传入函数的话,只会取消该事件对应的函数的监听
    this.$bus.$off('itemImageLoad', this.itemImgListener)
  },
  methods: {
    /**
     * 事件监听相关方法
     */
    tabClick(index) {
      switch(index) {
        case 0:
          this.currentType = 'pop'
          break
        case 1:
          this.currentType = 'new'
          break
        case 2:
          this.currentType = 'sell'
          break
      }
      this.$refs.tabControl01.currentIndex = index
      this.$refs.tabControl02.currentIndex = index
    },
    backClick() {
      // 通过ref拿到Scroll组件中data中的scroll对象
      // 通过scroll拿到Scroll中的methods中的方法
      this.$refs.scroll.scrollTo(0, 0, 1000)
    },
    contentScroll(position) {
      // 在Home组件中就可以拿到Scroll中监听到的位置信息了,当y大于1000的时候显示返回顶部
      // 1.判断BackScroll是否显示
      this.isShowBackTop = (-position.y) > 1000

      // 2.决定tabControl是否吸顶(position:fixed)
      this.isTabFixed = (-position.y) > this.tabOffsetTop
    },
    loadMore() {
      this.getHomeGoods(this.currentType)
    },
    swiperImageLoad() {
      // 拿到tabControl的offsetTop
      this.tabOffsetTop = this.$refs.tabControl02.$el.offsetTop;
    },
    /**
     * 网络请求相关方法
     */
    getHomeMultiData() {
      getHomeMultiData().then(res => {
        this.banners = res.data.banner.list;
        this.recommends = res.data.recommend.list;
      })
    },
    getHomeGoods(type) {
      const page = this.goods[type].page + 1
      getHomeGoods(type, page).then(res => {
        // 数据的解构:它会把我们从服务器取到的那一页的数组列表一个一个解构出来然后在放到goods中的list中
        this.goods[type].list.push(...res.data.list)
        this.goods[type].page += 1

        // 完成上拉加载更多
        this.$refs.scroll.finishPullUp()
      })
    }
  }
}
</script>

<!--
  style中设置scoped的好处,该组件中的样式只对本组件中的html样式标签起作用,如果没有scoped可能有影响其他组件同名class下的样式
-->
<style scoped>
/*如果使用导航栏固定位置,则轮播图会与顶部对齐,从而轮播图会被导航栏遮挡掉一部分,因此把home整体下拉一点*/
#home {
  /*padding-top: 44px;*/
  height: 100vh;
  position: relative;
}
.home-nav {
  background-color: var(--color-tint);
  color: #e9e9e9;

  /*让导航栏不滚动*/
 /* position: fixed;
  left: 0;
  right: 0;
  top: 0;
  z-index: 99;*/
}

.tab-control {
  /*使用相对定位可以使用z-index*/
  position: relative;;
  z-index: 9;
}

.content {
  /*height: 300px;*/
  overflow: hidden;
  position: absolute;
  top: 44px;
  bottom: 49px;
  left: 0;
  right: 0;
}
</style>
在Detail.vue中监听:
注意,Detail中我们取消了keep-alive,当我们离开Detail时,并不会调用deactivated,而是调用destroyed
在Detail中做的操作和Home中的操作是一样的,所以我们抽离封装一下函数
现在在两个组件中使用到重复代码,需要使用混入技术:mix in
注意:这里不能使用继承:但继承是在类中使用的。这里是两个对象,不能使用继承
混入代码中可以使用vue生命周期中的函数
mixin.js
import {debounce} from "@/common/utils";

export const itemListenerMixin = {
  mounted() {
    let newRefresh = debounce(this.$refs.scroll.refresh, 100)
    this.itemImgListener = () => {
      newRefresh()
    }
    this.$bus.$on('itemImageLoad', this.itemImgListener)
    console.log('这时混入代码');
  }
}
在Detail中导入mixin.js
import {itemListenerMixin} from "@/common/mixin";
使用:
mixins: [itemListenerMixin],
这时,itemListenerMixin中的代码就会加到Detail组件中的mounted生命周期中:
把data也混入:mixin.js
import {debounce} from "@/common/utils";

export const itemListenerMixin = {
  data() {
    return {
      itemImgListener: null
    }
  },
  mounted() {
    let newRefresh = debounce(this.$refs.scroll.refresh, 100)
    this.itemImgListener = () => {
      newRefresh()
    }
    this.$bus.$on('itemImageLoad', this.itemImgListener)
  }
}
Detail.vue
<template>
  <div id="detail">
    <!--导航-->
    <detail-nav-bar class="detail-nav"></detail-nav-bar>
    <scroll class="content" ref="scroll">
      <detail-swiper :top-images="topImages"></detail-swiper>
      <detail-base-info :GoodsInfo="goods"></detail-base-info>
      <detail-shop-info :shop-info="shop"></detail-shop-info>
      <detail-goods-info :detail-info="detailInfo" @imageLoad="imageLoad"></detail-goods-info>
      <detail-param-info :goods-param="paramInfo"></detail-param-info>
      <detail-comment-info :comment-info="commentInfo"/>
      <goods-list :goods="recommends"/>
    </scroll>
  </div>
</template>

<script>
import DetailNavBar from "./childComps/DetailNavBar";
import DetailSwiper from "./childComps/DetailSwiper";
import DetailBaseInfo from "./childComps/DetailBaseInfo";
import DetailShopInfo from "./childComps/DetailShopInfo";
import DetailGoodsInfo from "./childComps/DetailGoodsInfo";
import DetailParamInfo from "./childComps/DetailParamInfo";
import DetailCommentInfo from "./childComps/DetailCommentInfo";

import Scroll from "components/common/scroll/Scroll";
import GoodsList from "components/content/goods/GoodsList";

import {getDetail, Goods, Shop, GoodsParams, getRecommend} from "@/network/detail";
import {itemListenerMixin} from "@/common/mixin";

export default {
  name: "Detail",
  data() {
    return {
      iid: null,
      topImages: [],
      goods: {},
      shop: {},
      detailInfo: {},
      paramInfo: {},
      commentInfo: {},
      recommends: [],
    }
  },
  components: {
    DetailNavBar,
    DetailSwiper,
    DetailBaseInfo,
    DetailShopInfo,
    Scroll,
    DetailGoodsInfo,
    DetailParamInfo,
    DetailCommentInfo,
    GoodsList
  },
  mixins: [itemListenerMixin],
  methods: {
    imageLoad() {
      this.$refs.scroll.refresh()
    }
  },
  // 组件创建后获取并保存iid
  created() {
    // 1.保存传入的iid
    this.iid = this.$route.params.iid

    // 2.根据iid请求详情数据
    getDetail(this.iid).then(res => {
      // 1. 获取顶部图片的轮播数据
      this.topImages = res.result.itemInfo.topImages
      // 2.获取商品基本信息
      this.goods = new Goods(res.result.itemInfo, res.result.columns, res.result.shopInfo.services)
      // 3.创建店铺信息对象
      this.shop = new Shop(res.result.shopInfo)
      // 4.保存商品的详情数据
      this.detailInfo = res.result.detailInfo
      // 5.获取参数信息
      this.paramInfo = new GoodsParams(res.result.itemParams.info, res.result.itemParams.rule)
      // 6.取出评论信息:由于不是所有的商品都有评论,所以需要先判断一下
      if(res.result.rate.cRate !== 0) {
        this.commentInfo = res.result.rate.list[0]
      }
    })

    // 请求推荐数据
    getRecommend().then(res => {
      // 保存数据
      this.recommends = res.data.list
    })
  },
  mounted() {

  },
  destroyed() {
    this.$bus.off('itemImageLoad', this.itemImgListener)
  }
}
</script>

<style scoped>
#detail {
  position: relative;
  z-index: 10;
  background-color: #ffffff;
  height: 100vh;
}

.detail-nav {
  position: relative;
  z-index: 9;
  background-color: #ffffff;
}

.content {
  height: calc(100% - 44px);
}
</style>
效果:
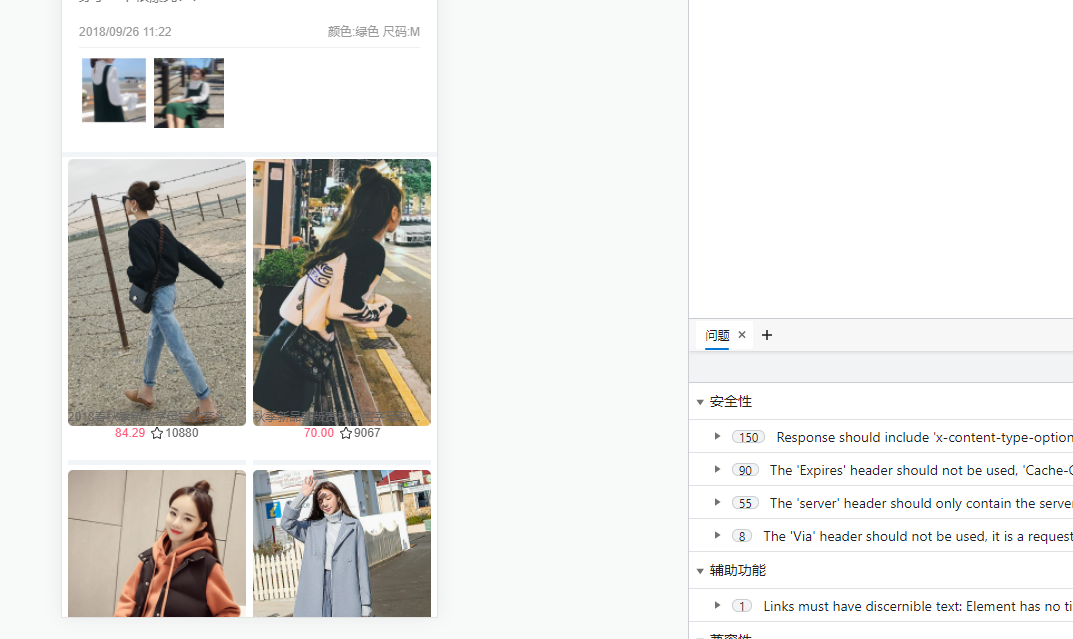
这里图片显示有点问题。后面看能不能解决
1.11、回顾
详情页导航栏实现:
- 返回按钮:left
- 标题列表的展示
请求详情数据:
- 接口:/detail?iid=
轮播图实现:
- Swiper/SwiperItem
商品基本信息展示:
- 数据来自四面八方:使用一个对象整合
- 把这个对象传到子组件中
店铺信息展示:
商品图片展示
参数信息展示
评论信息展示
- 事件格式化
- yyyy-MM-dd hh:mm:ss
推荐展示:
- 请求推荐数据
- GoodsList展示数据
mixin的使用:
- 创建混入对象:const mixin = {}
- 组件对象中使用mixin混入
详情页不能滚动处理方式二:使用混入
mixin.js
import {debounce} from "@/common/utils";

export const itemListenerMixin = {
  data() {
    return {
      itemImgListener: null,
      newRefresh: null
    }
  },
  mounted() {
    this.newRefresh = debounce(this.$refs.scroll.refresh, 100)
    this.itemImgListener = () => {
      this.newRefresh()
    }
    this.$bus.$on('itemImageLoad', this.itemImgListener)
  }
}
在Detail.vue中直接使用:
methods: {
  imageLoad() {
    this.newRefresh()
  }
}
我们之前使用的是父子组件的通信:$emit(),我们项目中没有改为现在这个方式,使用的还是父子组件通信的方式。
注意:在methods中不能直接如下使用:
methods: {
  imageLoad() {
    let newRefresh = debounce(this.$refs.scroll.refresh, 100)
    this.$bus.$on('itemImageLoad', () => {
      newRefresh()
    })
  }
}
如果这样使用的话,有几张图片加载,imageLoad()函数就会被重新调用几次,并不能达到节流的效果,这是因为imageLoad()是函数,没加载一张图片,就会被调用一次,而newRefresh是局部变量,没调用一次函数就会被重新创建一次,而在mounted中,其代码如下:
mounted() {
  let newRefresh = debounce(this.$refs.scroll.refresh, 100)
  this.itemImgListener = () => {
    newRefresh()
  }
  this.$bus.$on('itemImageLoad', this.itemImgListener)
}
由于mounted只被执行一次,所以newRefresh不会被重新创建,他一直是一个debounce,里面的timer也会被重新清空赋值,newRefresh属于闭包的调用,所以可以达到节流的效果。
1.12、点击标题滚动到对应的位置
1、详情页的联动效果
2、底部工具栏,点击加入购物车
3、回到顶部
1、联动效果
标题和内容的联动效果
a、点击标题滚动到正确的主题位置
DetailNavBar组件发出事件:
methods: {
  titleClick(index) {
    this.currentIndex = index
    // 发出事件
    this.$emit('titleClick', index)
  },
  backClick() {
    // go(-1)回退一格,相当于back()
    this.$router.go(-1)
  }
}
注意在vue中,组件中props中的变量名为驼峰命名,则在传入数据是使用该属性时用-风格(因为html在解析时不区分大小写),如imageLoad,使用属性时为:image-load="",而事件监听时,即@后可以使用驼峰命名(一般里面传出什么,我们就写什么,好像这个使用-会出现一些问题)
定义变量themeTopYs用于保存商品、参数等的y值,其中商品的y为0(第一个)
其他的y值可以使用offsetTop,即组件的offsetTop,通过ref获取,如
参数的offsetTop: this. p a r a m s . params. params.el.offsetTop
我们获取offsetTop的时候,不能再mounted中,因为只是只是数据可能还没有渲染,只是把组件给挂载了。
我们需要再updated中获取,但是updated更新很频繁,只要有值变化就会更新,所以我们在updated中需要每次都把themeTopYs赋空,防止无限制的加入数字。
updated() {
  this.themeTopYs = []
  this.themeTopYs.push(0)
  this.themeTopYs.push(this.$refs.params.$el.offsetTop)
  this.themeTopYs.push(this.$refs.comment.$el.offsetTop)
  this.themeTopYs.push(this.$refs.recommend.$el.offsetTop)
  console.log(this.themeTopYs);
},
我们也可以在created的请求数据中,把数据都赋值完成后(这时数据还没渲染,可能还去不到offsetTop值),使用this.$nextTick()函数,这个函数的作用就是在数据渲染完成后再来回调nextTick(函数)中的函数
注意:一点要在数据拿到赋值完成后再调用this. n e x t T i c k ( ) , 即 再 t h e n ( ) 中 写 该 函 数 ( t h i s . nextTick(),即再then()中写该函数(this. nextTick(),即再then()中写该函数(this.nextTick())
虽然再created中拿到数据再获取offsetTop值看起来不错,但还是会有问题,因为this.$nextTick()可以保证把数据加载完了,但是不包含图片的加载,即有的图片还未加载完成,所以y值还是有错误。
offsetTop值不对,一般都是由于图片延迟加载造成的。
所以我们需要等到图片加载完成再赋值。
方式三:我们再methods中,等待监听图片加载完成,我们再获取offsetTop值
methods: {
  imageLoad() {
    this.$refs.scroll.refresh()

    this.themeTopYs = []
    this.themeTopYs.push(0)
    this.themeTopYs.push(this.$refs.params.$el.offsetTop)
    this.themeTopYs.push(this.$refs.comment.$el.offsetTop)
    this.themeTopYs.push(this.$refs.recommend.$el.offsetTop)
    console.log(this.themeTopYs);
  }
}
也可对获取值进行防抖操作:
methods: {
  this.getThemeTopY = debounce(() => {
    this.themeTopYs = []

    this.themeTopYs.push(0)
    this.themeTopYs.push(this.$refs.params.$el.offsetTop)
    this.themeTopYs.push(this.$refs.comment.$el.offsetTop)
    this.themeTopYs.push(this.$refs.recommend.$el.offsetTop)
    console.log(this.themeTopYs);
  }, 100)
}
我们这里还是要做防抖操作的,否则位置还是会有一些偏差
Detail.vue
<template>
  <div id="detail">
    <!--导航-->
    <detail-nav-bar class="detail-nav" @titleClick="titleClick"></detail-nav-bar>
    <scroll class="content" ref="scroll">
      <detail-swiper :top-images="topImages"></detail-swiper>
      <detail-base-info :GoodsInfo="goods"></detail-base-info>
      <detail-shop-info :shop-info="shop"></detail-shop-info>
      <detail-goods-info :detail-info="detailInfo" @imageLoad="imageLoad"></detail-goods-info>
      <detail-param-info :goods-param="paramInfo" ref="params"></detail-param-info>
      <detail-comment-info :comment-info="commentInfo" ref="comment"/>
      <goods-list :goods="recommends" ref="recommend"/>
    </scroll>
  </div>
</template>

<script>
import DetailNavBar from "./childComps/DetailNavBar";
import DetailSwiper from "./childComps/DetailSwiper";
import DetailBaseInfo from "./childComps/DetailBaseInfo";
import DetailShopInfo from "./childComps/DetailShopInfo";
import DetailGoodsInfo from "./childComps/DetailGoodsInfo";
import DetailParamInfo from "./childComps/DetailParamInfo";
import DetailCommentInfo from "./childComps/DetailCommentInfo";

import Scroll from "components/common/scroll/Scroll";
import GoodsList from "components/content/goods/GoodsList";

import {getDetail, Goods, Shop, GoodsParams, getRecommend} from "@/network/detail";
import {itemListenerMixin} from "@/common/mixin";

export default {
  name: "Detail",
  data() {
    return {
      iid: null,
      topImages: [],
      goods: {},
      shop: {},
      detailInfo: {},
      paramInfo: {},
      commentInfo: {},
      recommends: [],
      themeTopYs: [],
      themeTopY: null
    }
  },
  components: {
    DetailNavBar,
    DetailSwiper,
    DetailBaseInfo,
    DetailShopInfo,
    Scroll,
    DetailGoodsInfo,
    DetailParamInfo,
    DetailCommentInfo,
    GoodsList
  },
  mixins: [itemListenerMixin],
  methods: {
    imageLoad() {
      this.$refs.scroll.refresh()

      this.themeTopYs = []
      this.themeTopYs.push(0)
      this.themeTopYs.push(this.$refs.params.$el.offsetTop)
      this.themeTopYs.push(this.$refs.comment.$el.offsetTop)
      this.themeTopYs.push(this.$refs.recommend.$el.offsetTop)
    },
    titleClick(index) {
      this.$refs.scroll.scrollTo(0, -this.themeTopYs[index], 100)
    }
  },
  // 组件创建后获取并保存iid
  created() {
    // 1.保存传入的iid
    this.iid = this.$route.params.iid

    // 2.根据iid请求详情数据
    getDetail(this.iid).then(res => {
      // 1. 获取顶部图片的轮播数据
      this.topImages = res.result.itemInfo.topImages
      // 2.获取商品基本信息
      this.goods = new Goods(res.result.itemInfo, res.result.columns, res.result.shopInfo.services)
      // 3.创建店铺信息对象
      this.shop = new Shop(res.result.shopInfo)
      // 4.保存商品的详情数据
      this.detailInfo = res.result.detailInfo
      // 5.获取参数信息
      this.paramInfo = new GoodsParams(res.result.itemParams.info, res.result.itemParams.rule)
      // 6.取出评论信息:由于不是所有的商品都有评论,所以需要先判断一下
      if(res.result.rate.cRate !== 0) {
        this.commentInfo = res.result.rate.list[0]
      }

      // 第2次获取,值不对(图片没有加载完成)
      /*this.$nextTick(() => {
        this.themeTopYs = []
        this.themeTopYs.push(0)
        this.themeTopYs.push(this.$refs.params.$el.offsetTop)
        this.themeTopYs.push(this.$refs.comment.$el.offsetTop)
        this.themeTopYs.push(this.$refs.recommend.$el.offsetTop)
        console.log(this.themeTopYs);
      })*/
    })

    // 请求推荐数据
    getRecommend().then(res => {
      // 保存数据
      this.recommends = res.data.list
    })

    // 第1次获取:值不对:$el没有渲染
    /*this.themeTopYs = []
    this.themeTopYs.push(0)
    this.themeTopYs.push(this.$refs.params.$el.offsetTop)
    this.themeTopYs.push(this.$refs.comment.$el.offsetTop)
    this.themeTopYs.push(this.$refs.recommend.$el.offsetTop)
    console.log(this.themeTopYs);*/

    this.themeTopY = debounce(() => {
      this.themeTopYs = []
      this.themeTopYs.push(0)
      this.themeTopYs.push(this.$refs.params.$el.offsetTop)
      this.themeTopYs.push(this.$refs.comment.$el.offsetTop)
      this.themeTopYs.push(this.$refs.recommend.$el.offsetTop)
    }, 100)
  },
  mounted() {
  },
  updated() {
  },
  destroyed() {
    this.$bus.off('itemImageLoad', this.itemImgListener)
  }
}
</script>

<style scoped>
#detail {
  position: relative;
  z-index: 10;
  background-color: #ffffff;
  height: 100vh;
}

.detail-nav {
  position: relative;
  z-index: 9;
  background-color: #ffffff;
}

.content {
  height: calc(100% - 44px);
}
</style>
效果:
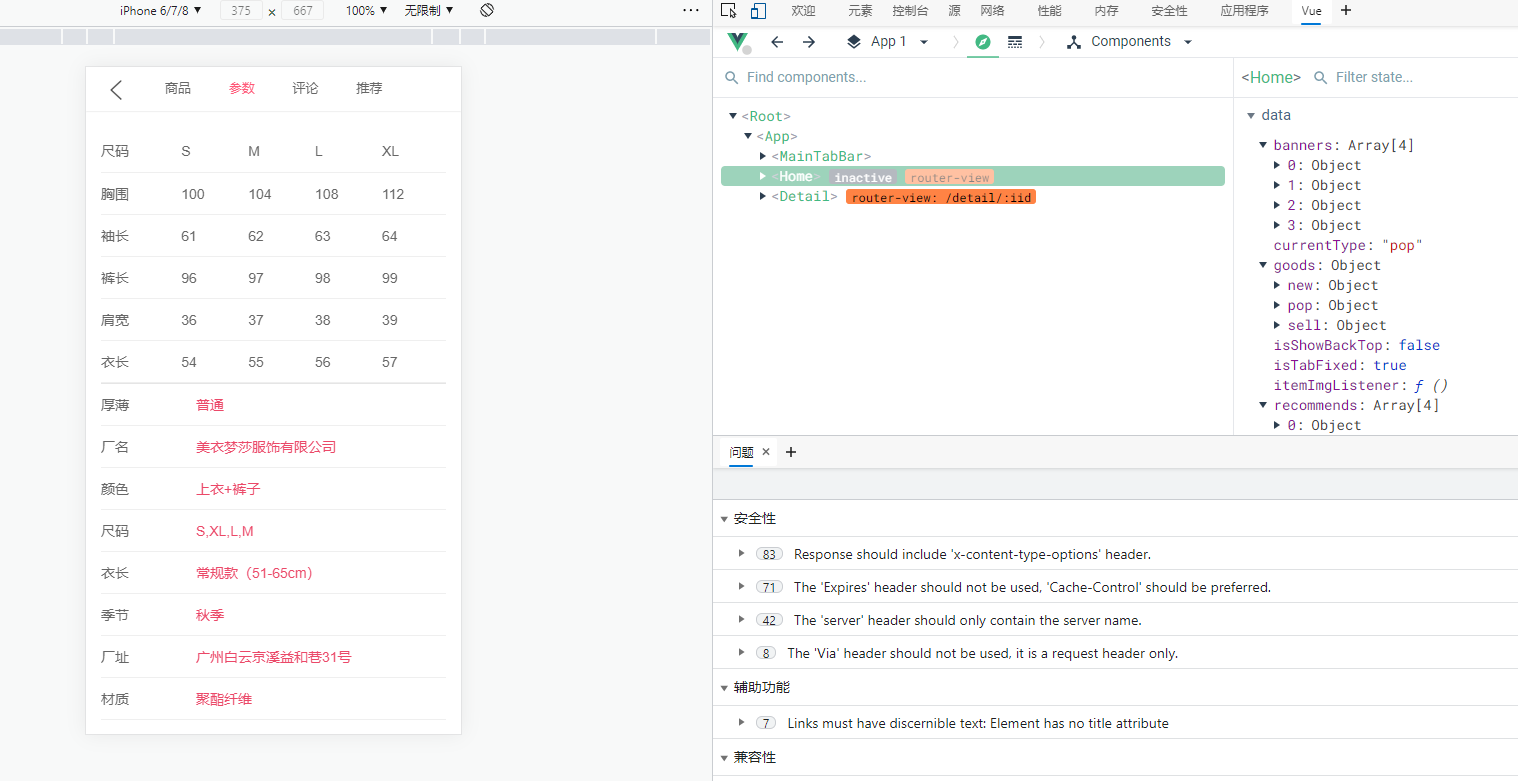
总结:
- 再detail中监听标题的点击,获取index
- 滚动到对应的主题:
- 获取所有主题的offsetTop
- 问题
- created肯定不行,压根不能获取元素
- mounted也不行,数据还没有渲染
- 获取到数据的回调中也不行(this.nextTick()),图片的高度还没有被计算
- 在图片加载完成后,获取的高度才满足
注意:offsetTop中的y是正值,而scroll滚动时的y是负值。
b、滚动内容,显示对应标题
当滚动内容时,我们之前再scroll中发出了一个scroll事件,我们可以Detail中监听这个事件,当y变化到一定程度时,就修改顶部标题
注意:
# i in this.themeTopYs可以拿到themTopYs数组的下标
# 但是这里的i是字符串str,执行i+1时,如果i=0,则i=1=01,如果i=2,则i+1=21等
for(i in this.themeTopYs){
  if(positionY > this.themeTopYs[i] && positionY < this.themeTopYs[i+1]) {

  }
}
这里使用一种比较笨的方法:
// 监听内容的滚动
contentScroll(position) {
  // 1.获取y值
  const positionY = -position.y
  // positionY在0~this.themeTopYs[1]之间,index=0
  // positionY在this.themeTopYs[1]~this.themeTopYs[2]之间,index=1
  // positionY在this.themeTopYs[2]~this.themeTopYs[3]之间,index=2
  // positionY>this.themeTopYs[3],index=3
  for(let i = 0;i < this.themeTopYs.length; i++) {
    if(positionY > this.themeTopYs[i] && positionY < this.themeTopYs[i+1]) {

    }
  }
}
还有一个问题:当i=3时,i=1=4出现越界问题
// 监听内容的滚动
contentScroll(position) {
  // 1.获取y值
  const positionY = -position.y
  const length = this.themeTopYs.length
  // positionY在0~this.themeTopYs[1]之间,index=0
  // positionY在this.themeTopYs[1]~this.themeTopYs[2]之间,index=1
  // positionY在this.themeTopYs[2]~this.themeTopYs[3]之间,index=2
  // positionY>this.themeTopYs[3],index=3
  for(let i = 0;i < this.themeTopYs.length; i++) {
    if((i < length-1 && positionY > this.themeTopYs[i] && positionY < this.themeTopYs[i+1]) || (i === length - 1 && positionY > this.themeTopYs[i])) {
      this.currentIndex = i
      console.log(i)
    }
  }
}
这时发现i打印非常频繁,只要有滚动,就会打印i,最终解决方法如下:
// 监听内容的滚动
contentScroll(position) {
  // 1.获取y值
  const positionY = -position.y
  const length = this.themeTopYs.length
  // positionY在0~this.themeTopYs[1]之间,index=0
  // positionY在this.themeTopYs[1]~this.themeTopYs[2]之间,index=1
  // positionY在this.themeTopYs[2]~this.themeTopYs[3]之间,index=2
  // positionY>this.themeTopYs[3],index=3
  for(let i = 0;i < this.themeTopYs.length; i++) {
    if(this.currentIndex !== i && ((i < length-1 && positionY >= this.themeTopYs[i] && positionY < this.themeTopYs[i+1]) || (i === length - 1 && positionY >= this.themeTopYs[i]))) {
      this.currentIndex = i
      console.log(this.currentIndex);
    }
  }
}
Detail.vue
<template>
  <div id="detail">
    <!--导航-->
    <detail-nav-bar class="detail-nav" @titleClick="titleClick" ref="detailNav"></detail-nav-bar>
    <scroll class="content" ref="scroll" @scroll="contentScroll" :probe-type="3">
      <detail-swiper :top-images="topImages"></detail-swiper>
      <detail-base-info :GoodsInfo="goods"></detail-base-info>
      <detail-shop-info :shop-info="shop"></detail-shop-info>
      <detail-goods-info :detail-info="detailInfo" @imageLoad="imageLoad"></detail-goods-info>
      <detail-param-info :goods-param="paramInfo" ref="params"></detail-param-info>
      <detail-comment-info :comment-info="commentInfo" ref="comment"/>
      <goods-list :goods="recommends" ref="recommend"/>
    </scroll>
  </div>
</template>

<script>
import DetailNavBar from "./childComps/DetailNavBar";
import DetailSwiper from "./childComps/DetailSwiper";
import DetailBaseInfo from "./childComps/DetailBaseInfo";
import DetailShopInfo from "./childComps/DetailShopInfo";
import DetailGoodsInfo from "./childComps/DetailGoodsInfo";
import DetailParamInfo from "./childComps/DetailParamInfo";
import DetailCommentInfo from "./childComps/DetailCommentInfo";

import Scroll from "components/common/scroll/Scroll";
import GoodsList from "components/content/goods/GoodsList";

import {getDetail, Goods, Shop, GoodsParams, getRecommend} from "@/network/detail";
import {itemListenerMixin} from "@/common/mixin";
import {debounce} from "@/common/utils";

export default {
  name: "Detail",
  data() {
    return {
      iid: null,
      topImages: [],
      goods: {},
      shop: {},
      detailInfo: {},
      paramInfo: {},
      commentInfo: {},
      recommends: [],
      themeTopYs: [],
      themeTopY: null,
      currentIndex: 0
    }
  },
  components: {
    DetailNavBar,
    DetailSwiper,
    DetailBaseInfo,
    DetailShopInfo,
    Scroll,
    DetailGoodsInfo,
    DetailParamInfo,
    DetailCommentInfo,
    GoodsList
  },
  mixins: [itemListenerMixin],
  methods: {
    imageLoad() {
      this.$refs.scroll.refresh()

      this.themeTopYs = []
      this.themeTopYs.push(0)
      this.themeTopYs.push(this.$refs.params.$el.offsetTop)
      this.themeTopYs.push(this.$refs.comment.$el.offsetTop)
      this.themeTopYs.push(this.$refs.recommend.$el.offsetTop)
    },
    titleClick(index) {
      this.$refs.scroll.scrollTo(0, -this.themeTopYs[index], 100)
    },
    // 监听内容的滚动
    contentScroll(position) {
      // 1.获取y值
      const positionY = -position.y
      const length = this.themeTopYs.length
      // positionY在0~this.themeTopYs[1]之间,index=0
      // positionY在this.themeTopYs[1]~this.themeTopYs[2]之间,index=1
      // positionY在this.themeTopYs[2]~this.themeTopYs[3]之间,index=2
      // positionY>this.themeTopYs[3],index=3
      for(let i = 0;i < this.themeTopYs.length; i++) {
        if(this.currentIndex !== i && ((i < length-1 && positionY > this.themeTopYs[i] && positionY < this.themeTopYs[i+1]) || (i === length - 1 && positionY > this.themeTopYs[i]))) {
          this.currentIndex = i
          this.$refs.detailNav.currentIndex = this.currentIndex
        }
      }
    }
  },
  // 组件创建后获取并保存iid
  created() {
    // 1.保存传入的iid
    this.iid = this.$route.params.iid

    // 2.根据iid请求详情数据
    getDetail(this.iid).then(res => {
      // 1. 获取顶部图片的轮播数据
      this.topImages = res.result.itemInfo.topImages
      // 2.获取商品基本信息
      this.goods = new Goods(res.result.itemInfo, res.result.columns, res.result.shopInfo.services)
      // 3.创建店铺信息对象
      this.shop = new Shop(res.result.shopInfo)
      // 4.保存商品的详情数据
      this.detailInfo = res.result.detailInfo
      // 5.获取参数信息
      this.paramInfo = new GoodsParams(res.result.itemParams.info, res.result.itemParams.rule)
      // 6.取出评论信息:由于不是所有的商品都有评论,所以需要先判断一下
      if(res.result.rate.cRate !== 0) {
        this.commentInfo = res.result.rate.list[0]
      }

      // 第2次获取,值不对(图片没有加载完成)
      /*this.$nextTick(() => {
        this.themeTopYs = []
        this.themeTopYs.push(0)
        this.themeTopYs.push(this.$refs.params.$el.offsetTop)
        this.themeTopYs.push(this.$refs.comment.$el.offsetTop)
        this.themeTopYs.push(this.$refs.recommend.$el.offsetTop)
        console.log(this.themeTopYs);
      })*/
    })

    // 请求推荐数据
    getRecommend().then(res => {
      // 保存数据
      this.recommends = res.data.list
    })

    // 第1次获取:值不对:$el没有渲染
    /*this.themeTopYs = []
    this.themeTopYs.push(0)
    this.themeTopYs.push(this.$refs.params.$el.offsetTop)
    this.themeTopYs.push(this.$refs.comment.$el.offsetTop)
    this.themeTopYs.push(this.$refs.recommend.$el.offsetTop)
    console.log(this.themeTopYs);*/

    this.themeTopY = debounce(() => {
      this.themeTopYs = []
      this.themeTopYs.push(0)
      this.themeTopYs.push(this.$refs.params.$el.offsetTop)
      this.themeTopYs.push(this.$refs.comment.$el.offsetTop)
      this.themeTopYs.push(this.$refs.recommend.$el.offsetTop)
    }, 100)
  },
  mounted() {
  },
  updated() {
  },
  destroyed() {
    this.$bus.$off('itemImageLoad', this.itemImgListener)
  }
}
</script>

<style scoped>
#detail {
  position: relative;
  z-index: 10;
  background-color: #ffffff;
  height: 100vh;
}

.detail-nav {
  position: relative;
  z-index: 9;
  background-color: #ffffff;
}

.content {
  height: calc(100% - 44px);
}
</style>
对复杂代码的分析和优化:
if(this.currentIndex !== i && ((i < length-1 && positionY > this.themeTopYs[i] && positionY < this.themeTopYs[i+1]) || (i === length - 1 && positionY > this.themeTopYs[i]))) {
  this.currentIndex = i
  this.$refs.detailNav.currentIndex = this.currentIndex
}
普通做法:
(this.currentIndex !== i && ((i < length-1 && positionY > this.themeTopYs[i] && positionY < this.themeTopYs[i+1]) || (i === length - 1 && positionY > this.themeTopYs[i])))

条件成立:this.currentIndex = i
条件一:this.currentIndex !== i,防止赋值的过程过于频繁
条件二:((i < length-1 && positionY > this.themeTopYs[i] && positionY < this.themeTopYs[i+1]) || (i === length - 1 && positionY > this.themeTopYs[i]))
条件二中:
条件1:(i < length-1 && positionY > this.themeTopYs[i] && positionY < this.themeTopYs[i+1]):判断区间
条件2:(i === length - 1 && positionY > this.themeTopYs[i]):判断大于等于
hack做法:
在themeTopYs数组中添加一个很大的值,让后面的条件统一,不适用或操作符
js中获取js可以表示的最大值的方法:Number.MAX_VALUE
methods: {
  imageLoad() {
    this.$refs.scroll.refresh()

    this.themeTopYs = []
    this.themeTopYs.push(0)
    this.themeTopYs.push(this.$refs.params.$el.offsetTop)
    this.themeTopYs.push(this.$refs.comment.$el.offsetTop)
    this.themeTopYs.push(this.$refs.recommend.$el.offsetTop)
    this.themeTopYs.push(Number.MAX_VALUE)
  }
}
遍历:
// 监听内容的滚动
contentScroll(position) {
  // 1.获取y值
  const positionY = -position.y
  const length = this.themeTopYs.length
  // this.themeTopYs.length-1这个减一是必须有的,否则还是会越界
  for(let i = 0;i < this.themeTopYs.length-1; i++) {
    if(this.currentIndex !== i && (i < length-1 && positionY > this.themeTopYs[i] && positionY < this.themeTopYs[i+1])) {
      this.currentIndex = i
      this.$refs.detailNav.currentIndex = this.currentIndex
    }
  }
}
2、底部工具栏,点击加入购物车
新建组件:DetailBottomBar组件
Detail中导入组件:注意底部导航栏不需要滚动
使用fixed定位:
<style scoped>
.bottom-bar {
  height: 49px;
  background-color: red;
  position: fixed;
  left: 0;
  right: 0;
  bottom:0;
}
</style>
也可以使用相对定位
<style scoped>
.bottom-bar {
  height: 49px;
  background-color: red;
  position: relative;
  /*在原来的位置上向上移动49个像素*/
  bottom: 49px;
  /*position: fixed;
  left: 0;
  right: 0;
  bottom:0;*/
}
</style>
DetailBottomBar.vue
<template>
  <div class="bottom-bar">
    <div class="bar-item bar-left">
      <div>
        <i class="icon service"></i>
        <span class="text">客服</span>
      </div>
      <div>
        <i class="icon shop"></i>
        <span class="text">店铺</span>
      </div>
      <div>
        <i class="icon select"></i>
        <span class="text">收藏</span>
      </div>
    </div>
    <div class="bar-item bar-right">
      <div class="cart" @click="addToCart">加入购物车</div>
      <div class="buy">购买</div>
    </div>
  </div>
</template>

<script>
export default {
  name: "DetailBottomBar",
  methods: {
    addToCart() {
      this.$emit("addCart");
    }
  }
};
</script>

<style scoped>
.bottom-bar {
  height: 58px;
  position: fixed;
  background-color: #fff;
  left: 0;
  right: 0;
  bottom: 0;
  display: flex;
  text-align: center;
}

.bar-item {
  flex: 1;
  display: flex;
}

.bar-item > div {
  flex: 1;
}

.bar-left .text {
  font-size: 13px;
}

.bar-left .icon {
  display: block;
  width: 22px;
  height: 22px;
  margin: 10px auto 3px;
  background: url("~assets/img/detail/detail_bottom.png") 0 0/100%;
}

.bar-left .service {
  background-position: 0 -54px;
}

.bar-left .shop {
  background-position: 0 -98px;
}

.bar-right {
  font-size: 15px;
  color: #fff;
  line-height: 58px;
}

.bar-right .cart {
  background-color: #ffe817;
  color: #333;
}

.bar-right .buy {
  background-color: #f69;
}
</style>
这时Detail中的滚动的高度应该再减去49px:
.content {
  height: calc(100% - 44px - 49px);
}
这时如果DetailBottomBar中还有bottom: 49px属性,则DetailBottomBar组件也会跟着上移49px,所以应该把DetailBottomBar中的bottom属性去掉(上面的代码已经去了)
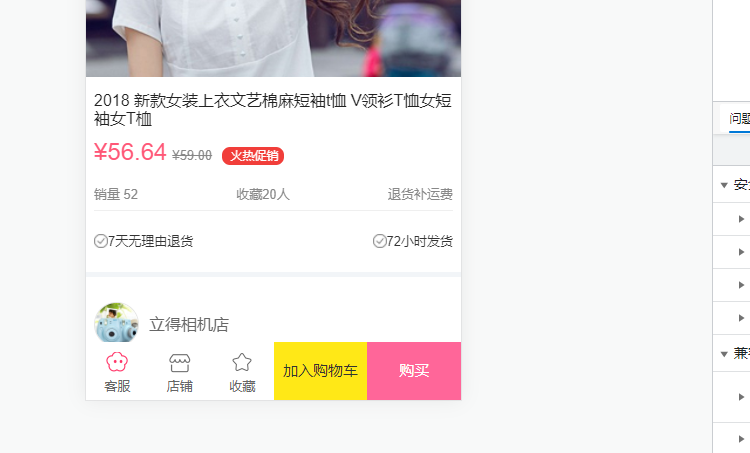
回到顶部代码抽取:抽取到混入中:
mixin.js
import {debounce} from "@/common/utils";
import BackTop from "components/content/backTop/BackTop";

export const itemListenerMixin = {
  data() {
    return {
      itemImgListener: null
    }
  },
  mounted() {
    let newRefresh = debounce(this.$refs.scroll.refresh, 100)
    this.itemImgListener = () => {
      newRefresh()
    }
    this.$bus.$on('itemImageLoad', this.itemImgListener)
  }
}

export const backTopMixin = {
  components: {
    BackTop
  },
  data() {
    return {
      isShowBackTop: false
    }
  },
  methods: {
    backClick() {
      this.$refs.scroll.scrollTo(0, 0, 300)
    }
  }
}
Detail.vue
<template>
  <div id="detail">
    <!--导航-->
    <detail-nav-bar class="detail-nav" @titleClick="titleClick" ref="detailNav"></detail-nav-bar>
    <scroll class="content" ref="scroll" @scroll="contentScroll" :probe-type="3">
      <detail-swiper :top-images="topImages"></detail-swiper>
      <detail-base-info :GoodsInfo="goods"></detail-base-info>
      <detail-shop-info :shop-info="shop"></detail-shop-info>
      <detail-goods-info :detail-info="detailInfo" @imageLoad="imageLoad"></detail-goods-info>
      <detail-param-info :goods-param="paramInfo" ref="params"></detail-param-info>
      <detail-comment-info :comment-info="commentInfo" ref="comment"/>
      <goods-list :goods="recommends" ref="recommend"/>
    </scroll>
    <detail-bottom-bar></detail-bottom-bar>
    <back-top @click.native="backClick" v-show="isShowBackTop"/>
  </div>
</template>

<script>
import DetailNavBar from "./childComps/DetailNavBar";
import DetailSwiper from "./childComps/DetailSwiper";
import DetailBaseInfo from "./childComps/DetailBaseInfo";
import DetailShopInfo from "./childComps/DetailShopInfo";
import DetailGoodsInfo from "./childComps/DetailGoodsInfo";
import DetailParamInfo from "./childComps/DetailParamInfo";
import DetailCommentInfo from "./childComps/DetailCommentInfo";
import DetailBottomBar from "./childComps/DetailBottomBar";

import Scroll from "components/common/scroll/Scroll";
import GoodsList from "components/content/goods/GoodsList";

import {getDetail, Goods, Shop, GoodsParams, getRecommend} from "@/network/detail";
import {itemListenerMixin, backTopMixin} from "@/common/mixin";
import {debounce} from "@/common/utils";

export default {
  name: "Detail",
  data() {
    return {
      iid: null,
      topImages: [],
      goods: {},
      shop: {},
      detailInfo: {},
      paramInfo: {},
      commentInfo: {},
      recommends: [],
      themeTopYs: [],
      themeTopY: null,
      currentIndex: 0
    }
  },
  components: {
    DetailNavBar,
    DetailSwiper,
    DetailBaseInfo,
    DetailShopInfo,
    Scroll,
    DetailGoodsInfo,
    DetailParamInfo,
    DetailCommentInfo,
    GoodsList,
    DetailBottomBar
  },
  mixins: [itemListenerMixin, backTopMixin],
  methods: {
    imageLoad() {
      this.$refs.scroll.refresh()

      this.themeTopYs = []
      this.themeTopYs.push(0)
      this.themeTopYs.push(this.$refs.params.$el.offsetTop)
      this.themeTopYs.push(this.$refs.comment.$el.offsetTop)
      this.themeTopYs.push(this.$refs.recommend.$el.offsetTop)
      this.themeTopYs.push(Number.MAX_VALUE)
    },
    titleClick(index) {
      this.$refs.scroll.scrollTo(0, -this.themeTopYs[index], 100)
    },
    // 监听内容的滚动
    contentScroll(position) {
      // 1.获取y值
      const positionY = -position.y
      const length = this.themeTopYs.length
      // positionY在0~this.themeTopYs[1]之间,index=0
      // positionY在this.themeTopYs[1]~this.themeTopYs[2]之间,index=1
      // positionY在this.themeTopYs[2]~this.themeTopYs[3]之间,index=2
      // positionY>this.themeTopYs[3],index=3
      for(let i = 0;i < this.themeTopYs.length-1; i++) {
        if(this.currentIndex !== i && (i < length-1 && positionY > this.themeTopYs[i] && positionY < this.themeTopYs[i+1])) {
          this.currentIndex = i
          this.$refs.detailNav.currentIndex = this.currentIndex
        }
      }

      // 是否显示回到顶部
      this.isShowBackTop = (-position.y) > 1000
    }
  },
  // 组件创建后获取并保存iid
  created() {
    // 1.保存传入的iid
    this.iid = this.$route.params.iid

    // 2.根据iid请求详情数据
    getDetail(this.iid).then(res => {
      // 1. 获取顶部图片的轮播数据
      this.topImages = res.result.itemInfo.topImages
      // 2.获取商品基本信息
      this.goods = new Goods(res.result.itemInfo, res.result.columns, res.result.shopInfo.services)
      // 3.创建店铺信息对象
      this.shop = new Shop(res.result.shopInfo)
      // 4.保存商品的详情数据
      this.detailInfo = res.result.detailInfo
      // 5.获取参数信息
      this.paramInfo = new GoodsParams(res.result.itemParams.info, res.result.itemParams.rule)
      // 6.取出评论信息:由于不是所有的商品都有评论,所以需要先判断一下
      if(res.result.rate.cRate !== 0) {
        this.commentInfo = res.result.rate.list[0]
      }

      // 第2次获取,值不对(图片没有加载完成)
      /*this.$nextTick(() => {
        this.themeTopYs = []
        this.themeTopYs.push(0)
        this.themeTopYs.push(this.$refs.params.$el.offsetTop)
        this.themeTopYs.push(this.$refs.comment.$el.offsetTop)
        this.themeTopYs.push(this.$refs.recommend.$el.offsetTop)
        console.log(this.themeTopYs);
      })*/
    })

    // 请求推荐数据
    getRecommend().then(res => {
      // 保存数据
      this.recommends = res.data.list
    })

    // 第1次获取:值不对:$el没有渲染
    /*this.themeTopYs = []
    this.themeTopYs.push(0)
    this.themeTopYs.push(this.$refs.params.$el.offsetTop)
    this.themeTopYs.push(this.$refs.comment.$el.offsetTop)
    this.themeTopYs.push(this.$refs.recommend.$el.offsetTop)
    console.log(this.themeTopYs);*/

    this.themeTopY = debounce(() => {
      this.themeTopYs = []
      this.themeTopYs.push(0)
      this.themeTopYs.push(this.$refs.params.$el.offsetTop)
      this.themeTopYs.push(this.$refs.comment.$el.offsetTop)
      this.themeTopYs.push(this.$refs.recommend.$el.offsetTop)
    }, 100)
  },
  mounted() {
  },
  updated() {
  },
  destroyed() {
    this.$bus.$off('itemImageLoad', this.itemImgListener)
  }
}
</script>

<style scoped>
#detail {
  position: relative;
  z-index: 10;
  background-color: #ffffff;
  height: 100vh;
}

.detail-nav {
  position: relative;
  z-index: 9;
  background-color: #ffffff;
}

.content {
  height: calc(100% - 44px - 49px);
}
</style>
Home.vue
<template>
  <div id="home">
    <nav-bar class="home-nav">
      <div slot="center">购物街</div>
    </nav-bar>
    <tab-control :titles="['流行', '精选', '新款']"
                 ref="tabControl01"
                 @tabClick="tabClick"
                 class="tab-control"
                 v-show="isTabFixed"/>
    <!-- :probe-type加冒号和不加冒号的区别:不加冒号,"3"会被当成字符串传过去,而我们Scroll中设置的类型为Number
       加了冒号后:如果符合标识符命名规范就会被当成变量,会去vue的data中取值传过去,如果是数组就会被当成数字类型(Number)传过去-->
    <scroll class="content" ref="scroll"
            :probe-type="3"
            @scroll="contentScroll"
            :pull-up-load="true"
            @pullingUp="loadMore">
      <home-swiper :banners="banners" @swiperImageLoad="swiperImageLoad"/>
      <recommend-view :recommends="recommends"/>
      <feature-view/>
      <tab-control :titles="['流行', '精选', '新款']"
                   ref="tabControl02"
                   @tabClick="tabClick"/>
      <goods-list :goods="showGoods"/>
    </scroll>
    <!-- v-show:为true时显示,为false时隐藏-->
    <back-top @click.native="backClick" v-show="isShowBackTop"/>
  </div>
</template>

<script>
// 导入NavBar组件:分类导入,并且在注册组件时,保持和导入的顺序一致,方便以后管理。
import HomeSwiper from "./childComps/HomeSwiper";
import RecommendView from "./childComps/RecommendView";
import FeatureView from "./childComps/FeatureView";

import NavBar from "components/common/navbar/NavBar";
import TabControl from "components/content/tabControl/TabControl";
import GoodsList from "components/content/goods/GoodsList";
import Scroll from "components/common/scroll/Scroll";

import {getHomeMultiData, getHomeGoods} from "network/home";
import {itemListenerMixin, backTopMixin} from "@/common/mixin";

export default {
  name: "Home",
  components: {
    HomeSwiper,
    RecommendView,
    FeatureView,
    NavBar,
    TabControl,
    GoodsList,
    Scroll
  },
  data() {
    return {
      // result: null
      banners: [],
      recommends: [],
      goods: {
        'pop': {page: 0, list: []},
        'new': {page: 0, list: []},
        'sell': {page: 0, list: []}
      },
      currentType: 'pop',
      tabOffsetTop: 0,
      isTabFixed: false,
      // 用于保存离开组件时y的位置
      saveY: 0
    }
  },
  mixins: [itemListenerMixin, backTopMixin],
  created() {
    // 1、请求多个数据
    this.getHomeMultiData()

    // 2.商品数据请求:this.函数名,调用的是vue methods中的函数,不使用this时表示的是使用import导入的函数
    this.getHomeGoods('pop')

    this.getHomeGoods('new')

    this.getHomeGoods('sell')
  },
  mounted() {
  },
  computed: {
    showGoods() {
      return this.goods[this.currentType].list
    }
  },
  destroyed() {
    console.log('home组件销毁');
  },
  activated() {
    this.$refs.scroll.scrollTo(0, this.saveY, 0)
    this.$refs.scroll.refresh()
  },
  deactivated() {
    // 1.保存y值
    this.saveY = this.$refs.scroll.getScrollY()

    // 2.取消全局事件监听:参数一,要取消的事件名,参数二,该事件名对应的函数
    // 这里不能只传一个事件名,这样的话所有的该事件的监听都会被取消,如果传入函数的话,只会取消该事件对应的函数的监听
    this.$bus.$off('itemImageLoad', this.itemImgListener)
  },
  methods: {
    /**
     * 事件监听相关方法
     */
    tabClick(index) {
      switch(index) {
        case 0:
          this.currentType = 'pop'
          break
        case 1:
          this.currentType = 'new'
          break
        case 2:
          this.currentType = 'sell'
          break
      }
      this.$refs.tabControl01.currentIndex = index
      this.$refs.tabControl02.currentIndex = index
    },
    contentScroll(position) {
      // 在Home组件中就可以拿到Scroll中监听到的位置信息了,当y大于1000的时候显示返回顶部
      // 1.判断BackScroll是否显示
      this.isShowBackTop = (-position.y) > 1000

      // 2.决定tabControl是否吸顶(position:fixed)
      this.isTabFixed = (-position.y) > this.tabOffsetTop
    },
    loadMore() {
      this.getHomeGoods(this.currentType)
    },
    swiperImageLoad() {
      // 拿到tabControl的offsetTop
      this.tabOffsetTop = this.$refs.tabControl02.$el.offsetTop;
    },
    /**
     * 网络请求相关方法
     */
    getHomeMultiData() {
      getHomeMultiData().then(res => {
        this.banners = res.data.banner.list;
        this.recommends = res.data.recommend.list;
      })
    },
    getHomeGoods(type) {
      const page = this.goods[type].page + 1
      getHomeGoods(type, page).then(res => {
        // 数据的解构:它会把我们从服务器取到的那一页的数组列表一个一个解构出来然后在放到goods中的list中
        this.goods[type].list.push(...res.data.list)
        this.goods[type].page += 1

        // 完成上拉加载更多
        this.$refs.scroll.finishPullUp()
      })
    }
  }
}
</script>

<!--
  style中设置scoped的好处,该组件中的样式只对本组件中的html样式标签起作用,如果没有scoped可能有影响其他组件同名class下的样式
-->
<style scoped>
/*如果使用导航栏固定位置,则轮播图会与顶部对齐,从而轮播图会被导航栏遮挡掉一部分,因此把home整体下拉一点*/
#home {
  /*padding-top: 44px;*/
  height: 100vh;
  position: relative;
}
.home-nav {
  background-color: var(--color-tint);
  color: #e9e9e9;

  /*让导航栏不滚动*/
 /* position: fixed;
  left: 0;
  right: 0;
  top: 0;
  z-index: 99;*/
}

.tab-control {
  /*使用相对定位可以使用z-index*/
  position: relative;;
  z-index: 9;
}

.content {
  /*height: 300px;*/
  overflow: hidden;
  position: absolute;
  top: 44px;
  bottom: 49px;
  left: 0;
  right: 0;
}
</style>
1.13、将商品加入到购物车
点击加入购物车,将商品加入到购物车中
现在是在详情页中保存商品的信息,之后我们是在购物车中展示信息,所以我们使用vuex管理商品的状态信息:如果还没有安装vuex,需安装vuex:
npm instal vuex --save
在store目录下新建index.js(当然其他名字也可以)
index.js
import Vue from 'vue'
import Vuex from "vuex";

// 1.安装vuex插件
Vue.use(Vuex)

// 2.创建store对象
const store = new Vuex.Store({
  state: {},
  mutations: {}
})

// 3.导出
export default  store
在main.js中导入,挂载
import Vue from 'vue'
import App from './App.vue'
import store from './store'
import router from "@/router";

Vue.config.productionTip = false
// 添加事件总线,并且把该事件总线设置为Vue实例,应为vue实例可以发射事件并且可以作为事件总线
Vue.prototype.$bus = new Vue

new Vue({
  store,
  router,
  render: h => h(App)
}).$mount('#app')
store/index.js中添加商品的判断:
方式1:for in
mutations: {
  addCart(state, payload) {
    // 判断当前加入的商品是否在cartList中,如果在,则数量加一
    let oldProduct = null
    for(let item in state.cartList) {
      if(item.iid === payload.iid) {
        oldProduct = item
      }
    }
    if(oldProduct) {
      oldProduct.count += 1
    }else {
      payload.count = 1
      state.cartList.push(payload)
    }
  }
}
方式2:for of
mutations: {
  addCart(state, payload) {
    let index = state.cartList.indexOf(payload)
    if(index === -1) {
      payload.count = 1
      state.cartList.push(payload)
    }else {
      let oldProduct = state.cartList[index]
      oldProduct.count += 1
    }
  }
}
方式3:find函数,它会遍历cartList数组中的对象,传给find()中的函数,当条件为true的时候,它会返回这个对象(即cartList中取出的item)
mutations: {
  addCart(state, payload) {
    let product = state.cartList.find(function(item) {
       return item.iid === payload.iid
    })
    if(product) {
        product.count += 1
    }else {
      payload.count = 1
      state.cartList.push(payload)
    }
  }
}

// 简写
mutations: {
  addCart(state, payload) {
    // 判断当前加入的商品是否在cartList中,如果在,则数量加一
    let oldProduct = state.cartList.find(item => item.iid === payload.iid)
    if(oldProduct) {
      oldProduct.count += 1
    }else {
      payload.count = 1
      state.cartList.push(payload)
    }
  }
}
如果出现unknown mutation type: addCart commit,可以使用全名导入:
main.js
import Vue from 'vue'
import App from './App.vue'
import store from "./store/index";
import router from "@/router";

Vue.config.productionTip = false
// 添加事件总线,并且把该事件总线设置为Vue实例,应为vue实例可以发射事件并且可以作为事件总线
Vue.prototype.$bus = new Vue

new Vue({
  store,
  router,
  render: h => h(App)
}).$mount('#app')
Detail.vue中:添加商品信息
addToCart() {
  // 1.获取购物车需要展示的信息,添加到购物车
  const product = {}
  // 图片取一张即可
  product.image = this.topImages[0]
  product.title = this.goods.title
  // 描述信息
  product.desc = this.goods.desc
  product.price = this.goods.realPrice
  product.iid = this.iid

  // 2.将购买的商品添加到购物车:由vuex管理的cartList中,通过mutations提交
  this.$store.commit('addCart', product)
}
Detail.vue
<template>
  <div id="detail">
    <!--导航-->
    <detail-nav-bar class="detail-nav" @titleClick="titleClick" ref="detailNav"></detail-nav-bar>
    <scroll class="content" ref="scroll" @scroll="contentScroll" :probe-type="3">
      <detail-swiper :top-images="topImages"></detail-swiper>
      <detail-base-info :GoodsInfo="goods"></detail-base-info>
      <detail-shop-info :shop-info="shop"></detail-shop-info>
      <detail-goods-info :detail-info="detailInfo" @imageLoad="imageLoad"></detail-goods-info>
      <detail-param-info :goods-param="paramInfo" ref="params"></detail-param-info>
      <detail-comment-info :comment-info="commentInfo" ref="comment"/>
      <goods-list :goods="recommends" ref="recommend"/>
    </scroll>
    <detail-bottom-bar @addCart="addToCart"></detail-bottom-bar>
    <back-top @click.native="backClick" v-show="isShowBackTop"/>
  </div>
</template>

<script>
import DetailNavBar from "./childComps/DetailNavBar";
import DetailSwiper from "./childComps/DetailSwiper";
import DetailBaseInfo from "./childComps/DetailBaseInfo";
import DetailShopInfo from "./childComps/DetailShopInfo";
import DetailGoodsInfo from "./childComps/DetailGoodsInfo";
import DetailParamInfo from "./childComps/DetailParamInfo";
import DetailCommentInfo from "./childComps/DetailCommentInfo";
import DetailBottomBar from "./childComps/DetailBottomBar";

import Scroll from "components/common/scroll/Scroll";
import GoodsList from "components/content/goods/GoodsList";

import {getDetail, Goods, Shop, GoodsParams, getRecommend} from "@/network/detail";
import {itemListenerMixin, backTopMixin} from "@/common/mixin";
import {debounce} from "@/common/utils";

export default {
  name: "Detail",
  data() {
    return {
      iid: null,
      topImages: [],
      goods: {},
      shop: {},
      detailInfo: {},
      paramInfo: {},
      commentInfo: {},
      recommends: [],
      themeTopYs: [],
      themeTopY: null,
      currentIndex: 0
    }
  },
  components: {
    DetailNavBar,
    DetailSwiper,
    DetailBaseInfo,
    DetailShopInfo,
    Scroll,
    DetailGoodsInfo,
    DetailParamInfo,
    DetailCommentInfo,
    GoodsList,
    DetailBottomBar
  },
  mixins: [itemListenerMixin, backTopMixin],
  methods: {
    imageLoad() {
      this.$refs.scroll.refresh()

      this.themeTopYs = []
      this.themeTopYs.push(0)
      this.themeTopYs.push(this.$refs.params.$el.offsetTop)
      this.themeTopYs.push(this.$refs.comment.$el.offsetTop)
      this.themeTopYs.push(this.$refs.recommend.$el.offsetTop)
      this.themeTopYs.push(Number.MAX_VALUE)
    },
    titleClick(index) {
      this.$refs.scroll.scrollTo(0, -this.themeTopYs[index], 100)
    },
    // 监听内容的滚动
    contentScroll(position) {
      // 1.获取y值
      const positionY = -position.y
      const length = this.themeTopYs.length
      // positionY在0~this.themeTopYs[1]之间,index=0
      // positionY在this.themeTopYs[1]~this.themeTopYs[2]之间,index=1
      // positionY在this.themeTopYs[2]~this.themeTopYs[3]之间,index=2
      // positionY>this.themeTopYs[3],index=3
      for(let i = 0;i < this.themeTopYs.length-1; i++) {
        if(this.currentIndex !== i && (i < length-1 && positionY > this.themeTopYs[i] && positionY < this.themeTopYs[i+1])) {
          this.currentIndex = i
          this.$refs.detailNav.currentIndex = this.currentIndex
        }
      }

      // 是否显示回到顶部
      this.isShowBackTop = (-position.y) > 1000
    },
    addToCart() {
      // 1.获取购物车需要展示的信息,添加到购物车
      const product = {}
      // 图片取一张即可
      product.image = this.topImages[0]
      product.title = this.goods.title
      // 描述信息
      product.desc = this.goods.desc
      product.price = this.goods.realPrice
      product.iid = this.iid

      // 2.将购买的商品添加到购物车:由vuex管理的cartList中,通过mutations提交
      this.$store.commit('addCart', product)
    }
  },
  // 组件创建后获取并保存iid
  created() {
    // 1.保存传入的iid
    this.iid = this.$route.params.iid

    // 2.根据iid请求详情数据
    getDetail(this.iid).then(res => {
      // 1. 获取顶部图片的轮播数据
      this.topImages = res.result.itemInfo.topImages
      // 2.获取商品基本信息
      this.goods = new Goods(res.result.itemInfo, res.result.columns, res.result.shopInfo.services)
      // 3.创建店铺信息对象
      this.shop = new Shop(res.result.shopInfo)
      // 4.保存商品的详情数据
      this.detailInfo = res.result.detailInfo
      // 5.获取参数信息
      this.paramInfo = new GoodsParams(res.result.itemParams.info, res.result.itemParams.rule)
      // 6.取出评论信息:由于不是所有的商品都有评论,所以需要先判断一下
      if(res.result.rate.cRate !== 0) {
        this.commentInfo = res.result.rate.list[0]
      }

      // 第2次获取,值不对(图片没有加载完成)
      /*this.$nextTick(() => {
        this.themeTopYs = []
        this.themeTopYs.push(0)
        this.themeTopYs.push(this.$refs.params.$el.offsetTop)
        this.themeTopYs.push(this.$refs.comment.$el.offsetTop)
        this.themeTopYs.push(this.$refs.recommend.$el.offsetTop)
        console.log(this.themeTopYs);
      })*/
    })

    // 请求推荐数据
    getRecommend().then(res => {
      // 保存数据
      this.recommends = res.data.list
    })

    // 第1次获取:值不对:$el没有渲染
    /*this.themeTopYs = []
    this.themeTopYs.push(0)
    this.themeTopYs.push(this.$refs.params.$el.offsetTop)
    this.themeTopYs.push(this.$refs.comment.$el.offsetTop)
    this.themeTopYs.push(this.$refs.recommend.$el.offsetTop)
    console.log(this.themeTopYs);*/

    this.themeTopY = debounce(() => {
      this.themeTopYs = []
      this.themeTopYs.push(0)
      this.themeTopYs.push(this.$refs.params.$el.offsetTop)
      this.themeTopYs.push(this.$refs.comment.$el.offsetTop)
      this.themeTopYs.push(this.$refs.recommend.$el.offsetTop)
    }, 100)
  },
  mounted() {
  },
  updated() {
  },
  destroyed() {
    this.$bus.$off('itemImageLoad', this.itemImgListener)
  }
}
</script>

<style scoped>
#detail {
  position: relative;
  z-index: 10;
  background-color: #ffffff;
  height: 100vh;
}

.detail-nav {
  position: relative;
  z-index: 9;
  background-color: #ffffff;
}

.content {
  height: calc(100% - 44px - 49px);
}
</style>
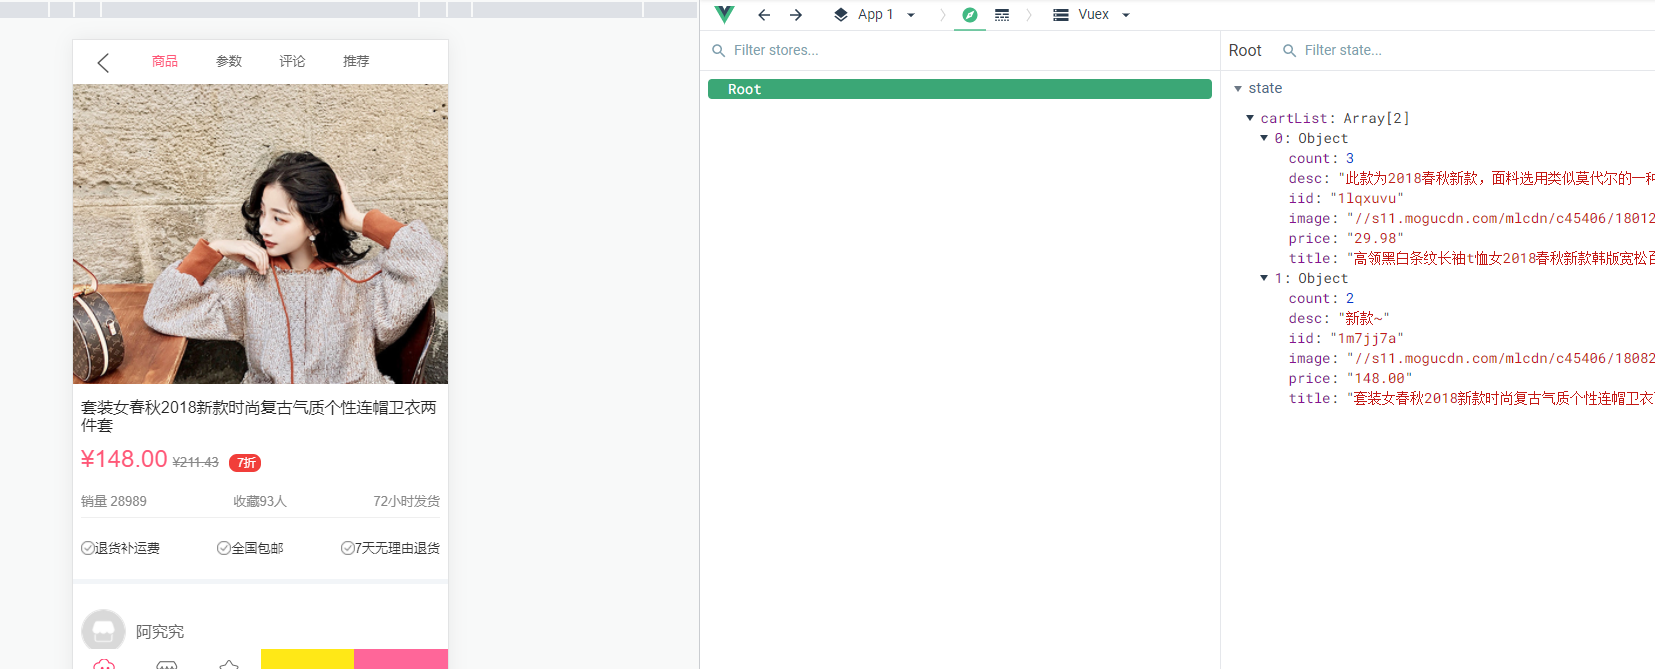
vuex中代码的重构:
mutations的设计原则:
mutations的唯一目的就是修改state中的状态
mutations中的每个方法尽可能只完成一件事
上面的mutations完成了两件事,既有可能是添加了一个商品,也有可能是数量加一,不满足单一性要求。
有判断逻辑或是异步操作我们一般放到actions中,上面的代码属于由逻辑判断,所以放到actions中,在actions中在通过commit调用mutations中的函数,这样做是为了devtools容易跟踪mutations的变化
index.js
import Vue from 'vue'
import Vuex from "vuex";

// 1.安装vuex插件
Vue.use(Vuex)

// 2.创建store对象
const store = new Vuex.Store({
  state: {
    cartList: []
  },
  mutations: {
    addCount(state, payload) {
      payload.count++
    },
    addCart(state, payload) {
      state.cartList.push(payload)
    }
  },
  actions: {
    addCart(context, payload) {
      // 判断当前加入的商品是否在cartList中,如果在,则数量加一
      let oldProduct = context.state.cartList.find(item => item.iid === payload.iid)
      if(oldProduct) {
        context.commit('addCount', oldProduct)
      }else {
        payload.count = 1
        context.commit('addCart', payload)
      }
    }
  }
})

// 3.导出
export default  store
Detail.vue中,通过dispatch调用actions中的函数:
this.$store.dispatch('addCart', product)
上面index.js中actions的解构写法:
actions: {
  addCart({state,commit}, payload) {
    // 判断当前加入的商品是否在cartList中,如果在,则数量加一
    let oldProduct = state.cartList.find(item => item.iid === payload.iid)
    if(oldProduct) {
      commit('addCount', oldProduct)
    }else {
      payload.count = 1
      commit('addCart', payload)
    }
  }
}
store的分离写法:
mutations.js
export default {
  addCount(state, payload) {
  payload.count++
 },
  addCart(state, payload) {
    state.cartList.push(payload)
  }
}
action.js
export default {
  addCart(context, payload) {
    // 判断当前加入的商品是否在cartList中,如果在,则数量加一
    let oldProduct = context.state.cartList.find(item => item.iid === payload.iid)
    if(oldProduct) {
      context.commit('addCount', oldProduct)
    }else {
      payload.count = 1
      context.commit('addCart', payload)
    }
  }
}
index.js
import Vue from 'vue'
import Vuex from "vuex";
import mutations from "./mutations";
import actions from "./actions";

// 1.安装vuex插件
Vue.use(Vuex)

// 2.创建store对象
const state = {
  cartList: []
}
const store = new Vuex.Store({
  state,
  mutations,
  actions
})

// 3.导出
export default  store
mutations中的方法名使用常量时的抽取:
mutations-types.js
export const ADD_COUNTER = 'add_counter'
export const ADD_TO_CART = 'add_to_cart'
mutations.js
import {
  ADD_COUNTER,
  ADD_TO_CART
}from "./mutations-types";

export default {
  [ADD_COUNTER](state, payload) {
  payload.count++
 },
  [ADD_TO_CART](state, payload) {
    state.cartList.push(payload)
  }
}
actions.js
import {
  ADD_COUNTER,
  ADD_TO_CART
}from "./mutations-types";

export default {
  addCart(context, payload) {
    // 判断当前加入的商品是否在cartList中,如果在,则数量加一
    let oldProduct = context.state.cartList.find(item => item.iid === payload.iid)
    if(oldProduct) {
      context.commit(ADD_COUNTER, oldProduct)
    }else {
      payload.count = 1
      context.commit(ADD_TO_CART, payload)
    }
  }
}
二、购物车
2.1、导航栏的实现
在views/cart下新建childComps目录
在Cart.vue组件中使用原来封装的导航栏组件
<template>
 <div class="cart">
   <nav-bar>
     <div slot="center">购物车({{cartLength}})</div>
   </nav-bar>
 </div>
</template>

<script>
import NavBar from "components/common/navbar/NavBar";

export default {
  name: "Cart",
  components: {
    NavBar
  },
  computed: {
    cartLength() {
      return this.$store.state.cartList.length
    }
  }
}
</script>

<style scoped>
.nav-bar {
  background-color: var(--color-tint);
  /*背景色:字体颜色*/
  color: #ffffff;
}
</style>
cartLength可能在多个地方使用,所以我们可以使用vuex中的getters:
getters.js
export default {
  cartLength(state) {
    return state.cartList.length
  }
}
index.js
import Vue from 'vue'
import Vuex from "vuex";
import mutations from "./mutations";
import actions from "./actions";
import getters from "./getters";

// 1.安装vuex插件
Vue.use(Vuex)

// 2.创建store对象
const state = {
  cartList: []
}
const store = new Vuex.Store({
  state,
  mutations,
  actions,
  getters
})

// 3.导出
export default  store
Cart.vue
<template>
 <div class="cart">
   <nav-bar>
     <div slot="center">购物车({{cartLength}})</div>
   </nav-bar>
 </div>
</template>

<script>
import NavBar from "components/common/navbar/NavBar";

export default {
  name: "Cart",
  components: {
    NavBar
  },
  computed: {
    cartLength() {
      //return this.$store.state.cartList.length
      // 使用vuex的getter是
      return this.$store.getters.cartLength
    }
  }
}
</script>

<style scoped>
.nav-bar {
  background-color: var(--color-tint);
  /*背景色:字体颜色*/
  color: #ffffff;
}
</style>
这里既使用了getter是又使用了computed,我们想把getters中的东西当作计算使用,vuex提供了mapGetters(从vuex中导入)
computed: {
  ...mapGetters(['cartLength'])
}
他会把getters中对应的方法转换为计算属性
…mapGetters([‘getters中需要转换为计算属性的方法’])
Cart.vue
<template>
 <div class="cart">
   <nav-bar>
     <div slot="center">购物车({{cartLength}})</div>
   </nav-bar>
 </div>
</template>

<script>
import NavBar from "components/common/navbar/NavBar";

import {mapGetters} from 'vuex'

export default {
  name: "Cart",
  components: {
    NavBar
  },
  computed: {
    ...mapGetters(['cartLength'])
  }
}
</script>

<style scoped>
.nav-bar {
  background-color: var(--color-tint);
  /*背景色:字体颜色*/
  color: #ffffff;
}
</style>
还可以写为:使用的名字和getters中的名字不一致
computed: {
  ...mapGetters({
    // 之后要使用的名字:getters中方法名
    length: 'cartLength'
  })
}
Cart.vue
<template>
 <div class="cart">
   <nav-bar>
     <div slot="center">购物车({{length}})</div>
   </nav-bar>
 </div>
</template>

<script>
import NavBar from "components/common/navbar/NavBar";

import {mapGetters} from 'vuex'

export default {
  name: "Cart",
  components: {
    NavBar
  },
  computed: {
    ...mapGetters({
      length: 'cartLength'
    })
  }
}
</script>

<style scoped>
.nav-bar {
  background-color: var(--color-tint);
  /*背景色:字体颜色*/
  color: #ffffff;
}
</style>
2.2、购物车商品列表展示
在childComps中创建子组件:CartList.vue
数据可以直接在子组件CartList中自己获取,也可通过父组件传过去,我们这里直接在子组件中获取,通过getters获取vuex中即将展示的数据
假内容,用于测试滚动:
li{内容$}*100
视图解构
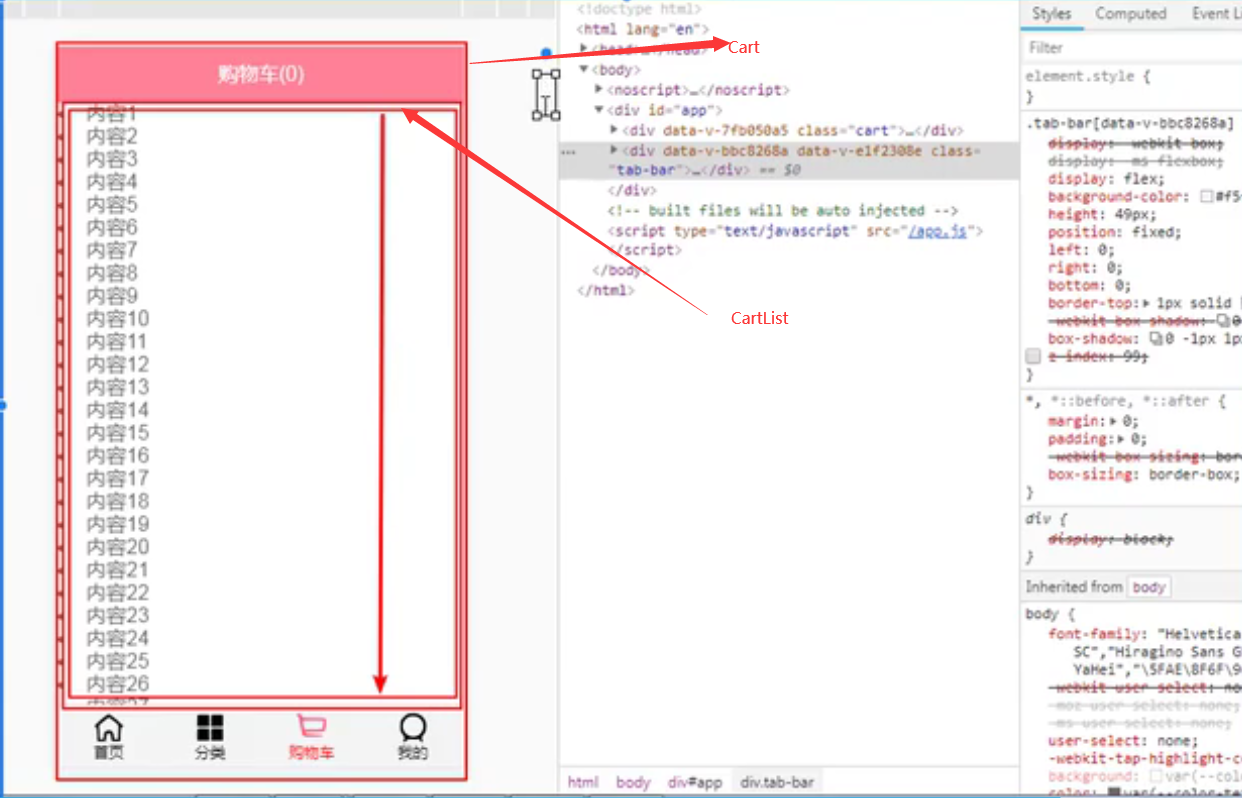
CartList组将中的内容要可以滚动,前提是父组件Cart要有一个固定的高度:
Cart.vue中
<style scoped>
.cart {
  height: 100vh;
}
.nav-bar {
  background-color: var(--color-tint);
  /*背景色:字体颜色*/
  color: #ffffff;
}
</style>
在创建有一个组件,用于显示每个商品:CartListItem.vue
<template>
  <div>
    <h2>{{product}}</h2>
  </div>
</template>

<script>
export default {
  name: "CartListItem",
  props: {
    product: {
      type: Object,
      default() {
        return {}
      }
    }
  }
}
</script>

<style scoped>

</style>
CartList.vue:由于vue是由缓存的,所以添加了数据后,不能再created和mounted中刷新scroll,需要在activated中进行刷新
<template>
  <div class="cart-list">
    <scroll class="content" ref="scroll">
      <cart-list-item v-for="(item, index) in cartList"
                      :key="index"
                      :product="item">

      </cart-list-item>
    </scroll>
  </div>
</template>

<script>
import Scroll from "components/common/scroll/Scroll";
import CartListItem from './CartListItem'

import {mapGetters} from 'vuex'

export default {
  name: "CartList",
  components: {
    Scroll,
    CartListItem
  },
  computed: {
    ...mapGetters(['cartList'])
  },
  activated() {
    // 进入组件时刷新scroll的可滚动高度,以保证在添加数据后可滚动的高度时正确的
    this.$refs.scroll.refresh()
  }
}
</script>

<style scoped>
.cart-list {
  height: calc(100% - 44px - 49px);
}

.content {
  height: 100%;
  overflow: hidden;
}
</style>
getters.js
export default {
  cartLength(state) {
    return state.cartList.length
  },
  cartList(state) {
    return state.cartList
  }
}
商品列表展示的封装:
选中按钮的封装:components/content/checkButton下:CheckButton.vue
<template>
  <div>
    <div class="icon-selector" :class="{'selector-active': checked}" @click="selectItem">
      <img src="~/assets/img/cart/tick.svg" alt />
    </div>
  </div>
</template>

<script>
export default {
  name: "CheckButton",
  props: {
    value: {
      type: Boolean,
      default: true
    }
  },
  data() {
    return {
      checked: this.value
    };
  },
  methods: {
    selectItem() {
      this.$emit("checkBtnClick");
    }
  },
  watch: {
    value: function(newValue) {
      this.checked = newValue;
    }
  }
};
</script>

<style>
.icon-selector {
  position: relative;
  margin: 0;
  width: 18px;
  height: 18px;
  border-radius: 50%;
  border: 2px solid #ccc;
  cursor: pointer;
}

.selector-active {
  background-color: #ff8198;
  border-color: #ff8198;
}
</style>
CartListItem.vue
<template>
  <div>
    <div id="shop-item">
      <div class="item-selector">
        <checkButton @checkBtnClick="checkBtnClick" v-model="product.checked"></checkButton>
      </div>
      <div class="item-img">
        <img :src="product.image" alt="商品图片" />
      </div>
      <div class="item-info">
        <div class="item-title">{{product.title}}</div>
        <div class="item-desc">商品描述: {{product.desc}}</div>
        <div class="info-bottom">
          <div class="item-price left">¥{{product.price}}</div>
          <div class="item-count right">x{{product.count}}</div>
        </div>
      </div>
    </div>
  </div>
</template>

<script>
import CheckButton from "components/content/checkButton/CheckButton";
export default {
  name: "CartListItem",
  props: {
    product: {
      type: Object,
      default() {
        return {};
      }
    }
  },
  components: {
    CheckButton
  },
  methods: {
    checkBtnClick() {
      this.product.checked = !this.product.checked;
    }
  }
};
</script>

<style>
#shop-item {
  width: 100%;
  display: flex;
  font-size: 0;
  padding: 5px;
  border-bottom: 1px solid #ccc;
}

.item-selector {
  width: 14%;
  display: flex;
  justify-content: center;
  align-items: center;
}

.item-title,
.item-desc {
  overflow: hidden;
  white-space: nowrap;
  text-overflow: ellipsis;
}

.item-img {
  padding: 5px;
  /*border: 1px solid #ccc;*/
}

.item-img img {
  width: 80px;
  height: 100px;
  display: block;
  border-radius: 5px;
}

.item-info {
  font-size: 17px;
  color: #333;
  padding: 5px 10px;
  position: relative;
  overflow: hidden;
}

.item-info .item-desc {
  font-size: 14px;
  color: #666;
  margin-top: 15px;
}

.info-bottom {
  margin-top: 10px;
  position: absolute;
  bottom: 10px;
  left: 10px;
  right: 10px;
}

.info-bottom .item-price {
  color: orangered;
}
</style>
效果:
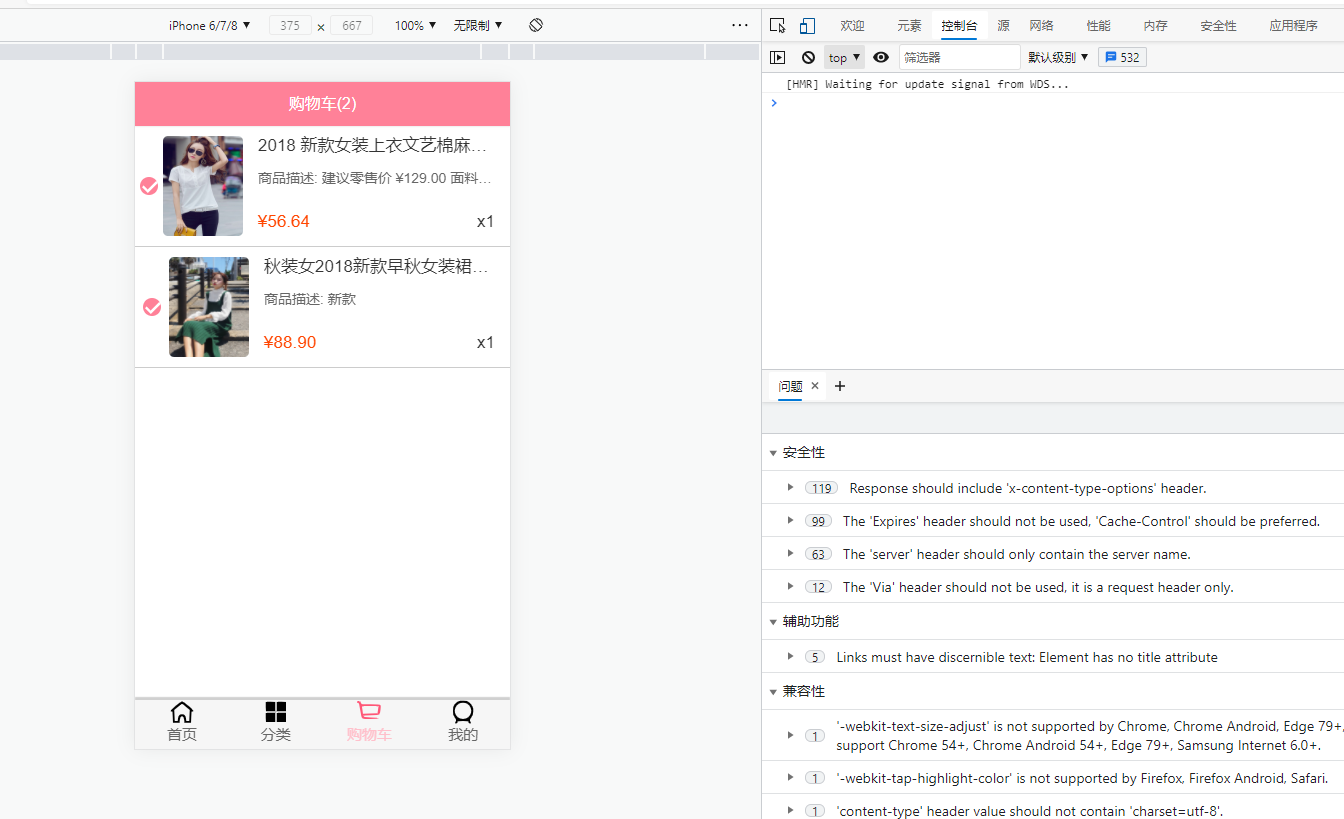
Item中选中和不选中的切换:
选中和不选中的切换应该都是在对象模型中做,这里的对象模型就是cartList,默认选中
CheckButton.vue
<template>
  <div>
    <div class="icon-selector" :class="{'selector-active': isChecked}" @click="selectItem">
      <img src="~/assets/img/cart/tick.svg" alt />
    </div>
  </div>
</template>

<script>
export default {
  name: "CheckButton",
  props: {
    isChecked: {
      type: Boolean,
      default: false
    }
  },
  data() {
    return {
      checked: this.isChecked
    };
  },
  methods: {
    selectItem() {
      this.$emit("checkBtnClick");
    }
  },
  watch: {
    value: function(newValue) {
      this.checked = newValue;
    }
  }
};
</script>

<style>
.icon-selector {
  position: relative;
  margin: 0;
  width: 18px;
  height: 18px;
  border-radius: 50%;
  border: 2px solid #ccc;
  cursor: pointer;
}

.selector-active {
  background-color: #ff8198;
  border-color: #ff8198;
}
</style>
注意:现在wach并没有使用到
mutations.js
import {
  ADD_COUNTER,
  ADD_TO_CART
}from "./mutations-types";

export default {
  [ADD_COUNTER](state, payload) {
  payload.count++
 },
  [ADD_TO_CART](state, payload) {
    // 新添加的商品默认选中
    payload.checked = true
    state.cartList.push(payload)
  }
}
CartListItem.vue
<template>
  <div>
    <div id="shop-item">
      <div class="item-selector">
        <CheckButton @checkBtnClick="checkBtnClick" :isChecked="product.checked"></CheckButton>
      </div>
      <div class="item-img">
        <img :src="product.image" alt="商品图片" />
      </div>
      <div class="item-info">
        <div class="item-title">{{product.title}}</div>
        <div class="item-desc">商品描述: {{product.desc}}</div>
        <div class="info-bottom">
          <div class="item-price left">¥{{product.price}}</div>
          <div class="item-count right">x{{product.count}}</div>
        </div>
      </div>
    </div>
  </div>
</template>

<script>
import CheckButton from "components/content/checkButton/CheckButton";
export default {
  name: "CartListItem",
  props: {
    product: {
      type: Object,
      default() {
        return {};
      }
    }
  },
  components: {
    CheckButton
  },
  methods: {
    checkBtnClick() {
      this.product.checked = !this.product.checked;
    }
  }
};
</script>

<style>
#shop-item {
  width: 100%;
  display: flex;
  font-size: 0;
  padding: 5px;
  border-bottom: 1px solid #ccc;
}

.item-selector {
  width: 14%;
  display: flex;
  justify-content: center;
  align-items: center;
}

.item-title,
.item-desc {
  overflow: hidden;
  white-space: nowrap;
  text-overflow: ellipsis;
}

.item-img {
  padding: 5px;
  /*border: 1px solid #ccc;*/
}

.item-img img {
  width: 80px;
  height: 100px;
  display: block;
  border-radius: 5px;
}

.item-info {
  font-size: 17px;
  color: #333;
  padding: 5px 10px;
  position: relative;
  overflow: hidden;
}

.item-info .item-desc {
  font-size: 14px;
  color: #666;
  margin-top: 15px;
}

.info-bottom {
  margin-top: 10px;
  position: absolute;
  bottom: 10px;
  left: 10px;
  right: 10px;
}

.info-bottom .item-price {
  color: orangered;
}
</style>
选中:
不选中:
购物车底部工具栏的封装:
在childComps中新建CartBottonBar.vue
<template>
  <div class="bottom-bar"></div>
</template>

<script>
export default {
  name: "CartBottomBar"
}
</script>

<style scoped>
.bottom-bar {
  height: 40px;
  background-color: red;
  position: relative;
  bottom: 40px;
}
</style>
效果:
这样的话又有一个问题,就是待会滚动的时候,红色部分会被挡住,所以我们去CartList中在减去40px:
.cart-list {
  height: calc(100% - 44px - 49px - 40px);
}
并且CartBottomBar中的bottom属性去掉:
<style scoped>
.bottom-bar {
  height: 40px;
  background-color: red;
  position: relative;
}
</style>
CartBottomBar中需要使用CheckBottom按钮:
CartBottomBar.vue
<template>
  <div class="bottom-bar">
    <div class="check-content">
      <check-button class="check-area"/>
      <span>全选</span>
    </div>
    <div class="price">
      合计:{{totalPrice}}
    </div>
    <div class="calculate">
      去计算
    </div>
  </div>
</template>

<script>
import CheckButton from "components/content/checkButton/CheckButton";

import {mapGetters} from 'vuex'

export default {
  name: "CartBottomBar",
  components: {
    CheckButton
  },
  computed: {
    ...mapGetters(['cartList']),

    totalPrice() {
      // 使用filter返回选中状态的商品
      // 过滤后使用reduce汇总
      return '¥' + this.$store.getters.cartList.filter(item => {
        return item.checked
      }).reduce((preValue, item) => {
        return preValue + item.price * item.count
      }, 0).toFixed(2)
    },
    checkLength() {
      return this.$store.state.cartList.filter
    }
  }
}
</script>

<style scoped>
.bottom-bar {
  height: 40px;
  background-color: #eeeeee;
  line-height: 40px;

  position: relative;
  display: flex;
}

.check-content {
  display: flex;
  align-items: center;
  margin-left: 10px;
}

.check-area {
  width: 20px;
  height: 20px;
  line-height: 20px;
  margin-right: 6px;
}

.price {
  margin-left: 30px;
}
</style>
完成的CartBottomBar.vue
<template>
  <div class="bottom-bar">
    <div class="check-content">
      <check-button class="check-area"/>
      <span>全选</span>
    </div>
    <div class="price">
      合计:{{totalPrice}}
    </div>
    <div class="calculate">
      去计算({{checkLength}})
    </div>
  </div>
</template>

<script>
import CheckButton from "components/content/checkButton/CheckButton";

import {mapGetters} from 'vuex'

export default {
  name: "CartBottomBar",
  components: {
    CheckButton
  },
  computed: {
    ...mapGetters(['cartList']),

    totalPrice() {
      // 使用filter返回选中状态的商品
      // 过滤后使用reduce汇总
      return '¥' + this.cartList.filter(item => {
        return item.checked
      }).reduce((preValue, item) => {
        return preValue + item.price * item.count
      }, 0).toFixed(2)
    },
    checkLength() {
      return this.cartList.filter(item => item.checked).length
    }
  }
}
</script>

<style scoped>
.bottom-bar {
  height: 40px;
  background-color: #eeeeee;
  line-height: 40px;

  position: relative;
  display: flex;
}

.check-content {
  display: flex;
  align-items: center;
  margin-left: 10px;
  width: 60px;
}

.check-area {
  width: 20px;
  height: 20px;
  line-height: 20px;
  margin-right: 6px;
}

.price {
  margin-left: 30px;
  flex: 1;
}

.calculate {
  width: 80px;
  background: red;
  color: #ffffff;
  text-align: center;
}
</style>
Cart.vue
<template>
 <div class="cart">
   <!--导航-->
   <nav-bar class="nav-bar">
     <div slot="center">购物车({{length}})</div>
   </nav-bar>

   <!--商品列表-->
   <cart-list></cart-list>

   <!--底部汇总-->
   <cart-bottom-bar></cart-bottom-bar>
 </div>
</template>

<script>
import NavBar from "components/common/navbar/NavBar";
import CartList from "./childComps/CartList";
import CartBottomBar from "./childComps/CartBottomBar"

import {mapGetters} from 'vuex'

export default {
  name: "Cart",
  components: {
    NavBar,
    CartList,
    CartBottomBar
  },
  computed: {
    ...mapGetters({
      length: 'cartLength'
    })
  }
}
</script>

<style scoped>
.cart {
  height: 100vh;
}
.nav-bar {
  background-color: var(--color-tint);
  /*背景色:字体颜色*/
  color: #ffffff;
}
</style>
效果:
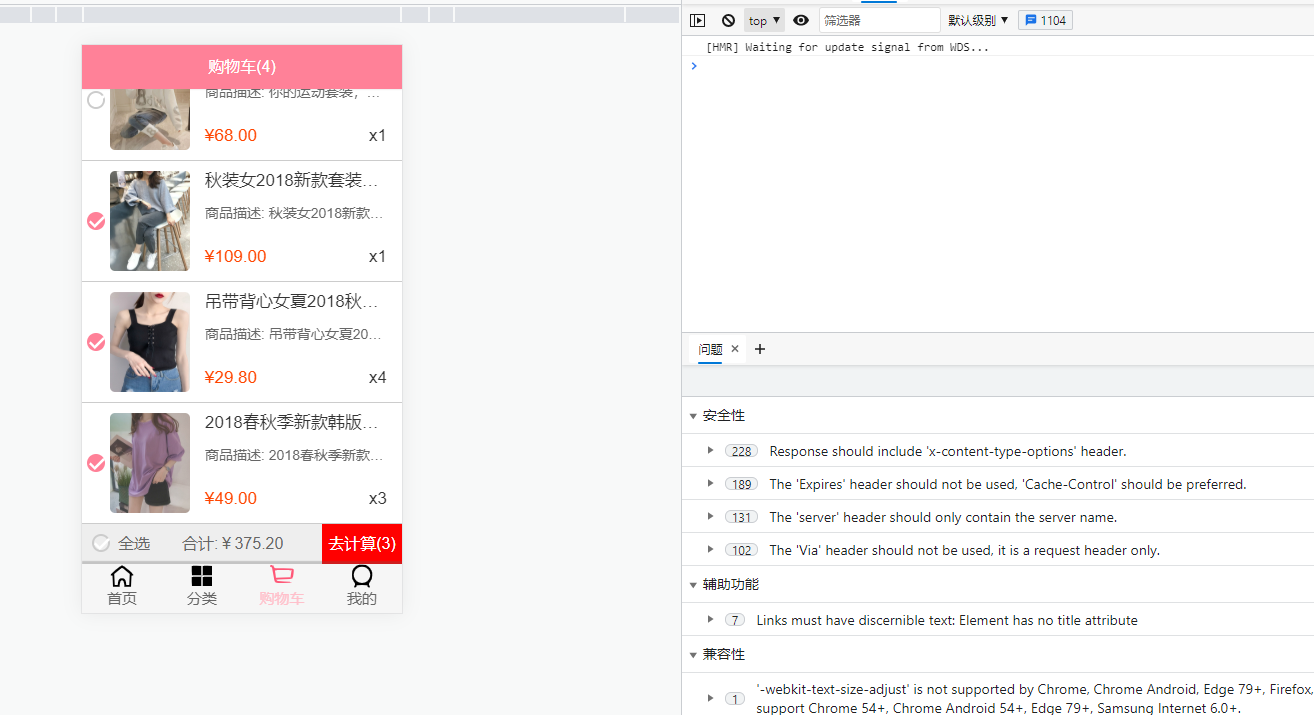
2.3、内容回顾
1、点击加入购物车
监听加入购物车按钮的点击,并且获取商品
- 监听
- 获取商品信息:iid/price/image/title/desc
2、将商品添加到vuex中
-
安装vuex
-
配置vuex
-
定义mutations,将商品添加到state.cartList中
-
重构代码
- 将mutations中的代码抽取
- 将mutations/actions单独抽取到文件中
3、购物车的展示
购物车导航栏的展示
购物车商品展示
- CartList->Scroll(滚动问题)
- CartList->CheckButton
商品的选中和不选中切换:
- 修改模型对象,改变选中和不选中
底部工具栏
- 全选按钮
- 汇总
- 去计算
2.4、全选按钮
购物车的全选按钮
-
显示的状态
- 判断是否有一个不选中,如果有一个商品未选中,则全选按钮呈未选中状态(可以点击全选)
-
点击全选按钮
- 如果原来都是选中的,点击一次,全部不选中
- 如果原来有不选中的,点击全部选中
没有数据时:
isSelectAll() {
    return !undefined; //即返回true,所以没有值的时候全选按钮也会选上
}
CartBottomBar.vue
<template>
  <div class="bottom-bar">
    <div class="check-content">
      <check-button class="check-area" :is-checked="isSelectAll"/>
      <span>全选</span>
    </div>
    <div class="price">
      合计:{{totalPrice}}
    </div>
    <div class="calculate">
      去计算({{checkLength}})
    </div>
  </div>
</template>

<script>
import CheckButton from "components/content/checkButton/CheckButton";

import {mapGetters} from 'vuex'

export default {
  name: "CartBottomBar",
  components: {
    CheckButton
  },
  computed: {
    ...mapGetters(['cartList']),

    totalPrice() {
      // 使用filter返回选中状态的商品
      // 过滤后使用reduce汇总
      return '¥' + this.cartList.filter(item => {
        return item.checked
      }).reduce((preValue, item) => {
        return preValue + item.price * item.count
      }, 0).toFixed(2)
    },
    checkLength() {
      return this.cartList.filter(item => item.checked).length
    },
    isSelectAll() {
      // this.cartList.filter(item => !item.checked).length未选中的长度,如果有未选中的,则长度不为0
      // !(this.cartList.filter(item => !item.checked).length),如果没有未选中的,即全部选中,则返回true,即!(0)=true,否则有未选中的!(数字)=false
      // return !(this.cartList.filter(item => !item.checked).length)

      // 也可以使用find函数,找到一个未选中的即停止,这样就不用遍历完,性能更高一点
      // find: 当!item.checked为true时返回item,但有值时,isSelectAll()应该为false,所以最终返回!(this.cartList.find(item => !item.checked))

      // 解决cartList为空时的小bug
      if(this.cartList.length === 0) {
        return false
      }
      return !(this.cartList.find(item => !item.checked))
    }
  }
}
</script>

<style scoped>
.bottom-bar {
  height: 40px;
  background-color: #eeeeee;
  line-height: 40px;

  position: relative;
  display: flex;
}

.check-content {
  display: flex;
  align-items: center;
  margin-left: 10px;
  width: 60px;
}

.check-area {
  width: 20px;
  height: 20px;
  line-height: 20px;
  margin-right: 6px;
}

.price {
  margin-left: 30px;
  flex: 1;
}

.calculate {
  width: 80px;
  background: red;
  color: #ffffff;
  text-align: center;
}
</style>
如果不使用高阶函数,可以使用遍历方式:
isSelectAll() {
    if(this.cartList === 0) {
        return false
    }
    for(let item of this.cartList) {
        if(!item.checked) {
            return false;
        }
    }
    return true;
}
点击全选按钮:
CartBottomBar.vue
<template>
  <div class="bottom-bar">
    <div class="check-content">
      <check-button class="check-area"
                    :is-checked="isSelectAll"
                    @click.native="checkClick"/>
      <span>全选</span>
    </div>
    <div class="price">
      合计:{{totalPrice}}
    </div>
    <div class="calculate">
      去计算({{checkLength}})
    </div>
  </div>
</template>

<script>
import CheckButton from "components/content/checkButton/CheckButton";

import {mapGetters} from 'vuex'

export default {
  name: "CartBottomBar",
  components: {
    CheckButton
  },
  computed: {
    ...mapGetters(['cartList']),

    totalPrice() {
      // 使用filter返回选中状态的商品
      // 过滤后使用reduce汇总
      return '¥' + this.cartList.filter(item => {
        return item.checked
      }).reduce((preValue, item) => {
        return preValue + item.price * item.count
      }, 0).toFixed(2)
    },
    checkLength() {
      return this.cartList.filter(item => item.checked).length
    },
    isSelectAll() {
      // this.cartList.filter(item => !item.checked).length未选中的长度,如果有未选中的,则长度不为0
      // !(this.cartList.filter(item => !item.checked).length),如果没有未选中的,即全部选中,则返回true,即!(0)=true,否则有未选中的!(数字)=false
      // return !(this.cartList.filter(item => !item.checked).length)

      // 也可以使用find函数,找到一个未选中的即停止,这样就不用遍历完,性能更高一点
      // find: 当!item.checked为true时返回item,但有值时,isSelectAll()应该为false,所以最终返回!(this.cartList.find(item => !item.checked))

      // 解决cartList为空时的小bug
      if(this.cartList.length === 0) {
        return false
      }
      return !(this.cartList.find(item => !item.checked))
    }
  },
  methods: {
    checkClick() {
      if(this.isSelectAll) {
        // 全部选中,修改为全部不选中
        this.cartList.forEach(item => item.checked = false)
      }else {
        // 全部修改为选中状态
        this.cartList.forEach(item => item.checked = true)
      }
    }
  }
}
</script>

<style scoped>
.bottom-bar {
  height: 40px;
  background-color: #eeeeee;
  line-height: 40px;

  position: relative;
  display: flex;
}

.check-content {
  display: flex;
  align-items: center;
  margin-left: 10px;
  width: 60px;
}

.check-area {
  width: 20px;
  height: 20px;
  line-height: 20px;
  margin-right: 6px;
}

.price {
  margin-left: 30px;
  flex: 1;
}

.calculate {
  width: 80px;
  background: red;
  color: #ffffff;
  text-align: center;
}
</style>
全选代码简化:
methods: {
  checkClick() {
    /*if(this.isSelectAll) {
      // 全部选中,修改为全部不选中
      this.cartList.forEach(item => item.checked = false)
    }else {
      // 全部修改为选中状态
      this.cartList.forEach(item => item.checked = true)
    }*/

    // 代码简化
    this.cartList.forEach(item => item.checked = !this.isSelectAll)
  }
}
但是这里并不能这样做,因为item.checked在变化的时候会影响isSelectAll(),这两个相互影响,从而不能达到预期的结果
2.5、加入购物车弹窗效果
vuex-actons返回Promise-MapActions
点击购物车成功后弹出弹窗提示添加成功
弹窗名字:toast(烤面包,干杯,烤火,取暖,广受赞誉的人)
toast可以封装一个公共组件,可以在多个界面使用
1、首先是普通的使用(在Detail中使用)
// 3.添加到购物车成功:要添加成功了再加入到购物车:如何证明已经添加到购物车:dispatch是actions中的方法,我们可以返回一个Promise,如果返回了,就证明添加成功
修改actions.js中的addCart方法
export default {
  addCart(context, payload) {
    return new Promise((resolve, reject) => {
      // 判断当前加入的商品是否在cartList中,如果在,则数量加一
      let oldProduct = context.state.cartList.find(item => item.iid === payload.iid)
      if(oldProduct) {
        context.commit(ADD_COUNTER, oldProduct)
        resolve('当前的商品数量加1')
      }else {
        payload.count = 1
        context.commit(ADD_TO_CART, payload)
        resolve('添加新的商品')
      }
    })
  }
}
在addToCart()方法中:使用(Detail中的methods中的方法)
addToCart() {
  // 1.获取购物车需要展示的信息,添加到购物车
  const product = {}
  // 图片取一张即可
  product.image = this.topImages[0]
  product.title = this.goods.title
  // 描述信息
  product.desc = this.goods.desc
  product.price = this.goods.realPrice
  product.iid = this.iid

  // 2.将购买的商品添加到购物车:由vuex管理的cartList中,通过mutations提交
  // this.$store.commit('addCart', product)
  // 通过actions分发
  this.$store.dispatch('addCart', product).then(res => {
    console.log(res);
  })

  // 3.添加到购物车成功:要添加成功了再加入到购物车:如何证明已经添加到购物车:dispatch是actions中的方法,我们可以返回一个Promise,如果返回了,就证明添加成功

}
效果:
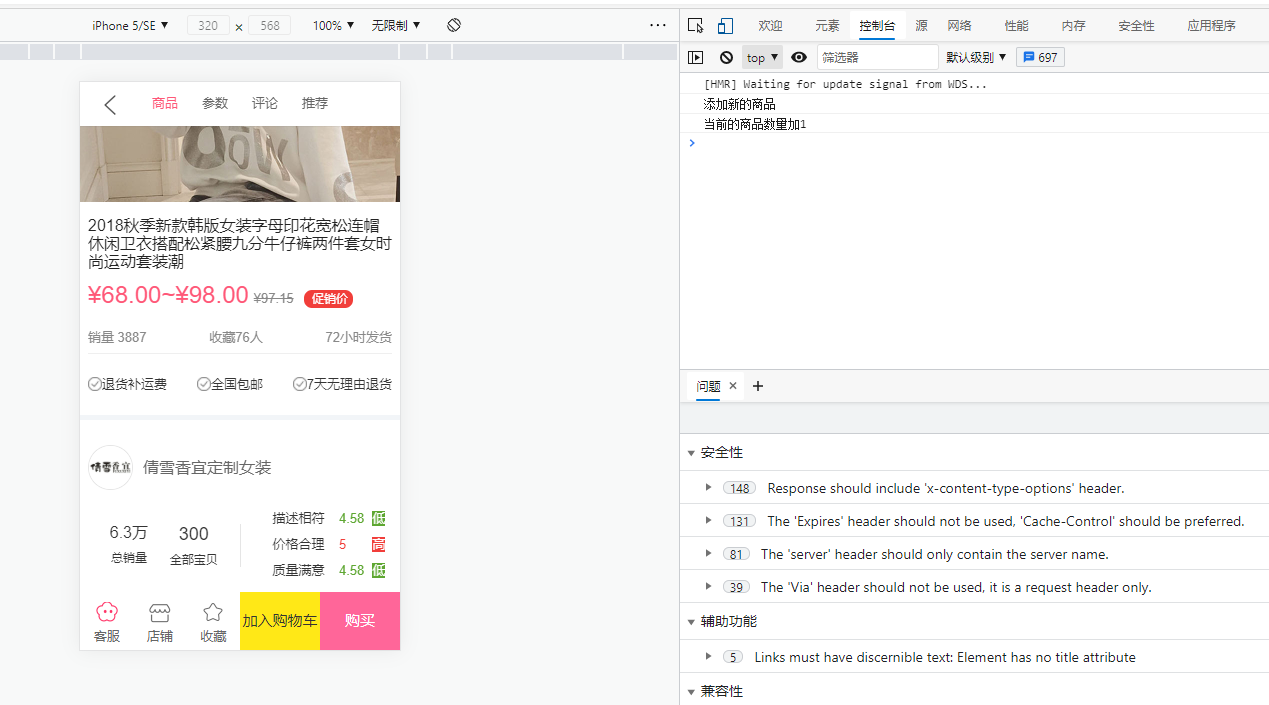
把actions中的方法映射到vue中,就可以使用this.addCart(product)的方式调用actions中的方法了:
首先在Detail.vue中导入mapActions:
import {mapActions} from 'vuex'
然后在methods中使用:…mapActions([‘addCart’])
this.addCart(product).then(res => {
  // 3.添加到购物车成功:要添加成功了再加入到购物车:如何证明已经添加到购物车:dispatch是actions中的方法,我们可以返回一个Promise,如果返回了,就证明添加成功
  console.log(res);
})
Detail.vue
<template>
  <div id="detail">
    <!--导航-->
    <detail-nav-bar class="detail-nav" @titleClick="titleClick" ref="detailNav"></detail-nav-bar>
    <scroll class="content" ref="scroll" @scroll="contentScroll" :probe-type="3">
      <detail-swiper :top-images="topImages"></detail-swiper>
      <detail-base-info :GoodsInfo="goods"></detail-base-info>
      <detail-shop-info :shop-info="shop"></detail-shop-info>
      <detail-goods-info :detail-info="detailInfo" @imageLoad="imageLoad"></detail-goods-info>
      <detail-param-info :goods-param="paramInfo" ref="params"></detail-param-info>
      <detail-comment-info :comment-info="commentInfo" ref="comment"/>
      <goods-list :goods="recommends" ref="recommend"/>
    </scroll>
    <detail-bottom-bar @addCart="addToCart"></detail-bottom-bar>
    <back-top @click.native="backClick" v-show="isShowBackTop"/>
  </div>
</template>

<script>
import DetailNavBar from "./childComps/DetailNavBar";
import DetailSwiper from "./childComps/DetailSwiper";
import DetailBaseInfo from "./childComps/DetailBaseInfo";
import DetailShopInfo from "./childComps/DetailShopInfo";
import DetailGoodsInfo from "./childComps/DetailGoodsInfo";
import DetailParamInfo from "./childComps/DetailParamInfo";
import DetailCommentInfo from "./childComps/DetailCommentInfo";
import DetailBottomBar from "./childComps/DetailBottomBar";

import Scroll from "components/common/scroll/Scroll";
import GoodsList from "components/content/goods/GoodsList";

import {getDetail, Goods, Shop, GoodsParams, getRecommend} from "@/network/detail";
import {itemListenerMixin, backTopMixin} from "@/common/mixin";
import {debounce} from "@/common/utils";

import {mapActions} from 'vuex'

export default {
  name: "Detail",
  data() {
    return {
      iid: null,
      topImages: [],
      goods: {},
      shop: {},
      detailInfo: {},
      paramInfo: {},
      commentInfo: {},
      recommends: [],
      themeTopYs: [],
      themeTopY: null,
      currentIndex: 0
    }
  },
  components: {
    DetailNavBar,
    DetailSwiper,
    DetailBaseInfo,
    DetailShopInfo,
    Scroll,
    DetailGoodsInfo,
    DetailParamInfo,
    DetailCommentInfo,
    GoodsList,
    DetailBottomBar
  },
  mixins: [itemListenerMixin, backTopMixin],
  methods: {
    ...mapActions(['addCart']),
    imageLoad() {
      this.$refs.scroll.refresh()

      this.themeTopYs = []
      this.themeTopYs.push(0)
      this.themeTopYs.push(this.$refs.params.$el.offsetTop)
      this.themeTopYs.push(this.$refs.comment.$el.offsetTop)
      this.themeTopYs.push(this.$refs.recommend.$el.offsetTop)
      this.themeTopYs.push(Number.MAX_VALUE)
    },
    titleClick(index) {
      this.$refs.scroll.scrollTo(0, -this.themeTopYs[index], 100)
    },
    // 监听内容的滚动
    contentScroll(position) {
      // 1.获取y值
      const positionY = -position.y
      const length = this.themeTopYs.length
      // positionY在0~this.themeTopYs[1]之间,index=0
      // positionY在this.themeTopYs[1]~this.themeTopYs[2]之间,index=1
      // positionY在this.themeTopYs[2]~this.themeTopYs[3]之间,index=2
      // positionY>this.themeTopYs[3],index=3
      for(let i = 0;i < this.themeTopYs.length-1; i++) {
        if(this.currentIndex !== i && (i < length-1 && positionY > this.themeTopYs[i] && positionY < this.themeTopYs[i+1])) {
          this.currentIndex = i
          this.$refs.detailNav.currentIndex = this.currentIndex
        }
      }

      // 是否显示回到顶部
      this.isShowBackTop = (-position.y) > 1000
    },
    addToCart() {
      // 1.获取购物车需要展示的信息,添加到购物车
      const product = {}
      // 图片取一张即可
      product.image = this.topImages[0]
      product.title = this.goods.title
      // 描述信息
      product.desc = this.goods.desc
      product.price = this.goods.realPrice
      product.iid = this.iid

      // 2.将购买的商品添加到购物车:由vuex管理的cartList中,通过mutations提交
      // this.$store.commit('addCart', product)
      // 通过actions分发
      /*this.$store.dispatch('addCart', product).then(res => {
        // 3.添加到购物车成功:要添加成功了再加入到购物车:如何证明已经添加到购物车:dispatch是actions中的方法,我们可以返回一个Promise,如果返回了,就证明添加成功
        console.log(res);
      })*/
      this.addCart(product).then(res => {
        // 3.添加到购物车成功:要添加成功了再加入到购物车:如何证明已经添加到购物车:dispatch是actions中的方法,我们可以返回一个Promise,如果返回了,就证明添加成功
        console.log(res);
      })
    }
  },
  // 组件创建后获取并保存iid
  created() {
    // 1.保存传入的iid
    this.iid = this.$route.params.iid

    // 2.根据iid请求详情数据
    getDetail(this.iid).then(res => {
      // 1. 获取顶部图片的轮播数据
      this.topImages = res.result.itemInfo.topImages
      // 2.获取商品基本信息
      this.goods = new Goods(res.result.itemInfo, res.result.columns, res.result.shopInfo.services)
      // 3.创建店铺信息对象
      this.shop = new Shop(res.result.shopInfo)
      // 4.保存商品的详情数据
      this.detailInfo = res.result.detailInfo
      // 5.获取参数信息
      this.paramInfo = new GoodsParams(res.result.itemParams.info, res.result.itemParams.rule)
      // 6.取出评论信息:由于不是所有的商品都有评论,所以需要先判断一下
      if(res.result.rate.cRate !== 0) {
        this.commentInfo = res.result.rate.list[0]
      }

      // 第2次获取,值不对(图片没有加载完成)
      /*this.$nextTick(() => {
        this.themeTopYs = []
        this.themeTopYs.push(0)
        this.themeTopYs.push(this.$refs.params.$el.offsetTop)
        this.themeTopYs.push(this.$refs.comment.$el.offsetTop)
        this.themeTopYs.push(this.$refs.recommend.$el.offsetTop)
        console.log(this.themeTopYs);
      })*/
    })

    // 请求推荐数据
    getRecommend().then(res => {
      // 保存数据
      this.recommends = res.data.list
    })

    // 第1次获取:值不对:$el没有渲染
    /*this.themeTopYs = []
    this.themeTopYs.push(0)
    this.themeTopYs.push(this.$refs.params.$el.offsetTop)
    this.themeTopYs.push(this.$refs.comment.$el.offsetTop)
    this.themeTopYs.push(this.$refs.recommend.$el.offsetTop)
    console.log(this.themeTopYs);*/

    this.themeTopY = debounce(() => {
      this.themeTopYs = []
      this.themeTopYs.push(0)
      this.themeTopYs.push(this.$refs.params.$el.offsetTop)
      this.themeTopYs.push(this.$refs.comment.$el.offsetTop)
      this.themeTopYs.push(this.$refs.recommend.$el.offsetTop)
    }, 100)
  },
  mounted() {
  },
  updated() {
  },
  destroyed() {
    this.$bus.$off('itemImageLoad', this.itemImgListener)
  }
}
</script>

<style scoped>
#detail {
  position: relative;
  z-index: 10;
  background-color: #ffffff;
  height: 100vh;
}

.detail-nav {
  position: relative;
  z-index: 9;
  background-color: #ffffff;
}

.content {
  height: calc(100% - 44px - 49px);
}
</style>
2.6、toast的封装
我们把它封装到components/common中,因为这的话,下个项目也可以使用
在components/common下新建toast目录,该目录下新建Toast组件
<template>
  <div class="toast" v-show="show">
    <div>{{message}}</div>
  </div>
</template>

<script>
export default {
  name: "Toast",
  props: {
    message: {
      type: String,
      default: ''
    },
    show: {
      type: Boolean,
      default: false
    }
  }
}
</script>

<style scoped>
.toast {
  position: fixed;
  top: 50%;
  left: 50%;
  transform: translate(-50%, -50%);
  color: #ffffff;
  background: rgba(0, 0, 0, .75);
  padding: 8px 10px;
}
</style>
Detail.vue使用:
1、导入注册
import Toast from "components/common/toast/Toast";
2、使用变量绑定与传输数据
data() {
  return {
    message: '',
    show: false
  }
}
3、使用
<toast :message="message" :show="show"></toast>
4、控制Toast显示与消失
this.addCart(product).then(res => {
  // 3.添加到购物车成功:要添加成功了再加入到购物车:如何证明已经添加到购物车:dispatch是actions中的方法,我们可以返回一个Promise,如果返回了,就证明添加成功
  this.show = true;
  this.message = res;
  // 停留1.5秒后,toast弹窗消失,并且把message清空
  setTimeout(() => {
    this.show = false;
    this.message = ''
  }, 1500)
})
以上是普通封装:
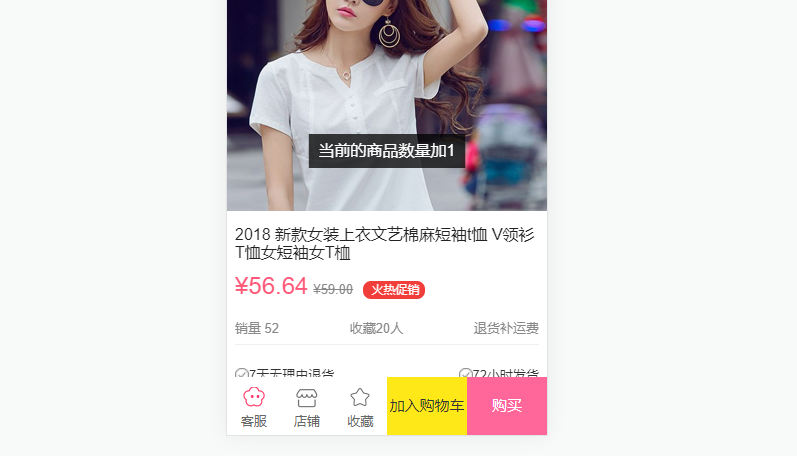
但是这样的话,其他组件要使用的话还得导入,注册封装变量,使用很麻烦。
插件方式的封装:
删除之前的导入与相关的变量
把这个组件封装为一个插件,在使用的时候安装这个插件即可
在toast目录下新建index.js
测试1:
import Toast from "components/common/toast/Toast";

const obj = {}

obj.install = function(Vue) {
  // 在install函数把要预备的东西全部预备好:install函数在执行的时候会默认传入一个参数:Vue,于是我们在install函数中就可以拿到Vue
  // 也就可以使用Vue.prototype给Vue中加入一些全局参数
  document.body.appendChild(Toast.$el)
  Vue.prototype.$toast = Toast
}

export default obj
我们不能把Toast直接赋给 t o a s t 的 原 因 是 T o a s t 中 有 t e m p l a t e 模 板 , 直 接 赋 给 toast的原因是Toast中有template模板,直接赋给 toast的原因是Toast中有template模板,直接赋给toast的话,Toast组件中的模板是不能直接加到body中的。
通过测试,以上的方式也不行,因为这个install函数执行的时候,$el还没有挂载,为undefined。
用普通的方式做:
1、创建组件构造器
const toastConstructor = Vue.extends(Toast)
2、通过new的方式,根据组件构造器,可以创建出来一个组件对象
const toast = new toastConstructor()
3、将我们的组件对象,手动的挂载到某一个元素上
// 这里创建一个div元素,并把这个组件挂载上去,挂载使用$mount
toast.$mount(document.createElement('div'))
4、以后toast.$el就是这里的div了
这时就可以把这个div添加到body上了
document.body.appendChild(toast.$el)
这时body中就多了一个div,class=‘toast’,就是我们刚才定义的组件

index.js
import Toast from "components/common/toast/Toast";

const obj = {}

obj.install = function(Vue) {
  // 在install函数把要预备的东西全部预备好:install函数在执行的时候会默认传入一个参数:Vue,于是我们在install函数中就可以拿到Vue
  // 也就可以使用Vue.prototype给Vue中加入一些全局参数
  const toastConstructor = Vue.extend(Toast)
  const toast = new toastConstructor()
  toast.$mount(document.createElement('div'))
  document.body.appendChild(toast.$el)
  Vue.prototype.$toast = toast
}

export default obj
在main.js中安装插件
import Vue from 'vue'
import App from './App.vue'
import store from "./store/index";
import router from "@/router";

import toast from 'components/common/toast'

Vue.config.productionTip = false
// 添加事件总线,并且把该事件总线设置为Vue实例,应为vue实例可以发射事件并且可以作为事件总线
Vue.prototype.$bus = new Vue

// 安装toast插件:本质是执行toast中对象.install函数
// 安装插件:执行了Vue.use()后,该插件就准备好了,之后可以随时使用
Vue.use(toast)

new Vue({
  store,
  router,
  render: h => h(App)
}).$mount('#app')
Detail.vue中使用
this.addCart(product).then(res => {
  // 3.添加到购物车成功:要添加成功了再加入到购物车:如何证明已经添加到购物车:dispatch是actions中的方法,我们可以返回一个Promise,如果返回了,就证明添加成功
  /*this.show = true;
  this.message = res;
  // 停留1.5秒后,toast弹窗消失,并且把message清空
  setTimeout(() => {
    this.show = false;
    this.message = ''
  }, 1500)*/
  this.$toast.show(res, 1500)
})
Deatil.vue
<template>
  <div id="detail">
    <!--导航-->
    <detail-nav-bar class="detail-nav" @titleClick="titleClick" ref="detailNav"></detail-nav-bar>
    <scroll class="content" ref="scroll" @scroll="contentScroll" :probe-type="3">
      <detail-swiper :top-images="topImages"></detail-swiper>
      <detail-base-info :GoodsInfo="goods"></detail-base-info>
      <detail-shop-info :shop-info="shop"></detail-shop-info>
      <detail-goods-info :detail-info="detailInfo" @imageLoad="imageLoad"></detail-goods-info>
      <detail-param-info :goods-param="paramInfo" ref="params"></detail-param-info>
      <detail-comment-info :comment-info="commentInfo" ref="comment"/>
      <goods-list :goods="recommends" ref="recommend"/>
    </scroll>
    <detail-bottom-bar @addCart="addToCart"></detail-bottom-bar>
    <back-top @click.native="backClick" v-show="isShowBackTop"/>
  </div>
</template>

<script>
import DetailNavBar from "./childComps/DetailNavBar";
import DetailSwiper from "./childComps/DetailSwiper";
import DetailBaseInfo from "./childComps/DetailBaseInfo";
import DetailShopInfo from "./childComps/DetailShopInfo";
import DetailGoodsInfo from "./childComps/DetailGoodsInfo";
import DetailParamInfo from "./childComps/DetailParamInfo";
import DetailCommentInfo from "./childComps/DetailCommentInfo";
import DetailBottomBar from "./childComps/DetailBottomBar";

import Scroll from "components/common/scroll/Scroll";
import GoodsList from "components/content/goods/GoodsList";

import {getDetail, Goods, Shop, GoodsParams, getRecommend} from "@/network/detail";
import {itemListenerMixin, backTopMixin} from "@/common/mixin";
import {debounce} from "@/common/utils";

import {mapActions} from 'vuex'

export default {
  name: "Detail",
  data() {
    return {
      iid: null,
      topImages: [],
      goods: {},
      shop: {},
      detailInfo: {},
      paramInfo: {},
      commentInfo: {},
      recommends: [],
      themeTopYs: [],
      themeTopY: null,
      currentIndex: 0,
    }
  },
  components: {
    DetailNavBar,
    DetailSwiper,
    DetailBaseInfo,
    DetailShopInfo,
    Scroll,
    DetailGoodsInfo,
    DetailParamInfo,
    DetailCommentInfo,
    GoodsList,
    DetailBottomBar
  },
  mixins: [itemListenerMixin, backTopMixin],
  methods: {
    ...mapActions(['addCart']),
    imageLoad() {
      this.$refs.scroll.refresh()

      this.themeTopYs = []
      this.themeTopYs.push(0)
      this.themeTopYs.push(this.$refs.params.$el.offsetTop)
      this.themeTopYs.push(this.$refs.comment.$el.offsetTop)
      this.themeTopYs.push(this.$refs.recommend.$el.offsetTop)
      this.themeTopYs.push(Number.MAX_VALUE)
    },
    titleClick(index) {
      this.$refs.scroll.scrollTo(0, -this.themeTopYs[index], 100)
    },
    // 监听内容的滚动
    contentScroll(position) {
      // 1.获取y值
      const positionY = -position.y
      const length = this.themeTopYs.length
      // positionY在0~this.themeTopYs[1]之间,index=0
      // positionY在this.themeTopYs[1]~this.themeTopYs[2]之间,index=1
      // positionY在this.themeTopYs[2]~this.themeTopYs[3]之间,index=2
      // positionY>this.themeTopYs[3],index=3
      for(let i = 0;i < this.themeTopYs.length-1; i++) {
        if(this.currentIndex !== i && (i < length-1 && positionY > this.themeTopYs[i] && positionY < this.themeTopYs[i+1])) {
          this.currentIndex = i
          this.$refs.detailNav.currentIndex = this.currentIndex
        }
      }

      // 是否显示回到顶部
      this.isShowBackTop = (-position.y) > 1000
    },
    addToCart() {
      // 1.获取购物车需要展示的信息,添加到购物车
      const product = {}
      // 图片取一张即可
      product.image = this.topImages[0]
      product.title = this.goods.title
      // 描述信息
      product.desc = this.goods.desc
      product.price = this.goods.realPrice
      product.iid = this.iid

      // 2.将购买的商品添加到购物车:由vuex管理的cartList中,通过mutations提交
      // this.$store.commit('addCart', product)
      // 通过actions分发
      /*this.$store.dispatch('addCart', product).then(res => {
        // 3.添加到购物车成功:要添加成功了再加入到购物车:如何证明已经添加到购物车:dispatch是actions中的方法,我们可以返回一个Promise,如果返回了,就证明添加成功
        console.log(res);
      })*/
      this.addCart(product).then(res => {
        // 3.添加到购物车成功:要添加成功了再加入到购物车:如何证明已经添加到购物车:dispatch是actions中的方法,我们可以返回一个Promise,如果返回了,就证明添加成功
        /*this.show = true;
        this.message = res;
        // 停留1.5秒后,toast弹窗消失,并且把message清空
        setTimeout(() => {
          this.show = false;
          this.message = ''
        }, 1500)*/
        this.$toast.show(res, 1500)
      })
    }
  },
  // 组件创建后获取并保存iid
  created() {
    // 1.保存传入的iid
    this.iid = this.$route.params.iid

    // 2.根据iid请求详情数据
    getDetail(this.iid).then(res => {
      // 1. 获取顶部图片的轮播数据
      this.topImages = res.result.itemInfo.topImages
      // 2.获取商品基本信息
      this.goods = new Goods(res.result.itemInfo, res.result.columns, res.result.shopInfo.services)
      // 3.创建店铺信息对象
      this.shop = new Shop(res.result.shopInfo)
      // 4.保存商品的详情数据
      this.detailInfo = res.result.detailInfo
      // 5.获取参数信息
      this.paramInfo = new GoodsParams(res.result.itemParams.info, res.result.itemParams.rule)
      // 6.取出评论信息:由于不是所有的商品都有评论,所以需要先判断一下
      if(res.result.rate.cRate !== 0) {
        this.commentInfo = res.result.rate.list[0]
      }

      // 第2次获取,值不对(图片没有加载完成)
      /*this.$nextTick(() => {
        this.themeTopYs = []
        this.themeTopYs.push(0)
        this.themeTopYs.push(this.$refs.params.$el.offsetTop)
        this.themeTopYs.push(this.$refs.comment.$el.offsetTop)
        this.themeTopYs.push(this.$refs.recommend.$el.offsetTop)
        console.log(this.themeTopYs);
      })*/
    })

    // 请求推荐数据
    getRecommend().then(res => {
      // 保存数据
      this.recommends = res.data.list
    })

    // 第1次获取:值不对:$el没有渲染
    /*this.themeTopYs = []
    this.themeTopYs.push(0)
    this.themeTopYs.push(this.$refs.params.$el.offsetTop)
    this.themeTopYs.push(this.$refs.comment.$el.offsetTop)
    this.themeTopYs.push(this.$refs.recommend.$el.offsetTop)
    console.log(this.themeTopYs);*/

    this.themeTopY = debounce(() => {
      this.themeTopYs = []
      this.themeTopYs.push(0)
      this.themeTopYs.push(this.$refs.params.$el.offsetTop)
      this.themeTopYs.push(this.$refs.comment.$el.offsetTop)
      this.themeTopYs.push(this.$refs.recommend.$el.offsetTop)
    }, 100)
  },
  mounted() {
  },
  updated() {
  },
  destroyed() {
    this.$bus.$off('itemImageLoad', this.itemImgListener)
  }
}
</script>

<style scoped>
#detail {
  position: relative;
  z-index: 10;
  background-color: #ffffff;
  height: 100vh;
}

.detail-nav {
  position: relative;
  z-index: 9;
  background-color: #ffffff;
}

.content {
  height: calc(100% - 44px - 49px);
}
</style>
Toast.vue
<template>
  <div class="toast" v-show="isShow">
    <div>{{message}}</div>
  </div>
</template>

<script>
export default {
  name: "Toast",
  props: {
    /*message: {
      type: String,
      default: ''
    },
    show: {
      type: Boolean,
      default: false
    }*/
  },
  data() {
    return {
      message: '',
      isShow: false
    }
  },
  methods: {
    show(message='添加商品成功', duration=1500) {
      // es5设置默认值方法: duration = duration || 1500
      this.message = message;
      this.isShow = true

      setTimeout(() => {
        this.isShow = false
        this.message = ''
      }, duration)
    }
  }
}
</script>

<style scoped>
.toast {
  position: fixed;
  top: 50%;
  left: 50%;
  transform: translate(-50%, -50%);
  color: #ffffff;
  background-color: rgba(0, 0, 0, .75);
  padding: 8px 10px;
  z-index: 10;
}
</style>
在CartBottomBar.vue中的去计算使用:
监听
<div class="calculate" @click="calcClick">
  去计算({{checkLength}})
</div>
使用:
calcClick() {
  if(!this.isSelectAll) {
    this.$toast.show('请选择购买的商品', 2000)
  }
}
CartBottomBar.vue
<template>
  <div class="bottom-bar">
    <div class="check-content">
      <check-button class="check-area"
                    :is-checked="isSelectAll"
                    @click.native="checkClick"/>
      <span>全选</span>
    </div>
    <div class="price">
      合计:{{totalPrice}}
    </div>
    <div class="calculate" @click="calcClick">
      去计算({{checkLength}})
    </div>
  </div>
</template>

<script>
import CheckButton from "components/content/checkButton/CheckButton";

import {mapGetters} from 'vuex'

export default {
  name: "CartBottomBar",
  components: {
    CheckButton
  },
  computed: {
    ...mapGetters(['cartList']),

    totalPrice() {
      // 使用filter返回选中状态的商品
      // 过滤后使用reduce汇总
      return '¥' + this.cartList.filter(item => {
        return item.checked
      }).reduce((preValue, item) => {
        return preValue + item.price * item.count
      }, 0).toFixed(2)
    },
    checkLength() {
      return this.cartList.filter(item => item.checked).length
    },
    isSelectAll() {
      // this.cartList.filter(item => !item.checked).length未选中的长度,如果有未选中的,则长度不为0
      // !(this.cartList.filter(item => !item.checked).length),如果没有未选中的,即全部选中,则返回true,即!(0)=true,否则有未选中的!(数字)=false
      // return !(this.cartList.filter(item => !item.checked).length)

      // 也可以使用find函数,找到一个未选中的即停止,这样就不用遍历完,性能更高一点
      // find: 当!item.checked为true时返回item,但有值时,isSelectAll()应该为false,所以最终返回!(this.cartList.find(item => !item.checked))

      // 解决cartList为空时的小bug
      if(this.cartList.length === 0) {
        return false
      }
      return !(this.cartList.find(item => !item.checked))
    }
  },
  methods: {
    checkClick() {
      if(this.isSelectAll) {
        // 全部选中,修改为全部不选中
        this.cartList.forEach(item => item.checked = false)
      }else {
        // 全部修改为选中状态
        this.cartList.forEach(item => item.checked = true)
      }
    },
    calcClick() {
      if(!this.isSelectAll) {
        this.$toast.show('请选择购买的商品', 2000)
      }
    }
  }
}
</script>

<style scoped>
.bottom-bar {
  height: 40px;
  background-color: #eeeeee;
  line-height: 40px;

  position: relative;
  display: flex;
}

.check-content {
  display: flex;
  align-items: center;
  margin-left: 10px;
  width: 60px;
}

.check-area {
  width: 20px;
  height: 20px;
  line-height: 20px;
  margin-right: 6px;
}

.price {
  margin-left: 30px;
  flex: 1;
}

.calculate {
  width: 80px;
  background: red;
  color: #ffffff;
  text-align: center;
}
</style>
效果:
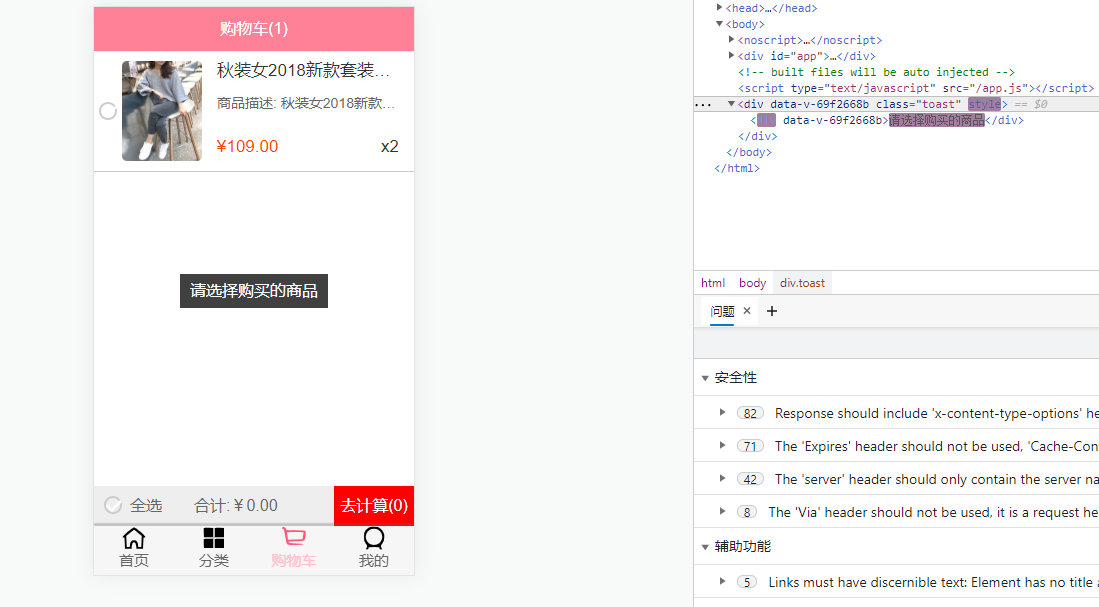
2.7、解决移动端300ms延迟问题
在移动端的浏览器我们点击监听事件的时候,是有300ms的延迟的,
polyfill:补丁,用于适配
FastClick可以解决移动端300ms毫秒延迟问题
使用步骤:
1、安装fastClick
npm install fastClick --save
2、导入
import fastclick from 'fastclick'
3、使用:fastclick中有一个attach函数,把他attach到body上即可
// 解决移动端的300ms延迟问题
fastclick.attach(document.body)
main.js
import Vue from 'vue'
import App from './App.vue'
import store from "./store/index";
import router from "@/router";

import toast from 'components/common/toast'
import fastclick from 'fastclick'

Vue.config.productionTip = false
// 添加事件总线,并且把该事件总线设置为Vue实例,应为vue实例可以发射事件并且可以作为事件总线
Vue.prototype.$bus = new Vue

// 解决移动端的300ms延迟问题
fastclick.attach(document.body)

// 安装toast插件:本质是执行toast中对象.install函数
// 安装插件:执行了Vue.use()后,该插件就准备好了,之后可以随时使用
Vue.use(toast)

new Vue({
  store,
  router,
  render: h => h(App)
}).$mount('#app')
2.8、图片懒加载
什么是图片懒加载?
图片用到时在加载。
可以自己封装,我们这里使用第三方工具:Vue-lazyload,可以去github上搜索
1、安装使用
npm install vue-lazyload --save
2、导入:main.js
import VueLazyload from "vue-lazyload";
3、安装lazyload插件:main.js
// 使用vue-lazyload插件
Vue.use(VueLazyLoad)
4、修改使用图片的地方:img->src修改为:v-lazy
<template>
  <div class="goods-item" @click="itemClick">
    <img v-lazy="showImage" alt="" @load="imageLoad">
    <div class="goods-info">
      <p>{{goodsItem.title}}</p>
      <span class="price">{{goodsItem.price}}</span>
      <span class="collect">{{goodsItem.cfav}}</span>
    </div>
  </div>
</template>
使用到图片的时候才加载图片
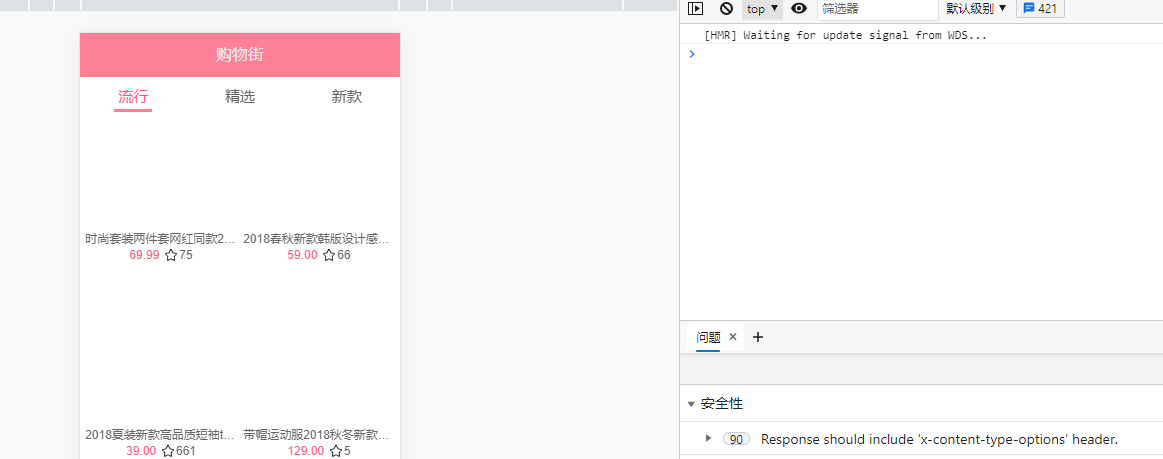
第二种使用方式:
Vue.use(插件名,{}),该对象中可以传入一些参数
import Vue from 'vue'
import App from './App.vue'
import store from "./store/index";
import router from "@/router";

import toast from 'components/common/toast'
import fastclick from 'fastclick'
import VueLazyLoad from "vue-lazyload";


Vue.config.productionTip = false
// 添加事件总线,并且把该事件总线设置为Vue实例,应为vue实例可以发射事件并且可以作为事件总线
Vue.prototype.$bus = new Vue

// 解决移动端的300ms延迟问题
fastclick.attach(document.body)

// 使用vue-lazyload插件
Vue.use(VueLazyLoad, {
  // 服务器图片还没加载时,使用的本地图片占位
  loading: require('./assets/img/common/placeholder.png')
})

// 安装toast插件:本质是执行toast中对象.install函数
// 安装插件:执行了Vue.use()后,该插件就准备好了,之后可以随时使用
Vue.use(toast)

new Vue({
  store,
  router,
  render: h => h(App)
}).$mount('#app')
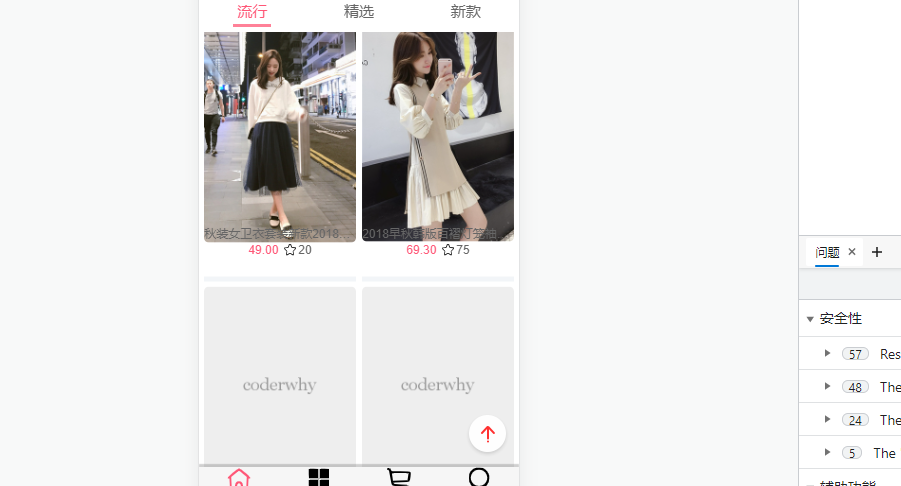
这里使用require导入静态资源
2.9、px2vw-css单位转化插件
在不同的设备使用不同的单位,例如把px单位转换为vw单位(postcss-px-to-viewport),也有px转rem单位
1、安装postcss-px-to-viewport插件
npm install postcss-px-to-viewport --save-dev
2、安装该插件后会生成一个postcss.config.js的配置文件,
3、修改配置文件
375vtina:750像素, 即一个vatina有两个像素
postcss.config.js
module.exports = {
  plugins: {
    autoprefixer: {},
    'postcss-px-to-viewport': {
      viewportWidth: 375, // 视窗的宽度,对应的是我们设计稿的宽度
      viewportHeight: 667, // 视窗高度,(也可以不配置)
      unitPrecision: 5, // 指定'px'转换为视窗单位的值的小数位数(很多时候无法整除)
      viewportUnit: 'vw', // 指定需要转换为的视窗单位,建议使用vw
      selectorBlackList: ['ignore', 'tab-bar', 'tab-bar-item'], // 指定不需要转换的类,即template中的class, 或者是css中的.后的东西都转换
      minPixelValue: 1, // 小于或等于'1px'不转换为视窗单位
      mediaQuery: false  // 允许在媒体查询中转换'px'
    }
  }
}
有的新版本可能会有一些问题,可以版本回退:
卸载postcss-px-to-viewport
npm uninstall postcss-px-to-viewport
重新安装低版本:
npm install postcss-px-to-viewport@指定版本 --save-dev
我们这里就不版本回退了,可以直接使用exclude排除某一个组件不用转换:
module.exports = {
  plugins: {
    autoprefixer: {},
    'postcss-px-to-viewport': {
      viewportWidth: 375, // 视窗的宽度,对应的是我们设计稿的宽度
      viewportHeight: 667, // 视窗高度,(也可以不配置)
      unitPrecision: 5, // 指定'px'转换为视窗单位的值的小数位数(很多时候无法整除)
      viewportUnit: 'vw', // 指定需要转换为的视窗单位,建议使用vw
      selectorBlackList: ['ignore', 'tab-bar', 'tab-bar-item'], // 指定不需要转换的类,即template中的class, 或者是css中的.后的东西都转换
      minPixelValue: 1, // 小于或等于'1px'不转换为视窗单位
      mediaQuery: false,  // 允许在媒体查询中转换'px'
      exclude: [/TabBar/]
    }
  }
}
1、在js中使用正则, /正则的相关规则/
2、exclude中存放的元素必须是正则表达式
3、按照排除的文件写对应的正则
这时在不同的终端设备有不同的高度:

三、nginx-项目在window下的部署
部署的方式很多,比如可以通过Apache的方式部署,这里我们使用build(打包)的方式部署+nginx部署
服务器问题:一台电脑(没有显示器,主机),24小时开机,为用户提供服务
公司有没有自己的服务器主机?
一般是没有的->租用阿里云/华为云/腾讯云
主机->操作系统->window(.net开发)/Linux->tomcat/nginx(软件),nginx主要用于反向代理
第一:将自己的电脑作为服务器->windows->nginx
第二:远程部署(MAC)
nginx包含很多版本,大致可以分为3类:
- Mainline version:Mainline是nginx目前主力在做的版本,可以说是开发版
- Stable version:最新稳定版本,生产环境建议使用该版本
- Legacy version:遗留的老版本的稳定版
我们选择Stable version,下载,解压,双击nginx.exe即可启动

访问localhost
说明启动成功
1、打包
npm run build
2、删除nginx安装目录下的html文件夹下的所有文件(两个html文件)

3、把我们打包后的dist目录中的东西全部复制到刚才我们删除文件的html目录下:
这时我们的网站就这样简单部署完毕了(有时不能访问需要重新启动nginx),因为nginx默认是访问html目录下的index.html文件
部署方式二:
1、把dist直接复制到nginx安装目录下:
2、去conf目录下找到nginx.conf修改启动时指向的文件
默认配置:
即访问localhost的时候,会去root(即nginx的安装目录)中去找html目录,然后在html目录中找index.html
修改配置文件:

修改完后需要重新启动nginx:
进入到nginx安装目录:
nginx -s stop  # 停止nginx
# 或者
nginx -s quit
# 启动
nginx
# 重启
nginx -s reload
注意:有时我们通过双击nginx启动时,由于会双击多次,导致启动多个nginx,在使用reload时报错,这时需要去任务管理器中结束nginx,再来启动
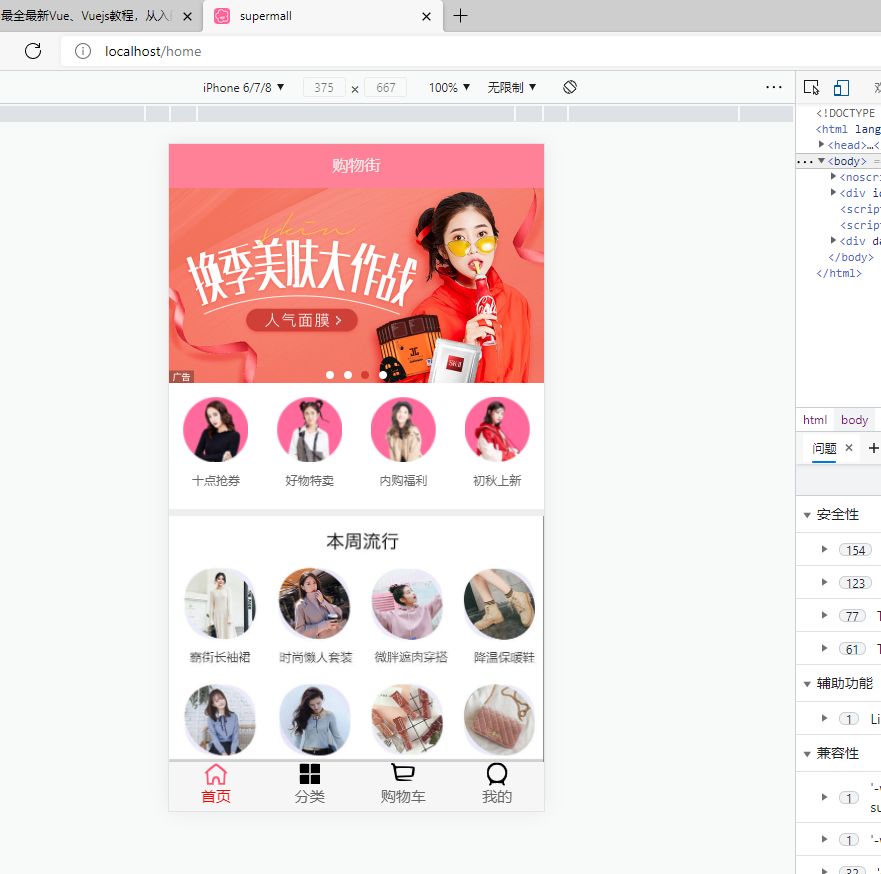
四、远程部署
centos系统下的部署:
远程主机->linux->centos->nginx:通过终端命令安装
yum:
安装并启动Nginx:
yum install nginx
systemctl start nginx.service # 开启nginx服务
systemctl enable nginx.service # 跟随系统启动
老师的远程服务器:
使用vim修改nginx的配置文件:
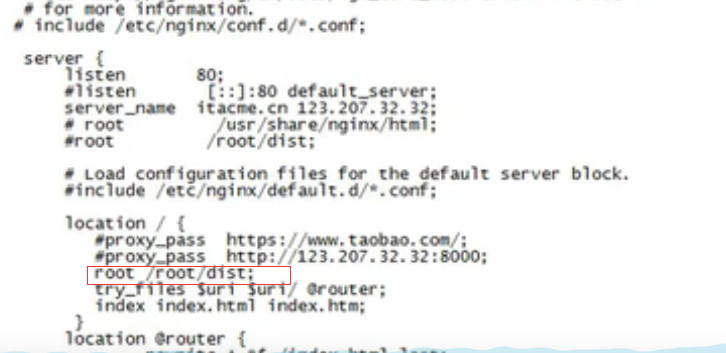
把本地的dist拖到/etc/nginx/下,重启nginx(修改了配置文件)
五、响应式原理-依赖技术的分析和学习
Vue的响应式原理?
不要认为数据发生改变,界面跟着更新是理所当然的。
1、app.message修改数据时,Vue内部是如何监听message数据的改变的。
用到了Object.defineProperty->监听对象属性的改变
2、当数据发生改变时,Vue是如何知道要通知那些人,界面要发生变化的。
使用到发布订阅模式。
使用Object.defineProperty监听属性的改变:
<!DOCTYPE html>
<html lang="en">
<head>
  <meta charset="UTF-8">
  <title>Title</title>
</head>
<body>
<div id="app">
  {{message}}
  {{message}}

  {{name}}
</div>


<script>
  const obj = {
    message: '哈哈哈',
    name: '小蕾'
  }

  Object.keys(obj).forEach(key => {
    let value = obj[key]

    Object.defineProperty(obj, key, {
      set(newValue) {
        console.log('监听' + key + '的改变');
        value = newValue
      },
      get() {
          console.log('获取' + key + '对应的值');
        return value
      }
    })
  })
</script>
<script src="./js/vue.js"></script>
<script>
  const app = new Vue({
    el: '#app',
    data: {
      message: '哈哈哈',
      name: '小蕾'
    }
  })
</script>
</body>
</html>

告诉谁对应的值发生了改变?谁用告诉谁?谁用了?
根据html代码,获取到那些人用到了这些属性?谁用,谁就会调用一次get,谁get了这个属性,谁就发生改变,于是get和set可以使用发布订阅模式:
<!DOCTYPE html>
<html lang="en">
<head>
  <meta charset="UTF-8">
  <title>Title</title>
</head>
<body>
<div id="app">
  {{message}}
  {{message}}

  {{name}}
</div>


<script>
  const obj = {
    message: '哈哈哈',
    name: '小蕾'
  }

  Object.keys(obj).forEach(key => {
    let value = obj[key]

    Object.defineProperty(obj, key, {
      set(newValue) {
        console.log('监听' + key + '的改变');
        // 告诉谁对应的值发生了改变?谁用告诉谁?谁用了?
        // 根据html代码,获取到那些人用到了这些属性?谁用,谁就会调用一次get,谁get了这个属性,谁就发生改变,于是get和set可以使用发布订阅模式:
        // 如:张三/李四/王五使用了该属性
        value = newValue
        // dep.notify()
      },
      get() {
        console.log('获取' + key + '对应的值');
        // 如果有人使用key这个变量,我就把他加到dep中
        // const w = new Watcher('')
        // 张三:get->update
        // 李四:get->update
        // 王五:get->update
        return value
      }
    })
  })

  // 发布订阅者模式
  class Dep {
    constructor() {
      // 用来记录订阅的属性
      this.subs = []
    }
    addSub(watcher) {
      this.subs.push(watcher)
    }
    notify() {
      this.subs.forEach(item => {
        item.update()
      })
    }
  }

  class Watcher {
    constructor(name) {
      this.name = name;
    }
    update() {
      console.log(this.name + '发生了更新');
    }
  }

  const dep = new Dep()
  const w1 = new Watcher('张三')
  dep.subs.push(w1)

  const w2 = new Watcher('李四')
  dep.subs.push(w2)

  const w3 = new Watcher('王五')
  dep.subs.push(w3)

  dep.notify()
</script>
<script src="./js/vue.js"></script>
<script>
  const app = new Vue({
    el: '#app',
    data: {
      message: '哈哈哈',
      name: '小蕾'
    }
  })
</script>
</body>
</html>

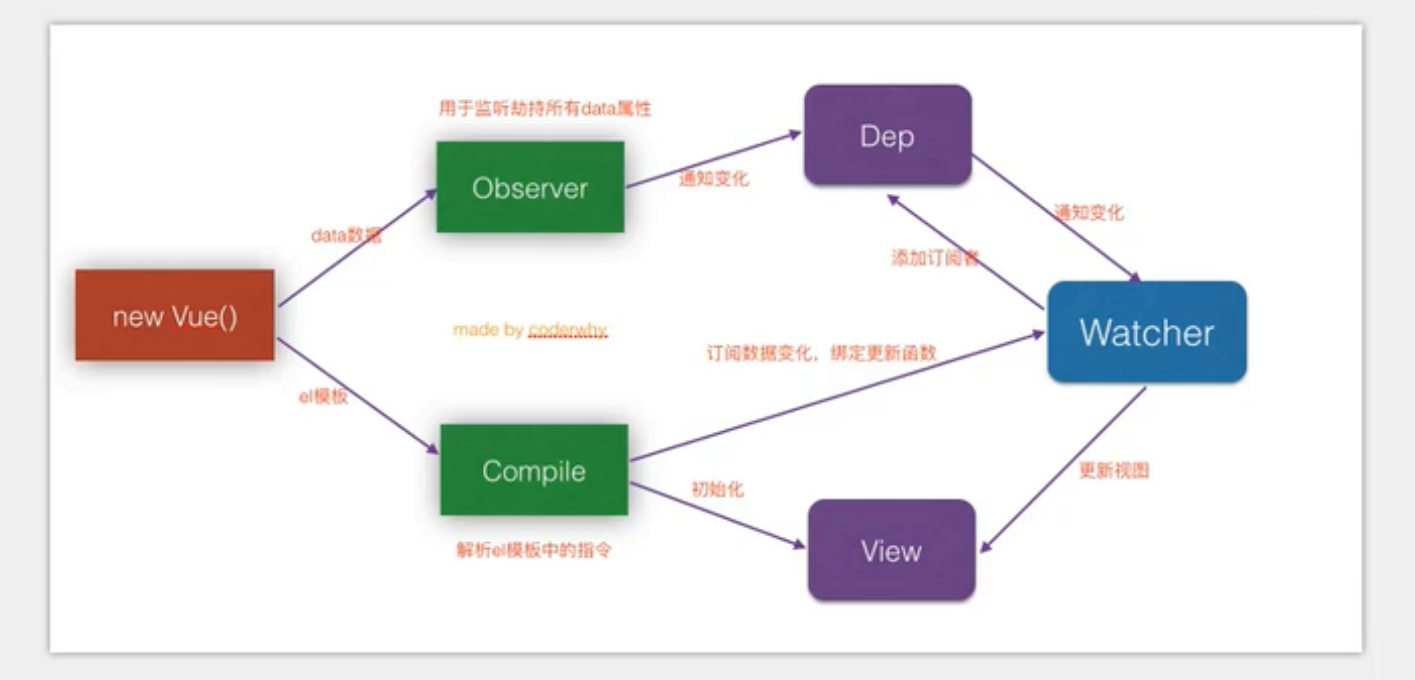
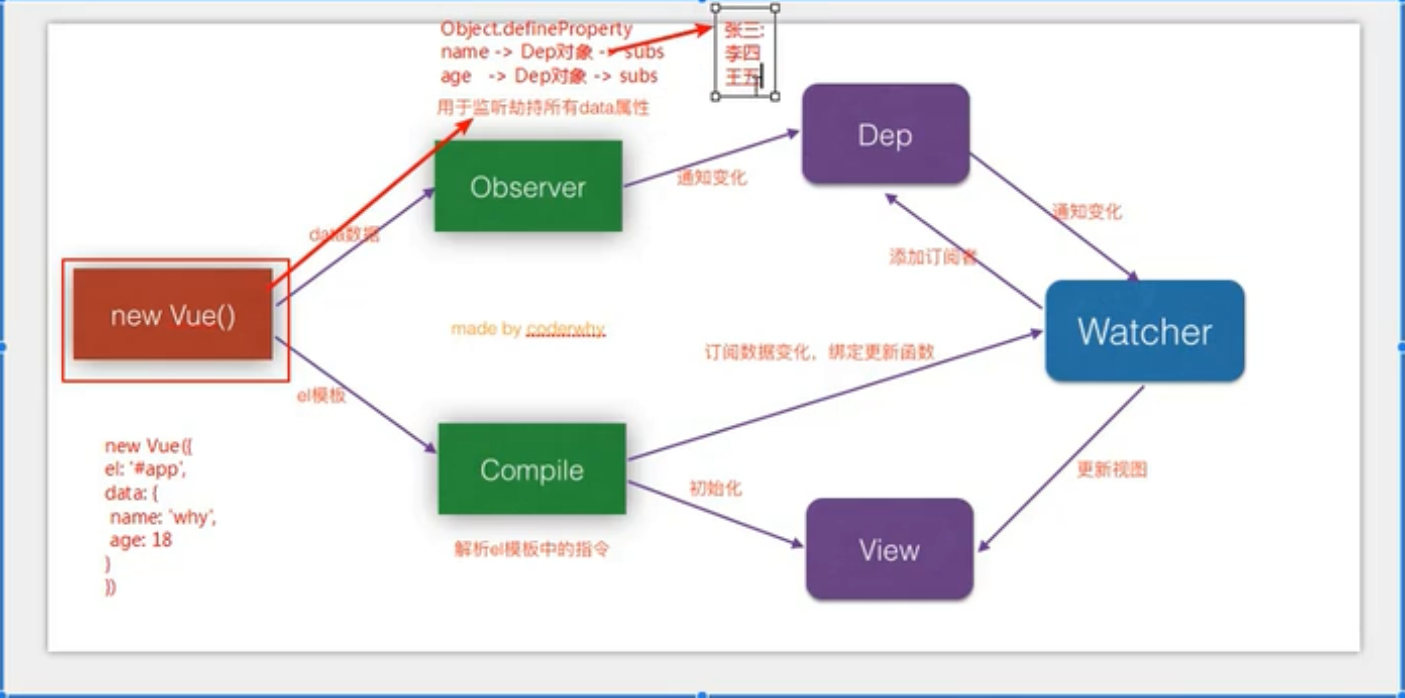
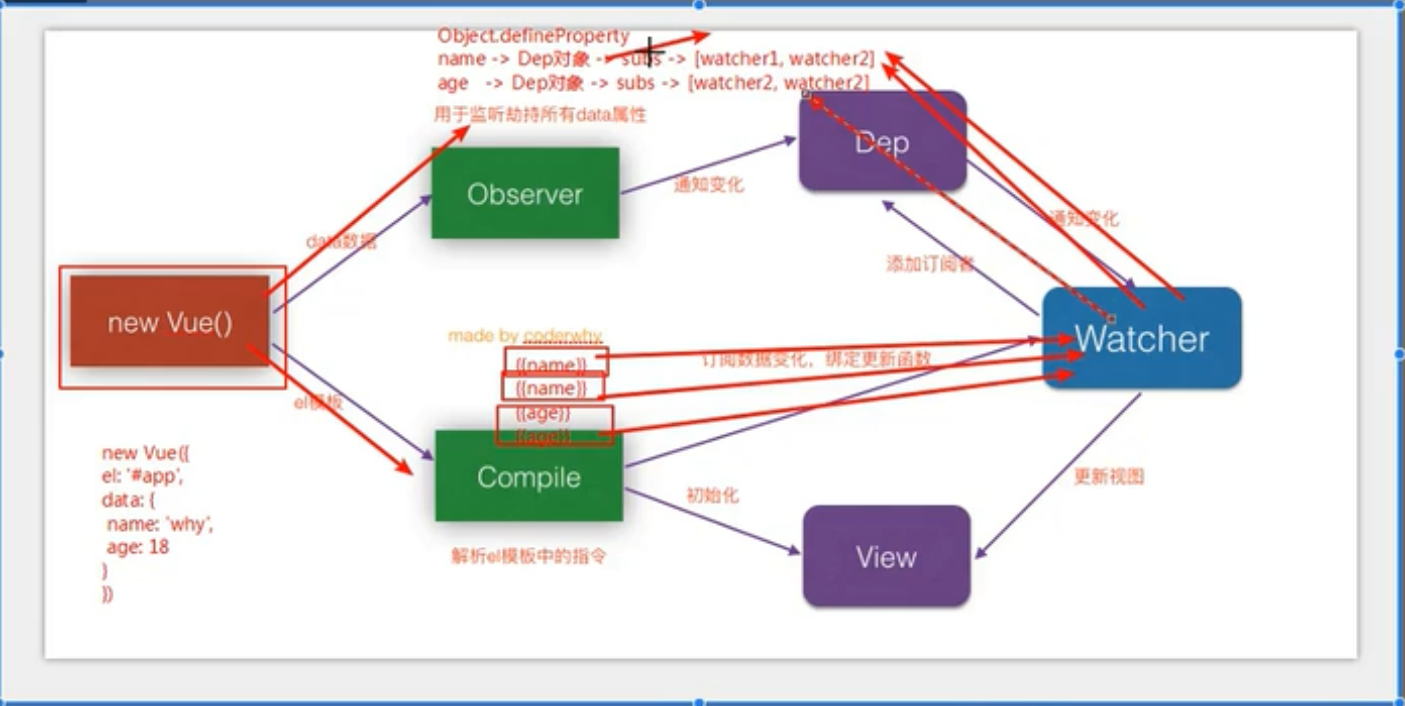
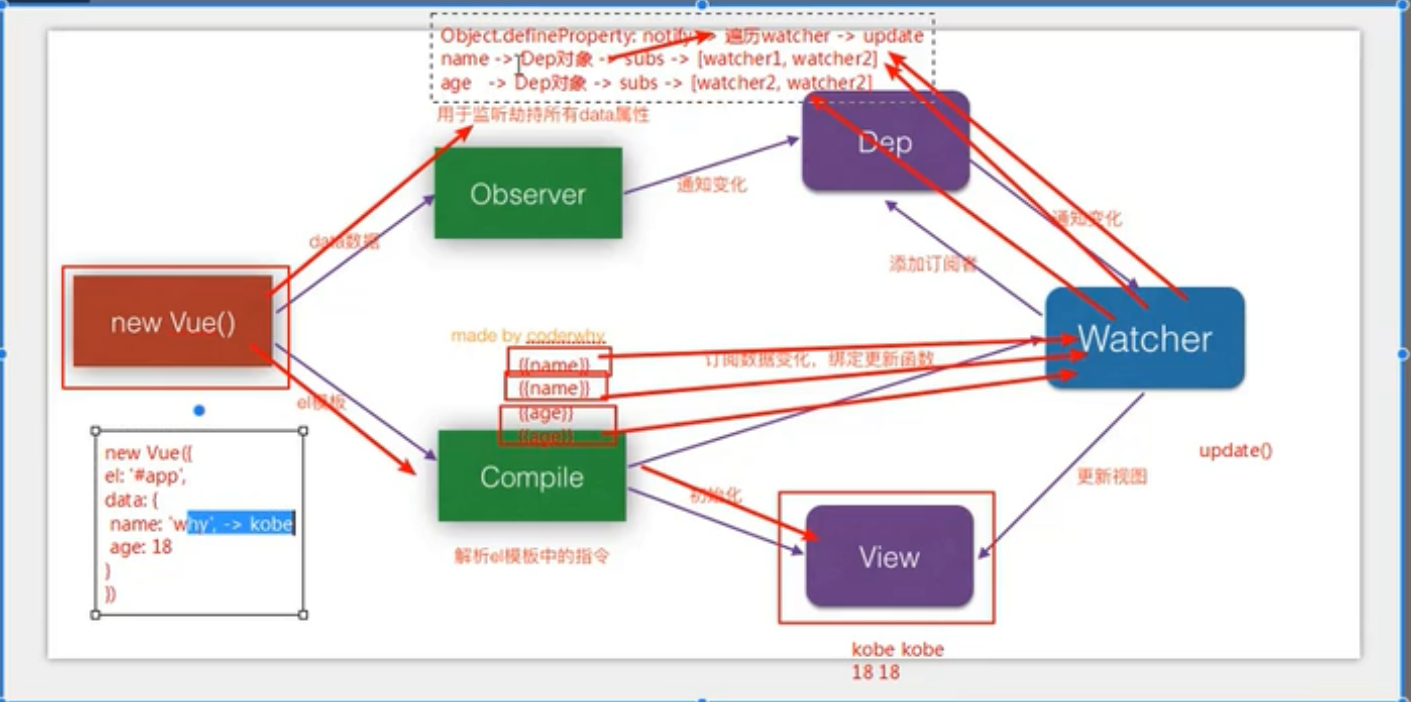
<!DOCTYPE html>
<html lang="en">
<head>
  <meta charset="UTF-8">
  <title>Title</title>
</head>
<body>
<div id="app">
  <input type="text" v-model="message">
  {{message}}
</div>

<script src="./js/vue.js"></script>
<script>
  const app = new Vue({
    el: '#app',
    data: {
      message: '你好呀',
      info: {
        name: 'why',
        age: 18
      }
    }
  })
</script>
</body>
</html>

如果把引入vue.js的script注释掉,则报错,如果我们自己实现响应式原理,则有可以正常使用:
<!DOCTYPE html>
<html lang="en">
<head>
  <meta charset="UTF-8">
  <title>Title</title>
</head>
<body>
<div id="app">
  <input type="text" v-model="message">
  {{message}}
</div>

<!--<script src="./js/vue.js"></script>-->
<script>
  class Vue {
    constructor(options) {
      // 1.保存数据
      this.$options = options;
      this.$data = options.data;
      this.$el = options.el;

      // 2.将data添加到响应式系统中
      new Observer(this.$data)

      // 3.代理this.$data的数据
      Object.keys(this.$data).forEach(key => {
        this._proxy(key)
      })

      // 4.处理el
      new Compiler(this.$el, this)
    }

    _proxy(key) {
      Object.defineProperty(this, key, {
        configurable: true,
        enumerable: true,
        set(newValue) {
          this.$data[key] = newValue
        },
        get() {
          return this.$data[key]
        }
      })
    }
  }

  class Observer {
    constructor(data) {
      this.data = data;
      Object.keys(data).forEach(key => {
        this.defineReactive(this.data, key, data[key])
      })
    }
    defineReactive(data, key, val) {
      // 一个属性对应一个Dep对象
      const dep = new Dep()
      Object.defineProperty(data, key, {
        enumerable: true,
        configurable: true,
        get() {
          if(Dep.target) {
            dep.addSub(Dep.target)
          }
          return val
        },
        set(newValue) {
          if(newValue === val) {
            return
          }
          val = newValue
          dep.notify()
        }
      })
    }
  }

  class Dep {
    constructor() {
      this.subs = []
    }

    addSub(sub) {
      this.subs.push(sub)
    }

    notify() {
      this.subs.forEach(sub => {
        sub.update()
      })
    }
  }

  class Watcher {
    constructor(node, name, vm) {
      this.node = node;
      this.name = name;
      this.vm = vm;
      Dep.target = this;
      this.update();
      Dep.target = null;
    }

    update() {
      this.node.nodeValue = this.vm[this.name] // 取属性,调用get
    }
  }

  const reg = /\{\{(.+)\}\}/

  class Compiler {
    constructor(el, vm) {
      this.el = document.querySelector(el)
      this.vm = vm

      this.frag = this._createFragment()
      this.el.appendChild(this.frag)
    }

    _createFragment() {
      const frag = document.createDocumentFragment()

      let child;
      while(child = this.el.firstChild) {
        this._compiler(child)  // 解析<h2>{{message}}</h2>
        frag.appendChild(child)
      }
      return frag
    }

    _compiler(node) {
      if(node.nodeType === 1) {
        // 如果nodeType===1则表明这是一个标签节点, =3为文本节点
        const attrs = node.attributes
        if(attrs.hasOwnProperty('v-model')) {
          const name = attrs['v-model'].nodeValue
          node.addEventListener('input', e => {
            this.vm[name] = e.target.value;
          })
        }
      }
      // 文本节点
      if(node.nodeType === 3) {
        console.log(reg.test(node.vodeValue));
        if(reg.test(node.nodeValue)) {
          // $1拿到正则表达式中的第一个分组(即第一个小括号中的东西)
          const name = RegExp.$1.trim();
          console.log(name);
          new Watcher(node, name, this.vm)
        }
      }
    }
  }
</script>
<script>
  const app = new Vue({
    el: '#app',
    data: {
      message: 'hello'
    }
  })
</script>
</body>
</html>
或者
nginx -s quit
启动
nginx
重启
nginx -s reload
注意:有时我们通过双击nginx启动时,由于会双击多次,导致启动多个nginx,在使用reload时报错,这时需要去任务管理器中结束nginx,再来启动

[外链图片转存中...(img-F4Y2VQGY-1630507155936)]


# 四、远程部署

centos系统下的部署:

远程主机->linux->centos->nginx:通过终端命令安装

yum:

安装并启动Nginx:
yum install nginx
systemctl start nginx.service # 开启nginx服务
systemctl enable nginx.service # 跟随系统启动
老师的远程服务器:

[外链图片转存中...(img-GPVuyWBs-1630507155936)]

使用vim修改nginx的配置文件:

[外链图片转存中...(img-bPZkf4g8-1630507155937)]

把本地的dist拖到/etc/nginx/下,重启nginx(修改了配置文件)


# 五、响应式原理-依赖技术的分析和学习

Vue的响应式原理?

不要认为数据发生改变,界面跟着更新是理所当然的。


1、app.message修改数据时,Vue内部是如何监听message数据的改变的。

用到了Object.defineProperty->监听对象属性的改变

2、当数据发生改变时,Vue是如何知道要通知那些人,界面要发生变化的。

使用到发布订阅模式。


使用Object.defineProperty监听属性的改变:

```html
<!DOCTYPE html>
<html lang="en">
<head>
  <meta charset="UTF-8">
  <title>Title</title>
</head>
<body>
<div id="app">
  {{message}}
  {{message}}

  {{name}}
</div>


<script>
  const obj = {
    message: '哈哈哈',
    name: '小蕾'
  }

  Object.keys(obj).forEach(key => {
    let value = obj[key]

    Object.defineProperty(obj, key, {
      set(newValue) {
        console.log('监听' + key + '的改变');
        value = newValue
      },
      get() {
          console.log('获取' + key + '对应的值');
        return value
      }
    })
  })
</script>
<script src="./js/vue.js"></script>
<script>
  const app = new Vue({
    el: '#app',
    data: {
      message: '哈哈哈',
      name: '小蕾'
    }
  })
</script>
</body>
</html>
[外链图片转存中…(img-M61ZInQQ-1630507155937)]
告诉谁对应的值发生了改变?谁用告诉谁?谁用了?
根据html代码,获取到那些人用到了这些属性?谁用,谁就会调用一次get,谁get了这个属性,谁就发生改变,于是get和set可以使用发布订阅模式:
<!DOCTYPE html>
<html lang="en">
<head>
  <meta charset="UTF-8">
  <title>Title</title>
</head>
<body>
<div id="app">
  {{message}}
  {{message}}

  {{name}}
</div>


<script>
  const obj = {
    message: '哈哈哈',
    name: '小蕾'
  }

  Object.keys(obj).forEach(key => {
    let value = obj[key]

    Object.defineProperty(obj, key, {
      set(newValue) {
        console.log('监听' + key + '的改变');
        // 告诉谁对应的值发生了改变?谁用告诉谁?谁用了?
        // 根据html代码,获取到那些人用到了这些属性?谁用,谁就会调用一次get,谁get了这个属性,谁就发生改变,于是get和set可以使用发布订阅模式:
        // 如:张三/李四/王五使用了该属性
        value = newValue
        // dep.notify()
      },
      get() {
        console.log('获取' + key + '对应的值');
        // 如果有人使用key这个变量,我就把他加到dep中
        // const w = new Watcher('')
        // 张三:get->update
        // 李四:get->update
        // 王五:get->update
        return value
      }
    })
  })

  // 发布订阅者模式
  class Dep {
    constructor() {
      // 用来记录订阅的属性
      this.subs = []
    }
    addSub(watcher) {
      this.subs.push(watcher)
    }
    notify() {
      this.subs.forEach(item => {
        item.update()
      })
    }
  }

  class Watcher {
    constructor(name) {
      this.name = name;
    }
    update() {
      console.log(this.name + '发生了更新');
    }
  }

  const dep = new Dep()
  const w1 = new Watcher('张三')
  dep.subs.push(w1)

  const w2 = new Watcher('李四')
  dep.subs.push(w2)

  const w3 = new Watcher('王五')
  dep.subs.push(w3)

  dep.notify()
</script>
<script src="./js/vue.js"></script>
<script>
  const app = new Vue({
    el: '#app',
    data: {
      message: '哈哈哈',
      name: '小蕾'
    }
  })
</script>
</body>
</html>
[外链图片转存中…(img-l2ugn1hv-1630507155938)]
[外链图片转存中…(img-UTExChJN-1630507155938)]
[外链图片转存中…(img-E73Foq1I-1630507155939)]
[外链图片转存中…(img-hHMTrPm1-1630507155940)]
[外链图片转存中…(img-RP3iNmLT-1630507155940)]
<!DOCTYPE html>
<html lang="en">
<head>
  <meta charset="UTF-8">
  <title>Title</title>
</head>
<body>
<div id="app">
  <input type="text" v-model="message">
  {{message}}
</div>

<script src="./js/vue.js"></script>
<script>
  const app = new Vue({
    el: '#app',
    data: {
      message: '你好呀',
      info: {
        name: 'why',
        age: 18
      }
    }
  })
</script>
</body>
</html>
[外链图片转存中…(img-aaG1qQQ6-1630507155941)]
如果把引入vue.js的script注释掉,则报错,如果我们自己实现响应式原理,则有可以正常使用:
<!DOCTYPE html>
<html lang="en">
<head>
  <meta charset="UTF-8">
  <title>Title</title>
</head>
<body>
<div id="app">
  <input type="text" v-model="message">
  {{message}}
</div>

<!--<script src="./js/vue.js"></script>-->
<script>
  class Vue {
    constructor(options) {
      // 1.保存数据
      this.$options = options;
      this.$data = options.data;
      this.$el = options.el;

      // 2.将data添加到响应式系统中
      new Observer(this.$data)

      // 3.代理this.$data的数据
      Object.keys(this.$data).forEach(key => {
        this._proxy(key)
      })

      // 4.处理el
      new Compiler(this.$el, this)
    }

    _proxy(key) {
      Object.defineProperty(this, key, {
        configurable: true,
        enumerable: true,
        set(newValue) {
          this.$data[key] = newValue
        },
        get() {
          return this.$data[key]
        }
      })
    }
  }

  class Observer {
    constructor(data) {
      this.data = data;
      Object.keys(data).forEach(key => {
        this.defineReactive(this.data, key, data[key])
      })
    }
    defineReactive(data, key, val) {
      // 一个属性对应一个Dep对象
      const dep = new Dep()
      Object.defineProperty(data, key, {
        enumerable: true,
        configurable: true,
        get() {
          if(Dep.target) {
            dep.addSub(Dep.target)
          }
          return val
        },
        set(newValue) {
          if(newValue === val) {
            return
          }
          val = newValue
          dep.notify()
        }
      })
    }
  }

  class Dep {
    constructor() {
      this.subs = []
    }

    addSub(sub) {
      this.subs.push(sub)
    }

    notify() {
      this.subs.forEach(sub => {
        sub.update()
      })
    }
  }

  class Watcher {
    constructor(node, name, vm) {
      this.node = node;
      this.name = name;
      this.vm = vm;
      Dep.target = this;
      this.update();
      Dep.target = null;
    }

    update() {
      this.node.nodeValue = this.vm[this.name] // 取属性,调用get
    }
  }

  const reg = /\{\{(.+)\}\}/

  class Compiler {
    constructor(el, vm) {
      this.el = document.querySelector(el)
      this.vm = vm

      this.frag = this._createFragment()
      this.el.appendChild(this.frag)
    }

    _createFragment() {
      const frag = document.createDocumentFragment()

      let child;
      while(child = this.el.firstChild) {
        this._compiler(child)  // 解析<h2>{{message}}</h2>
        frag.appendChild(child)
      }
      return frag
    }

    _compiler(node) {
      if(node.nodeType === 1) {
        // 如果nodeType===1则表明这是一个标签节点, =3为文本节点
        const attrs = node.attributes
        if(attrs.hasOwnProperty('v-model')) {
          const name = attrs['v-model'].nodeValue
          node.addEventListener('input', e => {
            this.vm[name] = e.target.value;
          })
        }
      }
      // 文本节点
      if(node.nodeType === 3) {
        console.log(reg.test(node.vodeValue));
        if(reg.test(node.nodeValue)) {
          // $1拿到正则表达式中的第一个分组(即第一个小括号中的东西)
          const name = RegExp.$1.trim();
          console.log(name);
          new Watcher(node, name, this.vm)
        }
      }
    }
  }
</script>
<script>
  const app = new Vue({
    el: '#app',
    data: {
      message: 'hello'
    }
  })
</script>
</body>
</html>
[外链图片转存中…(img-uk7iwi08-1630507155941)]
视频地址:https://www.bilibili.com/video/BV15741177Eh?p=1