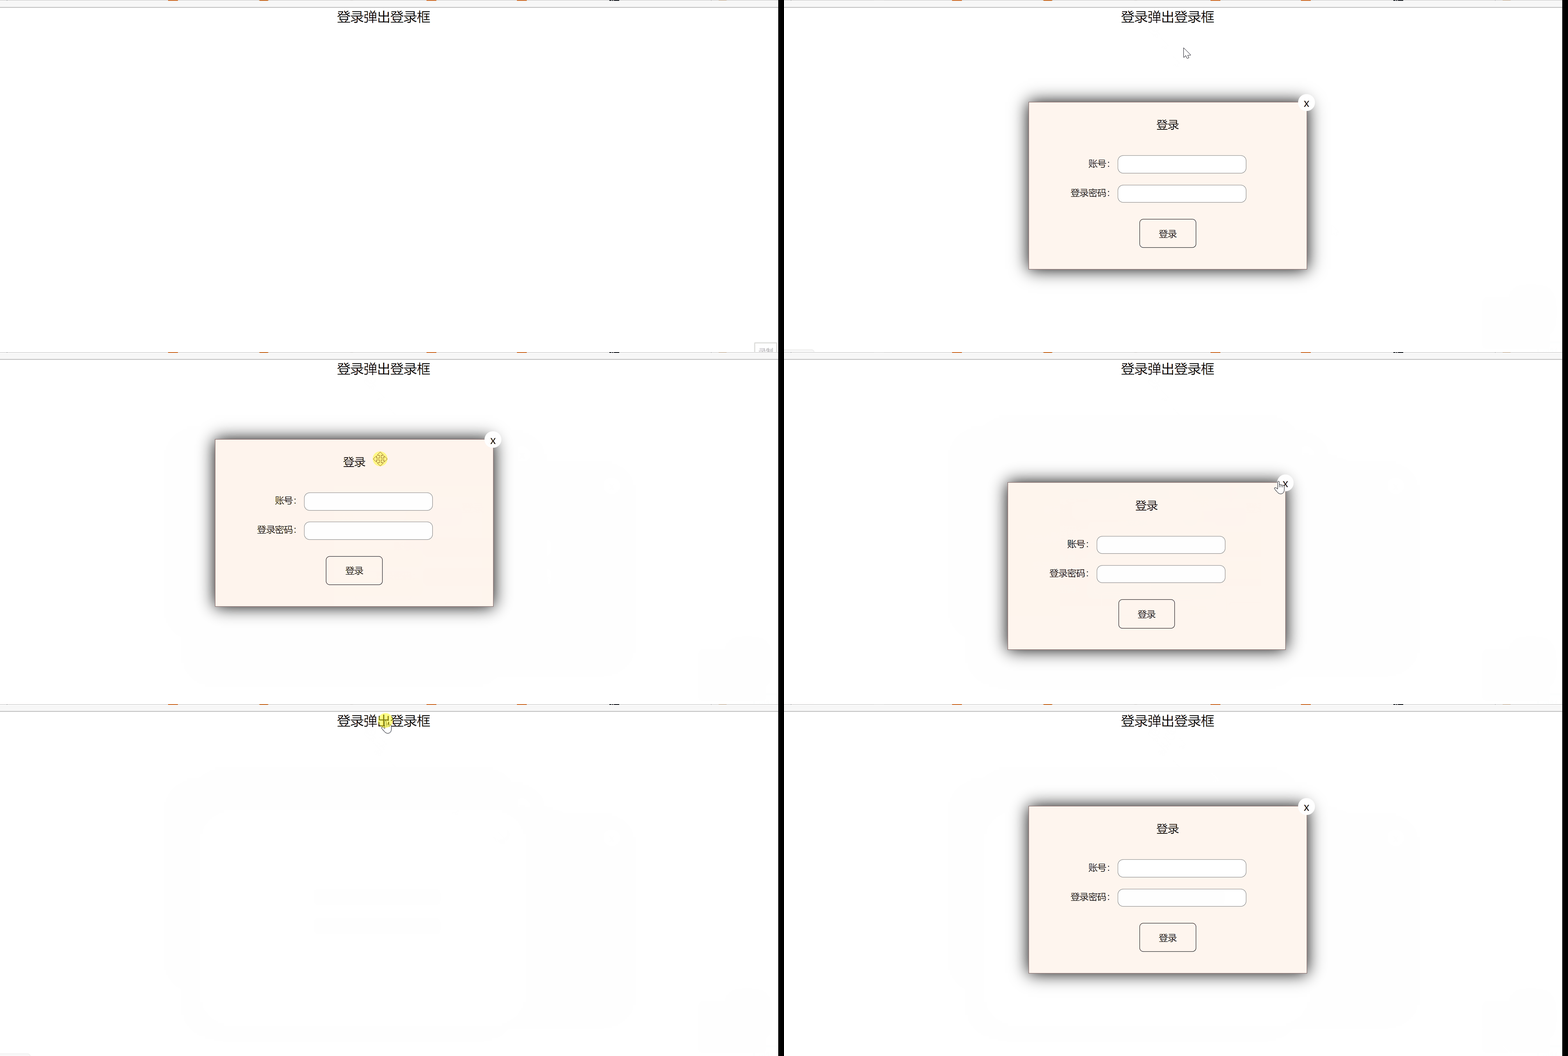
需求分析
- 点击弹出登录框

- 在登录框的特定区域可以将登录框拖拽至任意位置

- 可以关闭登录框,并且下一次点击弹出登录框归位

具体实现
完整代码
<!DOCTYPE html>
<html lang="en">
<head>
    <meta charset="UTF-8">
    <meta http-equiv="X-UA-Compatible" content="IE=edge">
    <meta name="viewport" content="width=device-width, initial-scale=1.0">
    <title>Document</title>
    <style>
        * {
            padding: 0;
            margin: 0;
        }
        a {
            text-decoration: none;
            color: black;
        }
        .login-header {
           /*  margin: 0 auto; */ /* 必须设置width才能起作用 */
            height: 30px;
            line-height: 30px;
            font-size: 24px;
            text-align: center;
        }
        .login {
            width: 500px;
            height: 300px;
            position: absolute;
            border: #725252 solid 1px;
           /*  transform: translate(-50%,-50%); */
            left: 50%;
            top: 50%;
            /* 这里不能有margin,因为我们只改变了left和right 的只,当移动过后 margin还会再次生效导致失败 */
           /*  margin-left: -250px;
            margin-top: 50px; */
            background-color: seashell;
            transform: translate(-50%, -50%);
            z-index: 9999;
            box-shadow: 0 0 30px black;
            display: none;

        }
        .login-title {
            position: relative;
            margin: 20px 0 0 0;
            height: 40px;
            line-height: 40px;
            text-align: center;
            font-size: 20px;
            cursor: move;
        }
        .close-btn {
            position: absolute;
            width: 30px;
            height: 30px;
            right: -15px;
            top: -35px;
            border-radius: 50%;
            background-color: #ffffff;
            line-height: 30px;
        }
        .login-content{
            margin: 15px auto;
            width: 450px;
            height: 230px;
        }
        .login-input label{
            margin-top: 20px;
            margin-left: 30px;
            width: 100px;
            text-align: right;
            height: 30px;
            line-height: 30px;
            display: inline-block;
        }
        .login-input input {
            height: 30px;
            width: 230px;
            border-radius: 10px;
            border: 1px solid rgba(0, 0, 0, .5);
        }
        .login-btn {
            width: 100px;
            height: 50px;
            margin: 30px auto;
            border: 1px solid black;
            border-radius: 7px;
            line-height: 50px;
            text-align: center;
        }
    </style>
</head>
<body>
    <div class="login-header"><a href="javascript:;">登录弹出登录框</a></div>
    <div class="login">
        <div class="login-title">登录
            <span><a href="javascript:;" class="close-btn">x</a></span>
        </div>
        <div class="login-content">
                <div class="login-input">
                    <label for="name">账号:</label>
                    <input type="text" id="name">
                </div>
                <div class="login-input">
                    <label for="pwd">登录密码:</label>
                    <input type="password" id="pwd">
                </div>
                <div class="login-btn">登录</div>
        </div>
    </div>
    <script>
        let out = document.querySelector('.login-header');
        let login_box = document.querySelector('.login');
        let title = document.querySelector('.login-title');
        let close = document.querySelector('.close-btn');
        let move = document.querySelector('.login-content');
        out.addEventListener('click',function() {
            login_box.style.display = 'block';
        });
        close.addEventListener('click',function () {
            login_box.style.left = 50 + '%';
                login_box.style.top = 50 + '%' ;
            login_box.style.display = 'none';
        });
        /* 只有title可以移动 */
        title.addEventListener('mousedown',function(e) {
            /* 按下鼠标的一瞬间计算出鼠标在title中的距离,并在下一次按下鼠标前保持不变 */
            /* 这里必须要用login_box的offset,因为在title之前已经有绝对定位的login_box了,它的offset都为0 */
            let mousex = e.pageX - login_box.offsetLeft;
            let mousey = e.pageY - login_box.offsetTop;
            console.log(mousex,mousey);
            /* 这里为什么用的是doucument而不用title原因是鼠标可能移动过快超出了title的范围,还有就是防止title盒子被遮挡,鼠标不在title上面从前无法触发移动和取消事假,从而不能失效 */
            function movee(e) {
                login_box.style.left = e.pageX - mousex + 'px';
                login_box.style.top = e.pageY - mousey + 'px' ;

            }
            document.addEventListener('mousemove',movee)
            document.addEventListener('mouseup',function () {

                document.removeEventListener('mousemove',movee)
            })
        });

    </script>
</body>
</html>
点击弹出登录框的实现方式
使用JavaScript的点击事件,当点击弹出时将登录框的display设置未block即可
out.addEventListener('click',function() {
            login_box.style.display = 'block';
        });
拖拽效果的实现
拖拽效果的实现分为三个步骤:
- 鼠标按下,获取鼠标在登陆框中的坐标
- 鼠标移动,获取登陆框移动的位置
- 松开鼠标,解除鼠标移动的事件
- 鼠标按下,获取鼠标在登陆框中的坐标
如何获得鼠标在登陆框中的位置呢? 在这里我们使用页面中鼠标的坐标减去登录框上左边距的方法.

由上图可得到,鼠标在登陆框内的坐标未: ( x , y ) = ( p a g e X ? o f f s e t L e f t , P a g e Y ? o f f s e t T o p ) (x,y) = (pageX - offsetLeft, PageY - offsetTop) (x,y)=(pageX?offsetLeft,PageY?offsetTop)
当让在这里是没有考虑边框对offset的影响.
/* 按下鼠标的一瞬间计算出鼠标在title中的距离,并在下一次按下鼠标前保持不变 */
/* 这里必须要用login_box的offset,因为在title之前已经有绝对定位的login_box了,它的offset都为0 */
let mousex = e.pageX - login_box.offsetLeft;
let mousey = e.pageY - login_box.offsetTop;
- 鼠标移动,获取登录框的位置
这时候鼠标在登录框的位置在鼠标松开之前是不会在变化的,我们可以利用这个特性来得到当前登录框的位置。那就是鼠标在页面中的坐标减去鼠标在页面中的坐标即可。这里就不再做过多的解释了。
/* 这里为什么用的是doucument而不用title原因是鼠标可能移动过快超出了title的范围,还有就是防止title盒子被遮挡,鼠标不在title上面从前无法触发移动和取消事假,从而不能失效 */
            function movee(e) {
                login_box.style.left = e.pageX - mousex + 'px';
                login_box.style.top = e.pageY - mousey + 'px' ;

            }
            document.addEventListener('mousemove',movee)
- 松开鼠标,解除鼠标移动的事件
document.addEventListener('mouseup',function () {
                document.removeEventListener('mousemove',movee)
            })
关闭登录框,位置归位
将其display设置为none即可,具体看代码。
close.addEventListener('click',function () {
            login_box.style.left = 50 + '%';
            login_box.style.top = 50 + '%' ;
            login_box.style.display = 'none';
        });
效果展示
代码实现时遇到的困难
- 使用
margin居中时必须要有width,好久没写代码了都有点忘记了。 - 因为给登录框设置了
margin导致移动错位,这是因为我的坐标计算公式是没有考虑margin的(只考虑了定位的left和right),导致登录框到达了坐标位置又因为magin又调整了位置。解决的方法应该时在计算移动的坐标时减去margin即可。 - offset是相对了有定位的父级节点来说的,要牢记。
- 为什么鼠标移动时是对document绑定的事件?
为了放置鼠标移动过快时间无法正确处理所以事件绑定到document上。若这个登录框没有加绝对定位,那么在移动的过程中可能会被其他的元素遮挡,所以移动事件不能绑定在登录框上,而是绑定在document上。