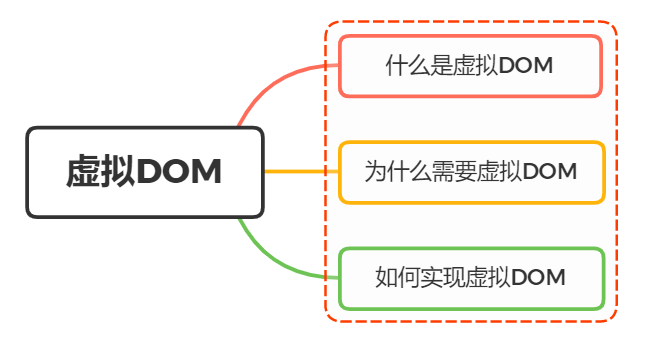
什么是虚拟DOM?如何实现一个虚拟DOM?说说你的思路

一、什么是虚拟DOM
1、虚拟 DOM (Virtual DOM )这个概念相信大家都不陌生,从 React 到 Vue ,虚拟 DOM 为这两个框架都带来了跨平台的能力(React-Native 和 Weex)
2、实际上它只是一层对真实DOM的抽象,以JavaScript 对象 (VNode 节点) 作为基础的树,用对象的属性来描述节点,最终可以通过一系列操作使这棵树映射到真实环境上
3、在Javascript对象中,虚拟DOM 表现为一个 Object对象。并且最少包含标签名 (tag)、属性 (attrs) 和子元素对象 (children) 三个属性,不同框架对这三个属性的名命可能会有差别
4、创建虚拟DOM就是为了更好将虚拟的节点渲染到页面视图中,所以虚拟DOM对象的节点与真实DOM的属性一一照应
5、在vue中同样使用到了虚拟DOM技术
6、定义真实DOM
	<div id="app">
    	<p class="p">节点内容</p>
    	<h3>{{ foo }}</h3>
	</div>
7、实例化vue
	const app = new Vue({
    	el:"#app",
    	data:{
        	foo:"foo"
    	}
	})
8、观察render的render,我们能得到虚拟DOM
	(function anonymous(
	) {
		with(this){return _c('div',{attrs:{"id":"app"}},[_c('p',{staticClass:"p"},
					  [_v("节点内容")]),_v(" "),_c('h3',[_v(_s(foo))])])}})
9、通过VNode,vue可以对这颗抽象树进行创建节点,删除节点以及修改节点的操作, 经过diff算法得出一些需要修改的最小单位,再更新视图,减少了dom操作,提高了性能
二、为什么需要虚拟DOM
1、DOM是很慢的,其元素非常庞大,页面的性能问题,大部分都是由DOM操作引起的
2、真实的DOM节点,哪怕一个最简单的div也包含着很多属性,可以打印出来直观感受一下:

3、由此可见,操作DOM的代价仍旧是昂贵的,频繁操作还是会出现页面卡顿,影响用户的体验
举个例子
1、你用传统的原生api或jQuery去操作DOM时,浏览器会从构建DOM树开始从头到尾执行一遍流程
2、当你在一次操作时,需要更新10个DOM节点,浏览器没这么智能,收到第一个更新DOM请求后,并不知道后续还有9次更新操作,因此会马上执行流程,最终执行10次流程
3、而通过VNode,同样更新10个DOM节点,虚拟DOM不会立即操作DOM,而是将这10次更新的diff内容保存到本地的一个js对象中,最终将这个js对象一次性attach到DOM树上,避免大量的无谓计算
很多人认为虚拟 DOM 最大的优势是 diff 算法,减少 JavaScript 操作真实 DOM 的带来的性能消耗。虽然这一个虚拟 DOM 带来的一个优势,但并不是全部。虚拟 DOM 最大的优势在于抽象了原本的渲染过程,实现了跨平台的能力,而不仅仅局限于浏览器的 DOM,可以是安卓和 IOS 的原生组件,可以是近期很火热的小程序,也可以是各种GUI
三、如何实现虚拟DOM
1、首先可以看看vue中VNode的结构
2、源码位置:src/core/vdom/vnode.js
export default class VNode {
  tag: string | void;
  data: VNodeData | void;
  children: ?Array<VNode>;
  text: string | void;
  elm: Node | void;
  ns: string | void;
  context: Component | void; // rendered in this component's scope
  functionalContext: Component | void; // only for functional component root nodes
  key: string | number | void;
  componentOptions: VNodeComponentOptions | void;
  componentInstance: Component | void; // component instance
  parent: VNode | void; // component placeholder node
  raw: boolean; // contains raw HTML? (server only)
  isStatic: boolean; // hoisted static node
  isRootInsert: boolean; // necessary for enter transition check
  isComment: boolean; // empty comment placeholder?
  isCloned: boolean; // is a cloned node?
  isOnce: boolean; // is a v-once node?

  constructor (
    tag?: string,
    data?: VNodeData,
    children?: ?Array<VNode>,
    text?: string,
    elm?: Node,
    context?: Component,
    componentOptions?: VNodeComponentOptions
  ) {
    /*当前节点的标签名*/
    this.tag = tag
    /*当前节点对应的对象,包含了具体的一些数据信息,是一个VNodeData类型,可以参考VNodeData类型中的数据信息*/
    this.data = data
    /*当前节点的子节点,是一个数组*/
    this.children = children
    /*当前节点的文本*/
    this.text = text
    /*当前虚拟节点对应的真实dom节点*/
    this.elm = elm
    /*当前节点的名字空间*/
    this.ns = undefined
    /*编译作用域*/
    this.context = context
    /*函数化组件作用域*/
    this.functionalContext = undefined
    /*节点的key属性,被当作节点的标志,用以优化*/
    this.key = data && data.key
    /*组件的option选项*/
    this.componentOptions = componentOptions
    /*当前节点对应的组件的实例*/
    this.componentInstance = undefined
    /*当前节点的父节点*/
    this.parent = undefined
    /*简而言之就是是否为原生HTML或只是普通文本,innerHTML的时候为true,textContent的时候为false*/
    this.raw = false
    /*静态节点标志*/
    this.isStatic = false
    /*是否作为跟节点插入*/
    this.isRootInsert = true
    /*是否为注释节点*/
    this.isComment = false
    /*是否为克隆节点*/
    this.isCloned = false
    /*是否有v-once指令*/
    this.isOnce = false
  }

  // DEPRECATED: alias for componentInstance for backwards compat.
  /* istanbul ignore next https://github.com/answershuto/learnVue*/
  get child (): Component | void {
    return this.componentInstance
  }
}
3、这里对VNode进行稍微的说明:
- (1)所有对象的
context选项都指向了Vue实例- (2)
elm属性则指向了其相对应的真实DOM节点
4、vue是通过createElement生成VNode
5、源码位置:src/core/vdom/create-element.js
export function createElement (
  context: Component,
  tag: any,
  data: any,
  children: any,
  normalizationType: any,
  alwaysNormalize: boolean
): VNode | Array<VNode> {
  if (Array.isArray(data) || isPrimitive(data)) {
    normalizationType = children
    children = data
    data = undefined
  }
  if (isTrue(alwaysNormalize)) {
    normalizationType = ALWAYS_NORMALIZE
  }
  return _createElement(context, tag, data, children, normalizationType)
}
6、上面可以看到createElement 方法实际上是对 _createElement 方法的封装,对参数的传入进行了判断
export function _createElement(
    context: Component,
    tag?: string | Class<Component> | Function | Object,
    data?: VNodeData,
    children?: any,
    normalizationType?: number
): VNode | Array<VNode> {
    if (isDef(data) && isDef((data: any).__ob__)) {
        process.env.NODE_ENV !== 'production' && warn(
            `Avoid using observed data object as vnode data: ${JSON.stringify(data)}\n` +
            'Always create fresh vnode data objects in each render!',
            context`
        )
        return createEmptyVNode()
    }
    // object syntax in v-bind
    if (isDef(data) && isDef(data.is)) {
        tag = data.is
    }
    if (!tag) {
        // in case of component :is set to falsy value
        return createEmptyVNode()
    }
    ...
    // support single function children as default scoped slot
    if (Array.isArray(children) &&
        typeof children[0] === 'function'
    ) {
        data = data || {}
        data.scopedSlots = { default: children[0] }
        children.length = 0
    }
    if (normalizationType === ALWAYS_NORMALIZE) {
        children = normalizeChildren(children)
    } else if ( === SIMPLE_NORMALIZE) {
        children = simpleNormalizeChildren(children)
    }
	// 创建VNode
    ...
}
7、可以看到_createElement接收5个参数:
- (1)
context表示VNode的上下文环境,是Component类型- (2)
tag表示标签,它可以是一个字符串,也可以是一个Component- (3)
data表示VNode的数据,它是一个VNodeData类型- (4)
children表示当前VNode的子节点,它是任意类型的- (5)
normalizationType表示子节点规范的类型,类型不同规范的方法也就不一样,主要是参考render函数是编译生成的还是用户手写的
8、根据normalizationType 的类型,children会有不同的定义
if (normalizationType === ALWAYS_NORMALIZE) {
    children = normalizeChildren(children)
} else if ( === SIMPLE_NORMALIZE) {
    children = simpleNormalizeChildren(children)
}
9、simpleNormalizeChildren方法调用场景是 render 函数是编译生成的
10、normalizeChildren方法调用场景分为下面两种:>
- (1)
render函数是用户手写的 -
- (2)编译
slot、v-for的时候会产生嵌套数组
- (2)编译
11、无论是simpleNormalizeChildren还是normalizeChildren都是对children进行规范(使children 变成了一个类型为 VNode 的 Array),这里就不展开说了
12、规范化children的源码位置在:src/core/vdom/helpers/normalzie-children.js
13、在规范化children后,就去创建VNode
let vnode, ns
// 对tag进行判断
if (typeof tag === 'string') {
  let Ctor
  ns = (context.$vnode && context.$vnode.ns) || config.getTagNamespace(tag)
  if (config.isReservedTag(tag)) {
    // 如果是内置的节点,则直接创建一个普通VNode
    vnode = new VNode(
      config.parsePlatformTagName(tag), data, children,
      undefined, undefined, context
    )
  } else if (isDef(Ctor = resolveAsset(context.$options, 'components', tag))) {
    // component
    // 如果是component类型,则会通过createComponent创建VNode节点
    vnode = createComponent(Ctor, data, context, children, tag)
  } else {
    vnode = new VNode(
      tag, data, children,
      undefined, undefined, context
    )
  }
} else {
  // direct component options / constructor
  vnode = createComponent(tag, data, context, children)
}
14、createComponent同样是创建VNode
15、源码位置:src/core/vdom/create-component.js
export function createComponent (
  Ctor: Class<Component> | Function | Object | void,
  data: ?VNodeData,
  context: Component,
  children: ?Array<VNode>,
  tag?: string
): VNode | Array<VNode> | void {
  if (isUndef(Ctor)) {
    return
  }
 // 构建子类构造函数
  const baseCtor = context.$options._base

  // plain options object: turn it into a constructor
  if (isObject(Ctor)) {
    Ctor = baseCtor.extend(Ctor)
  }

  // if at this stage it's not a constructor or an async component factory,
  // reject.
  if (typeof Ctor !== 'function') {
    if (process.env.NODE_ENV !== 'production') {
      warn(`Invalid Component definition: ${String(Ctor)}`, context)
    }
    return
  }

  // async component
  let asyncFactory
  if (isUndef(Ctor.cid)) {
    asyncFactory = Ctor
    Ctor = resolveAsyncComponent(asyncFactory, baseCtor, context)
    if (Ctor === undefined) {
      return createAsyncPlaceholder(
        asyncFactory,
        data,
        context,
        children,
        tag
      )
    }
  }

  data = data || {}

  // resolve constructor options in case global mixins are applied after
  // component constructor creation
  resolveConstructorOptions(Ctor)

  // transform component v-model data into props & events
  if (isDef(data.model)) {
    transformModel(Ctor.options, data)
  }

  // extract props
  const propsData = extractPropsFromVNodeData(data, Ctor, tag)

  // functional component
  if (isTrue(Ctor.options.functional)) {
    return createFunctionalComponent(Ctor, propsData, data, context, children)
  }

  // extract listeners, since these needs to be treated as
  // child component listeners instead of DOM listeners
  const listeners = data.on
  // replace with listeners with .native modifier
  // so it gets processed during parent component patch.
  data.on = data.nativeOn

  if (isTrue(Ctor.options.abstract)) {
    const slot = data.slot
    data = {}
    if (slot) {
      data.slot = slot
    }
  }

  // 安装组件钩子函数,把钩子函数合并到data.hook中
  installComponentHooks(data)

  //实例化一个VNode返回。组件的VNode是没有children的
  const name = Ctor.options.name || tag
  const vnode = new VNode(
    `vue-component-${Ctor.cid}${name ? `-${name}` : ''}`,
    data, undefined, undefined, undefined, context,
    { Ctor, propsData, listeners, tag, children },
    asyncFactory
  )
  if (__WEEX__ && isRecyclableComponent(vnode)) {
    return renderRecyclableComponentTemplate(vnode)
  }

  return vnode
}
16、稍微提下createComponent生成VNode的三个关键流程:
- (1)构造子类构造函数
Ctor- (2)
installComponentHooks安装组件钩子函数- (3)实例化
vnode
小结
1、createElement 创建 VNode 的过程,每个 VNode 有 children,children 每个元素也是一个VNode,这样就形成了一个虚拟树结构,用于描述真实的DOM树结构
参考文献
- (1)https://ustbhuangyi.github.io/vue-analysis/v2/data-driven/create-element.html#children-%E7%9A%84%E8%A7%84%E8%8C%83%E5%8C%96
- (2)https://juejin.cn/post/6876711874050818061