停更已一年多,期间做了很多团队和项目管理的事情。回归初心~
1. 微前端
如何实现多个应用间的资源共享?
方案一: npm包的抽离和引用
缺点
- 开发及效率问题
先发布npm包;更新使用了该npm包的应用;项目构建 - 多团队代码管理问题
不同团队编码风格不同,每引入一个npm包,风格不一致
方案二:微前端
微前端官网:https://micro-frontends.org
定义:
Techniques, strategies and recipes for building a modern web app with multiple teams that can ship features independently.
特点:
- 独立部署
- 增量迁移
- 团队自治
- 松耦合代码
2. single-spa介绍
描述: A javascript router for front-end microservices
官网: https://single-spa.js.org/
3. 安装及项目启动
(1)安装及新建项目并启动
npm i create-single-spa@3.0.2 -g
create-single-spa

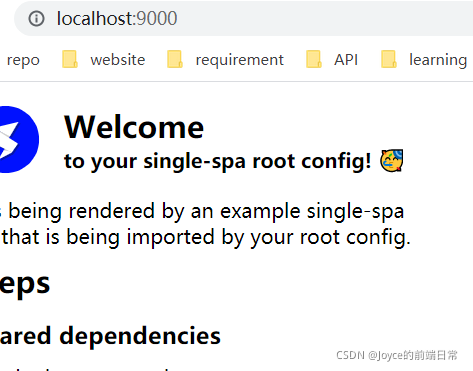
完成后执行npm start,如下图即为成功

(2)错误排查
开始使用create-single-spa@2.0.3完成项目create后,执行npm start会报以下错误
[webpack-cli] Invalid options object. Dev Server has been initialized using an options object that does not match the API schema.
 - options has an unknown property 'firewall'. These properties are valid:
   object { allowedHosts?, bonjour?, client?, compress?, devMiddleware?, headers?, historyApiFallback?, host?, hot?, http2?, https?, ipc?, liveReload?, onAfterSetupMiddleware?, onBeforeSetupMiddleware?, onListening?, open?, port?, proxy?, setupExitSignals?, static?, watchFiles?, webSocketServer? }
 - options.client has an unknown property 'host'. These properties are valid:
   object { logging?, overlay?, progress?, webSocketTransport?, webSocketURL? }
参考https://github.com/single-spa/create-single-spa/issues/309,版本3.0.2则不会出现上述问题。
4. 配置
The single-spa root config consists of the following:
[1] The root HTML file that is shared by all single-spa applications.
[2] The JavaScript that calls singleSpa.registerApplication().
Your root config exists only to start up the single-spa applications.
(1)引入子应用:study-root-config.js
Register Application的属性说明如下:
- name: String, 微前端应用名称“@组织名称/应用名称 ”
- app: Function,return Promise, 通过systemjs引用打包好的微前端应用模块代码
- activeWhen: 路由匹配时激活应用
import { registerApplication, start } from "single-spa";
registerApplication({
  name: "@single-spa/welcome",
  app: () =>
    System.import(
      "https://unpkg.com/single-spa-welcome/dist/single-spa-welcome.js"
    ),
  activeWhen: ["/"],
});

// registerApplication({
//   name: "@study/navbar",
//   app: () => System.import("@study/navbar"),
//   activeWhen: ["/"]
// });

start({
  urlRerouteOnly: true,
});
(2)Root HTML file:index.ejs
index.ej中引入基座

5. 新建并引入一个Vue的子应用
(1)创建Vue子应用
create-single-spa
注意type此时需选择single-spa application

项目初始化成功后,修改package.json如下,指定启动9001端口。
"serve": "vue-cli-service serve --port 9001",
(2)注册子应用到容器
在container的study-root-config.js中注册:
registerApplication({
  name: "@study/test-vue",
  app: () => System.import("@study/test-vue"),
  activeWhen: ["/test-vue"]
});
(3)增加vue及vue-router引用及子应用挂载
在container的index.ejs中增加vue及vue-router,并增加应用挂载:
{
   "imports": {
     "single-spa": "https://cdn.jsdelivr.net/npm/single-spa@5.9.0/lib/system/single-spa.min.js",
     "vue": "https://cdn.jsdelivr.net/npm/vue@2.6.10/dist/vue.js",
     "vue-router":"https://cdn.jsdelivr.net/npm/vue-router@3.0.7/dist/vue-router.min.js"
   }
 }
{
 "imports": {
    "@study/root-config": "//localhost:9000/study-root-config.js",
    "@study/test-vue":"//localhost:9001/js/app.js"
  }
}
(4)增加vue.config.js
在根目录新建vue.config.js代码如下:
module.exports = {
    chainWebpack: config =>{
        //不打包vue及vue-router
        config.externals(["vue","vue-router"])
    }
}
(5)修改注册路由
至此,当访问http://localhost:9000/test-vue依旧不能显示正确的vue工程页面。当把容器的路径由’/‘改为’/welcome’时,vue工程便可以正确显示。
registerApplication({
  name: "@single-spa/welcome",
  app: () =>
    System.import(
      "https://unpkg.com/single-spa-welcome/dist/single-spa-welcome.js"
    ),
  activeWhen: ["/welcome"],
所以,当为’/test-vue’时,’/'也可以匹配。故需要将根路径修改为精确匹配。
registerApplication(
  "@single-spa/welcome",
  () =>
    System.import(
      "https://unpkg.com/single-spa-welcome/dist/single-spa-welcome.js"
    ),
  location => location.pathname === '/'
);
两个路由地址便可以访问不同页面。
(6)Vue内部路由
在子应用的main.js中引入Router,创建component并注册。
import Vue from 'vue';
import singleSpaVue from 'single-spa-vue';

import App from './App.vue';

import VueRouter from 'vue-router';

Vue.use(VueRouter);

//路由组件
const Bar = {template:'<div>This is the Bar Component</div>'}
//路由规则
const routes = [
  {path:'/bar', component: Bar}
]
//路由实例
const router = new VueRouter({
  routes,
  mode: 'history',
  base: '/test-vue'
})

Vue.config.productionTip = false;

const vueLifecycles = singleSpaVue({
  Vue,
  appOptions: {
    router, //注册router
    render(h) {
      return h(App, {
        props: {
          // single-spa props are available on the "this" object. Forward them to your component as needed.
          // https://single-spa.js.org/docs/building-applications#lifecyle-props
          // if you uncomment these, remember to add matching prop definitions for them in your App.vue file.
          /*
          name: this.name,
          mountParcel: this.mountParcel,
          singleSpa: this.singleSpa,
          */
        },
      });
    },
  },
});

export const bootstrap = vueLifecycles.bootstrap;
export const mount = vueLifecycles.mount;
export const unmount = vueLifecycles.unmount;
在App.vue中增加router-view及跳转链接:
<template>
  <div id="app">
    <router-link to="/">Go back </router-link> |
    <router-link to="/bar">Go to bar</router-link>
    <div>
      <router-view />
    </div>
  </div>
</template>
至此,效果如下:


6. 创建utility实现容器间的通信
(1)创建utility模块
create-single-spa
注意type此时需选择in-browser utility module

项目初始化成功后,修改package.json如下,指定启动9005端口。
"serve": "webpack serve --port 9005",
便可以启动该应用。
Utility在src下的study-tools.js文件中可以暴露方法给其他子应用使用。例如:
// Anything exported from this file is importable by other in-browser modules.
export function publicToolsFunction(appName) {
    return `Imported by ${appName}. Here is the response from Tools`;
}
(2)在子应用中的使用
如何使用上述暴露出来的方法呢?首先需要在主应用container->src>index.ejs中引入tools:
{
 "imports": {
    "@study/root-config": "//localhost:9000/study-root-config.js",
    "@study/test-vue":"//localhost:9001/js/app.js",
    "@study/tools":"//localhost:9005/study-tools.js"
  }
}
注意!末尾项不要如js加上逗号,否则会报如下错误:

在上述子应用test-vue中新建页面进行测试。
新建一个componets文件夹下新建Bar.vue。在main.js中将其引入并注释掉之前的路由组件。
import Bar from './components/Bar'

//路由组件
// const Bar = {template:'<div>This is the Bar Component</div>'}
Bar.vue中使用:
<template>
  <div>
    <button @click="getTools">Get Tools</button>
    <p>{{msg}}</p>
 </div>
</template>

<script>
export default {
  name: 'Bar',
  data() {
    return {
      msg:"This is bar"
    }
  },
  methods:{
    async getTools(){
      try {
        let toolsModule = await window.System.import('@study/tools');
        this.msg = toolsModule.publicToolsFunction('bar');
      } catch (error) {
        alert(error);
      }
    }
  },
 }
</script>

点击按钮后的效果:
