前段笔记
(一)安装vscode
安装:插件
chinese 汉化
open-in-browser  ---> 启用
设置自动保存:文件 —> 自动保存
(二)认识页面结构:
Emmet:?
直接出结构: !
<!-- 注释 快捷键 ctrl + / -->
<!-- 按照h5的标准解析网页 -->
<!DOCTYPE html>
<!-- 根标签 一个网页从html标签开始 -->
<html lang="en">
<head>
    <meta charset="UTF-8">
    <meta http-equiv="X-UA-Compatible" content="IE=edge">
    <meta name="viewport" content="width=device-width, initial-scale=1.0">
    <!-- 页面标题 -->
    <title>页面标题-Hello</title>
</head>
<body>

</body>
</html>
(三)常用标签
1.标题
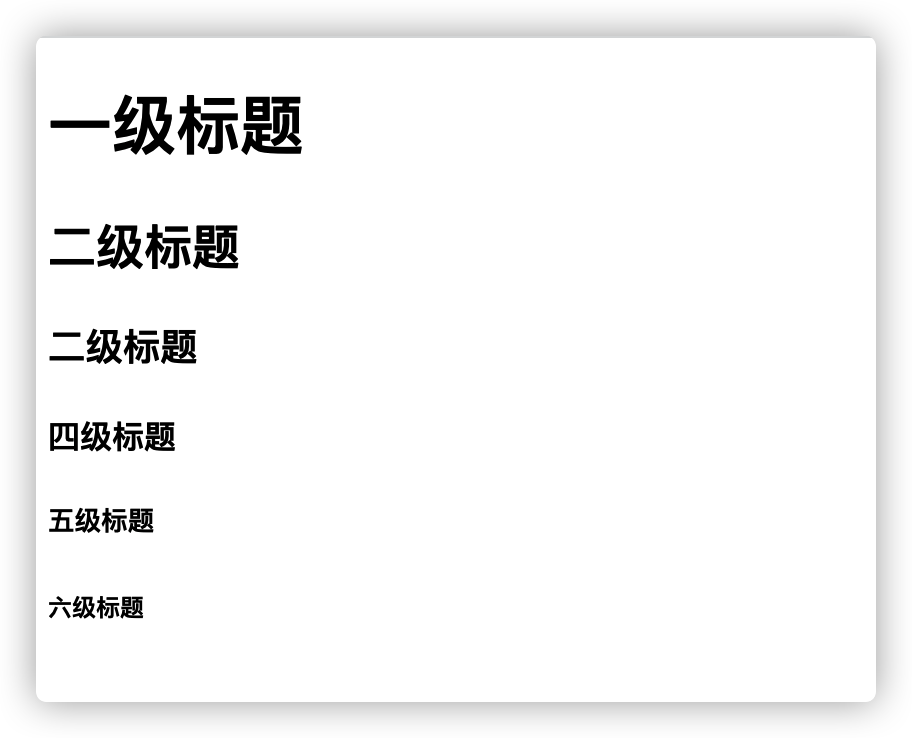
<!-- h1 -- h6 -->
<!-- 会自带一些默认的样式 -->
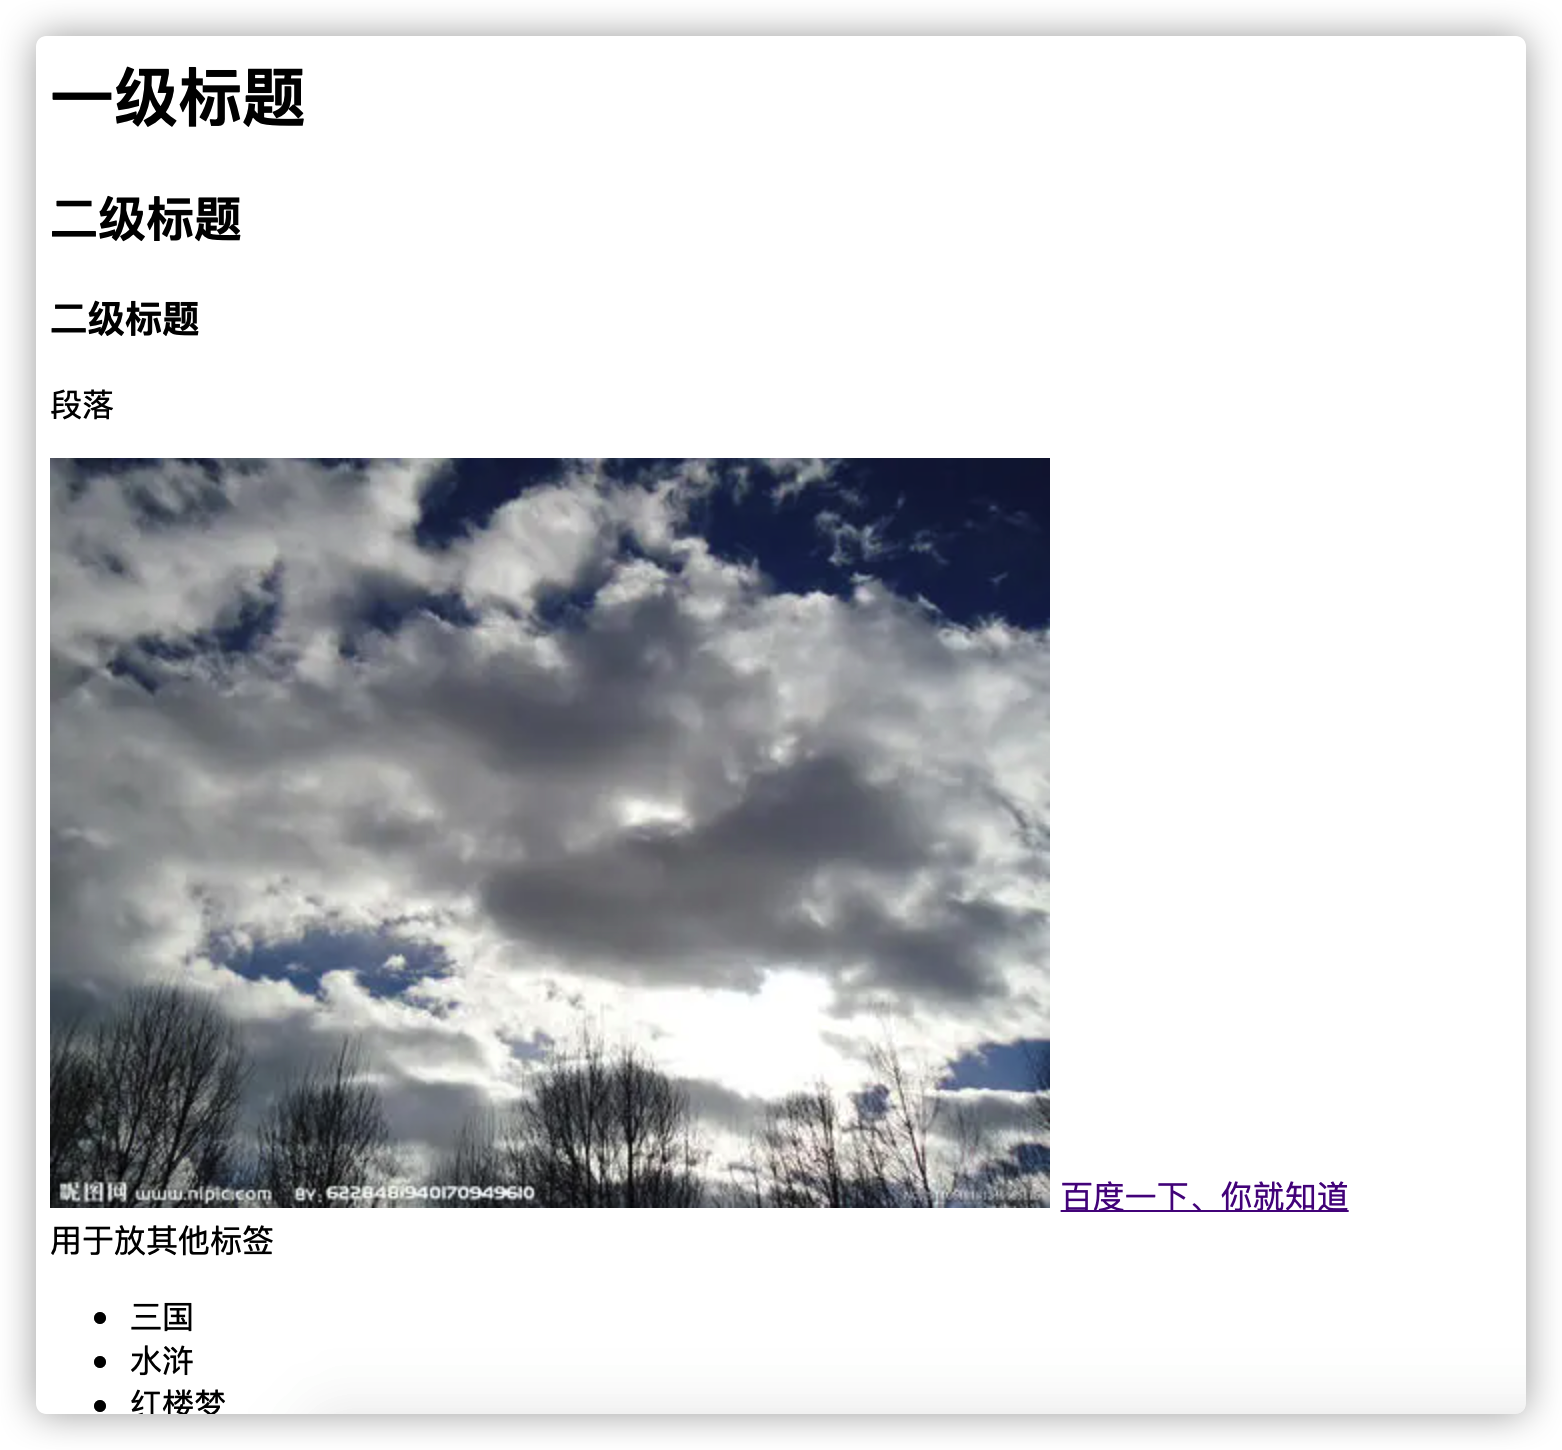
<h1>一级标题</h1>
<h2>二级标题</h2>
<h3>二级标题</h3>
<h4>四级标题</h4>
<h5>五级标题</h5>
<h6>六级标题</h6>
2.段落
<p>段落</p>
3.图片
src=“” 属性
scr 属性名
“” 中的是属性值
scr 指定图片路径 : 本地 or 网页
alt 当图片无法正常显示时 显示出来
" ./ " 根目录
 <!-- 图片 -->
    <!--
        src=“” 属性
        scr  属性名
        “”中的是属性值
        scr 指定图片路径 : 本地 or 网页
        alt 当图片无法正常显示时 显示出来
     -->
     <!--  ./   根目录 -->
    <img src="./1.webp" alt="本地图片描述">
    <img src="https://gimg2.baidu.com/image_search/src=http%3A%2F%2Fpic15.nipic.com%2F20110612%2F7573962_131346185125_2.jpg&refer=http%3A%2F%2Fpic15.nipic.com&app=2002&size=f9999,10000&q=a80&n=0&g=0n&fmt=jpeg?sec=1637809590&t=ade1057264d767700dc55683dbb5dbcf?" alt="网页图片描述">
4.超链接
a标签
href 跳转地址
 <!-- 超链接 -->
<!-- href 跳转地址 -->
<a href="http://www.baidu.com">百度一下、你就知道</a>
5.块 div
 <!-- division  -->
<div>
  用于放其他标签
</div>
6.列表
1.无序
<!-- 无序列表 -->
<ul>
  <!-- li 标签中的内容 -->
  <li>三国</li>
  <li>水浒</li>
  <li>红楼梦</li>
</ul>
2.有序
 <!-- order 有序列表 -->
<ol>
  <!-- li 标签中的内容 -->
  <li>三国</li>
  <li>水浒</li>
  <li>红楼梦</li>
</ol>
7.文字
<span>span标签一般用于设置文字</span>
实践
(四)元素分类
1.块级元素 display :block
    特点:独占一行

    默认宽度100% 与父元素等宽

    高度默认是0(由内容撑开)

    可以设置宽度高度
<div>块级元素</div>
 div {
  width: 100px;
  height: 100px;
  background-color: red;
  border-radius: 5px;
}
2.行元素 display :inline
    不独占一行 从左到右

    默认宽度内容撑开

    默认高度0(由内容撑开)

    设置宽度和高度无效
<span>span</span><span>span</span><span>span</span>
span {
  width: 100px;
  height: 100px;
  background-color: yellow;
}
3.行内块元素 inline-block;
    不独占一行 从左到右

    默认宽度内容撑开

    默认高度0(由内容撑开)

    可以设置宽度和高度
<button>按钮</button>
<button>按钮</button>
<button>按钮</button>
button {
  width: 100px;
  height: 100px;
}
(五)文档流
文档流:
内联元素(行元素、内块元素):
默认从左到右
默认遇到阻碍 or 宽度不够 自动换行,继续按照从左到右的方式布局
块元素 :
独占一行
并按照从上到下的方式布局
–> 称为 流式布局
(六)Css简介
前端:
1.Html Hyper Text Markup Language 超文本标记语言
2.css Cascading Style Sheets 层叠样式表
3.JavaScript 交互
1.内联式
<!-- 1.内联式 -->
<!-- 在style中 每个样式用;隔开 -->
<div style="color: red;font-size: 30px;">
  床前明月光,
  疑是地上霜,
  举头望明月,
  低头思故乡
</div>
2.内嵌式
<!-- 2.内嵌式 -->
<style>
  .box {
    font-family: '楷体';
    font-size: 30px;
    color: greenyellow;
  }
</style>
<div class="box">
  春眠不觉晓,
  处处闻啼鸟。
  夜来风雨声,
  花落知多少。
</div>
3.外引式
文件夹📁新建一个index.css 代码如下:
.box{
    background-color: green;
}
<head>
  <!-- 3.外引式 -->
	<link href="./index.css" rel="stylesheet">
</head>
(七)选择器
1.通配符
/*
  通配符 选中页面所有的元素
  一般用于样式重置
  格式: *{ }
*/
*{

    margin: 0;  /* 外边距 */
    padding: 0;  /* 内边距 */
}
2.标签选择器
/*
  标签选择器
	格式 tag名{}
*/
p{
  font-family: "楷体";
}
3.id选择器
/*
  id选择器 选中带有该id的标签
	格式 #id名{}
*/
#first{
  color: hotpink;
}
<p id="first">锄禾日当午</p>
4.class选择器
/*
  class 选择器
  格式    .className{}
*/
.box{
  /* 字体倾斜 */
  font-style: italic;
}
<!-- alt 键 + 鼠标左键 选中多行 -->
<h1 class="box">悯农</h1>
<h2 class="box">李绅</h2>

<p class="box">汗滴禾下土</p>
5.后代选择器
 <div class="header">
   <h1>咏鹅</h1>
   <div><h1>咏鹅</h1></div>
   <h2>罗兵王</h2>
   <div>鹅鹅鹅</div>
</div>
<div class="main">
  <div>
    <p>曲项向天歌</p>
  </div>

  <div>白毛浮绿色</div>
</div>
<div class="footer">
  <div>红掌拨清波</div>
</div>
/*
  后代选择器
  先找h1 再看祖先是否有.header
  css 是从右向左 找的
*/
/*只要前面有.header 不用父元素*/
.header  h1{
  color: red;
}
<div class="header">
  <h1>咏鹅</h1>
  <div><h1>咏鹅</h1></div>
  <h2>罗兵王</h2>
  <div>鹅鹅鹅</div>
</div>

#tips:
会先找到 所有的h1
然后向前寻找 只要能找到 class=header的 就成
无需是父元素,所以,这里会有两个红色的咏鹅
6.子代选择器
 <div class="header">
   <h1>咏鹅</h1>
   <div><h1>咏鹅</h1></div>
   <h2>罗兵王</h2>
   <div>鹅鹅鹅</div>
</div>
<div class="main">
  <div>
    <p>曲项向天歌</p>
  </div>

  <div>白毛浮绿色</div>
</div>
<div class="footer">
  <div>红掌拨清波</div>
</div>
/*
子代必须是父子关系
*/
/* .header > div{
color: yellowgreen;
} */
/*p的父元素必须是 div div的父必须是class=.main*/
.main >div> p{
  color:  yellowgreen;
}
<div class="main">
  <div>
    <p>曲项向天歌</p>
  </div>

  <div>白毛浮绿色</div>
</div>
#tips:
会先找到 所有的p
然后向前寻找 必须父元素是div 并且div的父元素的class = mian
所以这里 只有曲项向天歌 会变色
7.并列选择器
 <div class="header">
   <h1>咏鹅</h1>
   <div><h1>咏鹅</h1></div>
   <h2>罗兵王</h2>
   <div>鹅鹅鹅</div>
</div>
<div class="main">
  <div>
    <p>曲项向天歌</p>
  </div>

  <div>白毛浮绿色</div>
</div>
<div class="footer">
  <div>红掌拨清波</div>
</div>
/*
	并列选择器
*/
.main,.footer{
  font-size: 40px;
}

#tips:
会先找到 所有的class 为 main or footer的
然后修改字体大小
so 曲项向天歌,白毛浮绿色,红掌拨清波 字体都被设置成了40px
(八)选择优先级和权重
1.样式冲突:
- 优先级:
!important > 内联 >id >class >tag >* > 继承
无穷大∞ > 1000 > 100 > 10 > 1 > 0 > 无
<style>
div{
  color: red;
  font-size: 500px;
}
.box{
  color: green ;
}
#box{
  color: blue !important;
}
/*
  样式冲突:
  当多个选择器同时设置一个样式
  会储蓄爱样式冲突
*/
/*
  优先级
  !important > 内联 >id >class >tag >* > 继承
  无穷大∞ > 1000 > 100 > 10 > 1 > 0 > 无
*/
</style>

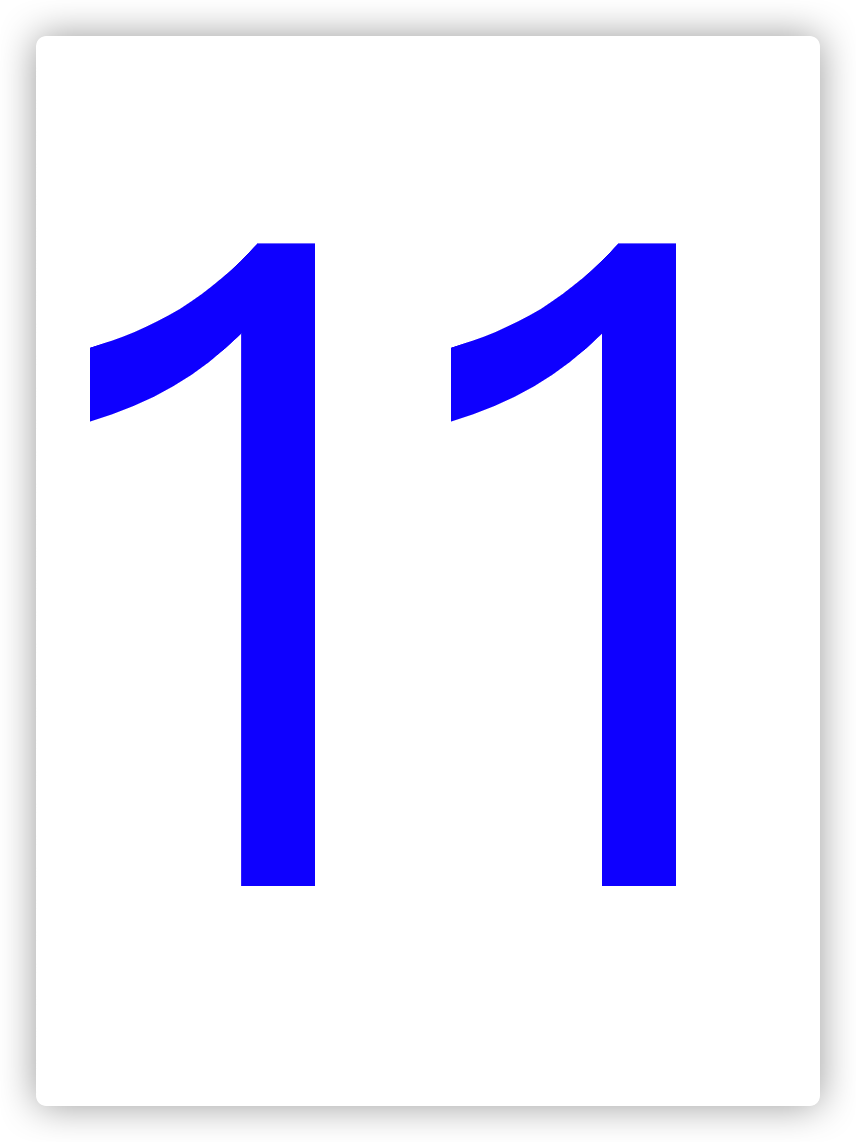
<div id="box" class="box">
	11
</div>

#tips
颜色会优先选择blue  字体大小为500px
2.相同优先级
/* 优先级相同: 就近原则 (最后设置的) */
P{
  color: red;
}
P{
  color: blue;
}
<p>222</p>
#tips
颜色会就近选择 最终是blue
(九)权重相加
选择器使用时 权重相加
但是不会超过他的数量级(比如11个class 也不会超过100 )!
/* 权重10 */
.box{
  color: red;
}
/* 权重:10+1 */
/* 选中class 是box的 div */
div.box{
  color: yellow;
}
/* 权重:1+10+10+10 */
div.box.box1.box2.box3{
  color: green;
}

<div id="box" class="box box1 box2 box3">
	测试权重相加
</div>

??tips:
在当前状态下颜色时green 因为权重最高
但是如果有了
#box {
   color: blue;
}
那权重就是100 再叠加box的权重都不会超过100
(十)盒模型
1.标准盒模型
- 内容+padding+border+margin
- 盒子的实际宽度 = content + padding +border
style>
.box{
 /* 设置 宽高 */
 width: 100px;
 height: 100px;
 /* 设置 内边距 */
 padding: 10px;
 /* 设置 边框 */
 border: 10px solid black;
 /* 设置 外边距 */
 margin: 20px;
}
</style>
<!-- 标准盒模型组成:
  内容+padding+border+margin
	盒子的实际宽度 = content + padding +border
-->
<!-- 以div 为例认识盒模型-->
<div class="box">
  内容区
</div>
2.怪异盒模型:
怪异盒模型:ie提出的方案
- 盒子的组成 : content+ padding + border + margin
- 盒子实际宽度 :content + padding + border
<style>
        .box{
            /* 这里的width是 content + padding +border */
            width: 100px;
            height: 100px;
            padding: 10px;
            border: 20px solid black;
            box-sizing: border-box;
        }
    </style>
</head>
<body>
    <!--
        怪异盒模型:ie提出的方案
        盒子的组成 : content+ padding + border + margin
        盒子实际宽度 :content + padding + border
     -->
    <div class="box"></div>
</body>
(十一)Padding
一个值:
上下左右 四个方向
两个值:
上下、左右
三个值:
上 、左右 、下
四个值:
上 右 下 左
记不住就直接上方向 padding-direction
.box{
    width: 100px;
    height: 100px;
    border: 2px solid black;
    /*
    一个值:
    	上下左右 四个方向
    两个值:
    	上下、左右
    三个值:
    	上 左右 下
    四个值:
    	上 右 下 左
    */
    padding: 10px;
    /* 怕记不住的话... */
    padding-top: 10px;
    padding-bottom: 10px;
    padding-left: 10px;
    padding-right: 10px;
}
<div class="box">
  好好学习、天天向上
</div>
(十一)边框
1.边框的设置
.box{
    width: 100px;
    height: 100px;
    /*
    颜色三种写法:
    1.对应英文单词
    2.rgb 取值 0-255
    3.十六进制 0-9 A B C D E  F
    ff == 255  ffffff == rgb(255 255 255)
    */
    background-color: rgb(82, 211, 56);
    /* 参数1 边框宽度 参数2 边框样式 参数3 颜色 */
    border: 10px dotted black;
    /* border-width: 100px; */
    /* dotted double solid */
}
2.边框的使用(圆形、三角形)
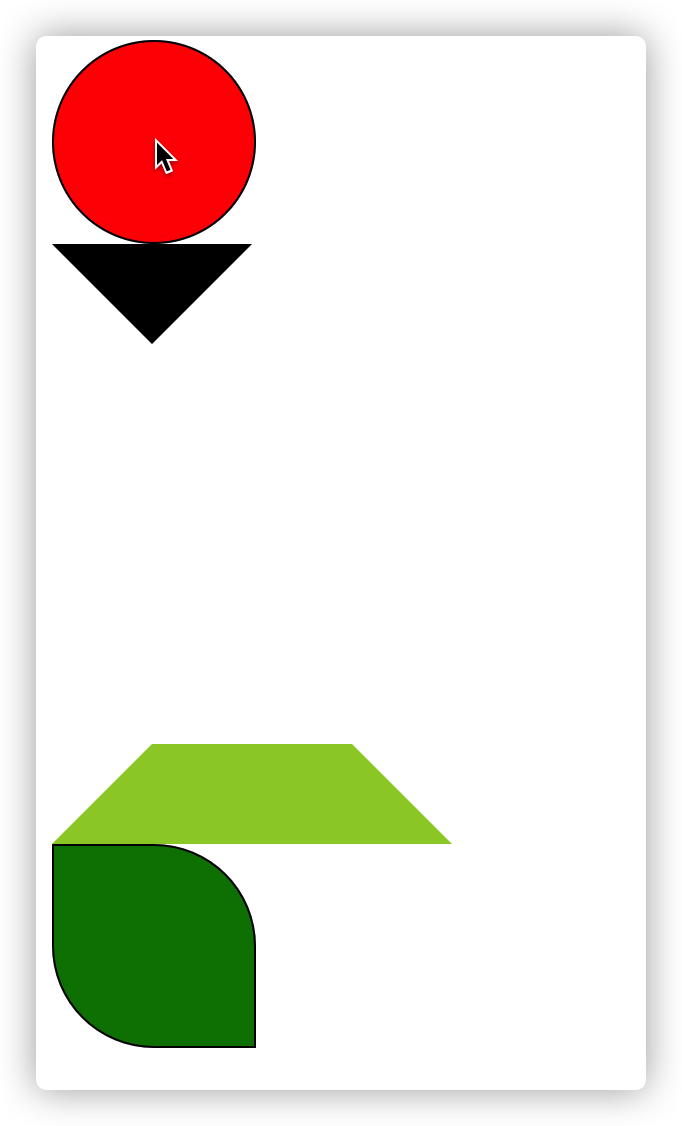
#圆形
.circle{
  width: 100px;
  height: 100px;
  border: 1px solid black;
  /* 切角 :
  单位: px  or %(百分制)
  */
  border-radius: 50%;
  background-color: red;
}

#三角形
.tri{
  width: 0;
  height: 0;
  border:  50px solid transparent;
  border-top-color: black;

}

#梯形
.tx{
  width: 100px;
  height: 100px;
  border: 5px solid transparent;
  border-top: 50px solid transparent;
  border-left: 50px solid transparent;
  border-bottom: 50px solid yellowgreen;
  border-right: 50px solid transparent;
}

#树叶🍂
.leaf{
  width: 100px;
  height: 100px;
  border: 1px solid black;
  background-color: green ;
  /* 右上方切角 */
  border-top-right-radius: 50%;
  /* 左上方切角 */
  border-bottom-left-radius: 50%;
}
(十二)边框
1.常规使用
margin和padding的一个、两个、三个、四个的值 是一样的
.box{
    width: 100px;
    height: 100px;
    background-color: red;
    /* margin和padding的一个、两个、三个、四个的值  是一样的 */
    margin-bottom: 50px;
}
.green{
    margin-top: 80px;
    width: 100px;
    height: 100px;
    background-color:yellow ;
}

<!--
        外边距重合
        按照大的为准  例如:
        上面的元素 :margin-bottom: 50px;
        下面的元素:margin-top: 80px;
        那么间隔是 80px
-->
<div class="box"></div>
<div class="green"></div>
??: 外边距重合 那么按照大的为准 例如:
上面的元素 :margin-bottom: 50px; 下面的元素:margin-top: 80px;
那么间隔是 80px
2.穿透问题
<style>
*{
  padding: 0;
  margin:0;
}
.parent{
  width: 100px;
  height: 100px;
  background-color: red;
}
.son{
  margin-top: 50px;
  width: 50px;
  height: 50px;
  background: yellow;
}
</style>

<div class="parent">
	<div class="son"></div>
</div>
会看到 虽然设置了son但是外面那个div也跟着一起移动了
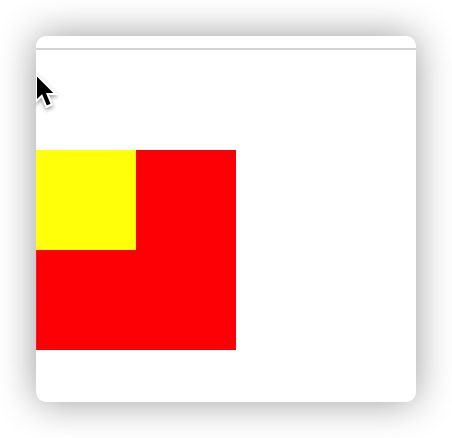
-
外边距穿透:
出现条件:1.父子关系 2.父元素没有边框
-
解决:
1.使用<u>内边距 padding(父元素)</u>

 2.不给父元素<u>加边框</u>
(十三)块的居中
<style>
*{
    padding: 0;
    margin: 0;
}
.box{
    height: 200px;
    background-color: red;
    width: 440px;
    margin: 0 auto;
}
</style>
tips:使用的方法 :
当margin是两个值的时候 设置为 0 和 auto
那么 上下是0 左右是auto
(十四)内联元素居中
内联元素居中在父元素中使用:text-align:center
<style>
  div{
    /* 在父元素中设置 文本居中 */
    text-align: center;
  }
</style>

<div>
  <span>行元素</span>
  <button>行内块</button>
</div>

(十五)伪元素
伪元素 中间使用 ::
例如:.box**:😗*before
??:伪元素 默认是 inline
.box{
  width: 100px;
  height: 100px;
  background-color: red;
}
/* 伪元素 中间使用:: */
.box::before{
  content: 'Y';
}
.box::after{
  content: 'B';
}
<div class="box"></div>
[外链图片转存失败,源站可能有防盗链机制,建议将图片保存下来直接上传(img-X0PftaOd-1636642658373)(http://pic.mymur.cn//image-20211111225628040.png)]
(十六)伪类
伪类 用 :
<head>
    <meta charset="UTF-8">
    <meta http-equiv="X-UA-Compatible" content="IE=edge">
    <meta name="viewport" content="width=device-width, initial-scale=1.0">
    <title>Document</title>
    <style>
        /* 伪类 用 : */
        /* 悬浮 */
        a:hover{
            color: red;
        }
        /* 激活状态 按住不放 */
        a:active{
            color: seagreen;
        }
        /*  聚焦 */
        input:focus{
            color: blue;
        }
    </style>
</head>
<body>
    <a href="https://www.baidu.com">baidu</a>
    <input type="text">
</body>
(十七)背景图
.box{
    width: 1000px;
    height: 1000px;
    /* background-color: red; */
    /* 背景图片 */
    /* 当div小 图片大式  默认显示图片左上角 */
    /* 当div大 图片小时  默认显示图片平铺 */
    background-image: url('https://img2.baidu.com/it/u=2687896763,759571384&fm=26&fmt=auto');
    /* 背景图片不重复 */
    background-repeat: no-repeat;
    /* 背景图片位置 */
    /* 参数1:x轴  参数2:y轴 */
    background-position: 20px 50px;
}

body{
    background-image: url(./1.png);
    background-size: cover;
    /* fixed 图片不随页面滚动 */
    background-attachment: fixed;
}

<body>
    <div class="box"></div>
    <div>撑开页面</div>
    <div>撑开页面</div>
    <div>撑开页面</div>
    <div>撑开页面</div>  ...*40
</body>
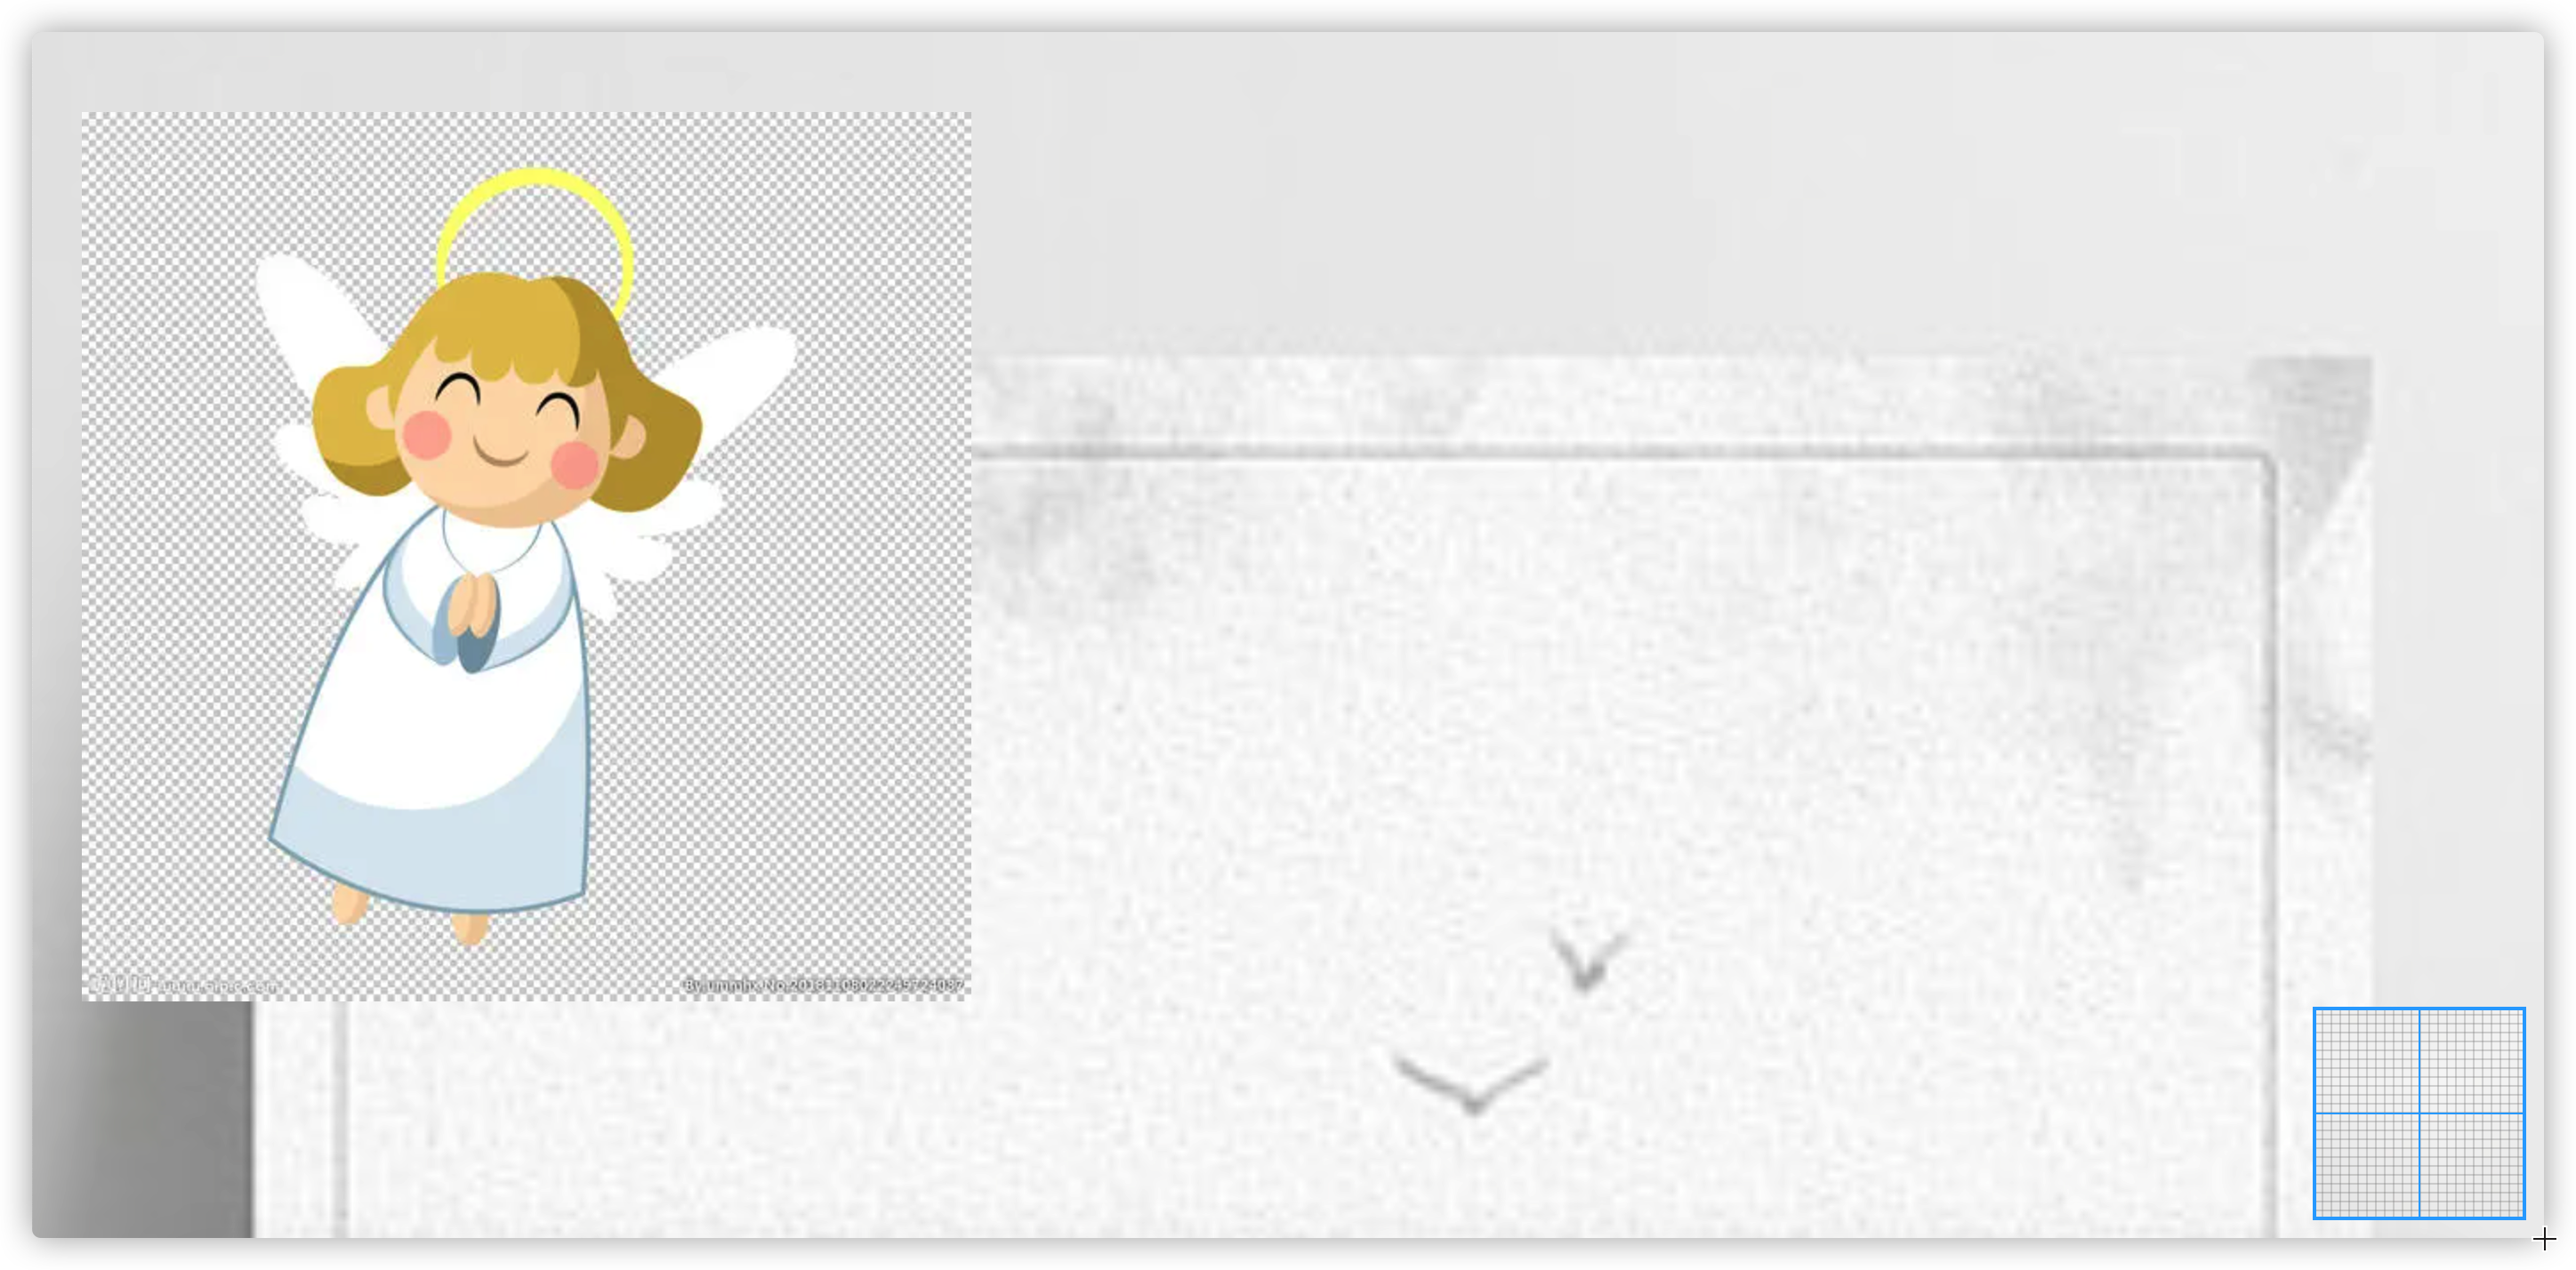
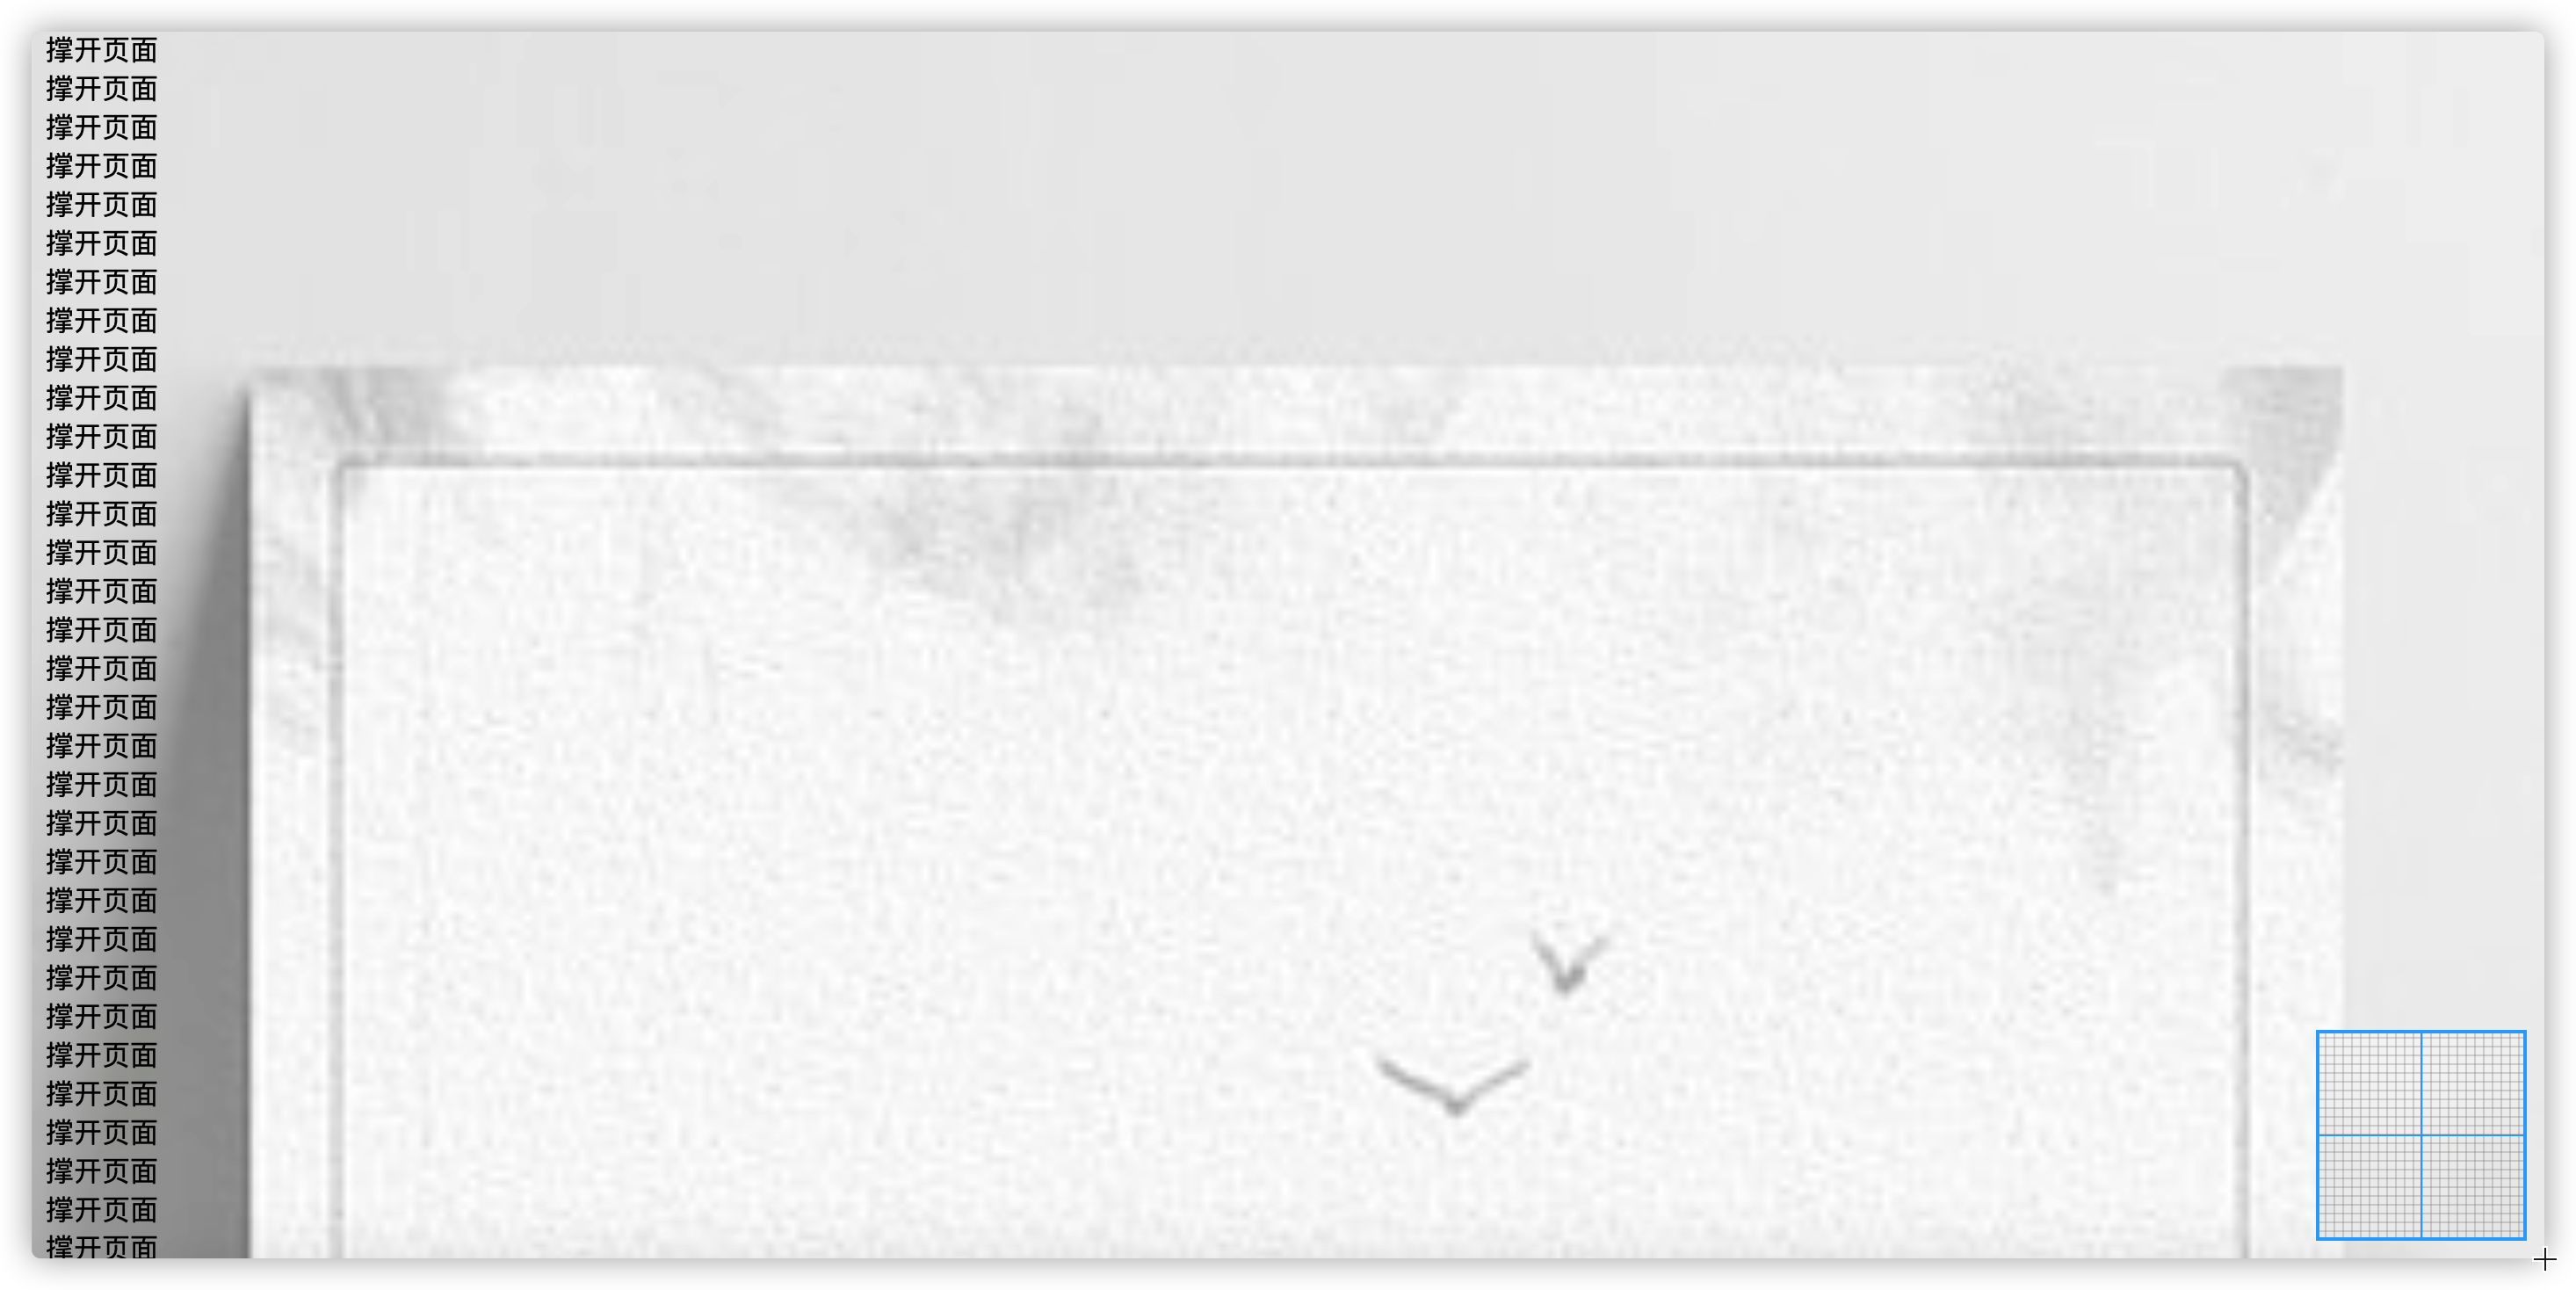
效果图:
(十八)行内块布局
1.传统的用table进行布局
<table  border ="1px solid black"  align="center">
  <tr>
    <td>1</td>
    <td>2</td>
    <td>3</td>
  </tr>
  <tr>
    <td>1</td>
    <td>2</td>
    <td>3</td>
  </tr>
  <tr>
    <td>1</td>
    <td>2</td>
    <td>3</td>
  </tr>
</table>
2.行内块 布局
<style>
    div{
      display: inline;
      width: 100px;
      height: 100px;
      background-color: yellow;
    }
    /* body{
    	font-size: 0px;
    } */
    /* .box1{
    	margin-left: -1em;
    } */
</style>
<body>
    <!--
        行内块 布局:中间会有空隙(因为空格或者换行引起)
        解决空隙:
            1.写在同一行
            2.在父元素设置font-size:0
            3.外边距  -1
            4.设置浮动
     -->
    <div class="box1">1</div>
    <div class="box2">2</div>
    <div class="box3">3</div>

</body>
自己实践:
<head>
    <title>Document</title>
    <style>
        /* 公共样式 */
        *{
            margin: 0;
            padding: 0;
        }
        /* 清除a标签的默认样式 */
        a {
           color: #000;
            /* 清除下划线 */
            text-decoration: none;
        }
        /* 头部开始 */
        .box {

            background-color: black;
            text-align: center;
        }
        .box a{
            color: rgb(176, 176, 176);
            font-size: 12px;
            height: 40px;
            width: 48px;
            /* 设置行高 */
            line-height: 40px;
            /* 文字行间距 = 行高  - 文字高度 */
        }
    </style>
</head>

<body>

    <div class="box">
        <a href="#">xiaomi01</a>
        <a href="#">xiaomi01</a>
        <a href="#">xiaomi01</a>
        <a href="#">xiaomi01</a>
        <a href="#">xiaomi01</a>
        <a href="#">xiaomi01</a>
        <a href="#">xiaomi01</a>
        <a href="#">xiaomi01</a>
        <a href="#">xiaomi01</a>

    </div>
</body>
样式重置:reset.css
网上有大神写的
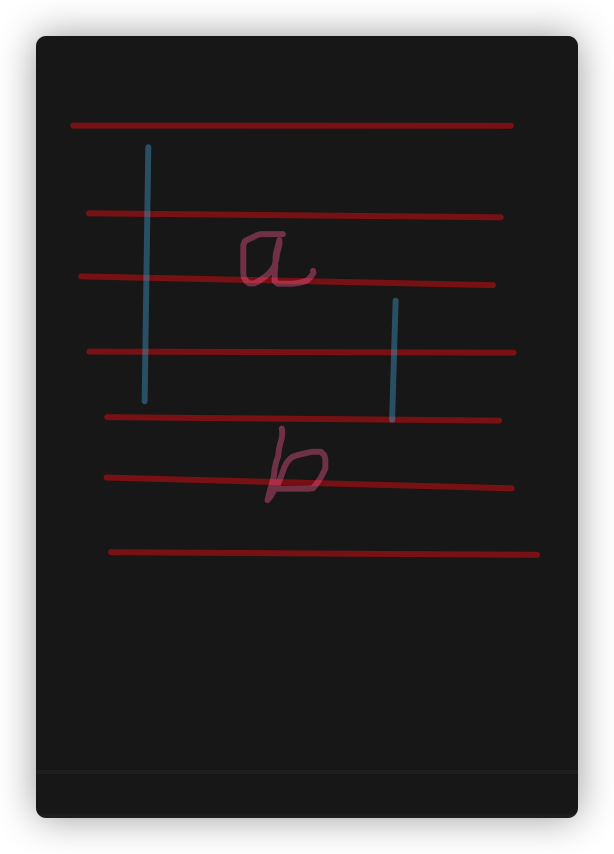
文字居中:
<u>文字行间距 = 行高 - 文字高度</u>
(十九)浮动布局
浮动布局:div + 浮动 + position
1.开启浮动元素自身:
浮动:分为 左浮动 和 右浮动
为啥使用浮动: 两个 or 多个 块元素 在同一行显示
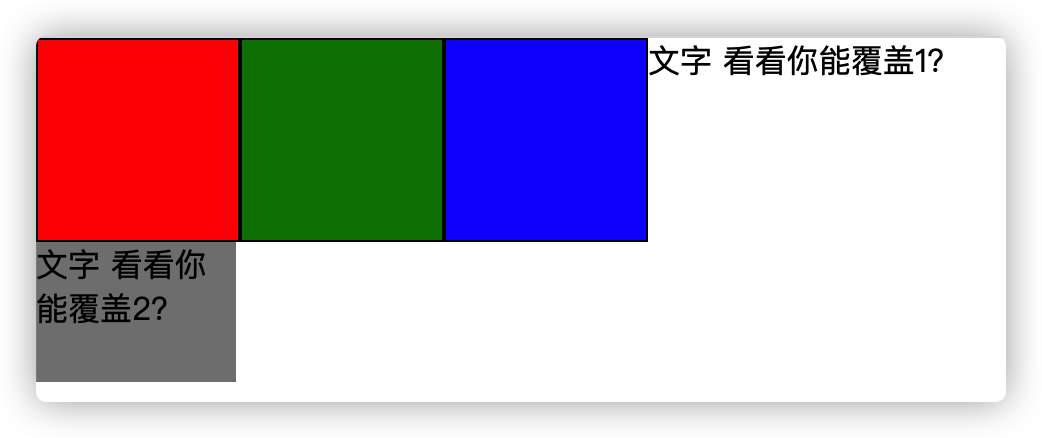
开启浮动元素自身特点:
  1.元素会脱离文档流(优先排列)

  2.元素的默认层级会上调

  3.不会覆盖文字

  4.行元素和行内块 在开启浮动后 会变为块元素 --》blocke(宽高由内容撑开)
<style>
  *{
    padding: 0;
    margin: 0;
  }
  .box{
    width: 100px;
    height: 100px;
    border: 1px solid black;
    /* 设置浮动 */
    float: left;
  }
  .red{
    background-color: red;
  }
  .green{
    background-color: green;
  }
  .blue{
    background-color: blue;
  }
  .box1{
    width: 100px;
    height: 150px;
    background-color: grey;
  }
</style>

<div class="box red"></div>
<div class="box green"></div>
<div class="box blue"></div>
<span>文字 看看你能覆盖1?</span>
<div class="box1">文字 看看你能覆盖2?</div>
2.对兄弟元素的影响:
-
1.如果上面的兄弟元素是块元素
下面开启浮动的元素 --》在上面元素的下方 -
2.清除兄弟元素(开启浮动) 对自生的影响 clear:left right both
<style>
  *{
    padding: 0;
    margin: 0;
  }
  .box{
    width: 100px;
    height: 100px;
    border: 1px solid black;

  }
  .red{
    background-color: red;
    float: left;
  }
  .green{
    background-color: green;
    /* float: right; */

    /* 清除浮动的影响: left right both */
    clear:left;
  }
</style>
 <!--
        1.如果上面的兄弟元素是块元素
            下面开启浮动的元素 --》在上面元素的下方
        2.清除兄弟元素(开启浮动) 对自生的影响 clear:left right both
     -->
<div class="box red"></div>
<div class="box green"></div>
3.对父亲元素的影响:
-
由于子元素开启浮动后 脱离文档流 无法支撑父元素高度(高度塌陷)
1.给父元素设置高度(不推荐)
2.让父元素也浮动(不推荐)
3.给一个空元素 cleaer
4.世界统一写法 使用伪元素
<style>
*{
  padding: 0;
  margin: 0;
}
.box{
  /* background-color: black; */
  border: 10px solid #000;
}
.item{
  width: 1000px;
  height: 100px;
  float: left;
}
.red{
  background-color: red;

}
.green{
  background-color: green;

}
.blue{
  background-color: blue;
}
.son{
  clear: both;
}
</style>

 <!--
  由于子元素开启浮动后 脱离文档流 无法支撑父元素高度
  1.给父元素设置高度(不推荐)
  2.让父元素也浮动(不推荐)
  3.给一个空元素 cleaer
  4.世界统一写法 使用伪元素
-->
<div class="box">
<div class="item red"></div>
<div class="item green"></div>
<div class="item blue"></div>
<!-- <div class="son"></div> -->
</div>
4.高度塌陷终极解决方案
??! !!用伪元素 清除浮动!!! cleaerFix::after
<style>
  *{
    padding: 0;
    margin: 0;
  }
  .box{
    /* background-color: black; */
    border: 10px solid #000;
  }
  .item{
    width: 1000px;
    height: 100px;
    float: left;
  }
  .red{
    background-color: red;

  }
  .green{
    background-color: green;

  }
  .blue{
    background-color: blue;
  }
  /* 用伪元素 清除浮动 */
  .cleaerFix::after{
    content: "";
    display: block;
    clear: both;
  }
</style>

<body>
    <div class="cleaerFix box">
        <div class="item red"></div>
        <div class="item green"></div>
        <div class="item blue"></div>
    </div>
</body>
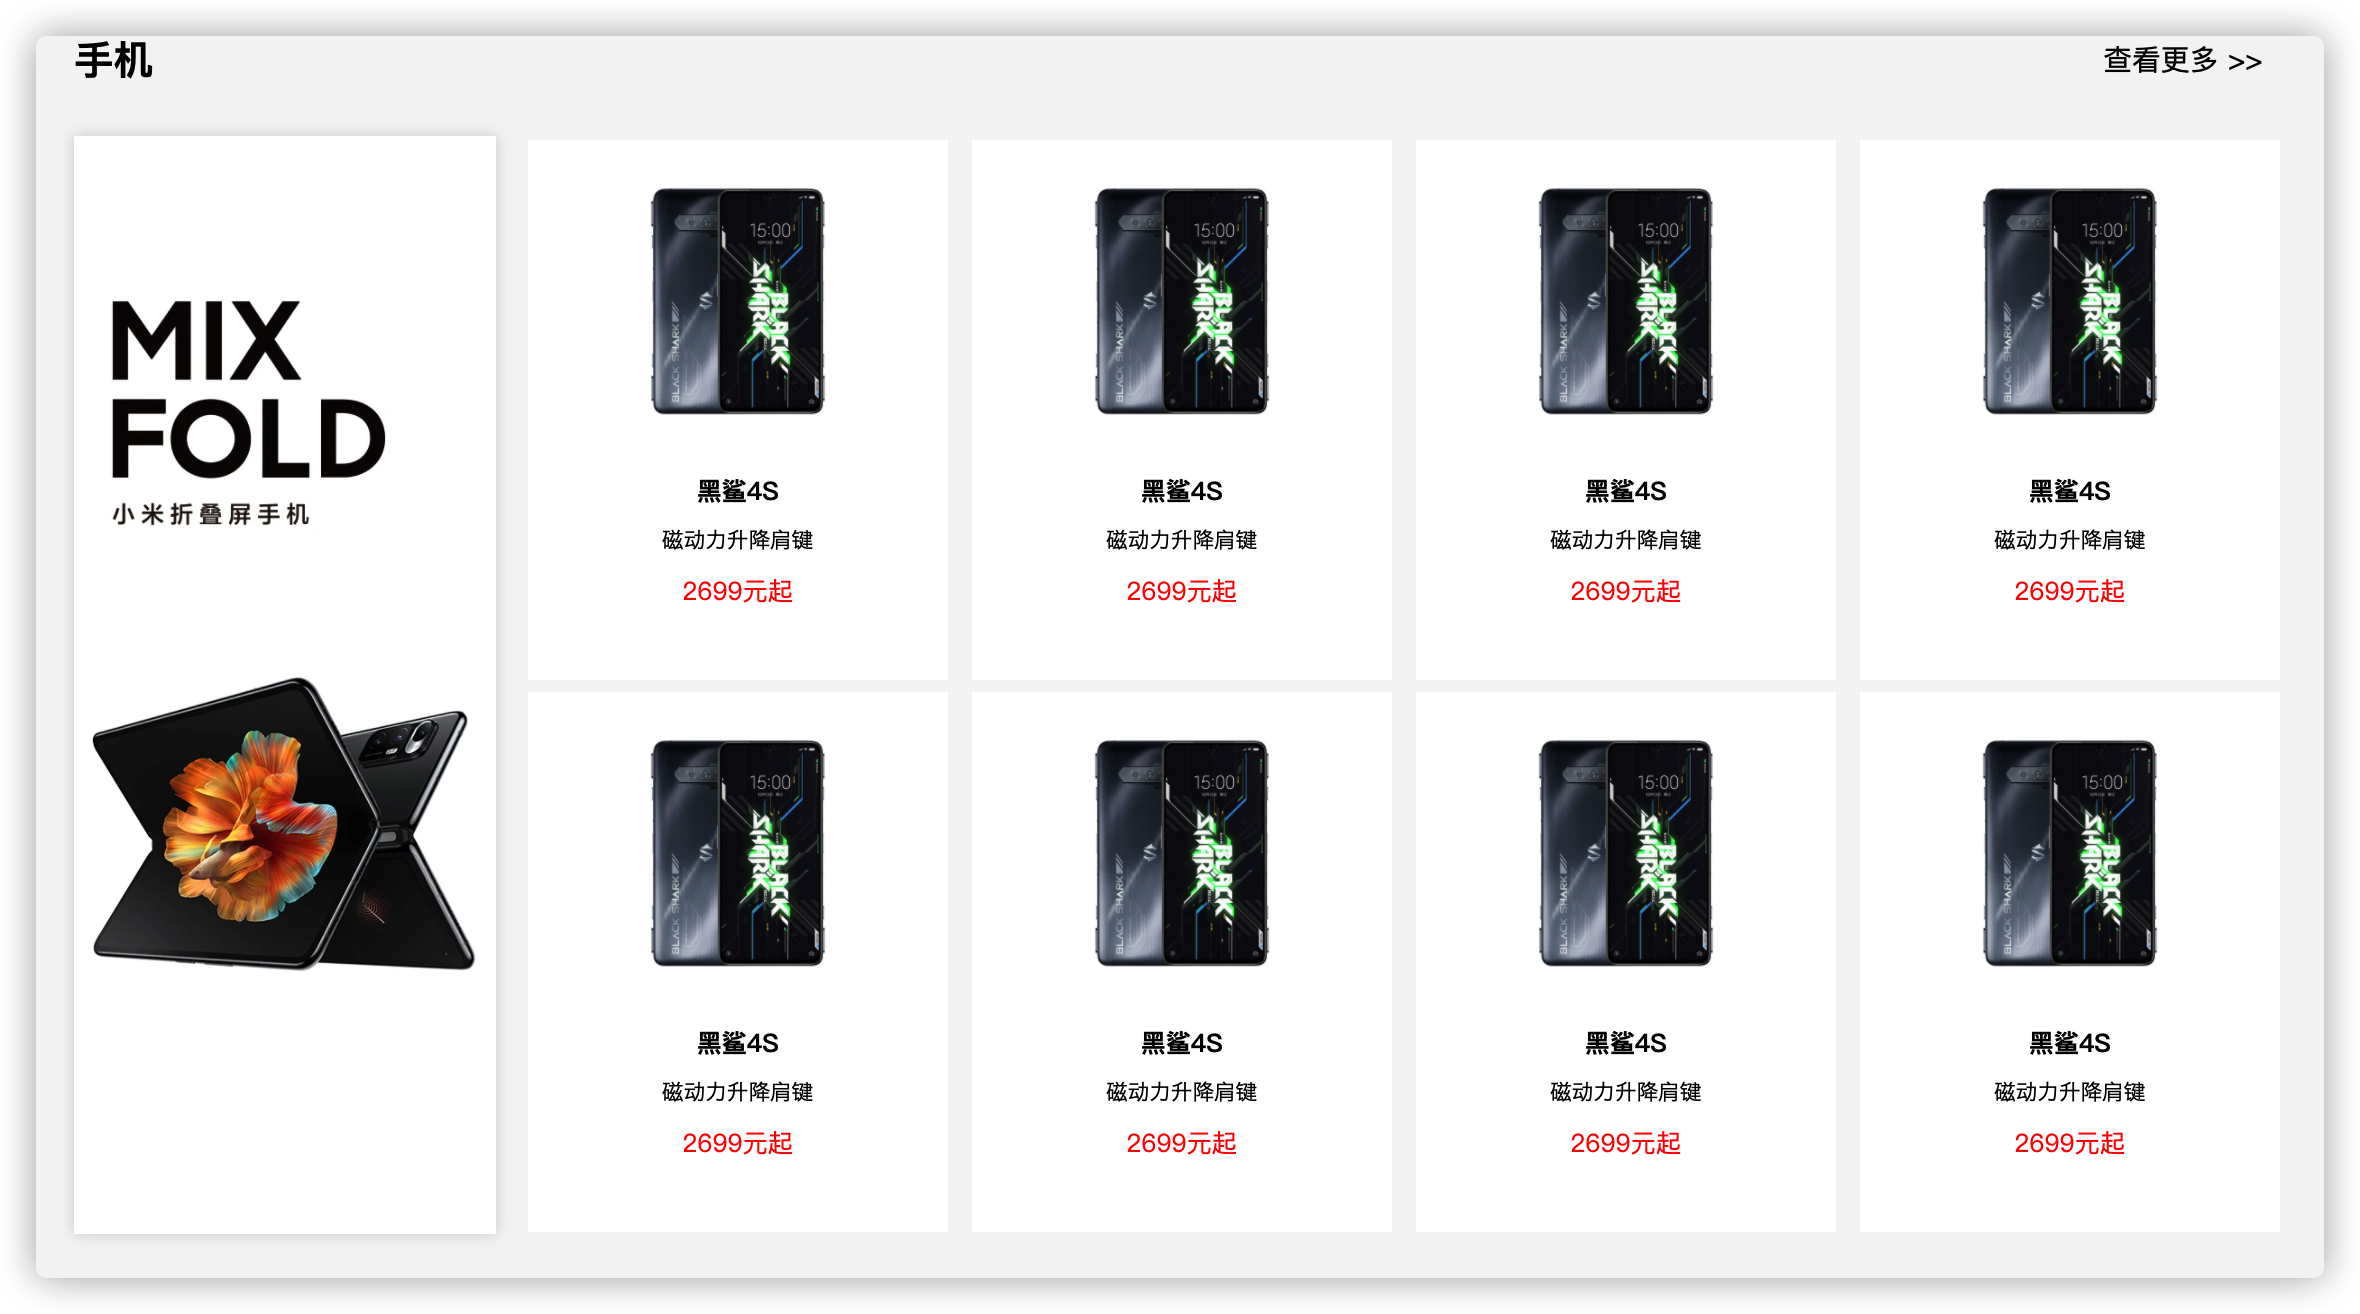
(二十)小米官网浮动简易案例
www.mi.com
<!DOCTYPE html>
<html lang="en">
<head>
<meta charset="UTF-8">
<meta http-equiv="X-UA-Compatible" content="IE=edge">
<meta name="viewport" content="width=device-width, initial-scale=1.0">
<title>Document</title>
<style>
/* 公共样式 */
*{
padding: 0;
margin: 0;
}
/* 用伪元素 清除浮动 */
.clearfix::after{
content:"";
display: block;
clear: both;
}
ul{
list-style:none;
}
a {
color: #000;
/* 清除下划线 */
text-decoration: none;
}
.left{
float: left;
}
.right{
float: right;
}
.w{
width: 1226px;
margin: 0 auto;
}
body{
background-color: #f5f5f5;
}
/* header部分 */
.header i{
font-style: normal;
display: inline-block;
width: 20px;
height: 20px;
border-radius: 50%;
background-color: #b0b0b0;
text-align: center;
line-height: 20px;
color: #fff;
padding-bottom: 5px;
}
.header-right{
cursor: pointer;
}
.header-right:hover{
color: #ff6700;
}
/* todoimportant*/
.header-right:hover i{
background-color: #ff6700;
}
/* 开始 main */
.main-left{
width: 234px;
}
.main-left img{
width: 234px;
height: 618px;
}
.main-right{
width: 992px;
}
.main-item{
text-align: center;
width: 234px;
height: 300px;
background-color: white;
margin-left: 14px;
margin-bottom: 14px;
}
.main-item img{
width: 160px;
height: 160px;
}
.title{
margin: 0 10px 2px;
}
.price{
color: #ff6700;
}
.des{
margin: 0 10px 10px;
height: 18px;
font-size: 12px;
color: #b0b0b0;
}
</style>
</head>
<body>
<div class="box ">
<div class="header w clearfix">
<div class="header-left left">
手机
</div>
<div class="header-right right">
<!-- gt greate than &转义字符 -->
查看更多 <i>></i>
</div>
</div>
<div class="main w clearfix">
<div class="main-left left">
<img src="./r.webp" alt="">
</div>
<div class="main-right right clearfix">
<div class="main-item left">
<img src="./l.webp" alt="">
<h3 class="title">黑鲨4S</h3>
<p class="des">磁动力生....</p>
<span class="price">2699起</span>
</div>
<div class="main-item left">
<img src="./l.webp" alt="">
<h3 class="title">黑鲨4S</h3>
<p class="des">磁动力生....</p>
<span class="price">2699起</span>
</div>
<div class="main-item left">
<img src="./l.webp" alt="">
<h3 class="title">黑鲨4S</h3>
<p class="des">磁动力生....</p>
<span class="price">2699起</span>
</div>
<div class="main-item left">
<img src="./l.webp" alt="">
<h3 class="title">黑鲨4S</h3>
<p class="des">磁动力生....</p>
<span class="price">2699起</span>
</div>
<div class="main-item left">
<img src="./l.webp" alt="">
<h3 class="title">黑鲨4S</h3>
<p class="des">磁动力生....</p>
<span class="price">2699起</span>
</div>
<div class="main-item left">
<img src="./l.webp" alt="">
<h3 class="title">黑鲨4S</h3>
<p class="des">磁动力生....</p>
<span class="price">2699起</span>
</div>
<div class="main-item left">
<img src="./l.webp" alt="">
<h3 class="title">黑鲨4S</h3>
<p class="des">磁动力生....</p>
<span class="price">2699起</span>
</div>
<div class="main-item left">
<img src="./l.webp" alt="">
<h3 class="title">黑鲨4S</h3>
<p class="des">磁动力生....</p>
<span class="price">2699起</span>
</div>
</div>
</div>
</div>
</body>
</html>
其他可学习
Sass、Less、BFC
(二十一)定位简介
.box{
     /*
       定位:
       static(静态)
       relative(相对定位)
       absolute(绝对定位)
       fixed(固定定位)
     */
   position: static;
}
其中静态定位 就是默认的文档流
(二十二)相对定位
相对定位:
-
1.参考点:元素本身在文档流中的位置
-
2.是否脱离文档流: 没有脱离文档流
-
3.层级: 默认会上调 可以用z-index 调整
-
4.位置: 默认在原来的位置
可以用 left top bottom right调整位置 -
5.使用场景:一般用于对元素位置微调
<style>
    *{
        padding: 0;
        margin: 0;
    }
    .red{
        width: 100px;
        height: 100px;
        background-color: red;
        position: relative;
        /* 越小越往里 */
        z-index: -1;
        top: 30px;
        left: 40px;
    }
    .green{
        width: 100px;
        height: 100px;
        background-color: green;
    }
</style>

<body>
    <!--
        相对定位:
            1.参考点:元素本身在文档流中的位置
            2.是否脱离文档流: 没有脱离文档流
            3.层级: 默认会上调 可以用z-index 调整
            4.位置: 默认在原来的位置
                可以用 left top bottom right调整位置
            5.使用场景:一般用于对元素位置微调
    -->
    <div class="red"></div>
    <div class="green"></div>
</body>
(二十三) 固定定位 fixed
固定定位:
- 1.参考点:浏览器窗口的可视区域
- 2.是否脱离文档流: 会脱离文档流
- 3.层级: 默认会上调 可以用z-index 调整
- 4.位置: 默认在原来的位置
可以用 left top bottom right调整位置 - 5.使用场景:用于相对于浏览器窗口定位(eg:侧边栏)
<style>
        *{
            padding: 0;
            margin: 0;
        }
        .box{
            width: 200px;
            height: 100px;
            background-color: red;
            position: fixed;
            /* bottom: 100px; */
            top: 50px;
            right: 0px;
        }
        .green{

            height: 100px;
            background-color: green;
        }
</style>

<body>
    <!-- 固定定位:
            1.参考点:浏览器窗口的可视区域
            2.是否脱离文档流: 会脱离文档流
            3.层级: 默认会上调 可以用z-index 调整
            4.位置: 默认在原来的位置
                可以用 left top bottom right调整位置
            5.使用场景:用于相对于浏览器窗口定位(eg:侧边栏) -->
    <div class="box"> </div>
    <div class="green"></div>
</body>
(二十四) 绝对定位 absolute
绝对定位:
-
1.参考点:离自己最近的 非static 的上面的元素
***<u>找不到 相对于body</u>*** **so:所以 如果父元素 不是 position:static 那就相对于父元素定位!** -
2.是否脱离文档流: 会脱离文档流
-
3.层级: 默认会上调 可以用z-index 调整
-
4.位置: 默认在原来的位置
可以用 left top bottom right调整位置 -
5.使用场景:一般 子绝(绝对)父相 (相对)
<style>
        *{
            padding: 0;
            margin: 0;
        }
        .box{
            width: 100px;
            height: 100px;
            background-color: red;
            position:absolute;
            /* z-index: -1; */
            top: 50px;
            left: 50px;
        }
        .green{
            width: 100px;
            height: 150px;
            background-color: yellow;
        }
        .parent{
            width: 300px;
            height: 300px;
            background-color: pink;
            /* position: relative; */
            /* position: absolute; */
            /* 就 static不行 */
        }
        .son{
            width: 100px;
            height: 100px;
            position: absolute;
            top: 50px;
            left: 50px;
            background-color: blue;
        }
</style>

<body>
     <!-- 绝对定位:
            1.参考点:离自己最近的 非static 的上面的元素
                    找不到 相对于body
            2.是否脱离文档流: 会脱离文档流
            3.层级: 默认会上调 可以用z-index 调整
            4.位置: 默认在原来的位置
                可以用 left top bottom right调整位置
            5.使用场景:一般 子绝父相 -->
    <div class="box"></div>
    <div class="green"></div>
    <hr>
        <div class="parent">
            <div class="son"></div>
        </div>

    <hr>
</body>
理解:应该是用于 有了父元素然后子元素的定位 :eg:更多按钮(父元素),鼠标放上去之后,显示一些内容。
(二十五)粘性定位
案例:企汇网 上方的导航条 但是好像是js的
<style>
    *{
      padding: 0;
      margin: 0;
    }
    .nav{
      width: 100%;
      height: 100px;
      background-color: red;
      position: sticky;
      /* 粘性定位实现吸顶效果 */
      top:0px
    }
</style>
<p>头部内容</p>
<p>头部内容</p>
<p>头部内容</p>
<p>头部内容</p>
<p>头部内容</p>
<div class="nav"></div>
<p>撑开页面</p>  *100 ....
(二十六)绝对定位居中
方法一:
margin: auto auto;
top: 0;
left: 0;
right: 0;
bottom: 0;
方法二:
left: 50%;
margin-left: -50px;  //width的一半
top: 50%;
margin-top: -50px;    //height的一半
width: 100px;
height: 100px;
完整代码:
<style>
  .box{
    width: 500px;
    height: 500px;
    background-color: red;
    margin: 0 auto;
    position: relative;
  }
  .son{
    position: absolute;
    /* 方法一: */
    /*
      margin: auto auto;
      top: 0;
      left: 0;
      right: 0;
      bottom: 0;
    */

		/* 方法二: */
    left: 50%;
    margin-left: -50px;
    top: 50%;
    margin-top: -50px;
    width: 100px;
    height: 100px;
    background-color: green;
  }
</style>

<body>
    <div class="box">
        <div class="son"></div>
    </div>
</body>
(二十七)tab 切换
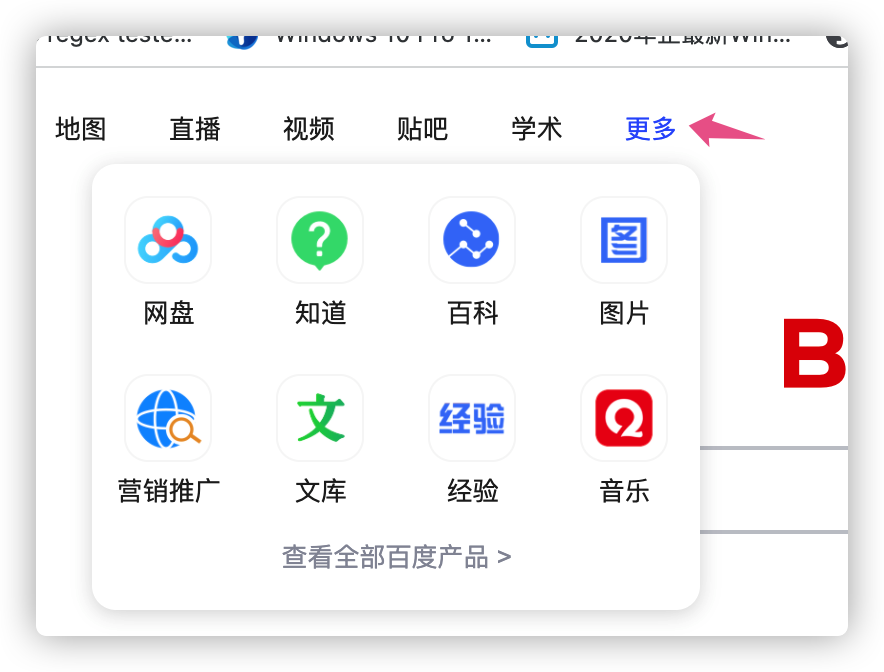
样例:可以参考 百度上方的更多 按钮
<style>
        *{
            padding: 0;
            margin: 0;

        }
        ul{
            list-style: none;
        }
        a{
            color: black;
            text-decoration: none;
        }
        .clearfix::after{
            content: "";
            display: block;
            clear: both;
        }
        li{
            float: left;
            /* margin-left: 10px; */
            padding: 5px;
            position: relative;
        }
        .item{
            width: 100px;
            height: 100px;
            background-color: yellow;
            position: absolute;
            display: none;
        }
        li:hover > .item{
            display: block;
        }
    </style>
</head>
<body>
    <ul class="clearfix">
        <li>
            <a href="#">小米手机</a>
            <div class="item">详细介绍</div>
        </li>
        <li><a href="#">小米洗衣机</a></li>
        <li><a href="#">小米汽车</a></li>

    </ul>
</body>
百度官网 利用(文档流+ 浮动+ 定位) 布局
注解:
**1.**一般网页的布局都是遵循文档流的模式

**2.**浮动 会用在 一些排列中。

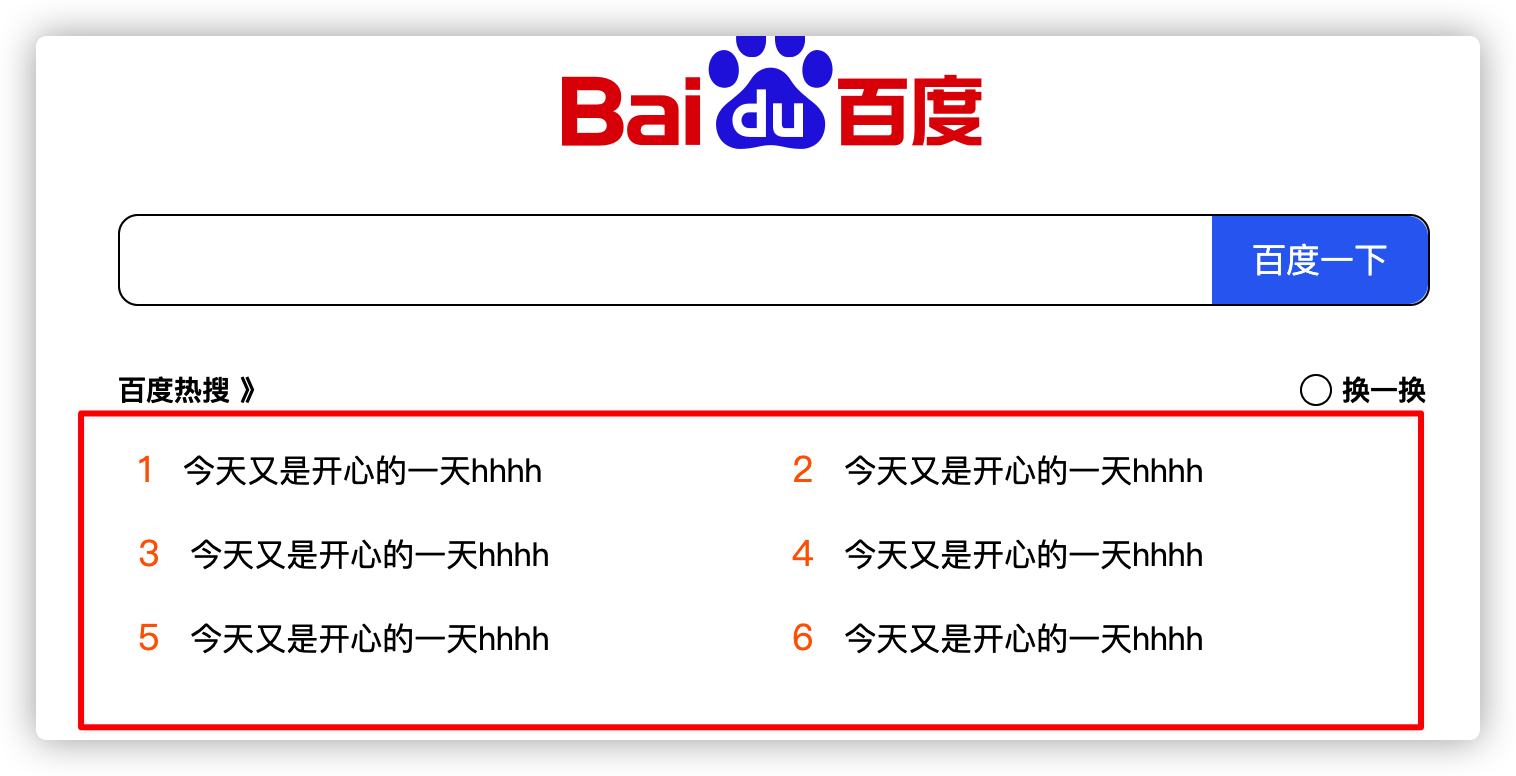
			比如 百度热搜1-6条
  1XXX.  4XXX.
  2XXX.  5XXX.
  3XXX.  6XXX.
会有一个如上的结构 做法:1-6的元素设置浮动 父元素用上面统一的方法clearfix (伪元素的方法)消除浮动
**3.**定位:

这里用到了
1.固定定位(fixed)
2.绝对定位(absolute)。—> 子元素absolute 父元素用relation (子绝父相)
用到固定定位的 是整个页面的 <u>右侧边栏</u>  和 <u>底部的简介按钮</u>。因为它们都按照。按浏览器大小 固定在页面一个位置

用到绝对定位的就是 “更多”这样的按钮,将鼠标悬浮 会浮现一个菜单

如果直接将 这个菜单的div 写入到“更多”按钮的旁边,会发现影响了其他按钮的排布

所以我们利用 绝对定位(absolute) 将此元素 和 **符合要求**的 ‘父’元素 相对定位,从而不会影响其他其他按钮的位置。【具体可以看 上面的 tab切换】 这里一般将元素的直系父元素的定位方式设置为相对 position:relation。当然也可以设置为除了static的其他定位方式。这里主要是要表达,一般把 **‘直系父亲’** 设置一个定位!!!让子元素有很好的参照。

<style>
        * {
            padding: 0;
            margin: 0;
        }

        body {
            background-color: white;
        }

        .left {
            float: left;
        }

        .right {
            float: right;
        }

        .center {
            margin: 0 auto;
        }

        .clearfix::after {
            content: '';
            display: block;
            clear: both;
        }

        ul {
            list-style: none;
        }

        input {
            background: none;
            outline: none;
            border: none;
        }

        a {
            color: black;
            text-decoration: none;
        }

        /* 开始内容 */
        .header-left div {
            float: left;
            padding: 17px;
        }

        .header-right div {
            float: right;
            /* background-color: red; */
            padding: 8px;
        }

        .header a {
            font-size: 13px;
        }

        #login {
            display: inline-block;
            text-align: center;
            width: 34px;
            padding: 0;
            background-color: rgb(48, 110, 242);
            border-radius: 3px;
            color: white;
        }

        .main-box {
            width: 654px;
            height: 510px;
            /* background-color: red; */
        }

        #logo {
            margin-top: 50px;
            width: 270px;
            height: 129px;
        }

        .main-logo {
            /* background-color: yellow; */
            text-align: center;
        }

        .main-search {
            margin-top: 15px;
            /* background-color: aqua; */
            width: 654px;
            height: 44px;
            border-radius: 10px;
            border: 1px solid black;


        }

        .main-search-btn {
            text-align: center;
            width: 108px;
            height: 44px;
            line-height: 44px;
            float: right;
            /* background-color: blue; */
            background-color: rgb(48, 110, 242);
            border-top-right-radius: 10px;
            border-bottom-right-radius: 10px;
            color: white;
            font-size: 17px;
        }

        .main-search input {

            width: 434px;
            height: 44px;
            border-top-left-radius: 10px;
            border-bottom-left-radius: 10px;
        }

        .main-hot {
            margin-top: 30px;
            width: 654px;

        }

        .hot-top {
            height: 24px;
            /* background-color: white; */
        }

        .hot-top h2 {
            height: 24px;
            /* width: 75px; */
            line-height: 24px;
            font-size: 14px;
        }

        #more-div {
            position: relative;
        }

        .more-info {
            display: none;

            right: 0;
            top: 20px;
            border-radius: 10px;
            position: absolute;
            width: 310px;

            background-color: wheat;
            /*
                x轴偏移量
                y轴偏移量
                模糊程度
                颜色
            */
            box-shadow: 0px 0px 10px black;
        }

        .more-info-box {
            margin-right: 5px;
            margin-top: 5px;
            float: left;
            width: 72px;
            height: 72px;
            background-color: red;
        }

        /* 兄弟元素 */
        #more-info-btn:hover~.more-info {
            display: block;
        }

        .circle {

            margin: 4px 5px 0 10px;

            width: 14px;
            height: 14px;
            border-radius: 50%;
            border: 1px solid black;
        }

        .hot-top-right h2 {
            float: left;
        }

        .hot-top-right div {
            float: left;
        }

        .hot-item {
            width: 306px;
            /* width: 250px; */
            height: 36px;
            /* background-color: blanchedalmond; */
        }

        .hot-content li {
            margin-right: 21px;
            margin-bottom: 6px;
            float: left;
        }

        .hot-content {
            margin-top: 10px;
        }

        .hot-item .hot-item-num {
            height: 36px;
            line-height: 36px;
            color: rgb(255, 102, 0);
            font-size: 18px;
        }

        .hot-item .hot-item-des {
            color: black;
            height: 36px;
            line-height: 36px;
            font-size: 16px;
        }

        .hot-item span {
            margin-left: 10px;
        }

        /* bottom */
        .footer {
            position: fixed;
            bottom: 0px;
        }

        .footer p {
            margin-left: 30px;
            margin-bottom: 12px;
            float: left;
            font-size: 12px;
            color: rgb(187, 187, 187);
        }

        /* side-wrapper */
        .side-wrapper {
            width: 44px;
            height: 88px;
            /* background-color: yellow; */
            position: fixed;
            right: 0;
            top: 80%;
        }

        .sider-wrapper-item {
            width: 44px;
            height: 44px;
            position: relative;
            /* background-color: wheat; */
        }

        .sider-wrapper-item:hover .side-box{
            display: block;
        }

        .sider-wrapper-item img {
            width: 44px;
            height: 44px;
        }

        .side-box{
            display: none;
            position: absolute;
            width: 100px;
            height: 100px;
            background-color: yellow;

            bottom: 10px;
            right:60px ;
        }

    </style>

<body>
    <div class="header clearfix">
        <div class="header-left left clearfix">
            <div><a href="#">新闻</a></div>
            <div><a href="#">hao123</a></div>
            <div><a href="#">直播</a></div>
            <div><a href="#">地图</a></div>
            <div><a href="#">视频</a></div>
            <div><a href="#">贴吧</a></div>
            <div><a href="#">学术</a></div>
            <div id="more-div">
                <a  id="more-info-btn" href="#">
                    更多

                    <div class="more-info clearfix">
                        <a href="#" class="more-info-box"></a>
                        <a href="#" class="more-info-box"></a>
                        <a href="#" class="more-info-box"></a>
                        <a href="#" class="more-info-box"></a>
                        <a href="#" class="more-info-box"></a>
                        <a href="#" class="more-info-box"></a>
                        <a href="#" class="more-info-box"></a>
                        <a href="#" class="more-info-box"></a>

                    </div>
                </a>

            </div>
        </div>
        <div class="header-right right clearfix">

            <div><a id="login" href="#">登陆</a></div>
            <div><a href="#">设置</a></div>
        </div>
    </div>
    <div class="main center">
        <div class="main-box center">
            <div class="main-logo">
                <img src="./BDLogo.png" alt="" id="logo">
            </div>
            <div class="main-search center clearfix">
                <input type="text" />
                <div class="main-search-btn">
                    百度一下
                </div>
            </div>
            <div class="main-hot center">
                <div class="hot-top clearfix">
                    <div class="left">
                        <h2>百度热搜 》</h2>
                    </div>
                    <div class="right hot-top-right clearfix">
                        <div class="circle"></div>

                        <h2>换一换</h2>
                    </div>
                </div>
                <div class="hot-content">
                    <ul class="clearfix">
                        <li>
                            <div class="hot-item">
                                <span class="hot-item-num">1</span>
                                <span class="hot-item-des">今天又是开心的一天hhhh</span>

                            </div>
                        </li>
                        <li>
                            <div class="hot-item">
                                <span class="hot-item-num">2</span>
                                <span class="hot-item-des">今天又是开心的一天hhhh</span>

                            </div>
                        </li>
                        <li>
                            <div class="hot-item">
                                <span class="hot-item-num">3</span>
                                <span class="hot-item-des">今天又是开心的一天hhhh</span>

                            </div>
                        </li>
                        <li>
                            <div class="hot-item">
                                <span class="hot-item-num">4</span>
                                <span class="hot-item-des">今天又是开心的一天hhhh</span>

                            </div>
                        </li>
                        <li>
                            <div class="hot-item">
                                <span class="hot-item-num">5</span>
                                <span class="hot-item-des">今天又是开心的一天hhhh</span>

                            </div>
                        </li>
                        <li>
                            <div class="hot-item">
                                <span class="hot-item-num">6</span>
                                <span class="hot-item-des">今天又是开心的一天hhhh</span>

                            </div>
                        </li>

                    </ul>
                </div>
            </div>
        </div>

    </div>
    <div class="footer">
        <p>关于百度</p>
        <p>About Baidu</p>
        <p>使用百度前必读</p>
        <p>帮助中心</p>
        <p>京公网安备11000002000001号</p>
        <p>京ICP证030173号</p>
        <p>?2021 Baidu </p>
        <p>互联网药品信息服务资格证书 (京)-经营性-2017-0020</p>
        <p>信息网络传播视听节目许可证 0110516</p>
    </div>
    <div class="side-wrapper">
        <div class="sider-wrapper-item">
            <img src="./r1.png" alt="">
            <div class="side-box">

            </div>
        </div>
        <div class="sider-wrapper-item">
            <img src="./r2.png" alt="">
        </div>
    </div>
</body>

</html>
(二十八)设置字体
@font-face {
   /* 给自定义字体 起名 */
   font-family:'myFont' ;
   /* 路径 */
   src: url("./XXXXX.ttf");
}
.box{
  font-family: "myFont"	;
}

 <div class="box">
  Hello
  我是大卫
  This is Dave
  这是我的学习笔记哈哈哈哈哈哈 很好看吧
</div>

(二十九)精灵图(雪碧图)
开局一张图:
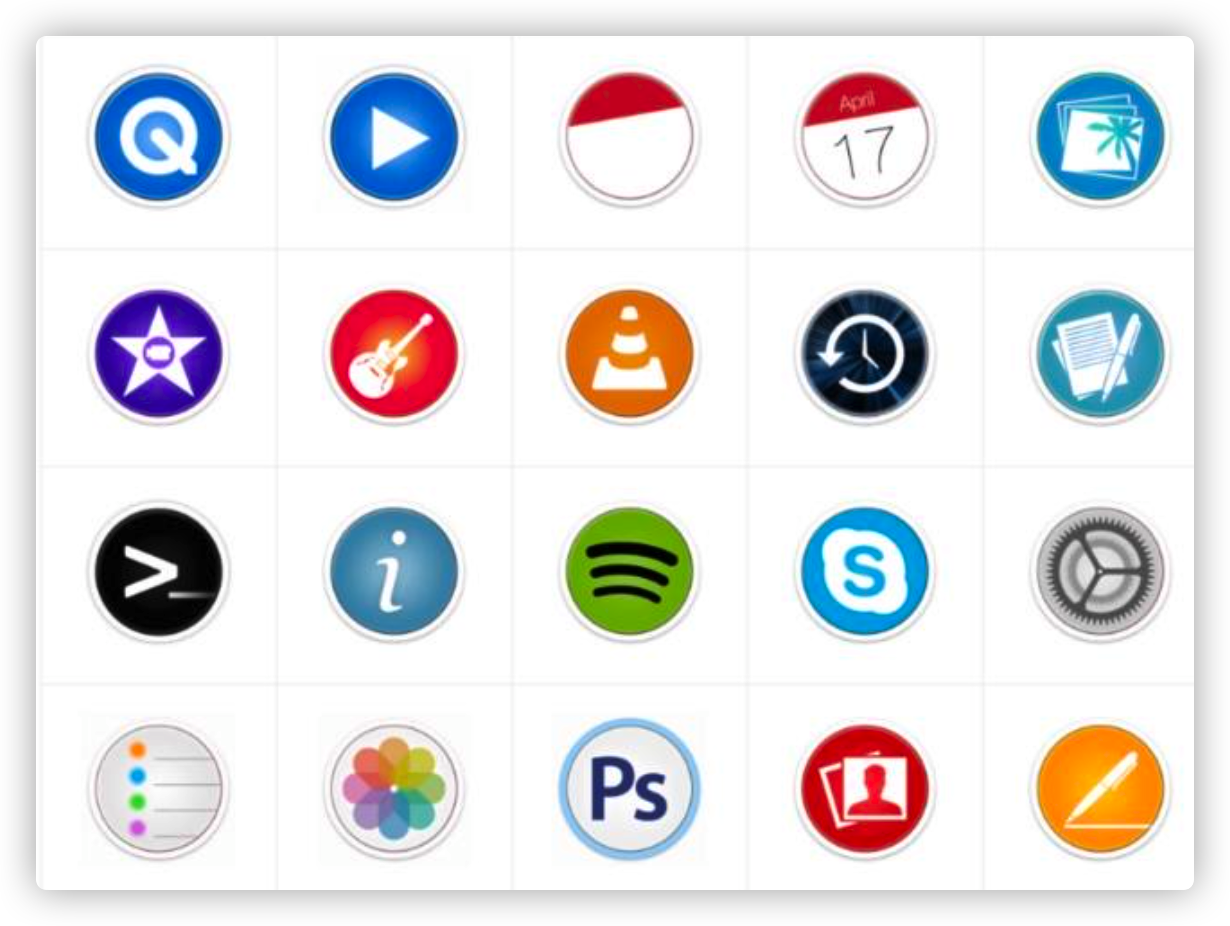
可以利用下面的网页制作:
马克鳗 高效的设计稿标注、测量工具
http://www.baidu.com/link?url=AEfe03LvT9oNZc2lxFCKLhsIji_KVCc-H7FwYCoecIBuqLqn7cmai93YfDs3BkV0
网页中 利用背景图片导入:
 <style>
  .box{
    width: 150px;
    height: 150px;
    background-image: url('./sprite.JPG');
    /* 正常是 100% 100%  然后我们根据行和列 scale */
    background-size: 500% 400%;
    background-position: -300% -200%;
  }
</style>
重点: background-size: 500% 400%;
解释:
1.因为如果**设置为100% 100%** 代表着,将jpg图片按照比**例1:1的放入到box中**

2.设置**500% 400%;** 是因为 有有**5列(x的方向) 4 行(y的方向)**--》这样就会显示**第一张图**了

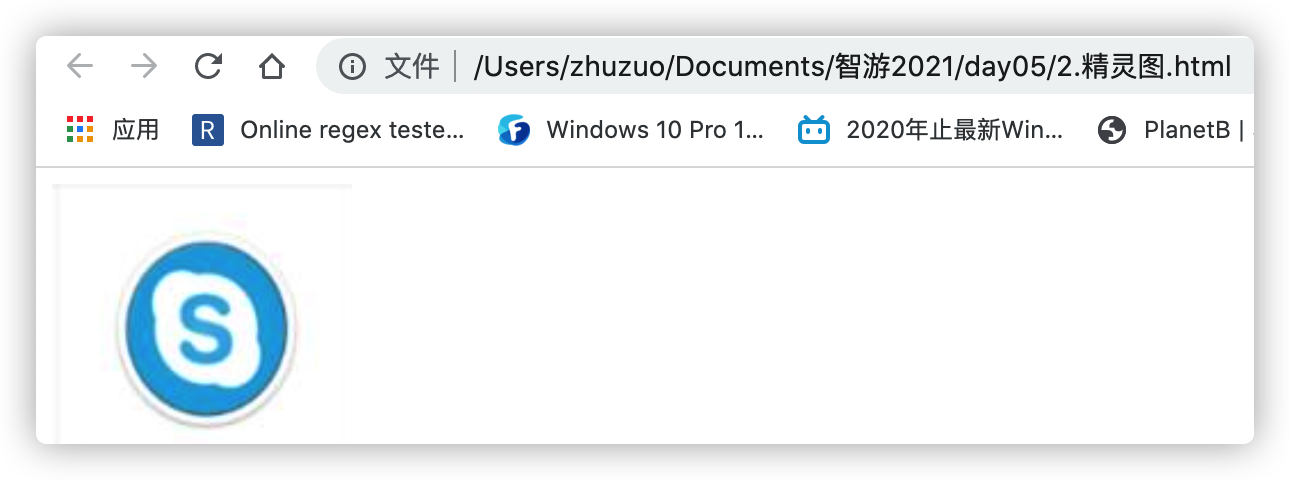
3.再通过 **background-position: -300% -200%**; 将图片**左移动3,上移动2**

4.就显示出 3行 4列的元素啦~
(三十)过度动画
添加过度动画 :
transition: x1 x2
X1: all 所有样式都生效 width:宽改变
X2: 动画持续时间 s
 <style>
        .box{
            width: 100px;
            height: 100px;
            background-color: red;
            /* 添加过度动画 */
            /* all 所有样式都生效 */
            /* 动画持续时间 s */
            /* transition: all .5s; */
            transition: width .5s;
        }
        .box:hover{
            width: 300px;
            height: 500px;
        }
</style>
</head>
<body>
    <div class="box"></div>
</body>
</html>
(三十一)关键帧动画
必要参数:
/* 自定义一个动画名称
animation-name: spin;
/* 动画时长 */
animation-duration: 1s;@keyframes spin {
**0-100%**{}}
 <style>
        .spin{
            width: 100px;
            height: 100px;
            background-color: red;
            margin: 50px auto;
            /* 关键帧动画 */
            /* animation: name duration timing-function delay iteration-count direction fill-mode; */
            /* 自定义一个动画名称 */
            animation-name: spin;
            /* 动画时长 */
            animation-duration: 1s;
            /* 动画次数 无限播放 */
            animation-iteration-count: infinite;
            /* 线性播放 */
            animation-timing-function:cubic-bezier(0.38, 0.97, 0.72, 0.7);
            /* 动画方向  reverse:反转*/
            animation-direction: reverse;

            /* animation-delay: 1s; */
        }

        /* 自己开始设置动画 */
        /* 默认将动画分成100份 */
        @keyframes spin {
            0%{
                transform: rotate(0);
            }

            100%{
                /* 360度  单位deg */
                transform: rotate(360deg);
            }
        }
</style>

<body>
    <div class="spin"></div>
</body>
(三十二)Js简介
<script>
        // js代码写在script标签下
        // js是一种弱类型
        // 定义变量
        var a=1;
        var b = true;
        var str = 'hello world!';
        console.log(str);
        if(b){
            console.log('if enter')
        }
        var sum =0;
        for(var i=0;i<100;i++){
            sum += 100;
        }
        console.log(sum)

        // 数组
        var arr = [1,2,3,4,5];
        for(var i=0;i<arr.length;i++){
            console.log(arr[i])
        }

        // 使用api 遍历 数组
        arr.forEach(function(v,i){
            console.log(v)
            console.log(i)
        })

        // 定义函数
        function f1(){
            console.log('f1')
        }

        function f2(a,b){
            return a+b;
        }

        console.log(f2(1,2))

        // 在js中 函数也是一个对象 所以可以函数嵌套函数
        function f3(){
            var a =1 ;
            function b(){
                console.log(a)
            }
        }

</script>
(三十三)Js对象
1.定义对象-字面量的方式
// 字面量的方式 定义一个对象
        var obj = {
            name:"悟空",
            age:1500,
            address:'花果山',
            nick:'美猴王',
            wife:{
                name:'紫霞仙子',
                address:'西方极乐世界'
            },
            skill:function(){
                console.log('72变!!')
            },
            // 方法简写 es6
            say(){
                console.log('俺老孙来也!!')
            },
            son:{
                name:'孙悟饭',
                age:12,
                address:'日本'
            },
            brother:{
                name:'八戒',
                wife:{
                    address:'address',
                    name:'高小姐'
                }
            }

        }
2.遍历对象
for(key in obj){
  console.log(obj[key])
}
3.调用对象中的方法
// 调用对象中的方法
obj.say();
4.增删改查
// 添加新的
obj.master ={
  name:'三藏法师',
  address:'长安'
}
// 修改
obj.name = "孙行者";
// 查询
console.log(obj.name)
console.log(obj['name'])
// 删除
delete obj.wifi
(三十四)Dom简介
如何用dom操作 style、css、获取键盘输入?
<style>
  .green{
    background-color: green;
  }
</style>

<div id="box">hello</div>
<button id="btn">button</button>
用dom操作 style、css、获取键盘输入:
<script>
    //js 操作  元素需要通过 DOM
    // DOM document object model 文档对象模型
    //浏览器会将 网页解析成一个一个对象


    //获取元素
    var box =  document.getElementById('box');
    // 通过style设置
    box.style = "color : red;width:100px;border: 1px solid black;height:100px"
    //通过class 来设置样式
    box.classList.add('green');
    console.log(box)


    var btn = document.getElementById('btn');
    btn.onclick = function(){
      alert('click!')
    }


    // 键盘时间
    // 系统会自动传入一个事件对象
    document.onkeydown = function(e){
      console.log(e.keyCode)
    }

    //dir 将对象的目录结构打印出来
    console.dir(document)
</script>
(三十五)jQuery模拟请求
$.get 请求web数据
//参数1请求的url路径
// 参数2 请求成功后 的回掉函数(成功后回掉)
<div id="box">
    mycontent
</div>

<!-- 从外部引入 js -->
<!-- 引入的script里面不要写代码  会忽略! -->
<script src="./zepton.js"></script>
<script>
  // jQuery 随用随找
  //jQuery 可以链式调用(返回的也是一个jQuery对象)
  console.log($)

  console.log( $('#box'))
  $('#box').css({
    'color':'red',
    'font-size':'22px'
  })

  var obj ={
    name:"孙悟空",
    age:1500
  }

  // 发送 ajax Asynchronous Javascript And XML
  // 现在使用的都是 json
  var res1 = JSON.stringify(obj);
  console.log(res1)

  // get  请求
  //参数1请求的url路径
  // 参数2 请求成功后 的回掉函数(成功后回掉)
  // ``  反撇号 字符串模版(可以在字符串中插入变量)
  $.get(`https://autumnfish.cn/artist/list?type=1&area=96&initial=b`,function(res){
    console.log(res)
  })
</script>
网易云 音乐案例
<!DOCTYPE html>
<html lang="en">
<head>
    <meta charset="UTF-8">
    <meta http-equiv="X-UA-Compatible" content="IE=edge">
    <meta name="viewport" content="width=device-width, initial-scale=1.0">
    <title>网易云 音乐搜索</title>
    <style>
        .header{
            width: 300px;
            margin:0 auto;
        }
        img{
            width: 100px;
            height: 100px;
        }
        .item{
            text-align: center;
            width: 150px;
            height: 150px;
            padding-top: 10px;
            border-radius: 10px;
            box-shadow:0 0 10px black;
        }
        .box{

            width: 1000px;
            margin: 20px auto;
            border: 1px solid black;
            /* 弹性布局 */
            display: flex;
            justify-content: space-around;
            /* 默认不会折行 */
            flex-wrap: wrap;
        }
    </style>
</head>
<body>

    <div class="header">
        <button type="-1">全部歌手</button>
        <button type="1">男歌手</button>
        <button type="2">女歌手</button>
        <button type="3">组合</button>
    </div>
    <div class="box"></div>
</body>
<script src="./zepton.js"></script>
<script>
    //当点击按钮  更具type类型请求
    $('button').live('click',function(){
        console.log($(this))   //.get(0) 返回的是dom对象
        //attr 获取属性值
        var type = $(this).attr("type");
        console.log(type)
        $.get(`https://autumnfish.cn/artist/list?type=${type}&area=96&initial=b`,function(res){
            console.log(res)
            var arr = res.artists
            // 将数据渲染到页面中
            // 使用字符串模板拼接
            var str = '';
            for(let i=0;i<arr.length;i++){
                str += `<div class="item">
                    <img src=${arr[i].picUrl}>
                    <p>${arr[i].name}</p>
                    </div>
                `;
            $('.box').html(str)
            }

        })


    })
</script>
</html>
四个实用总结
bolck类型 居中 定宽 margin:0 auto
inline类型 居中 text-align:center
水平+垂直 居中:子绝绝对 父相对
inline元素 --》需要改display 才能改width和height
杂
box-shadow:
 /*
  x轴偏移量
  y轴偏移量
  模糊程度
  颜色
*/
box-shadow: 0px 0px 10px black;
span:
??: span 要改 display 才能设置宽 高 !!!!!