12. 箭头函数
- 基本使用
<script>
const a = function () {
}
const obj = {
b(){
}
}
const c = ()=>{
}
</script>
- 参数和返回值
<script>
const sum = (num1,num2) => {
return num1 + num2
}
const power = num => {
return num * num
}
const test = ()=> {
console.log('hello werld')
}
const mul = (num1,num2) => num1 * num2
console.log(mul(10, 10))
</script>
- 箭头函数中this的使用
<script>
const obj = {
a(){
setTimeout(function () {
console.log(this)
})
setTimeout(()=>{
console.log(this)
})
}
}
</script>
13. vue-router
- vue-router的使用步骤
- 安装vue-router。npm install vue-router --save
- 在模块化工程中使用它
- 导入路由对象,并且调用Vue.use(VueRouter)
- 创建路由实例,并且传入路由映射配置
- 在Vue实例中挂在创建的路由实例 - 使用vue-router的步骤
- 创建路由组件
- 配置路由映射:组件和路径映射关系
- 使用路由:通过<router-link>和<router-view>
- router-link和router-view
- <router-link>:该标签是一个vur-router已经内置的组件,它会被渲染成一个<a>标签。
- <router-view>:该标签会根据当前的路径,动态渲染出不同的组件
- 网页的其他内容,比如顶部的标签/导航或者底部的一些版权信息等会和<router-view>处于同一个等级
- 在路由切换时,切换的是<reouter-view>挂载的组件,其他内容不会发生改变
- 代码

import Vue from 'vue'
import App from './App'
import router from './router'
Vue.config.productionTip = false
new Vue({
el: '#app',
router,
render: h => h(App)
})
import VuerRouter from 'vue-router'
import Vue from 'vue'
const Home = () => import('../components/Home')
const About = () => import('../components/About')
const User = () => import('../components/User')
const HomeNews = () => import('../components/HomeNews')
const HomeMessage = () => import('../components/HomeMessage')
const Profile = () => import('../components/Profile')
Vue.use(VuerRouter)
const routes = [
{
path: '',
redirect: '/home'
},
{
path: '/home',
component: Home,
meta: {
title: 'Home'
},
children: [
{
path: '',
redirect: 'news'
},
{
path: 'news',
component: HomeNews
},
{
path: 'message',
component: HomeMessage
}
]
},
{
path: '/about',
component: About,
meta: {
title: 'About'
}
},
{
path: '/user/:userId',
component: User,
meta: {
title: 'User'
}
},
{
path: '/profile',
component: Profile,
meta: {
title: 'Profile'
}
}
]
const router = new VuerRouter({
routes,
mode: 'history'
})
router.beforeEach(function (to,from,next) {
document.title = to.matched[0].meta.title
next()
})
router.afterEach((to,from) => {
})
export default router
<template>
<div id="app">
<router-link to="/home" tag="button" replace>首页</router-link>
<router-link to="/about" repalce>关于</router-link>
<router-link :to="'/user/'+userId">用户</router-link>
<router-link :to="{path: '/profile',query: {name: 'why',age: 18,height: 1.88}}">档案</router-link>
<button @click="userClick">用户2</button>
<button @click="profileClick">档案2</button>
<keep-alive exclude="Profile,User">
<router-view></router-view>
</keep-alive>
</div>
</template>
<script>
export default {
name: 'App',
data(){
return{
userId: 'lisi'
}
},
methods: {
homeClick() {
this.$router.replace('/home')
},
aboutClick() {
this.$router.replace('/about')
},
userClick() {
this.$router.push('/user/'+this.userId)
},
profileClick() {
this.$router.push({
path: '/profile',
query: {
name: 'test',
age: 18,
height: 1.88
}
})
}
}
}
</script>
<style>
.router-link-active {
color: #ff0000;
}
</style>
<template>
<div>
<h2>HOME..............</h2>
<router-link to="/home/news">新闻</router-link>
<router-link to="/home/message">消息</router-link>
<router-view></router-view>
</div>
</template>
<script>
export default {
name: 'Home',
data() {
return {
path: '/home/news'
}
},
created () {
console.log('homeCreated.......')
},
destroyed () {
console.log('homeDestroyed....')
},
activated () {
this.$router.push(this.path)
},
beforeRouteLeave(to,from,next) {
this.path = this.$route.path
next()
}
}
</script>
<style scoped>
</style>
<template>
  <div>
    <h2>ABOUT............</h2>
  </div>
</template>

<script>
  export default {
    name: 'About'
  }
</script>

<style scoped>

</style>
<template>
  <div>
    <ul>
      <li>消息1</li>
      <li>消息2</li>
      <li>消息3</li>
    </ul>
  </div>
</template>

<script>
  export default {
    name: 'HomeMessage'
  }
</script>

<style scoped>

</style>
<template>
  <div>
    <ul>
      <li>新闻1</li>
      <li>新闻2</li>
      <li>新闻3</li>
    </ul>
  </div>
</template>

<script>
  export default {
    name: 'HomeNews'
  }
</script>

<style scoped>

</style>
<template>
<div>
<h2>User.........</h2>
<h2>{{userId}}</h2>
<h2>{{$route.params.userId}}</h2>
</div>
</template>
<script>
export default {
name: 'User',
computed: {
userId() {
return this.$route.params.userId
}
}
}
</script>
<style scoped>
</style>
<template>
  <div>
    <h2>profile.........</h2>
    <h2>{{$route.query.name}}</h2>
    <h2>{{$route.query.age}}</h2>
    <h2>{{$route.query.height}}</h2>
  </div>
</template>

<script>
  export default {
    name: 'Profile'
  }
</script>

<style scoped>

</style>
14. Promise
- Promise的作用
- 回调地狱,代码难以维护, 常常第一个的函数的输出是第二个函数的输入这种现象
- promise可以支持多个并发的请求,获取并发请求中的数据
- 这个promise可以解决异步的问题,本身不能说promise是异步的
- Promise包含两个参数resolve和reject
- resolve :异步操作执行成功后的回调函数
- reject:异步操作执行失败后的回调函数
- Promise的基本使用
<script>
new Promise((resolve,reject)=>{
setTimeout(()=>{
resolve()
},1000)
}).then(()=>{
console.log('hello resolve')
return new Promise((resolve,reject)=>{
setTimeout(()=>{
resolve()
},1000)
})
}).then(()=>{
console.log('hello vue')
return new Promise((resolve,reject)=>{
setTimeout(()=>{
resolve()
},1000)
})
}).then(()=>{
console.log('hello python')
})
new Promise((resolve,reject)=>{
setTimeout(()=>{
resolve('testData')
reject('error message')
},1000)
}).then((data)=>{
console.log(data)
}).catch((data)=>{
console.log(data)
})
</script>
- Promise中的all
<script>
  Promise.all([
      new Promise((resolve,reject)=>{
        $.ajax({
          url: '',
          success: function (data) {
            resolve(data)
          }
        })
      }),
      new Promise((resolve,reject)=>{
        $.ajax({
          url: '',
          success: function (data) {
            resolve(data)
          }
        })
      })
  ]).then(res=>{
    console.log(res)
  })

</script>
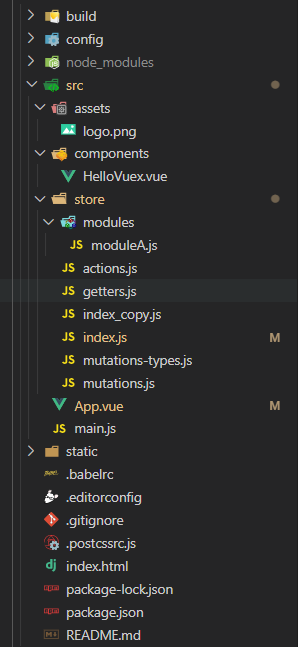
15. Vuex
- vuex的简单说明
- 为Vue.js应用程序开发的状态管理模式
- 采用集中式存储管理应用的所有组件的状态
- 状态管理的说明
- 可以简单的将其看成把需要多个组件共享的变量全部存储到一个对象里面。
- 将这个对象放在顶层的Vue实例中,让其他组件可以使用
- 代码介绍
import Vue from 'vue'
import App from './App'
import store from './store'
Vue.config.productionTip = false
new Vue({
el: '#app',
store,
render: h => h(App)
})
import Vue from 'vue'
import Vuex from 'vuex'
import {INCREMENT} from './mutations-types'
Vue.use(Vuex)
const moduleA = {
state: {
name: 'zh'
},
mutations: {
updateName(state,payload) {
state.name = payload
}
},
actions: {
aUpdateName(context) {
setTimeout(()=>{
context.commit('updateName','li')
},1000)
}
},
getters: {
fullname(state) {
return state.name + '1111'
},
fullname2(state,getters) {
return getters.fullname + '2222'
},
fullname3(state,getters,rootState) {
return getters.fullname2 + rootState.counter
}
}
}
const store = new Vuex.Store({
state: {
counter: 10,
students: [
{id:1,name:'w',age:18},
{id:2,name:'h',age:19},
{id:3,name:'y',age:20}
]
},
mutations: {
[INCREMENT](state) {
state.counter++
},
decrement(state) {
state.counter--
},
incrementCount(state,count) {
state.counter += count
},
addStudent(state,stu) {
state.students.push(stu)
}
},
actions: {
aUpdateInfo(context,payload) {
return new Promise((resolve, reject) => {
setTimeout(()=>{
context.commit('addStudent')
console.log(payload())
resolve()
},1000)
})
}
},
getters: {
powerCounter(state) {
return state.counter * state.counter
},
more20stu(state) {
return state.students.filter(s => s.age >= 20)
},
more20stuLen(state,getters) {
return getters.more20stu.length
},
moreAgeStu(state) {
return function (age) {
return state.students.filter(s => s.age>age)
}
}
},
modules: {
a: moduleA
}
})
export default store
<template>
<div id="app">
<h2>--------APP内容-----------</h2>
<h2>{{$store.state.counter}}</h2>
<button @click="addition">+</button>
<button @click="subtraction">-</button>
<button @click="addCount(5)">+5</button>
<button @click="addCount(10)">+10</button>
<button @click="addStudent">添加学生</button>
<h2>---------Hello Vuex内容------</h2>
<hello-vuex></hello-vuex>
<h2>App内容:getters相关信息</h2>
<h2>{{$store.getters.powerCounter}}</h2>
<h2>{{$store.getters.more20stu}}</h2>
<h2>{{$store.getters.more20stuLen}}</h2>
<h2>{{$store.getters.moreAgeStu(18)}}</h2>
<h2>App内容:modules中的内容</h2>
<h2>{{$store.state.a.name}}</h2>
<h2>{{$store.getters.fullname}}</h2>
<h2>{{$store.getters.fullname2}}</h2>
<h2>{{$store.getters.fullname3}}</h2>
<button @click="updateName">修改名字</button>
<button @click="asyncUpdateName">异步修改名字</button>
</div>
</template>
<script>
import HelloVuex from './components/HelloVuex'
import {INCREMENT} from './store/mutations-types'
export default {
name: 'App',
data() {
return {
message: 'vuex'
}
},
components: {
HelloVuex
},
methods: {
addition() {
this.$store.commit(INCREMENT)
},
subtraction() {
this.$store.commit('decrement')
},
addCount(count) {
this.$store.commit('incrementCount',count)
},
addStudent() {
const stu = {id:4,name:'why',age:21}
this.$store.dispatch('aUpdateInfo','我是携带的信息')
.then(res => {
console.log("里面提交完成了");
})
},
updateName(){
this.$store.commit('updateName','ang')
},
asyncUpdateName() {
this.$store.dispatch('aUpdateName')
}
}
}
</script>
<style>
</style>
<template>
  <div>
    <h2>{{$store.state.counter}}</h2>
  </div>
</template>

<script>
  export default {
    name: 'HelloVuex'
  }
</script>

<style scoped>

</style>
export const INCREMENT = 'increment'
- actions.js和getters.js和mutation.js是将index.js中单独抽离出来,然后用index_copy.js来整合
import Vue from 'vue'
import Vuex from 'vuex'
import mutations from './mutations'
import actions from './actions'
import getters from './getters'
import moduleA from './modules/moduleA'
Vue.use(Vuex)
const state = {
counter: 10,
students: [
{id:1,name:'w',age:18},
{id:2,name:'h',age:19},
{id:3,name:'y',age:20}
]
}
const store = new Vuex.Store({
state,
mutations,
actions,
getters,
modules: {
a: moduleA
}
})
export default store
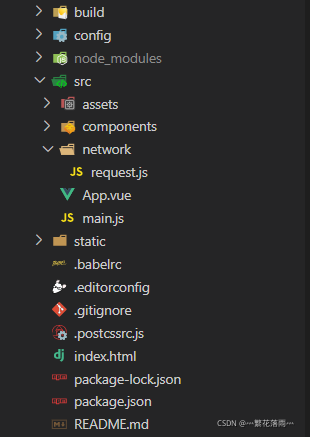
16. axios
- 简单说明
- axios主要是用于向后台发起请求的,还有在请求中做更多是可控功能。基于Promise语法的。
- 基本使用
import Vue from 'vue'
import App from './App'
import axios from 'axios'
Vue.config.productionTip = false
new Vue({
el: '#app',
render: h => h(App)
})
import {request} from './network/request'
request({
url: '/home'
}).then(res => {
}).catch(err => {
})
import axios from 'axios'
export function request (config) {
const instance = axios.create({
baseURL: 'http://www.baidu.com',
timeout: 5000
})
instance.interceptors.request.use(config => {
console.log(config)
return config
},err => {
console.log(err)
})
instance.interceptors.response.use(res => {
console.log(res)
return res.data
},err => {
console.log(err)
})
return instance(config)
}
<template>
  <div id="app">
  </div>
</template>

<script>

  export default {
    name: 'App',
    components: {

    }
  }

</script>

<style>

</style>
|