059 品牌管理-增删改查
品牌表:pms_brand
1?创建品牌管理菜单
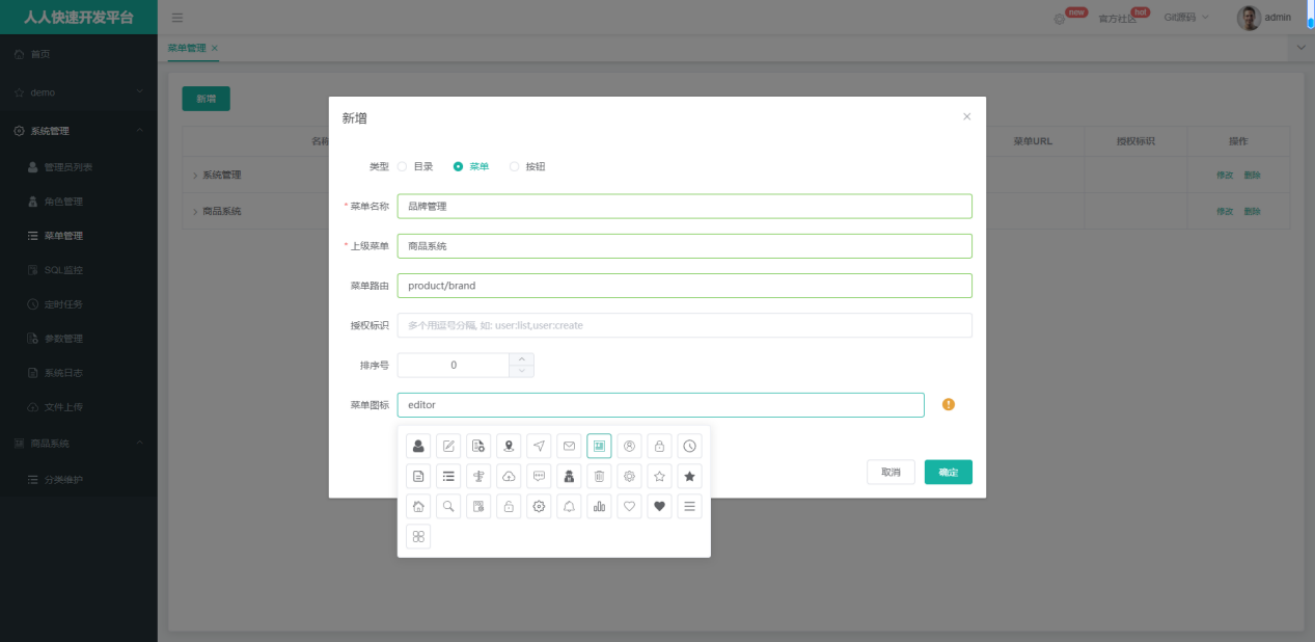
2 前端代码
在之前使用renren-generator生成的代码中,包含了一些.vue文件。
在gulimall-product/src/main/resources/src/views/modules/product/路径下,可以找到品牌管理的相关代码。
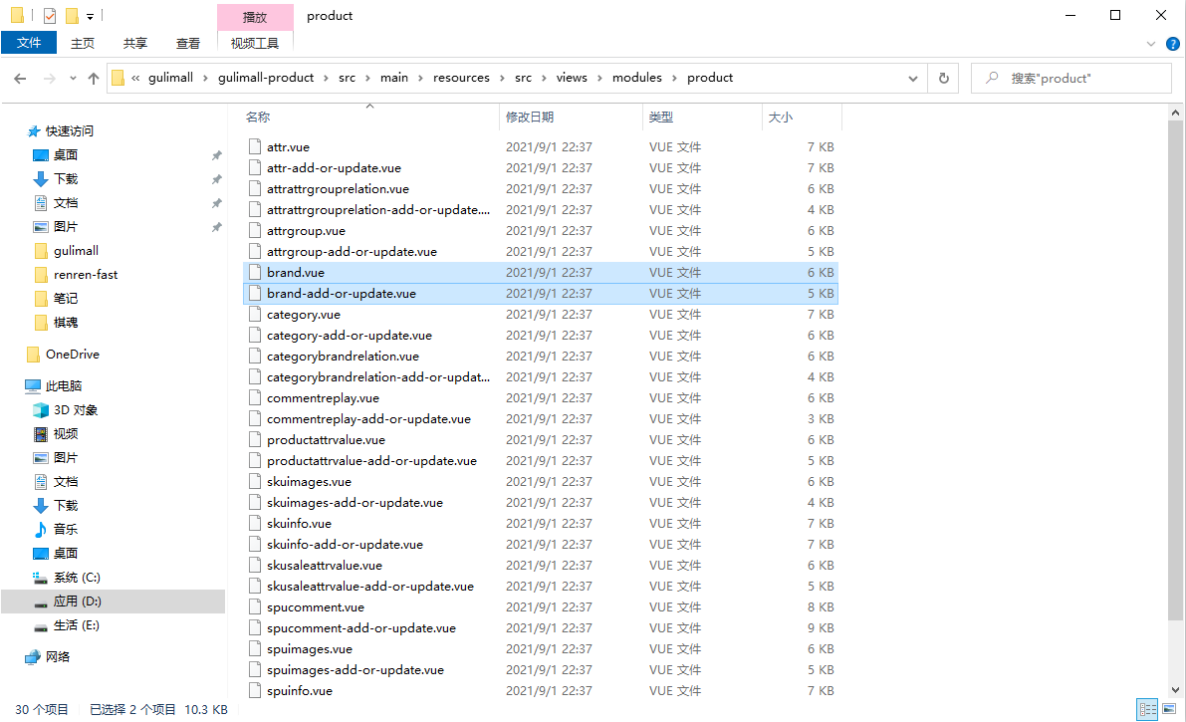
将brand.vue和brand-add-or-update.vue两个文件复制到前端项目renren-fast-vue的src/views/modules/product/路径下。
重启renren-fast-vue项目(ctrl c停止运行项目)?,品牌管理页面出现内容。
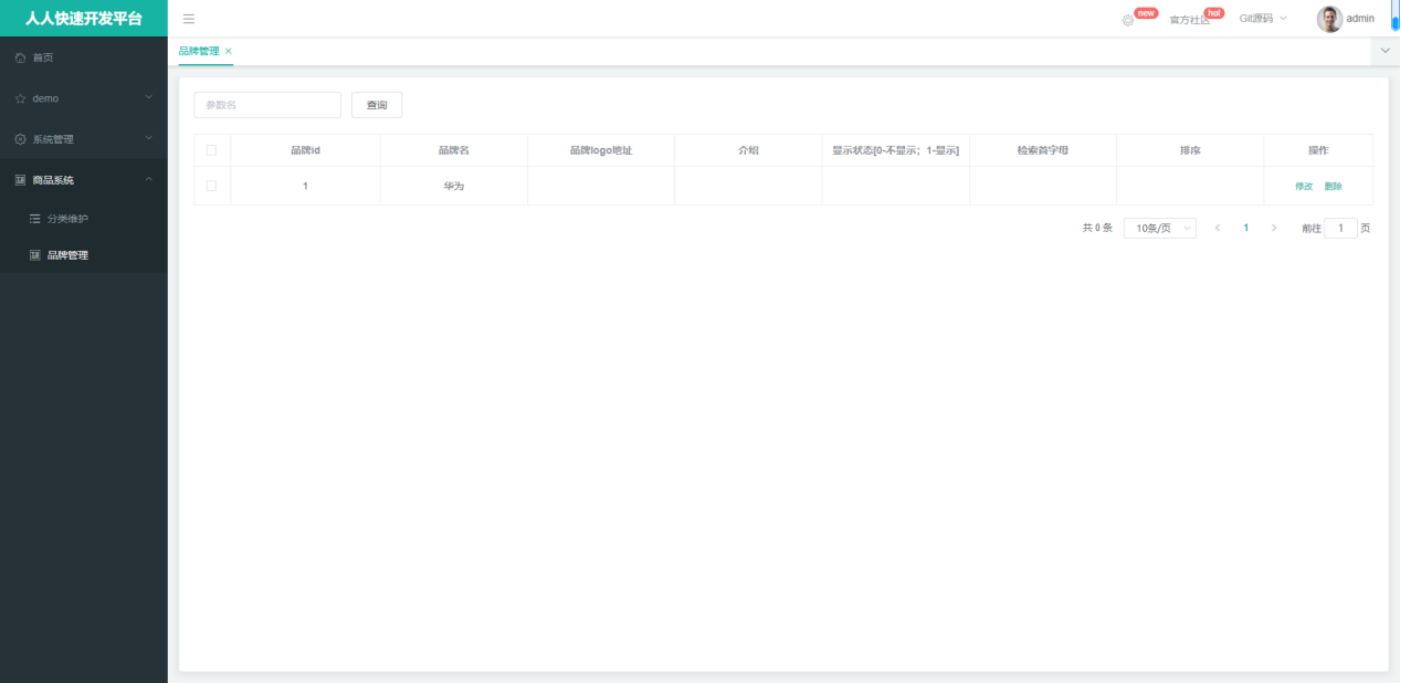
此时在品牌管理页面上并没有新增和批量删除的接口,实际上代码里是有的,只是因为权限问题没有显示出来。?
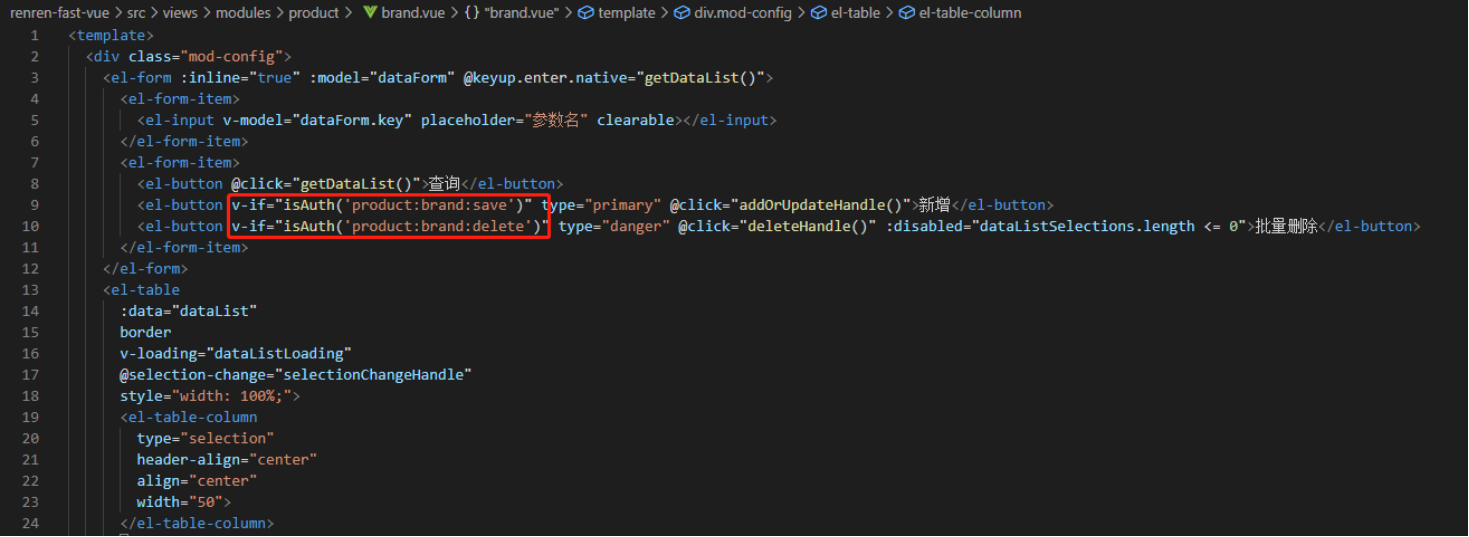
修改src/utils/index.js文件中的isAuth方法,使权限总是为true。

刷新页面,页面上出现新增和批量删除接口。
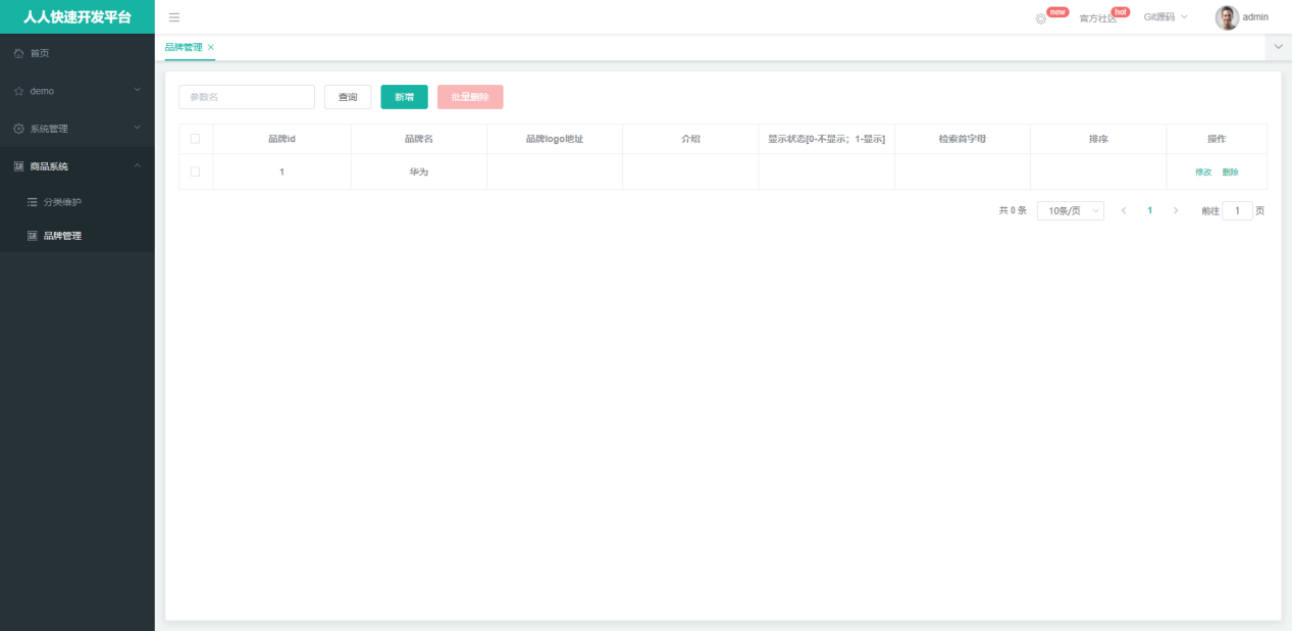
简单测试了一下,生成代码的新增、修改、删除功能都没问题。
060 品牌管理-使用开关表示布尔值
品牌的显示状态字段值为0或1,可以使用ElmentUI中的Switch开关组件来表示。

代码见?069?品牌管理-完整前端代码
061-064 品牌管理-云存储的开通与使用
新增或修改品牌时,我们希望将品牌logo地址一栏改为直接上传文件。
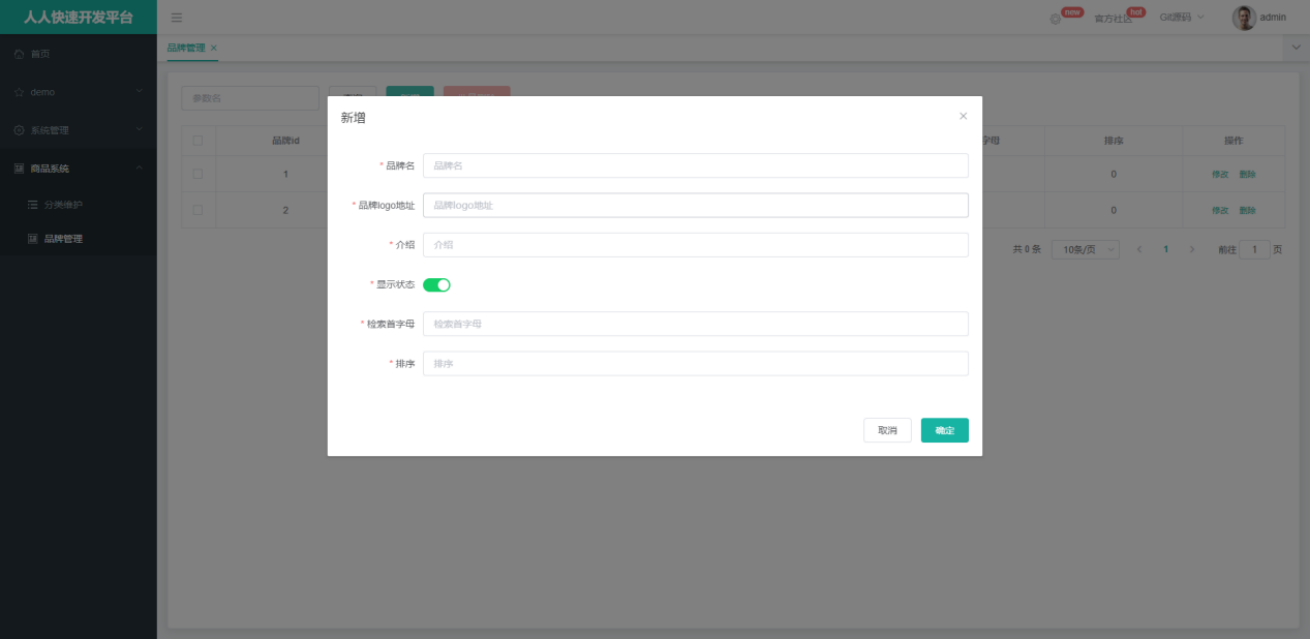
上传文件的存储架构为:

本项目使用阿里云对象存储(OSS)来实现。?
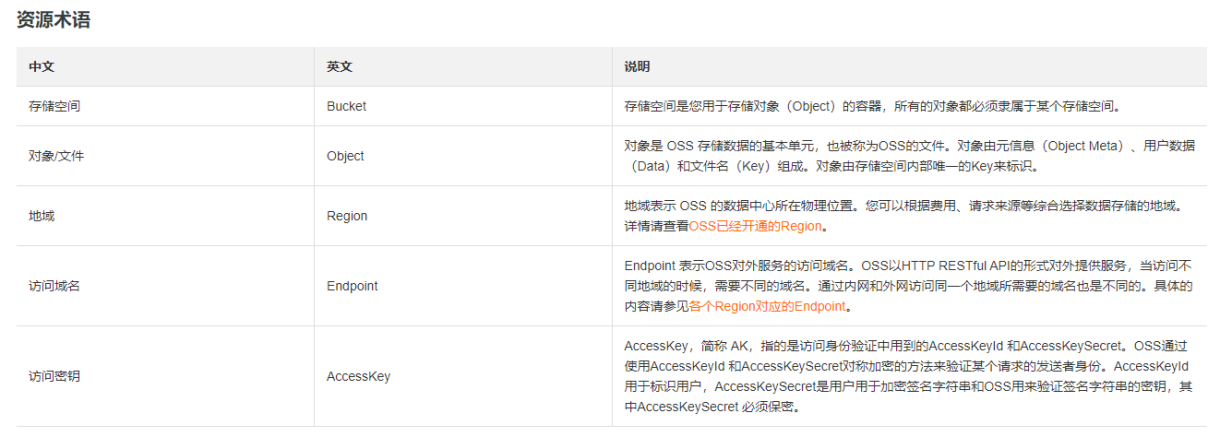
1 准备工作
OSS服务是一个第三方服务,我们以后可能会用到许多第三方服务,所以可以创建一个微服务gulimall-third-party来整合。
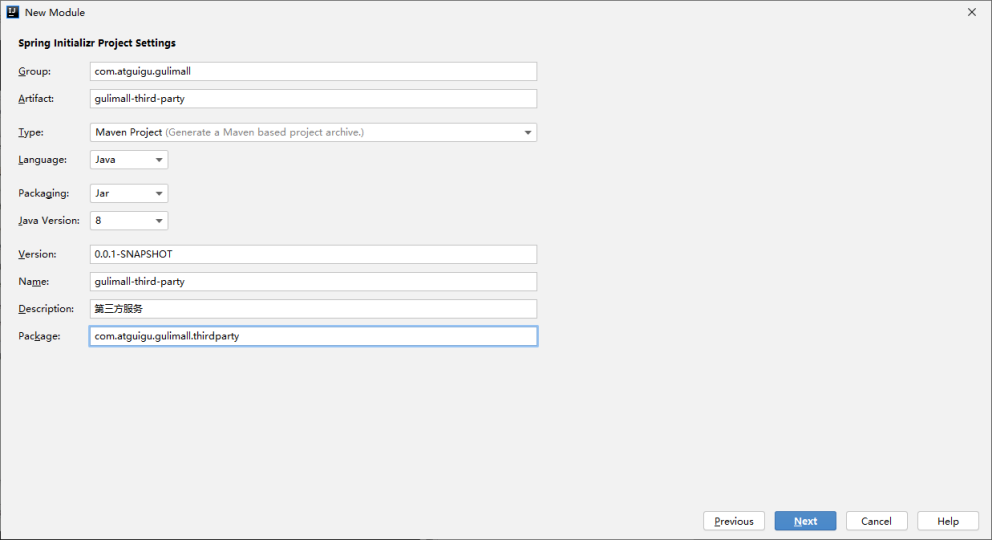

在pom.xml文件中添加对gulimall-common的依赖:
<dependency>
????<groupId>com.atguigu.gulimall</groupId>
????<artifactId>gulimall-common</artifactId>
????<version>0.0.1-SNAPSHOT</version>
????<exclusions>
????????<exclusion>
????????????<groupId>com.baomidou</groupId>
????????????<artifactId>mybatis-plus-boot-starter</artifactId>
????????</exclusion>
????</exclusions>
</dependency>
然后添加对OSS服务的依赖:
<dependency>
????<groupId>com.alibaba.cloud</groupId>
????<artifactId>spring-cloud-alicloud-oss</artifactId>
????<version>2.2.0.RELEASE</version>
</dependency>
包括dependencyManagement部分:
<dependency>
????<groupId>com.alibaba.cloud</groupId>
????<artifactId>spring-cloud-alibaba-dependencies</artifactId>
????<version>2021.1</version>
????<type>pom</type>
????<scope>import</scope>
</dependency>
在gulimall-third-party/src/main/resources/路径下添加配置文件:
bootstrap.properties
spring.application.name=gulimall-third-party
spring.cloud.nacos.config.server-addr=127.0.0.1:8848
application.yml
spring:
  cloud:
    nacos:
      discovery:
        server-addr: 127.0.0.1:8848
  application:
    name: gulimall-third-party

server:
  port: 30000
在gulimall-third-party/src/main/java/com/atguigu/gulimall/thirdparty/GulimallThirdPartyApplication类上添加注解:
@EnableDiscoveryClient
2 调用OSS服务
开通OSS服务后,创建一个bucket。(bucket名称自拟)
 在页面右上角的菜单中选择AccessKey管理,创建一个用户。
??????

?给创建的用户添加管理OSS的权限。
然后在gulimall-third-party/src/main/resources/application.yml中添加配置:(其中access-key和secret-key是创建用户时生成的)
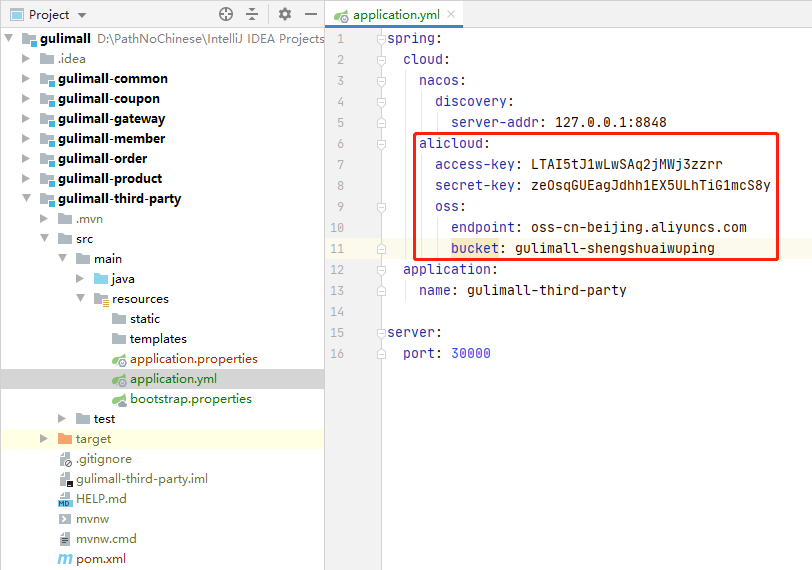
我们有许多种方式可以将文件提交给OSS,最终选择的方案是服务端签名后直传。
在gulimall-third-party/src/main/java/com/atguigu/gulimall/thirdparty/路径下创建目录controller/,并在该目录中创建OssController类(参照官方文档)。
package com.atguigu.gulimall.thirdparty.controller;

import com.aliyun.oss.OSS;
import com.aliyun.oss.common.utils.BinaryUtil;
import com.aliyun.oss.model.MatchMode;
import com.aliyun.oss.model.PolicyConditions;
import org.springframework.beans.factory.annotation.Autowired;
import org.springframework.beans.factory.annotation.Value;
import org.springframework.web.bind.annotation.RequestMapping;
import org.springframework.web.bind.annotation.RestController;

import java.text.SimpleDateFormat;
import java.util.Date;
import java.util.LinkedHashMap;
import java.util.Map;

@RestController
public class OssController {

    @Autowired
    OSS ossClient;

    @Value("${spring.cloud.alicloud.oss.endpoint}")
    private String endpoint;

    @Value("${spring.cloud.alicloud.oss.bucket}")
    private String bucket;

    @Value("${spring.cloud.alicloud.access-key}")
    private String accessId;

    @RequestMapping("/oss/policy")
    public R policy() {
        String host = "https://" + bucket + "." + endpoint; // host的格式为 bucketname.endpoint
        // callbackUrl为上传回调服务器的URL,请将下面的IP和Port配置为您自己的真实信息。
        //String callbackUrl = "http://88.88.88.88:8888";
        String format = new SimpleDateFormat("yyyyMMdd").format(new Date());
        String dir = format + "/"; // 用户上传文件时指定的前缀。

        Map<String, String> respMap = null;
        try {
            long expireTime = 30;
            long expireEndTime = System.currentTimeMillis() + expireTime * 1000;
            Date expiration = new Date(expireEndTime);
            // PostObject请求最大可支持的文件大小为5 GB,即CONTENT_LENGTH_RANGE为5*1024*1024*1024。
            PolicyConditions policyConds = new PolicyConditions();
            policyConds.addConditionItem(PolicyConditions.COND_CONTENT_LENGTH_RANGE, 0, 1048576000);
            policyConds.addConditionItem(MatchMode.StartWith, PolicyConditions.COND_KEY, dir);

            String postPolicy = ossClient.generatePostPolicy(expiration, policyConds);
            byte[] binaryData = postPolicy.getBytes("utf-8");
            String encodedPolicy = BinaryUtil.toBase64String(binaryData);
            String postSignature = ossClient.calculatePostSignature(postPolicy);

            respMap = new LinkedHashMap<String, String>();
            respMap.put("accessid", accessId);
            respMap.put("policy", encodedPolicy);
            respMap.put("signature", postSignature);
            respMap.put("dir", dir);
            respMap.put("host", host);
            respMap.put("expire", String.valueOf(expireEndTime / 1000));
            // respMap.put("expire", formatISO8601Date(expiration));
        } catch (Exception e) {
            // Assert.fail(e.getMessage());
            System.out.println(e.getMessage());
        } finally {
            ossClient.shutdown();
        }
        return R.ok().put("data", respMap);
    }
}
启动gulimall-third-party服务。
访问:http://localhost:30000/oss/policy

- accessid:访问ID
- policy:策略
- signature:签名
- dir:上传到的文件夹
- host:上传到的主机地址
- expire:签名过期时间
配置网关:gulimall-gateway/src/main/resources/application.yml

- id: third_party_route
  uri: lb://gulimall-third-party
  predicates:
    - Path=/api/thirdparty/**
  filters:
    - RewritePath=/api/thirdparty/?(?<segment>.*), /$\{segment}
重启gulimall-gateway服务。
访问:http://localhost:88/api/thirdparty/oss/policy

后端开发完成。?
3 前端部分
前端文件:百度网盘:提取码2239
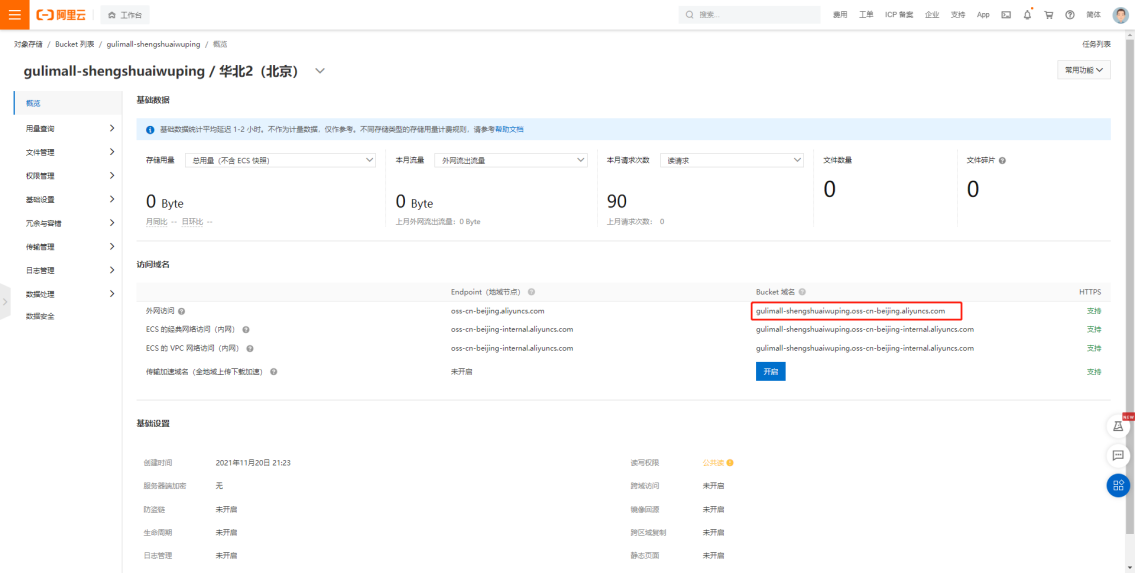
将upload文件夹放到renren-fast-vue/src/components/路径下。然后将multiUpload.vue和singleUpload.vue两个文件中的action属性改为自己的 bucket域名(前面加http://)。
修改renren-fast-vue/src/views/modules/product/brand-add-or-update.vue文件,将品牌logo地址的input输入框改为上传按钮。
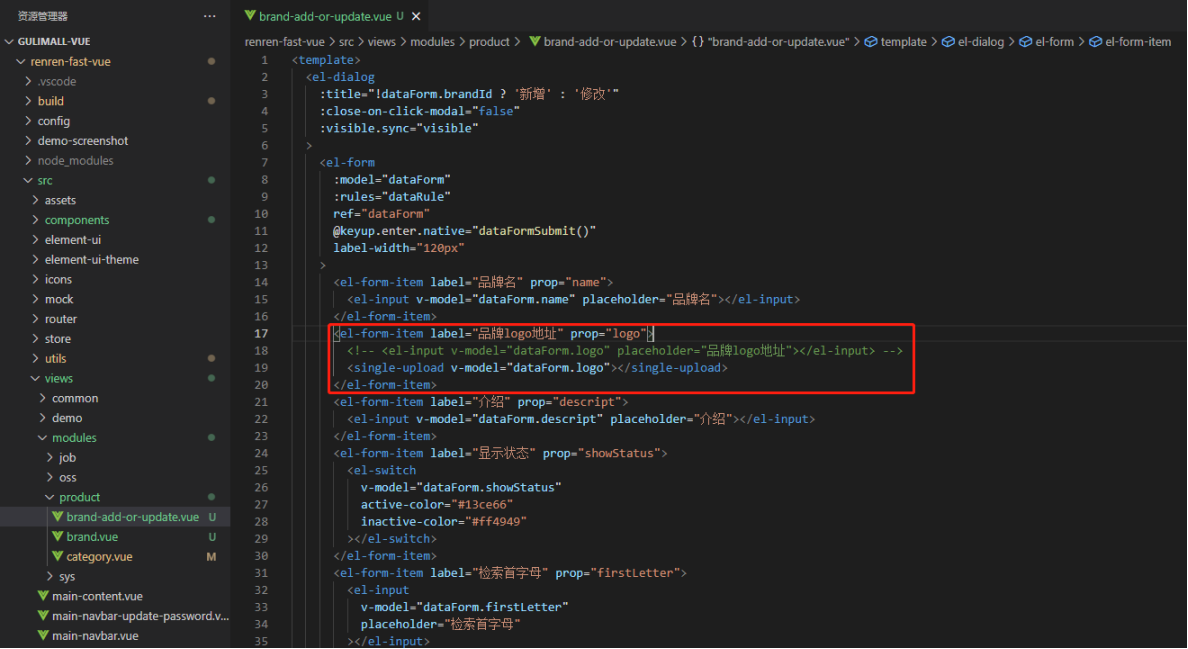
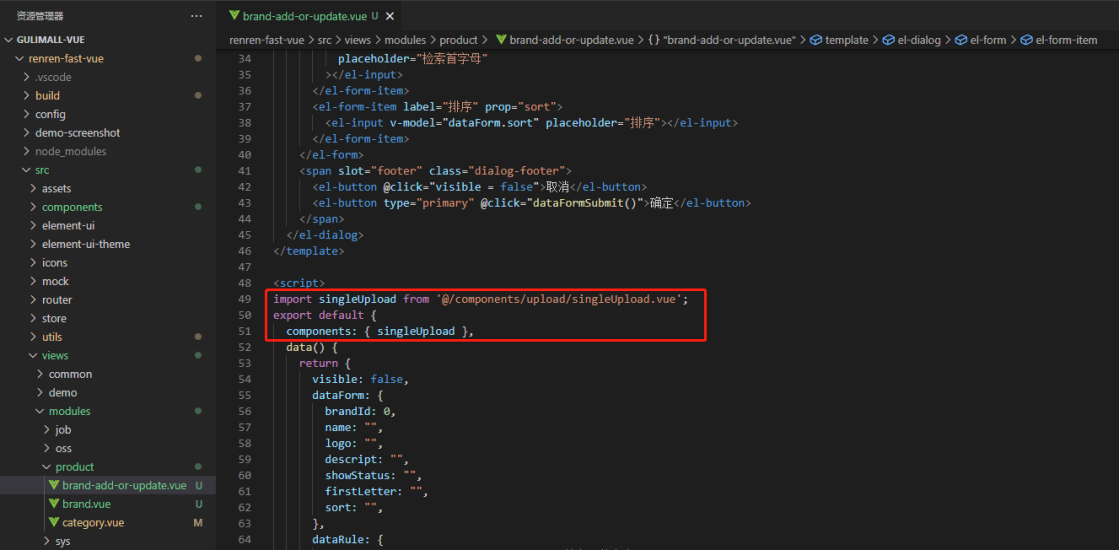
重启前端项目。进入品牌管理页面,选择新增或修改,发现品牌logo地址输入框已经变成了上传按钮。

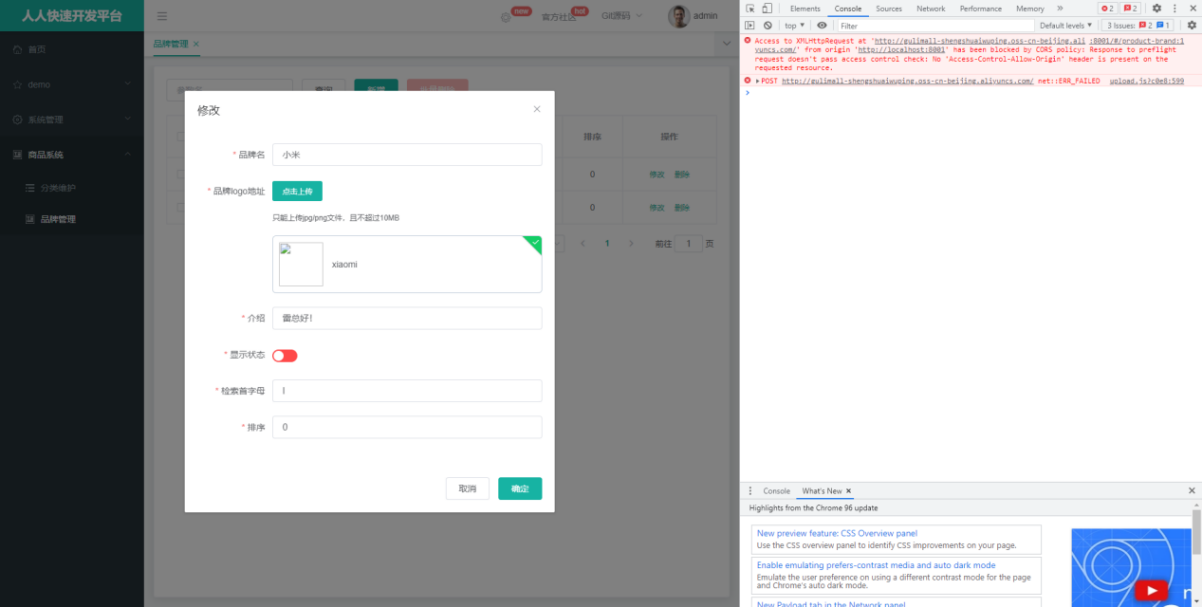
随便上传一个图片,发现发生了跨域问题。
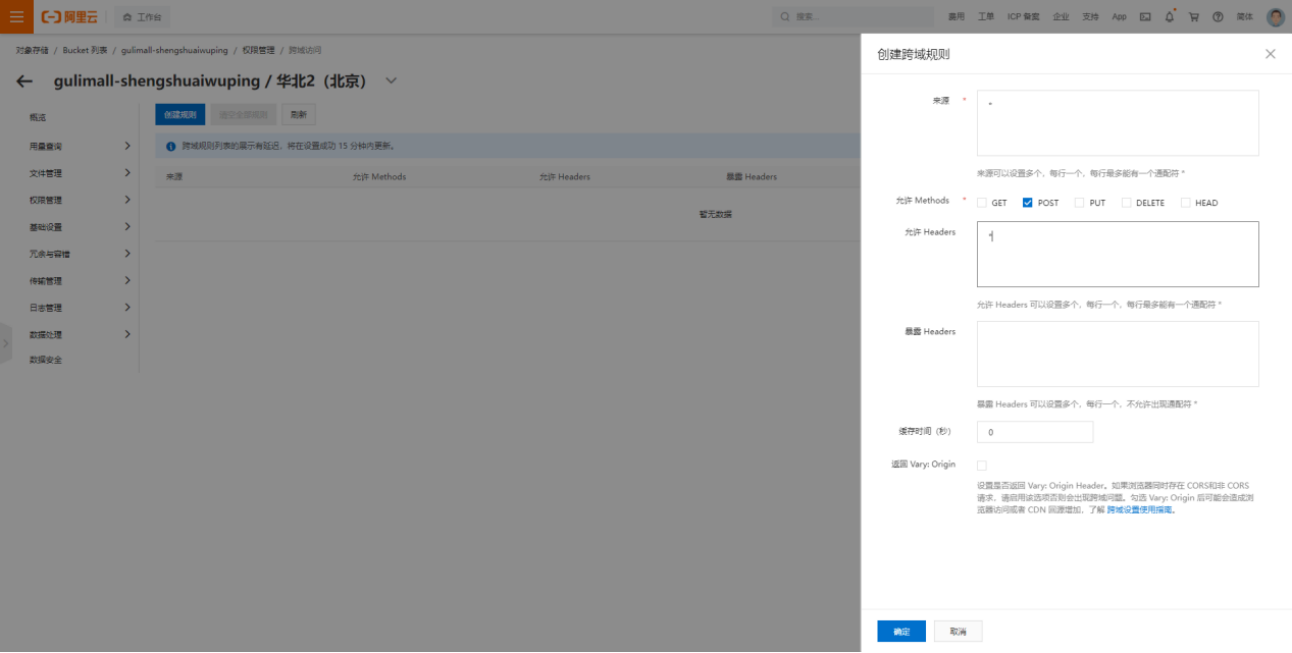
在OSS管理控制台,选择 权限管理-跨域设置,选择 跨域设置。创建跨域规则。
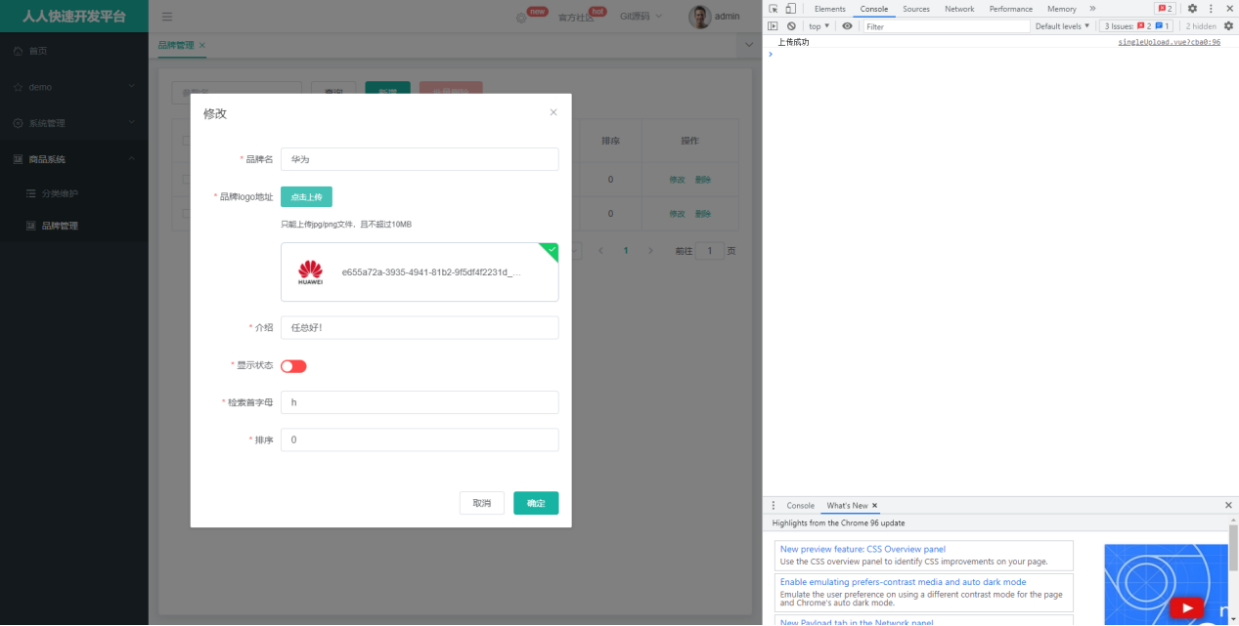
重新上传品牌logo,上传成功。?
 把品牌logo改为图片展示。?

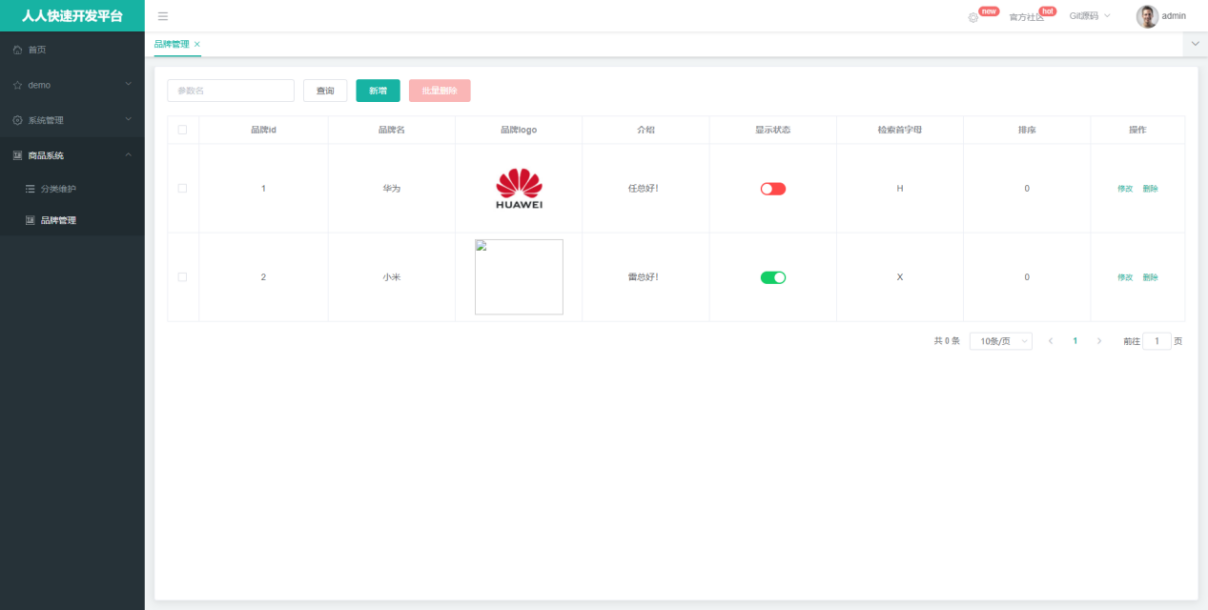 文件上传功能完成。?
065-069 表单字段校验
新增/修改品牌时,对输入的数据进行校验。
? ? ? ? 所有带*字段不能为空。
????????检索首字母字段必须是单个英文字母。
????????排序字段必须是正整数。
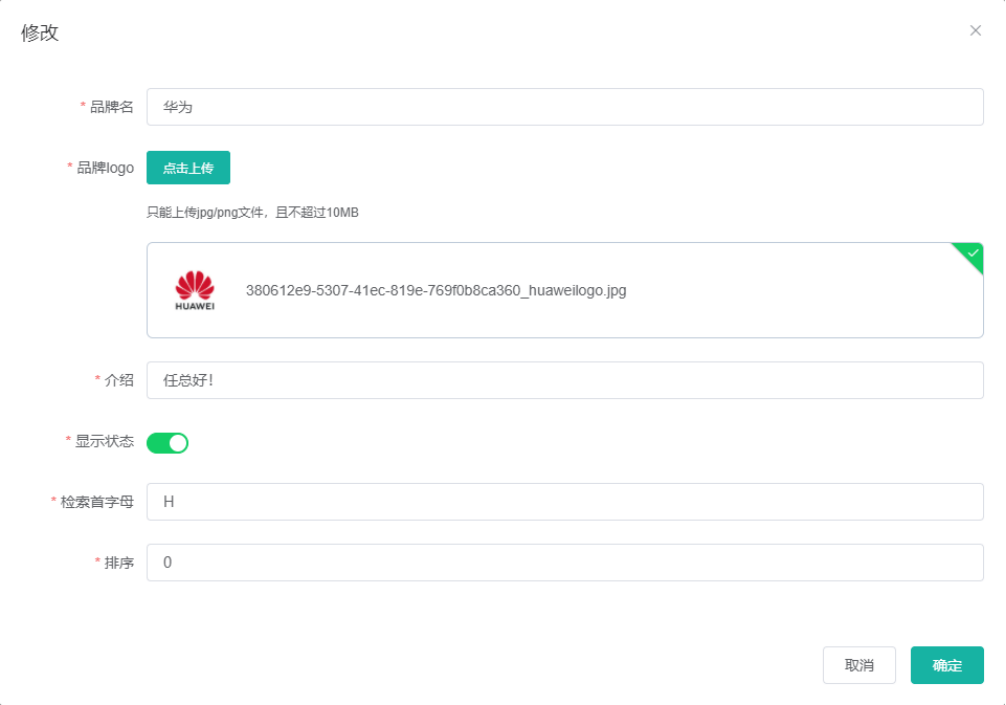
1 前端校验
代码见?069?品牌管理-完整前端代码
2 后端校验
我们主要使用JSR-303来做后端校验。
因为各个微服务都有后端校验的需求,所以我们做统一的异常处理。
在gulimall-common/src/main/java/com/atguigu/common/路径下创建exception/目录。在该目录下创建枚举BizCodeEnum。
public enum BizCodeEnum {
    UNKNOWN_EXCEPTION(10000, "系统未知异常"),
    VAILD_EXCEPTION(10001, "参数格式校验失败");

    private int code;
    private String msg;

    BizCodeEnum(int code, String msg) {
        this.code = code;
        this.msg = msg;
    }

    public int getCode() {
        return code;
    }

    public String getMsg() {
        return msg;
    }
}
在gulimall-product/src/main/java/com/atguigu/gulimall/product/路径下创建目录exception/,然后在该目录下创建GulimallExceptionControllerAdvice类。
import com.atguigu.common.exception.BizCodeEnum;
import com.atguigu.common.utils.R;
import lombok.extern.slf4j.Slf4j;
import org.springframework.validation.BindingResult;
import org.springframework.web.bind.MethodArgumentNotValidException;
import org.springframework.web.bind.annotation.ExceptionHandler;
import org.springframework.web.bind.annotation.RestControllerAdvice;

import java.util.HashMap;
import java.util.Map;

/**
 * 集中处理所有的异常
 */
@Slf4j
@RestControllerAdvice(basePackages = "com.atguigu.gulimall.product.controller")
public class GulimallExceptionControllerAdvice {

    @ExceptionHandler(value = MethodArgumentNotValidException.class)
    public R handleVaildException(MethodArgumentNotValidException e) {
        /**
         * 第一次运行时,使用下面一行代码确定异常类型为 MethodArgumentNotValidException
         * log.error("数据校验出现异常:{},异常类型:{}", e.getMessage(), e.getClass());
         */
        Map<String, String> errorMap = new HashMap<>();
        BindingResult bindingResult = e.getBindingResult();
        bindingResult.getFieldErrors().forEach((fieldError) ->
        {
            errorMap.put(fieldError.getField(), fieldError.getDefaultMessage());
        });

        return R.error(BizCodeEnum.VAILD_EXCEPTION.getCode(), BizCodeEnum.VAILD_EXCEPTION.getMsg()).put("data", errorMap);
    }

    @ExceptionHandler(value = Throwable.class)
    public R handleException(Throwable throwable) {
        return R.error(BizCodeEnum.UNKNOWN_EXCEPTION.getCode(), BizCodeEnum.UNKNOWN_EXCEPTION.getMsg());
    }
}
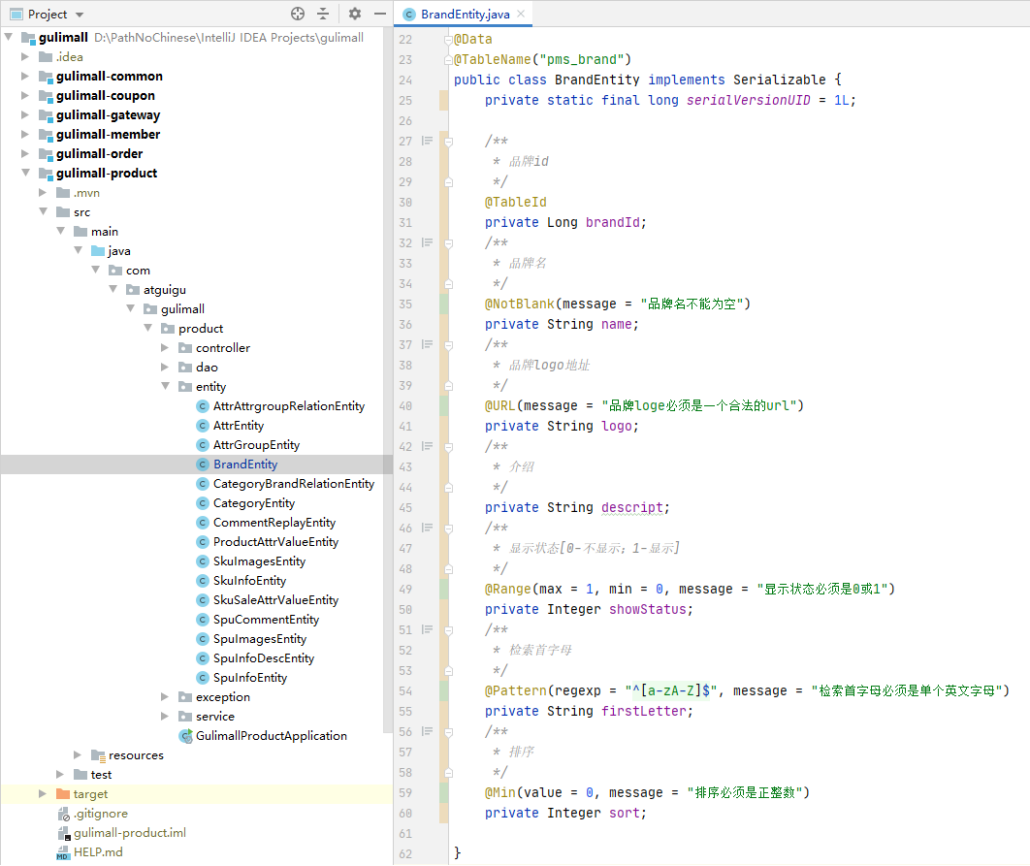
然后为品牌管理实体类gulimall-product/src/main/java/com/atguigu/gulimall/product/entity/BrandEntity添加校验注解。
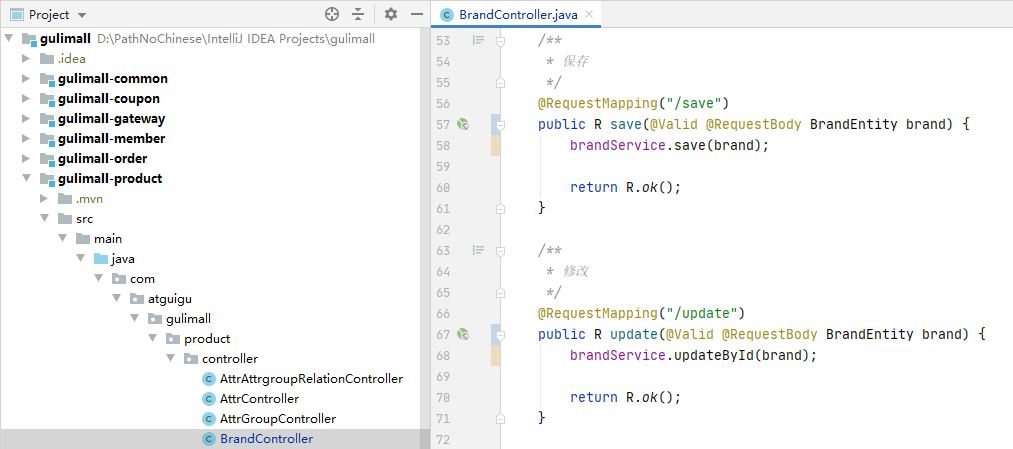
最后,给新增/修改的接口方法的入参添加@Valid注解。
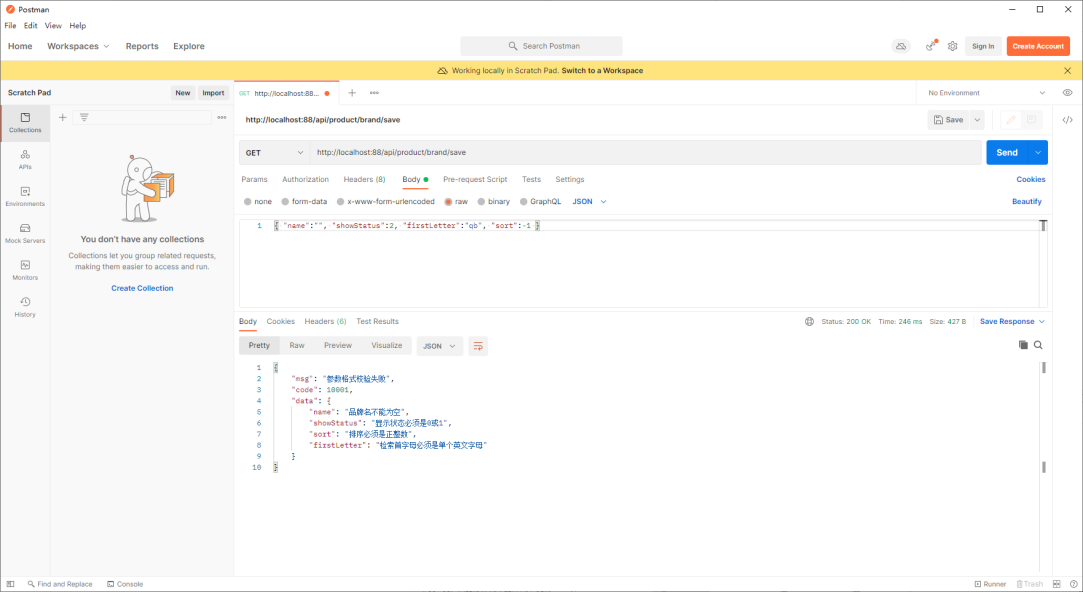
?使用postman进行测试。
3 分组校验
使用JSR-303实现分组校验,实际上就是group属性的用法,不实现了。
4 自定义校验
我觉得这部分内容对产品质量的提升不大,但是学习写自定义注解是有价值的。
品牌的显示状态字段showStatus的值必须是0或1。我们创建一个@ListValue注解来校验它。

- 编写一个自定义的校验注解
- 编写一个自定义的校验器
- 关联自定义的校验器和自定义的校验注解
在gulimall-common/src/main/java/com/atguigu/common/路径下创建valid/目录,在该目录下创建注解ListValue。
import javax.validation.Constraint;
import javax.validation.Payload;
import java.lang.annotation.*;

@Documented
// 指明该注解使用的校验器
@Constraint(validatedBy = {ListValueConstraintValidator.class})
// 指明该注解可以标注的位置
@Target({ElementType.METHOD, ElementType.FIELD, ElementType.ANNOTATION_TYPE, ElementType.CONSTRUCTOR, ElementType.PARAMETER, ElementType.TYPE_USE})
// 指明该注解生效的时机
@Retention(RetentionPolicy.RUNTIME)
public @interface ListValue {

    // 指明默认的错误信息
    String message() default "{com.atguigu.common.valid.ListValue.message}";

    // 支持分组校验功能
    Class<?>[] groups() default {};

    // 自定义负载信息
    Class<? extends Payload>[] payload() default {};

    int[] values() default {};
}
在valid/目录下创建ListValueConstraintValidator类。
import javax.validation.ConstraintValidator;
import javax.validation.ConstraintValidatorContext;
import java.util.HashSet;
import java.util.Set;

public class ListValueConstraintValidator implements ConstraintValidator<ListValue, Integer> {

    private Set<Integer> set = new HashSet<>();

    // 初始化方法
    @Override
    public void initialize(ListValue constraintAnnotation) {
        int[] values = constraintAnnotation.values();
        for (int val : values) {
            set.add(val);
        }
    }

    /**
     * 判断是否校验成功
     *
     * @param value   需要校验的值
     * @param context
     * @return
     */
    @Override
    public boolean isValid(Integer value, ConstraintValidatorContext context) {
        return set.contains(value);
    }
}
在gulimall-common/src/main/resources/路径下创建配置文件ValidationMessages.properties。
com.atguigu.common.valid.ListValue.message=只能提交列举的值重启gulimall-product服务,使用postman验证通过。
069 品牌管理-完整前端代码
brand.vue
<template>
  <div class="mod-config">
    <el-form
      :inline="true"
      :model="dataForm"
      @keyup.enter.native="getDataList()"
    >
      <el-form-item>
        <el-input
          v-model="dataForm.key"
          placeholder="参数名"
          clearable
        ></el-input>
      </el-form-item>
      <el-form-item>
        <el-button @click="getDataList()">查询</el-button>
        <el-button
          v-if="isAuth('product:brand:save')"
          type="primary"
          @click="addOrUpdateHandle()"
          >新增</el-button
        >
        <el-button
          v-if="isAuth('product:brand:delete')"
          type="danger"
          @click="deleteHandle()"
          :disabled="dataListSelections.length <= 0"
          >批量删除</el-button
        >
      </el-form-item>
    </el-form>
    <el-table
      :data="dataList"
      border
      v-loading="dataListLoading"
      @selection-change="selectionChangeHandle"
      style="width: 100%"
    >
      <el-table-column
        type="selection"
        header-align="center"
        align="center"
        width="50"
      >
      </el-table-column>
      <el-table-column
        prop="brandId"
        header-align="center"
        align="center"
        label="品牌id"
      >
      </el-table-column>
      <el-table-column
        prop="name"
        header-align="center"
        align="center"
        label="品牌名"
      >
      </el-table-column>
      <el-table-column
        prop="logo"
        header-align="center"
        align="center"
        label="品牌logo"
      >
        <template slot-scope="scope">
          <img :src="scope.row.logo" style="width: 140px; height: 120px" />
        </template>
      </el-table-column>
      <el-table-column
        prop="descript"
        header-align="center"
        align="center"
        label="介绍"
      >
      </el-table-column>
      <el-table-column
        prop="showStatus"
        header-align="center"
        align="center"
        label="显示状态"
      >
        <template slot-scope="scope">
          <el-switch
            v-model="scope.row.showStatus"
            active-color="#13ce66"
            inactive-color="#ff4949"
            :active-value="1"
            :inactive-value="0"
            @change="updateBrandStatus(scope.row)"
          ></el-switch>
        </template>
      </el-table-column>
      <el-table-column
        prop="firstLetter"
        header-align="center"
        align="center"
        label="检索首字母"
      >
      </el-table-column>
      <el-table-column
        prop="sort"
        header-align="center"
        align="center"
        label="排序"
      >
      </el-table-column>
      <el-table-column
        fixed="right"
        header-align="center"
        align="center"
        width="150"
        label="操作"
      >
        <template slot-scope="scope">
          <el-button
            type="text"
            size="small"
            @click="addOrUpdateHandle(scope.row.brandId)"
            >修改</el-button
          >
          <el-button
            type="text"
            size="small"
            @click="deleteHandle(scope.row.brandId)"
            >删除</el-button
          >
        </template>
      </el-table-column>
    </el-table>
    <el-pagination
      @size-change="sizeChangeHandle"
      @current-change="currentChangeHandle"
      :current-page="pageIndex"
      :page-sizes="[10, 20, 50, 100]"
      :page-size="pageSize"
      :total="totalPage"
      layout="total, sizes, prev, pager, next, jumper"
    >
    </el-pagination>
    <!-- 弹窗, 新增 / 修改 -->
    <add-or-update
      v-if="addOrUpdateVisible"
      ref="addOrUpdate"
      @refreshDataList="getDataList"
    ></add-or-update>
  </div>
</template>

<script>
import AddOrUpdate from "./brand-add-or-update";
export default {
  data() {
    return {
      dataForm: {
        key: "",
      },
      dataList: [],
      pageIndex: 1,
      pageSize: 10,
      totalPage: 0,
      dataListLoading: false,
      dataListSelections: [],
      addOrUpdateVisible: false,
    };
  },
  components: {
    AddOrUpdate,
  },
  activated() {
    this.getDataList();
  },
  methods: {
    // 获取数据列表
    getDataList() {
      this.dataListLoading = true;
      this.$http({
        url: this.$http.adornUrl("/product/brand/list"),
        method: "get",
        params: this.$http.adornParams({
          page: this.pageIndex,
          limit: this.pageSize,
          key: this.dataForm.key,
        }),
      }).then(({ data }) => {
        if (data && data.code === 0) {
          this.dataList = data.page.list;
          this.totalPage = data.page.totalCount;
        } else {
          this.dataList = [];
          this.totalPage = 0;
        }
        this.dataListLoading = false;
      });
    },
    // 每页数
    sizeChangeHandle(val) {
      this.pageSize = val;
      this.pageIndex = 1;
      this.getDataList();
    },
    // 当前页
    currentChangeHandle(val) {
      this.pageIndex = val;
      this.getDataList();
    },
    // 多选
    selectionChangeHandle(val) {
      this.dataListSelections = val;
    },
    // 新增 / 修改
    addOrUpdateHandle(id) {
      this.addOrUpdateVisible = true;
      this.$nextTick(() => {
        this.$refs.addOrUpdate.init(id);
      });
    },
    // 删除
    deleteHandle(id) {
      var ids = id
        ? [id]
        : this.dataListSelections.map((item) => {
            return item.brandId;
          });
      this.$confirm(
        `确定对[id=${ids.join(",")}]进行[${id ? "删除" : "批量删除"}]操作?`,
        "提示",
        {
          confirmButtonText: "确定",
          cancelButtonText: "取消",
          type: "warning",
        }
      ).then(() => {
        this.$http({
          url: this.$http.adornUrl("/product/brand/delete"),
          method: "post",
          data: this.$http.adornData(ids, false),
        }).then(({ data }) => {
          if (data && data.code === 0) {
            this.$message({
              message: "操作成功",
              type: "success",
              duration: 1500,
              onClose: () => {
                this.getDataList();
              },
            });
          } else {
            this.$message.error(data.msg);
          }
        });
      });
    },
    // 修改品牌显示状态
    updateBrandStatus(data) {
      let { brandId, showStatus } = data;
      this.$http({
        url: this.$http.adornUrl("/product/brand/update"),
        method: "post",
        data: this.$http.adornData({ brandId, showStatus }, false),
      }).then(({ data }) => {
        this.$message({
          type: "success",
          message: "更新成功",
        });
      });
    },
  },
};
</script>
brand-add-or-update.vue
<template>
  <el-dialog
    :title="!dataForm.brandId ? '新增' : '修改'"
    :close-on-click-modal="false"
    :visible.sync="visible"
  >
    <el-form
      :model="dataForm"
      :rules="dataRule"
      ref="dataForm"
      @keyup.enter.native="dataFormSubmit()"
      label-width="120px"
    >
      <el-form-item label="品牌名" prop="name">
        <el-input v-model="dataForm.name" placeholder="品牌名"></el-input>
      </el-form-item>
      <el-form-item label="品牌logo" prop="logo">
        <!-- <el-input v-model="dataForm.logo" placeholder="品牌logo地址"></el-input> -->
        <single-upload v-model="dataForm.logo"></single-upload>
      </el-form-item>
      <el-form-item label="介绍" prop="descript">
        <el-input v-model="dataForm.descript" placeholder="介绍"></el-input>
      </el-form-item>
      <el-form-item label="显示状态" prop="showStatus">
        <el-switch
          v-model="dataForm.showStatus"
          active-color="#13ce66"
          inactive-color="#ff4949"
          :active-value="1"
          :inactive-value="0"
        ></el-switch>
      </el-form-item>
      <el-form-item label="检索首字母" prop="firstLetter">
        <el-input
          v-model="dataForm.firstLetter"
          placeholder="检索首字母"
        ></el-input>
      </el-form-item>
      <el-form-item label="排序" prop="sort">
        <el-input v-model.number="dataForm.sort" placeholder="排序"></el-input>
      </el-form-item>
    </el-form>
    <span slot="footer" class="dialog-footer">
      <el-button @click="visible = false">取消</el-button>
      <el-button type="primary" @click="dataFormSubmit()">确定</el-button>
    </span>
  </el-dialog>
</template>

<script>
import singleUpload from "@/components/upload/singleUpload.vue";
export default {
  components: { singleUpload },
  data() {
    return {
      visible: false,
      dataForm: {
        brandId: 0,
        name: "",
        logo: "",
        descript: "",
        showStatus: 1,
        firstLetter: "",
        sort: 0,
      },
      dataRule: {
        name: [{ required: true, message: "品牌名不能为空", trigger: "blur" }],
        logo: [
          { required: true, message: "品牌logo不能为空", trigger: "blur" },
        ],
        descript: [
          { required: true, message: "介绍不能为空", trigger: "blur" },
        ],
        showStatus: [
          {
            required: true,
            message: "显示状态不能为空",
            trigger: "blur",
          },
        ],
        firstLetter: [
          {
            required: true,
            validator: (rule, value, callback) => {
              if (value === "") {
                callback(new Error("检索首字母不能为空"));
              } else if (!/^[a-zA-Z]$/.test(value)) {
                callback(new Error("检索首字母必须是单个英文字母"));
              } else {
                callback();
              }
            },
            trigger: "blur",
          },
        ],
        sort: [
          {
            required: true,
            validator: (rule, value, callback) => {
              if (value === "") {
                callback(new Error("排序不能为空"));
              } else if (!/^[0-9]*$/.test(value)) {
                callback(new Error("排序必须是正整数"));
              } else {
                callback();
              }
            },
            trigger: "blur",
          },
        ],
      },
    };
  },
  methods: {
    init(id) {
      this.dataForm.brandId = id || 0;
      this.visible = true;
      this.$nextTick(() => {
        this.$refs["dataForm"].resetFields();
        if (this.dataForm.brandId) {
          this.$http({
            url: this.$http.adornUrl(
              `/product/brand/info/${this.dataForm.brandId}`
            ),
            method: "get",
            params: this.$http.adornParams(),
          }).then(({ data }) => {
            if (data && data.code === 0) {
              this.dataForm.name = data.brand.name;
              this.dataForm.logo = data.brand.logo;
              this.dataForm.descript = data.brand.descript;
              this.dataForm.showStatus = data.brand.showStatus;
              this.dataForm.firstLetter = data.brand.firstLetter;
              this.dataForm.sort = data.brand.sort;
            }
          });
        }
      });
    },
    // 表单提交
    dataFormSubmit() {
      this.$refs["dataForm"].validate((valid) => {
        if (valid) {
          this.$http({
            url: this.$http.adornUrl(
              `/product/brand/${!this.dataForm.brandId ? "save" : "update"}`
            ),
            method: "post",
            data: this.$http.adornData({
              brandId: this.dataForm.brandId || undefined,
              name: this.dataForm.name,
              logo: this.dataForm.logo,
              descript: this.dataForm.descript,
              showStatus: this.dataForm.showStatus,
              firstLetter: this.dataForm.firstLetter,
              sort: this.dataForm.sort,
            }),
          }).then(({ data }) => {
            if (data && data.code === 0) {
              this.$message({
                message: "操作成功",
                type: "success",
                duration: 1500,
                onClose: () => {
                  this.visible = false;
                  this.$emit("refreshDataList");
                },
              });
            } else {
              this.$message.error(data.msg);
            }
          });
        }
      });
    },
  },
};
</script>