搭建Vue开发环境
本文仅作为学习记录
注意:搭建方式有多种,根据课程视频暂时使用这种
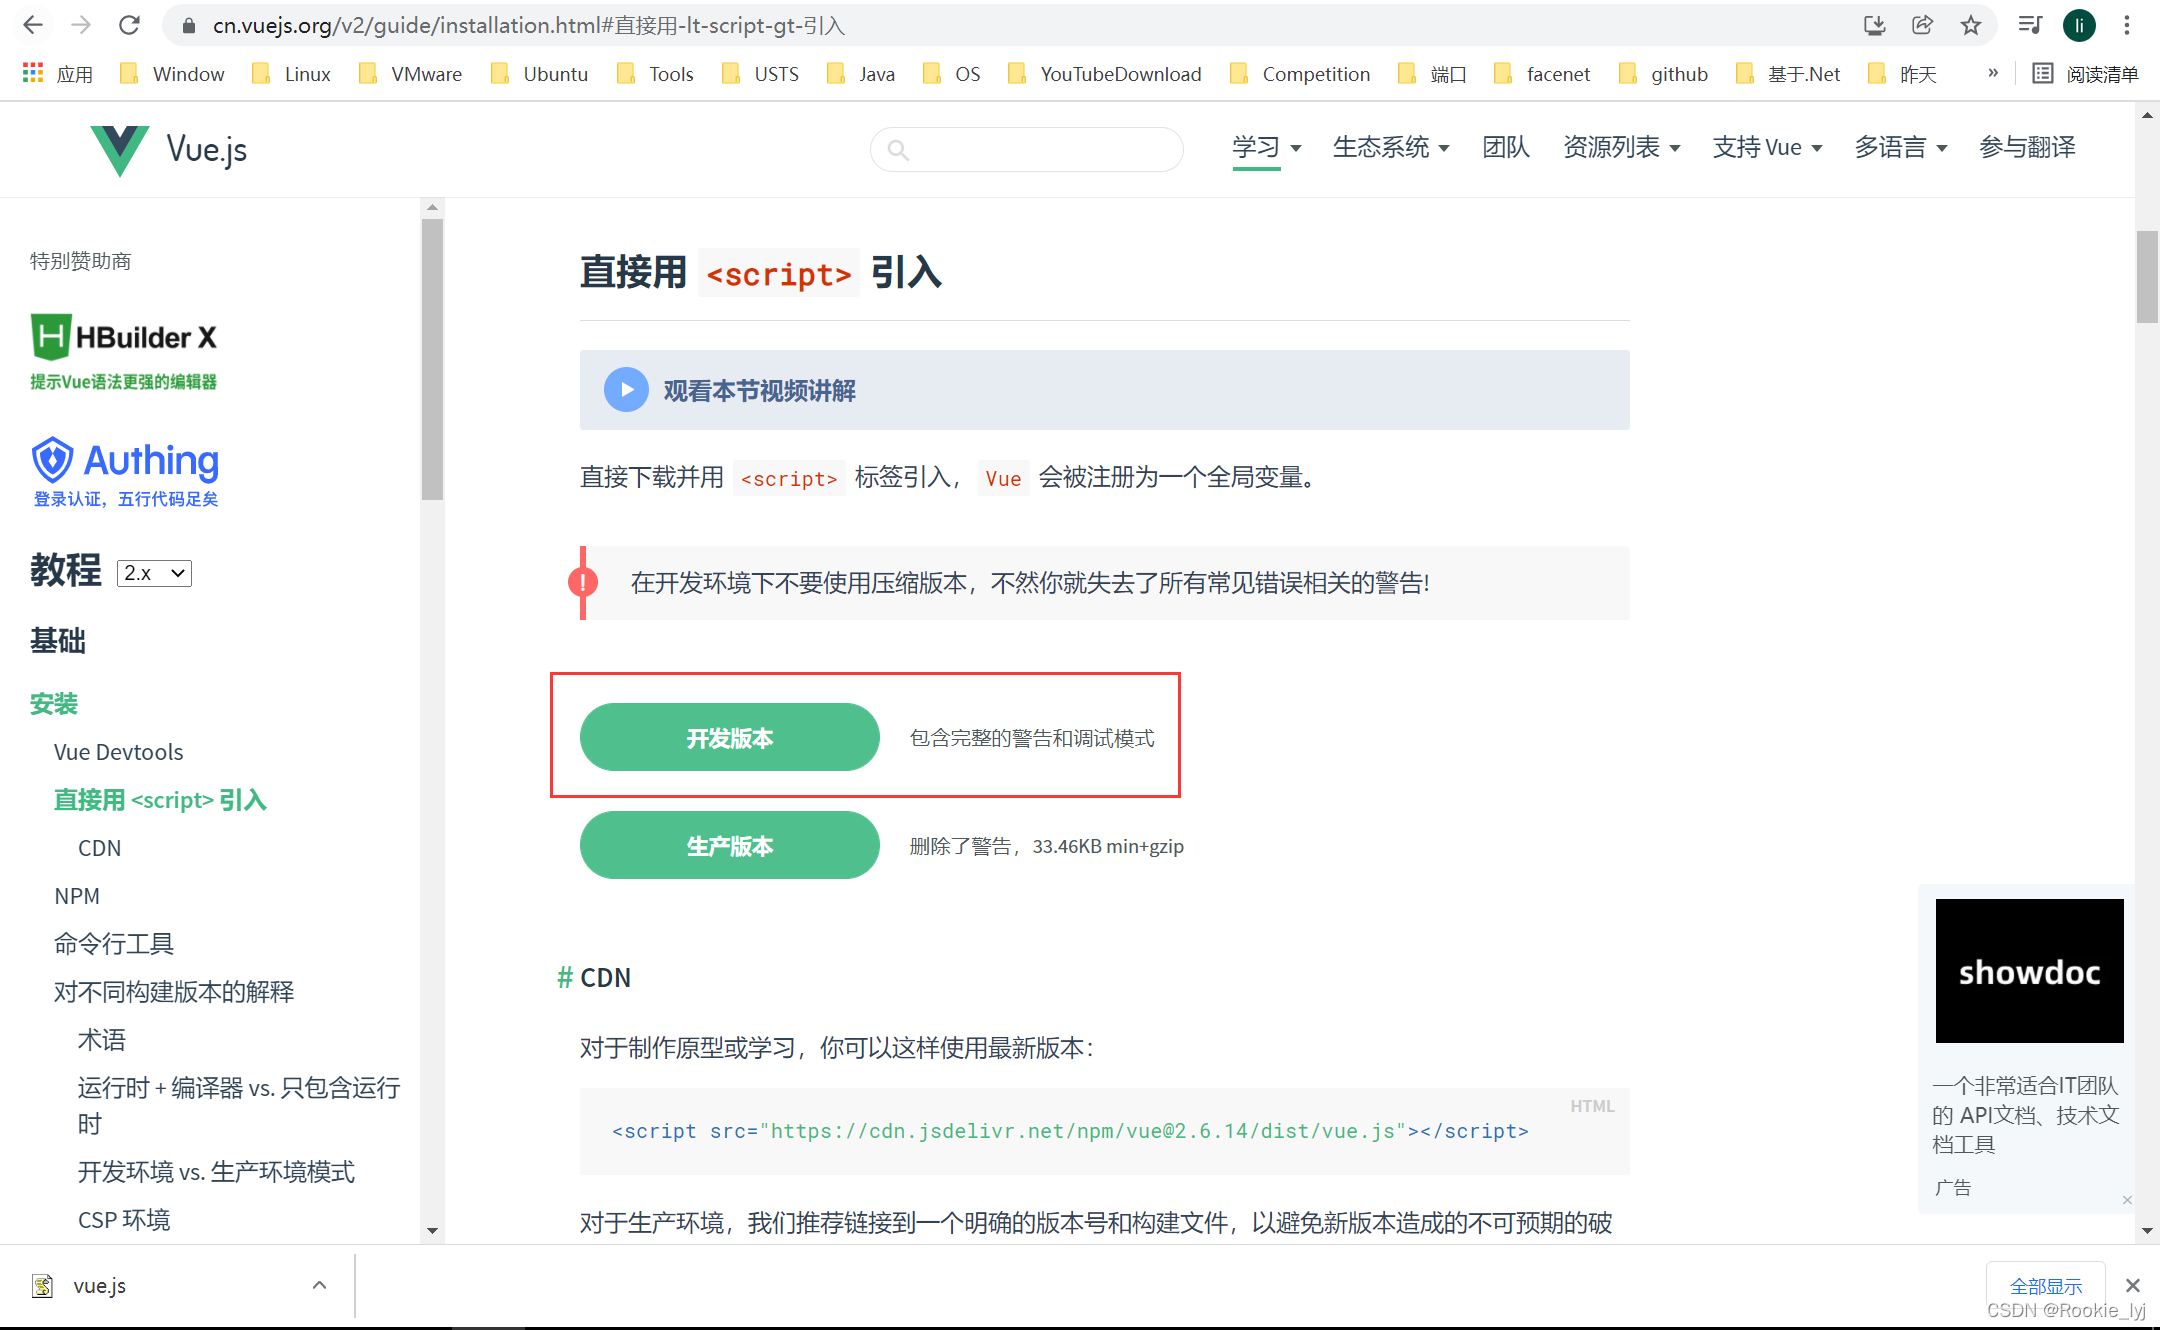
1.下载开发版本Vue.js
2.打开VSCode,创建相应文件夹、文件,并调整到适当位置

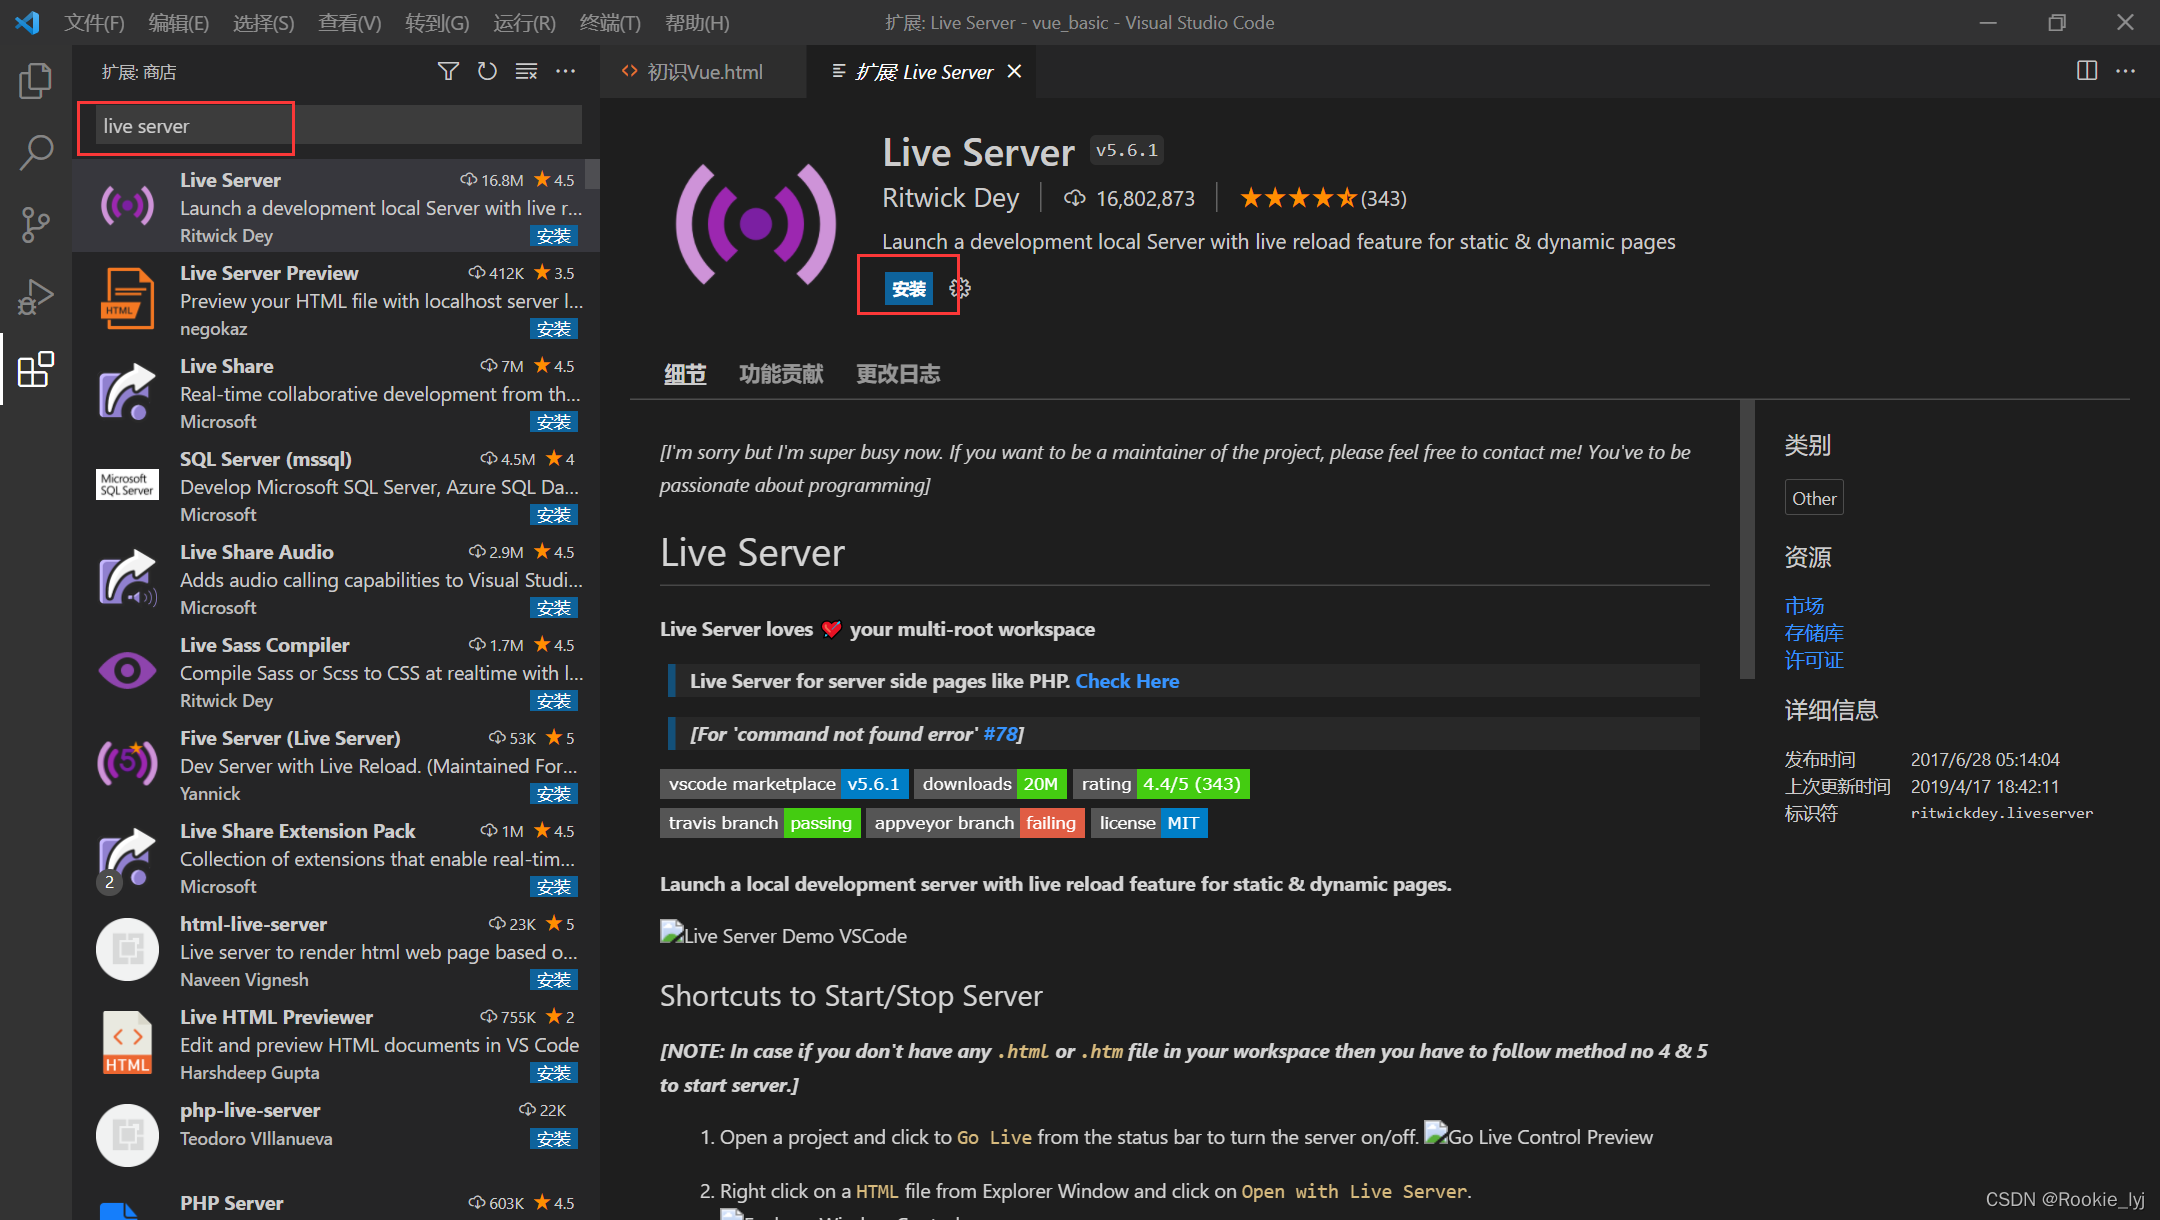
3.插入一个准备工作,在vscode中安装live server插件
3.1 在vscode扩展中搜索live server,并安装
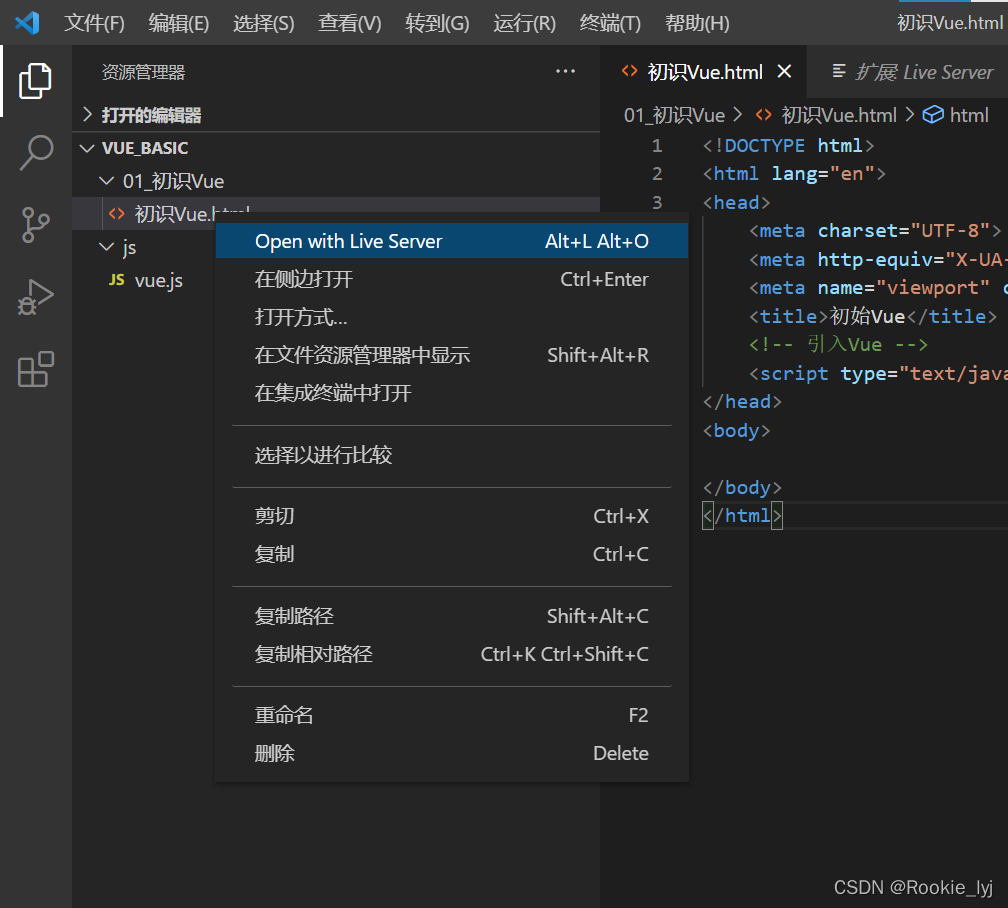
3.2 然后就可以使用这个插件了
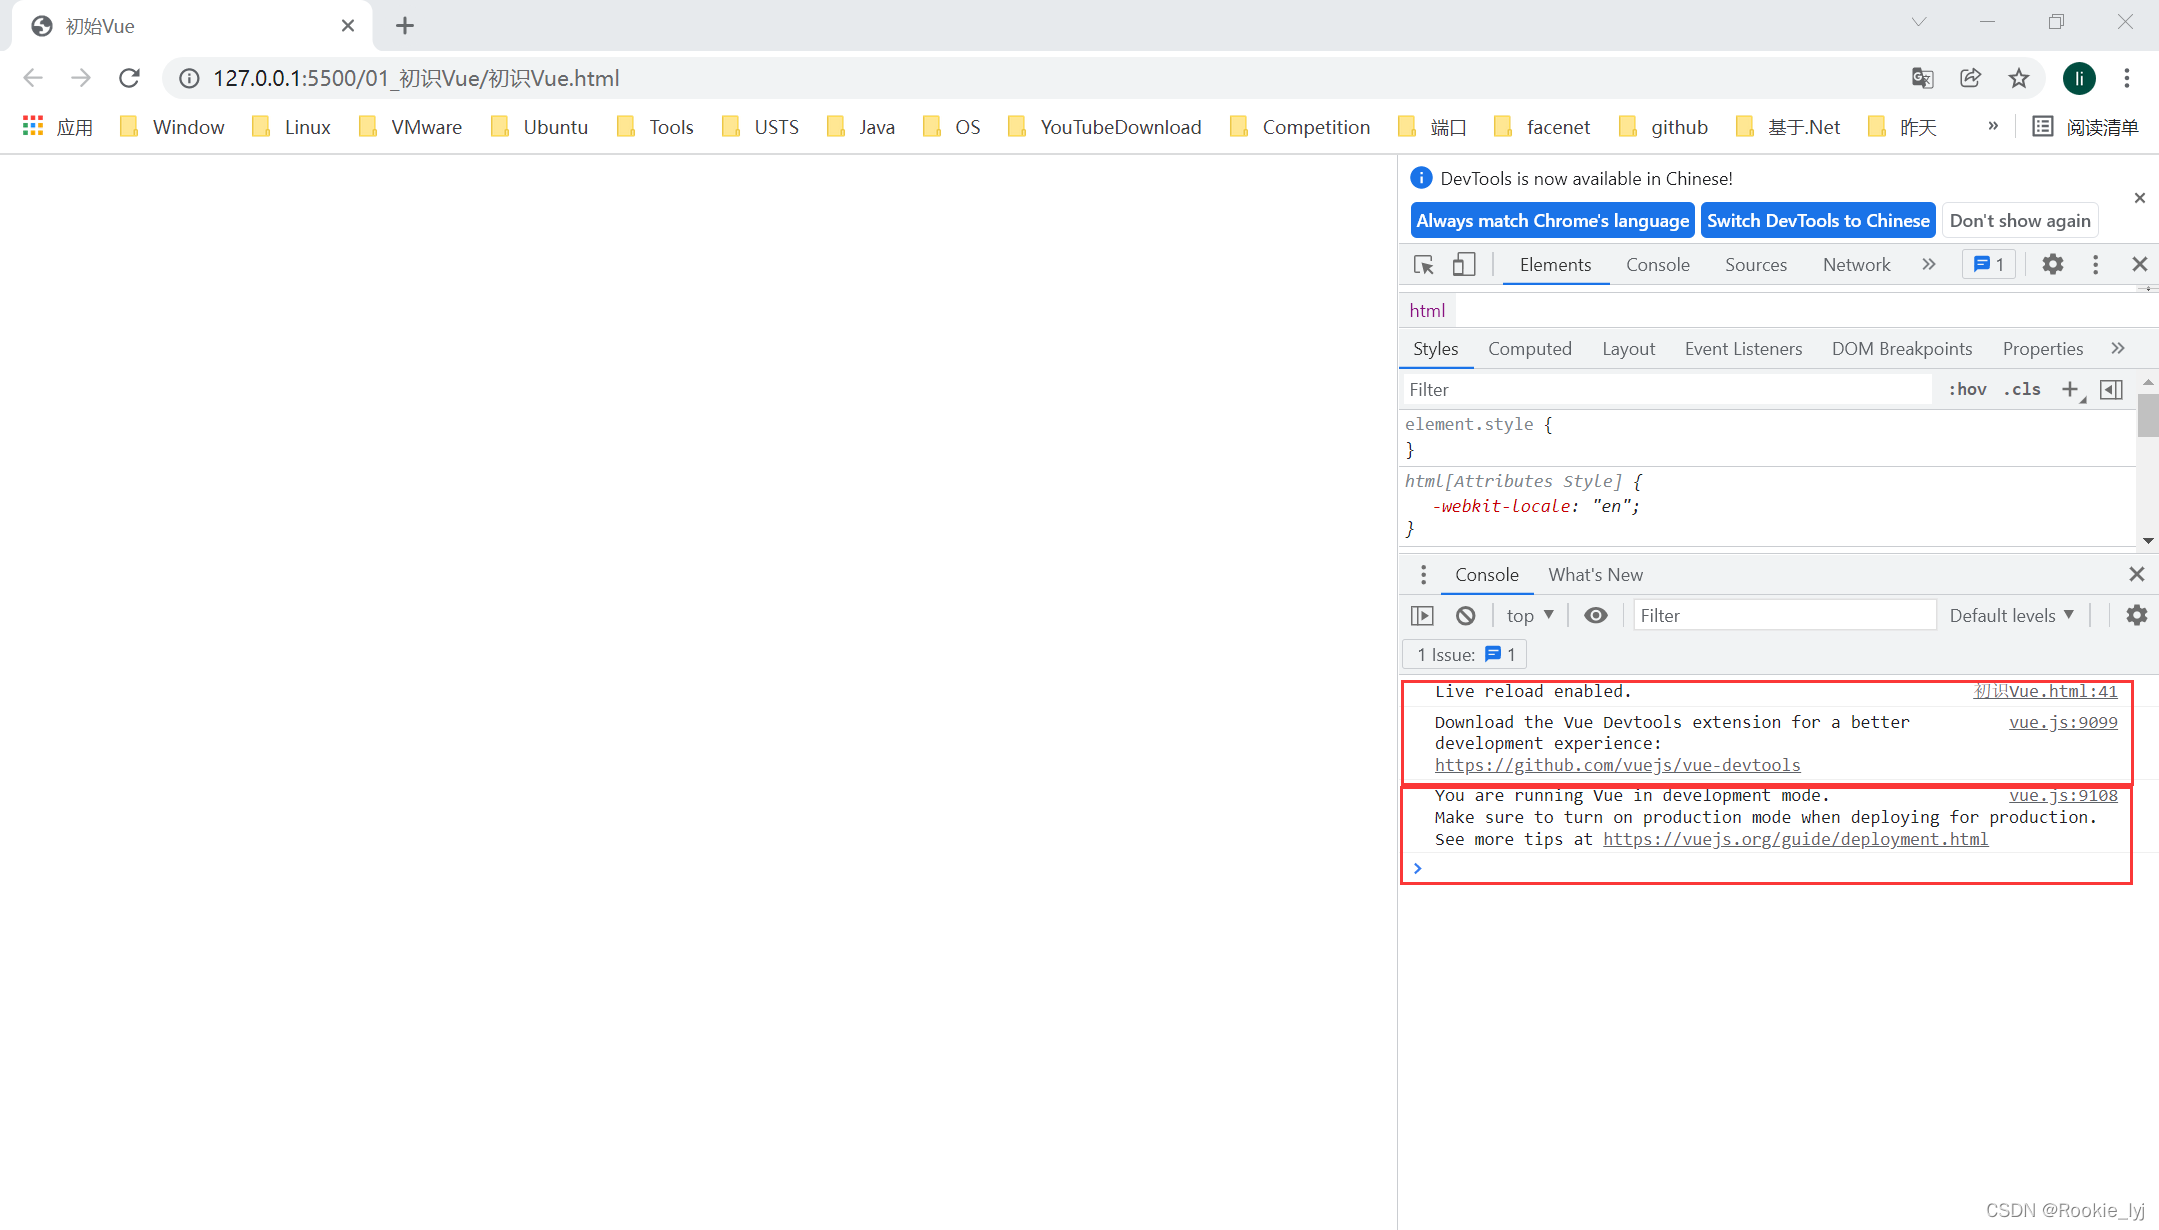
4.打开之后,切换到控制台,发现有两个小提示
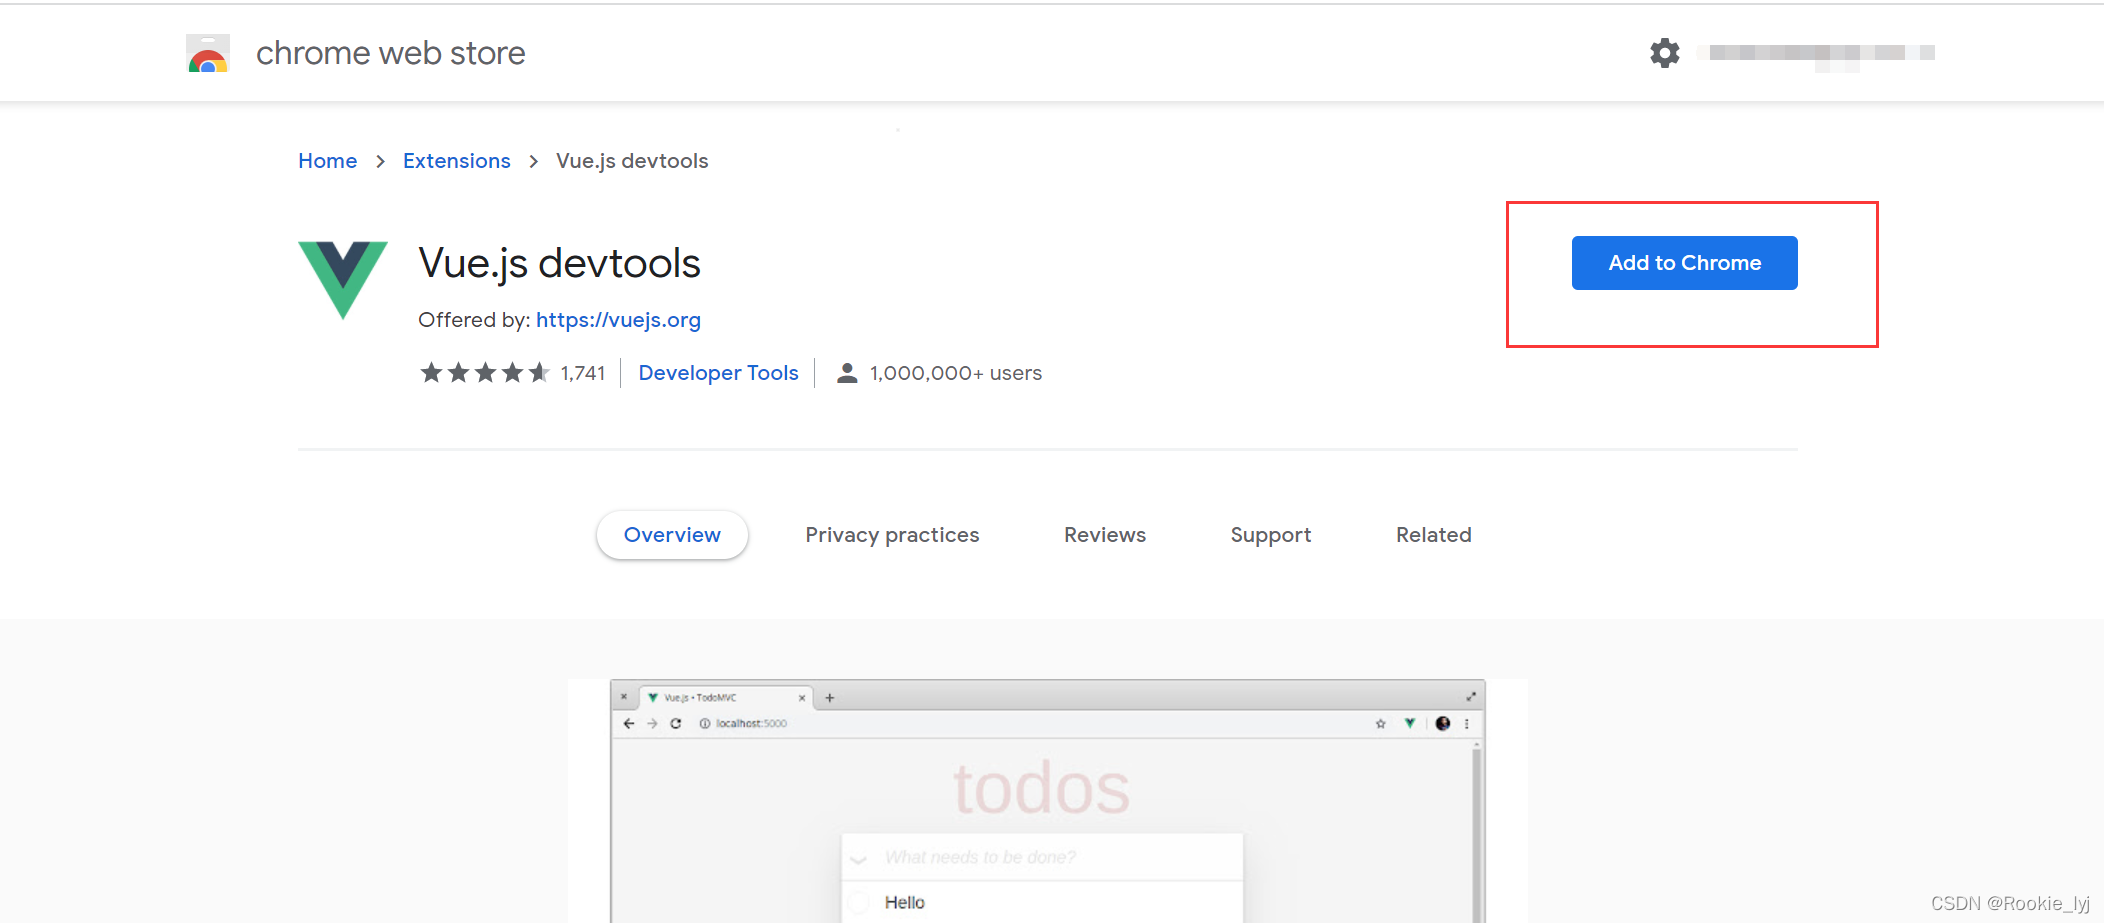
5.解决第一个小提示,在Google应用商店里找到Vue.js devtools,点击添加即可
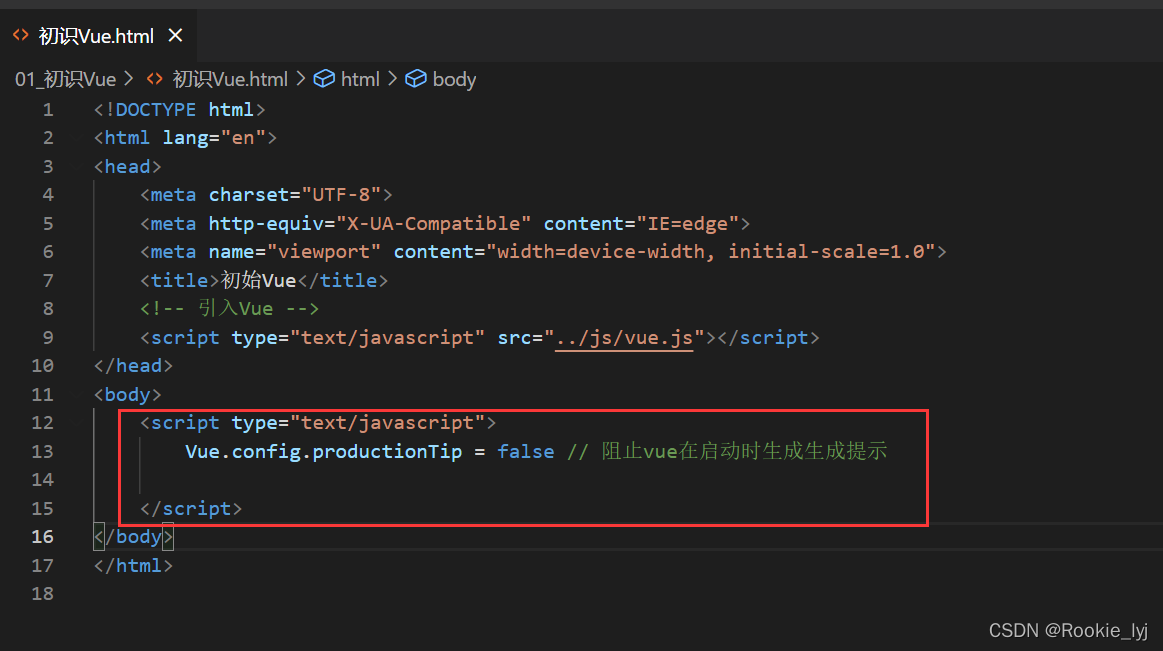
6.解决第二个小提示,回到VSCode,写上如下脚本(源码见最下面)
至此,Vue的环境初始搭建完毕
源码:
<!DOCTYPE html>
<html lang="en">
<head>
    <meta charset="UTF-8">
    <meta http-equiv="X-UA-Compatible" content="IE=edge">
    <meta name="viewport" content="width=device-width, initial-scale=1.0">
    <title>初始Vue</title>
    <!-- 引入Vue -->
    <script type="text/javascript" src="../js/vue.js"></script>
</head>
<body>
    <script type="text/javascript">
        Vue.config.productionTip = false // 阻止vue在启动时生成生成提示

    </script>
</body>
</html>
总结:
- 下载一个开发版本的Vue
- 安装开发者调试工具
- 关闭了两个烦人的提示
参考:
总结:
- 下载一个开发版本的Vue
- 安装开发者调试工具
- 关闭了两个烦人的提示