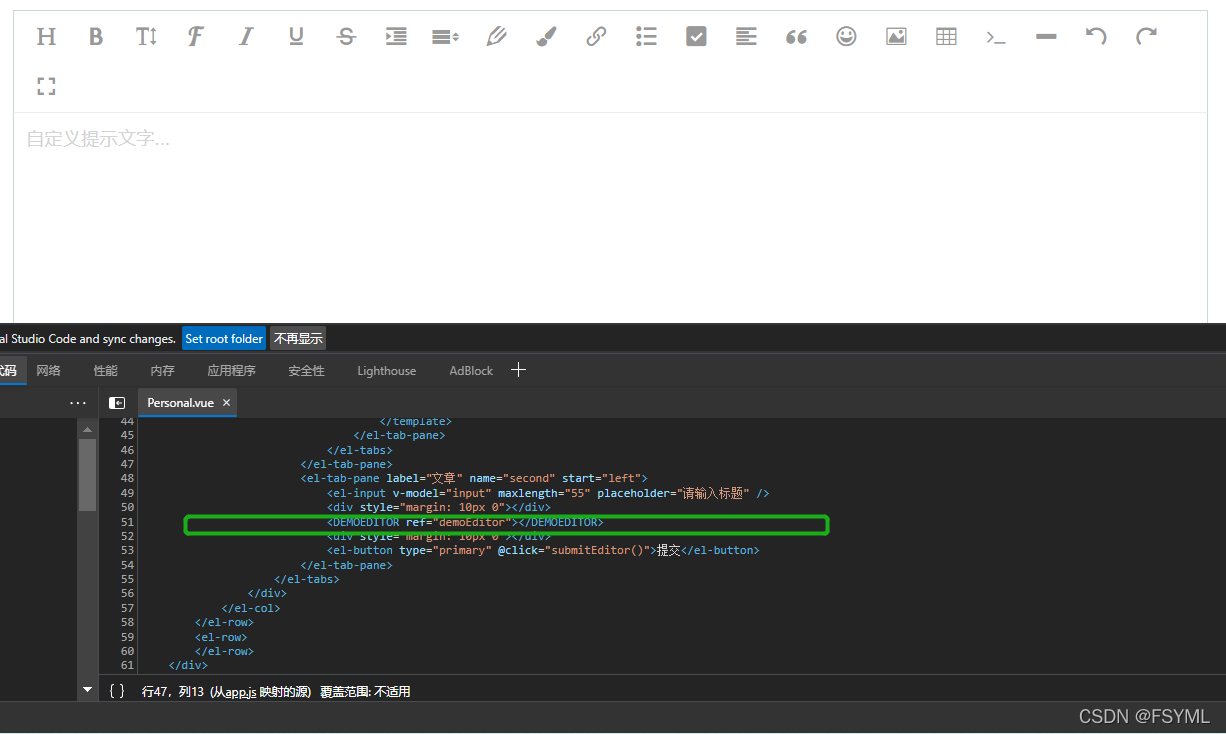
以封装 wangEditor 富文本编辑器为例,浅记 VUE 组件封装方式。本篇不涉及 wangEditor 具体使用方法介绍,如需要了解,请移步官网:wangEditor-轻量级 web 富文本编辑器。
VUE 版本:3.0。
1. 插件页面定义
<template>
    <div id="demoEditor">

    </div>
</template>

<script>
//导入 WangEditor 插件
import WangEditor from 'wangeditor';

export default {
	//命名空间, 可理解为本页面暴露给外部的名称
    name: 'demoEditor',
    data() {
        return {
            demoEditorHtml: ""
        }
    },
    methods: {
    	//初始化编辑器配置,配置属性为 WangEditor 主流属性
        initEditor() {
            this.demoEditor = new WangEditor('#demoEditor');
            //自定义提示文字
            this.demoEditor.config.placeholder = '自定义提示文字...';
            //一次最多上传 3 张图片
            this.demoEditor.config.uploadImgMaxLength = 3;
            //自定义不需要菜单
            this.demoEditor.config.excludeMenus = [
                'video'
            ];
            //监听内容变化并将内容传递给 demoEditorHtml, 对于外部来说
            //demoEditorHtml 便是封装后的编辑器内容
            this.demoEditor.config.onchange = (html) => {
                this.demoEditorHtml = html;
            };
            this.demoEditor.create();
        }
    },
    mounted() {
        this.initEditor();
    }
}
</script>
2. 引入插件
<template>
    <div class="common-layout">
    	<DEMOEDITOR ref="demoEditor"></DEMOEDITOR>
    	<div style="margin: 10px 0"></div>
        <el-button type="primary" @click="submitEditor()">提交</el-button>
    </div>
</template>

<script>
import demoEditor from '../../components/demoEditor.vue'

export default {
	//注册为组件,重点
    components: {
        DEMOEDITOR:demoEditor
    },
    data() {
        return {}
    },
    methods: {
        submitEditor(){
            //封装后的富文本编辑器内容
            console.log(">>html<<"+this.$refs.demoEditor.demoEditorHtml);
        }
    }
}
</script>
上面的“重点”标记,components 是 VUE 封装组件的精髓所在,DEMOEDITOR 即为封装后的组件在 html 页面使用时的标签名。所以本文全篇其实可归于一词 components,其余内容辅助理解。
3. 看看效果
