一、使用axios获取后端数据并使用
1.对axios进行封装 network/request.js
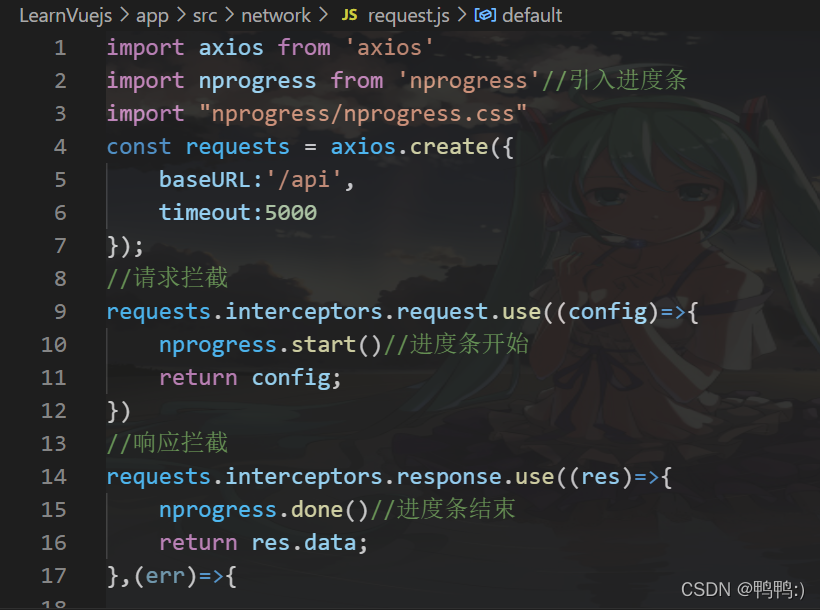
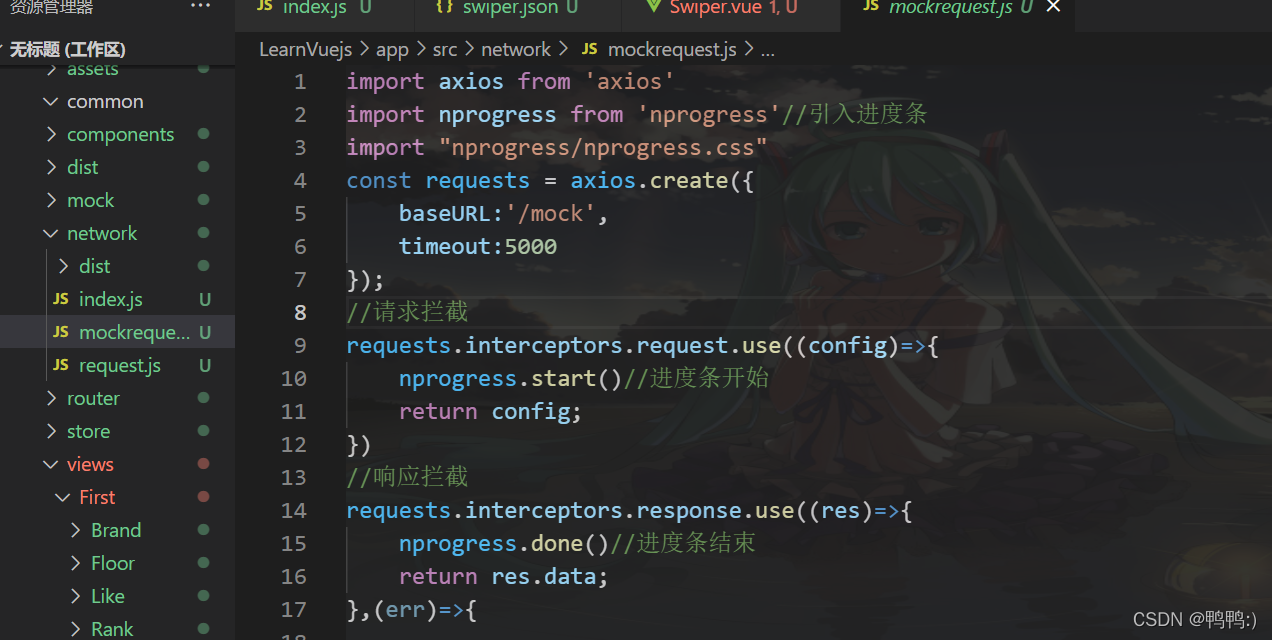
import axios from 'axios'
import nprogress from 'nprogress'//引入进度条
import "nprogress/nprogress.css"
const requests = axios.create({
    baseURL:'/api',
    timeout:5000
});
//请求拦截
requests.interceptors.request.use((config)=>{
    nprogress.start()//进度条开始
    return config;
})
//响应拦截
requests.interceptors.response.use((res)=>{
    nprogress.done()//进度条结束
    return res.data;
},(err)=>{

});
export default requests;
对api进行统一管理 network/index.js
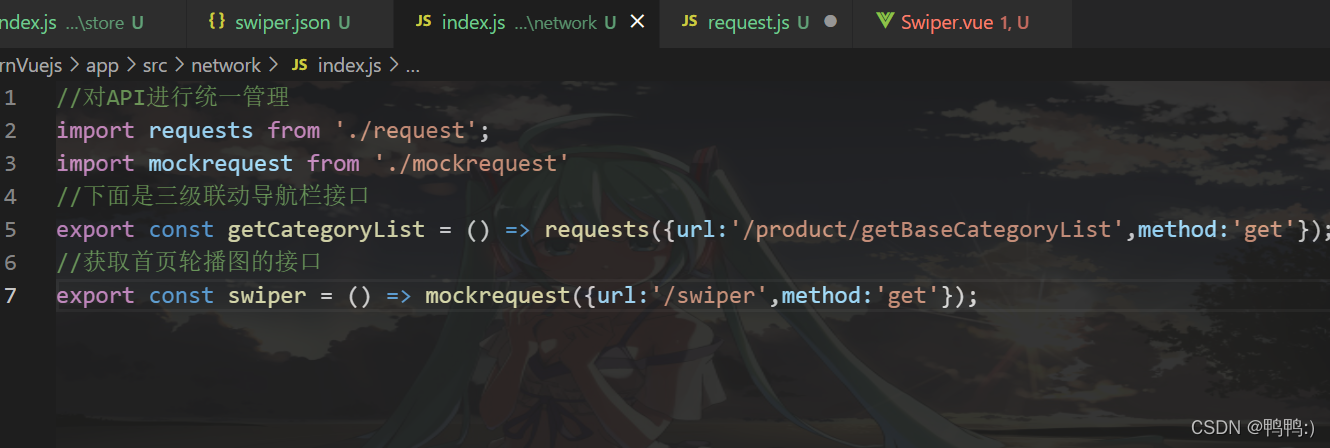
//对API进行统一管理
import requests from './request';
import mockrequest from './mockrequest'
//下面是三级联动导航栏接口
export const getCategoryList = () => requests({url:'/product/getBaseCategoryList',method:'get'});
//获取首页轮播图的接口
export const swiper = () => mockrequest({url:'/swiper',method:'get'});
2.在要获取的数据页面通过dispatch访问仓库里面actions(actions里面可以处理异步,向服务器发送请求)
mounted() {
    this.$store.dispatch("getSwiperList");
    //通过dispatch访问仓库store中actions里面的东西,即发送请求
    }

3.在仓库store里面的actions里面导入network里需要的模块,在actions里面处理获取服务器返回的数据的业务逻辑。
store/index.js
 async categoryList({commit}){
        //通过api里面的接口函数调用,向服务器发送请求,获取服务器的数据,把数据传给mutations,在mutations里面修改state
        let result = await getCategoryList();
        if(result.code==200){
            commit('CATEGORYLIST',result.data)
        }
    },

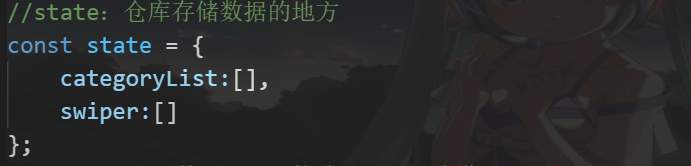
4.在mutations中修改state中的数据
CATEGORYLIST(state,categoryList){
        state.categoryList = categoryList
    },

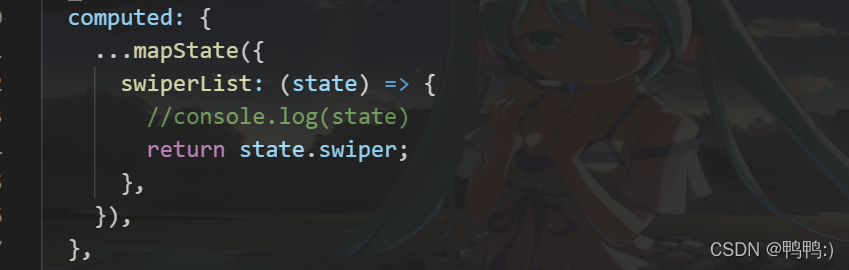
5.从仓库拿数据
import {mapState} from 'vuex';
computed:{
        ...mapState({
            swiperList:(state)=>{
                console.log(state)
                return state.swiper
            }
        })
    }

6.然后就可以使用啦!
二、使用Mock.js
1.先用npm安装mockjs
2.准备好json格式的数据
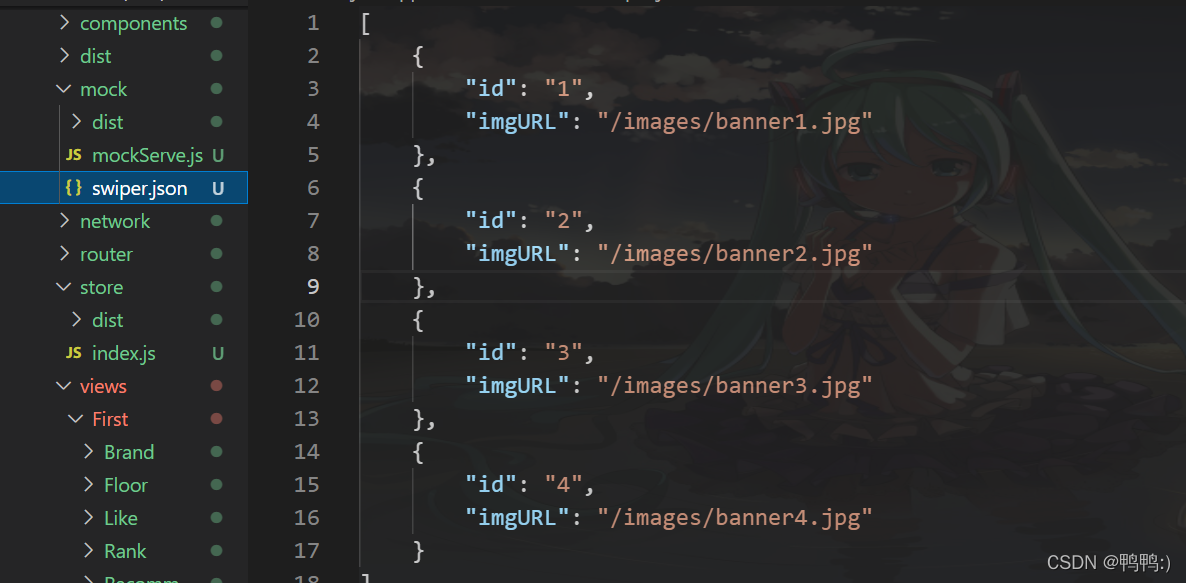
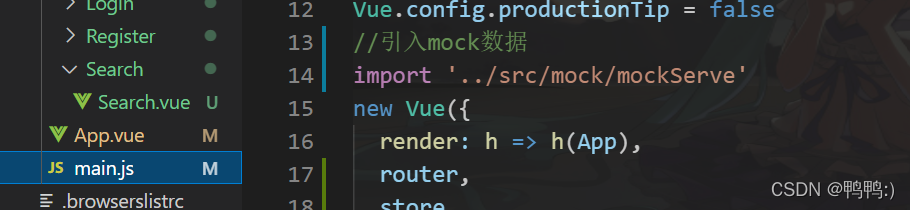
3.引入mock,模拟数据;把json数据格式引入进来

在入口文件main.js中执行
4.在network中封装mock的请求
5.剩下的就和使用axios一样的步骤。